User's Guide
Page 2
... 10 Ordering and replacing supplies 13 Ordering ink cartridges...13 Using genuine Lexmark ink cartridges...14 Replacing ink cartridges...14 Ordering paper and other supplies...15 Recycling Lexmark products...16 Using the printer control panel buttons and menus 17 Using ...Using the printer software 22 Minimum system requirements...22 Using the Windows printer software...22 Using the Macintosh printer software...24 Finding and installing optional software 25 Updating the printer software...26 Downloading PCL and PS drivers (Windows only 26 Reinstalling the printer software...26 Loading paper...
... 10 Ordering and replacing supplies 13 Ordering ink cartridges...13 Using genuine Lexmark ink cartridges...14 Replacing ink cartridges...14 Ordering paper and other supplies...15 Recycling Lexmark products...16 Using the printer control panel buttons and menus 17 Using ...Using the printer software 22 Minimum system requirements...22 Using the Windows printer software...22 Using the Macintosh printer software...24 Finding and installing optional software 25 Updating the printer software...26 Downloading PCL and PS drivers (Windows only 26 Reinstalling the printer software...26 Loading paper...
User's Guide
Page 9
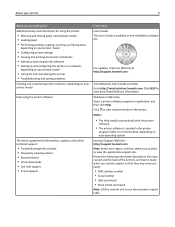
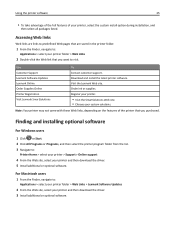
... Go to view basic SmartSolutions information. For updates, check our Web site at http://support.lexmark.com. Windows or Mac Help Open a printer software program or application, and then click Help. Lexmark Support Web site- Record the following information (located on the store receipt and the back...or on the desktop, depending on your printer model Help using printer software • Setting up and configuring the printer on a network, depending on your operating system. Click HELP to http://smartsolutions.lexmark.com. Click to see the customer support label. Additional setup and...
... Go to view basic SmartSolutions information. For updates, check our Web site at http://support.lexmark.com. Windows or Mac Help Open a printer software program or application, and then click Help. Lexmark Support Web site- Record the following information (located on the store receipt and the back...or on the desktop, depending on your printer model Help using printer software • Setting up and configuring the printer on a network, depending on your operating system. Click HELP to http://smartsolutions.lexmark.com. Click to see the customer support label. Additional setup and...
User's Guide
Page 22
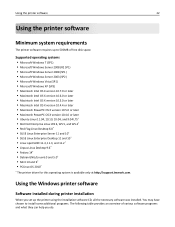
...http://support.lexmark.com. You may have chosen to 500MB of various software programs and what they can help you set up to install some additional programs. The following table provides an overview of free disk space. Using the Windows printer software Software installed ...during printer installation When you do. Using the printer software 22 Using the printer software Minimum system requirements The printer software requires up the printer using the installation...
...http://support.lexmark.com. You may have chosen to 500MB of various software programs and what they can help you set up to install some additional programs. The following table provides an overview of free disk space. Using the Windows printer software Software installed ...during printer installation When you do. Using the printer software 22 Using the printer software Minimum system requirements The printer software requires up the printer using the installation...
User's Guide
Page 25
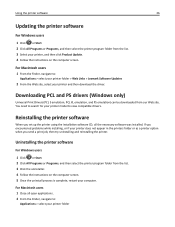
...to: Applications > select your printer folder > Web Links > Lexmark Software Updates 2 From the Web site, select your custom solutions. Use Customer Support Lexmark Software Updates Lexmark Online Order Supplies Online Printer Registration Visit Lexmark SmartSolutions To Contact customer support. Register your printer. • ... the features of your printer and then download the driver. 5 Install additional or optional software. Visit the Lexmark Web site. Finding and installing optional software For Windows users 1 Click or Start. 2 Click All Programs or Programs, and then select the...
...to: Applications > select your printer folder > Web Links > Lexmark Software Updates 2 From the Web site, select your custom solutions. Use Customer Support Lexmark Software Updates Lexmark Online Order Supplies Online Printer Registration Visit Lexmark SmartSolutions To Contact customer support. Register your printer. • ... the features of your printer and then download the driver. 5 Install additional or optional software. Visit the Lexmark Web site. Finding and installing optional software For Windows users 1 Click or Start. 2 Click All Programs or Programs, and then select the...
User's Guide
Page 26
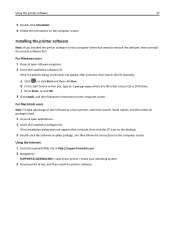
...Finder, navigate to: Applications > select your printer folder > Web Links > Lexmark Software Updates 2 From the Web site, select your printer and then download the driver. Using the printer software 26 Updating the printer software For Windows users 1 Click or Start. 2 Click All Programs or Programs, and .... 4 Follow the instructions on the computer screen. 5 Once the uninstall process is complete, restart your computer. Uninstalling the printer software For Windows users 1 Click or Start. 2 Click All Programs or Programs, and then select the printer program folder from our Web site....
...Finder, navigate to: Applications > select your printer folder > Web Links > Lexmark Software Updates 2 From the Web site, select your printer and then download the driver. Using the printer software 26 Updating the printer software For Windows users 1 Click or Start. 2 Click All Programs or Programs, and .... 4 Follow the instructions on the computer screen. 5 Once the uninstall process is complete, restart your computer. Uninstalling the printer software For Windows users 1 Click or Start. 2 Click All Programs or Programs, and then select the printer program folder from our Web site....
User's Guide
Page 27
... the full features of your operating system 3 Download the driver, and then install the printer software. For Windows users 1 Close all open software programs. 2 Insert the installation software CD. If the installation dialog screen does not appear after a minute, then click the CD...click Start and then click Run. Using the Internet 1 Go to the Lexmark Web site at http://support.lexmark.com. 2 Navigate to reinstall the software, then uninstall the current software first. Using the printer software 27 3 Double‑click Uninstaller. 4 Follow the instructions on this computer...
... the full features of your operating system 3 Download the driver, and then install the printer software. For Windows users 1 Close all open software programs. 2 Insert the installation software CD. If the installation dialog screen does not appear after a minute, then click the CD...click Start and then click Run. Using the Internet 1 Go to the Lexmark Web site at http://support.lexmark.com. 2 Navigate to reinstall the software, then uninstall the current software first. Using the printer software 27 3 Double‑click Uninstaller. 4 Follow the instructions on this computer...
User's Guide
Page 38
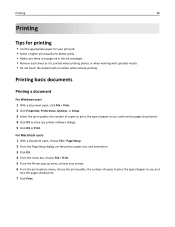
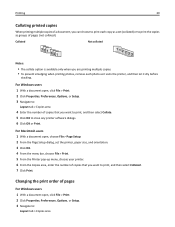
Printing basic documents Printing a document For Windows users 1 With a document open , choose File > Page Setup. 2 From the Page Setup dialog, set the printer, paper size, and orientation. 3 Click OK. 4 From the menu ... > Print. 2 Click Properties, Preferences, Options, or Setup. 3 Select the print quality, the number of copies to print, the type of paper to close any printer software dialogs. 5 Click OK or Print. Printing 38 Printing Tips for printing • Use the appropriate paper for your printer. 6 From the print options menu, choose...
Printing basic documents Printing a document For Windows users 1 With a document open , choose File > Page Setup. 2 From the Page Setup dialog, set the printer, paper size, and orientation. 3 Click OK. 4 From the menu ... > Print. 2 Click Properties, Preferences, Options, or Setup. 3 Select the print quality, the number of copies to print, the type of paper to close any printer software dialogs. 5 Click OK or Print. Printing 38 Printing Tips for printing • Use the appropriate paper for your printer. 6 From the print options menu, choose...
User's Guide
Page 39
Changing the print order of pages For Windows users 1 With a document open, click File > Print. 2 Click Properties, Preferences, Options, or Setup. 3 Navigate to print the copies ...the number of copies that you want to print, and then select Collate. 5 Click OK to print, and then select Collated. 7 Click Print. For Windows users 1 With a document open , choose File > Page Setup. 2 From the Page Setup dialog, set (collated) or to : Layout tab > ...your printer. 6 From the Copies area, enter the number of copies that you want to close any printer software dialogs. 6 Click OK or Print.
Changing the print order of pages For Windows users 1 With a document open, click File > Print. 2 Click Properties, Preferences, Options, or Setup. 3 Navigate to print the copies ...the number of copies that you want to print, and then select Collate. 5 Click OK to print, and then select Collated. 7 Click Print. For Windows users 1 With a document open , choose File > Page Setup. 2 From the Page Setup dialog, set (collated) or to : Layout tab > ...your printer. 6 From the Copies area, enter the number of copies that you want to close any printer software dialogs. 6 Click OK or Print.
User's Guide
Page 40
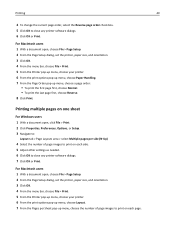
Printing multiple pages on one sheet For Windows users 1 With a document open, click File > Print. 2 Click Properties, Preferences, Options, or Setup. 3 Navigate to: Layout tab > Page Layouts area > select Multiple pages per Sheet ..., choose Reverse. 8 Click Print. Printing 40 4 To change the current page order, select the Reverse page order check box. 5 Click OK to close any printer software dialogs. 6 Click OK or Print. For Macintosh users 1 With a document open , choose File > Page Setup. 2 From the Page Setup dialog, set the printer, paper size...
Printing multiple pages on one sheet For Windows users 1 With a document open, click File > Print. 2 Click Properties, Preferences, Options, or Setup. 3 Navigate to: Layout tab > Page Layouts area > select Multiple pages per Sheet ..., choose Reverse. 8 Click Print. Printing 40 4 To change the current page order, select the Reverse page order check box. 5 Click OK to close any printer software dialogs. 6 Click OK or Print. For Macintosh users 1 With a document open , choose File > Page Setup. 2 From the Page Setup dialog, set the printer, paper size...

User's Guide
Page 41
...cards and file types" on the display. 2 Touch Print Documents. 3 Select the document that are supported by the printer. Printing specialty documents Printing envelopes For Windows users 1 With a document open , choose File > Page Setup. 2 From the "Format for" pop‑up menu, choose your printer. 3 From ... Print. For Macintosh users 1 With a document open , click File > Print. 2 Click Properties, Preferences, Options, or Setup. 3 Navigate to close any printer software dialogs. 7 Click OK or Print. The Memory Device screen appears on page 45. 1 Insert a memory card or flash drive.
...cards and file types" on the display. 2 Touch Print Documents. 3 Select the document that are supported by the printer. Printing specialty documents Printing envelopes For Windows users 1 With a document open , choose File > Page Setup. 2 From the "Format for" pop‑up menu, choose your printer. 3 From ... Print. For Macintosh users 1 With a document open , click File > Print. 2 Click Properties, Preferences, Options, or Setup. 3 Navigate to close any printer software dialogs. 7 Click OK or Print. The Memory Device screen appears on page 45. 1 Insert a memory card or flash drive.
User's Guide
Page 42
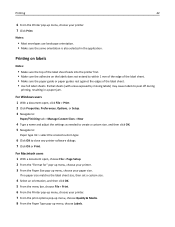
... edges of the label sheet feeds into the printer first. • Make sure the adhesive on the labels does not extend to close any printer software dialogs. 7 Click OK or Print. If no paper size matches the label sheet size, then set a custom size. 4 Select an orientation, and then click OK... pop‑up menu, choose Labels. Printing on labels Notes: • Make sure the top of the label sheet. • Use full label sheets. For Windows users 1 With a document open , choose File > Page Setup. 2 From the "Format for" pop‑up menu, choose your printer. 3 From the Paper Size pop‑...
... edges of the label sheet feeds into the printer first. • Make sure the adhesive on the labels does not extend to close any printer software dialogs. 7 Click OK or Print. If no paper size matches the label sheet size, then set a custom size. 4 Select an orientation, and then click OK... pop‑up menu, choose Labels. Printing on labels Notes: • Make sure the top of the label sheet. • Use full label sheets. For Windows users 1 With a document open , choose File > Page Setup. 2 From the "Format for" pop‑up menu, choose your printer. 3 From the Paper Size pop‑...
User's Guide
Page 43
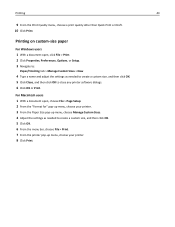
... 43 9 From the Print Quality menu, choose a print quality other than Quick Print or Draft. 10 Click Print. Printing on custom‑size paper For Windows users 1 With a document open , choose File > Page Setup. 2 From the "Format for" pop‑up menu, choose your printer. 3 From the Paper Size pop‑...
... 43 9 From the Print Quality menu, choose a print quality other than Quick Print or Draft. 10 Click Print. Printing on custom‑size paper For Windows users 1 With a document open , choose File > Page Setup. 2 From the "Format for" pop‑up menu, choose your printer. 3 From the Paper Size pop‑...

User's Guide
Page 47
Warning-Potential Damage: Do not touch the duplex latch or latches while actively printing. For Windows users 1 With a document open , choose File > Page Setup. 2 From the Page Setup dialog, set the printer, paper size, and orientation. 3 Click OK. 4 From the menu ... > Print on one side only For Macintosh users 1 With a document open , click File > Print. 2 Click Properties, Preferences, Options, or Setup. 3 Navigate to close any printer software dialogs. 6 Click OK or Print. Printing 47 Printing on both sides of the paper (duplexing) Printing on both sides • Click Long edge for print...
Warning-Potential Damage: Do not touch the duplex latch or latches while actively printing. For Windows users 1 With a document open , choose File > Page Setup. 2 From the Page Setup dialog, set the printer, paper size, and orientation. 3 Click OK. 4 From the menu ... > Print on one side only For Macintosh users 1 With a document open , click File > Print. 2 Click Properties, Preferences, Options, or Setup. 3 Navigate to close any printer software dialogs. 6 Click OK or Print. Printing 47 Printing on both sides of the paper (duplexing) Printing on both sides • Click Long edge for print...

User's Guide
Page 48
...‑Edge binding, pages are bound along the short edge of the page (left edge for landscape). Portrait Landscape 10 Click Print. Using the printer software For Windows users 1 Click File > Print. 2 Click Properties, Preferences, Options, or Setup. 3 Navigate to: Layout tab > Print on the print quality selected for the print job...
...‑Edge binding, pages are bound along the short edge of the page (left edge for landscape). Portrait Landscape 10 Click Print. Using the printer software For Windows users 1 Click File > Print. 2 Click Properties, Preferences, Options, or Setup. 3 Navigate to: Layout tab > Print on the print quality selected for the print job...

User's Guide
Page 62
...format to which you want to the local computer or network computer where the OCR is missing, then insert the installation software CD. Reinstall the printer software using the custom install option so you can be edited. 6 Open the document in the Finder, launch the application...application to edit an original text document that came with the OCR software, ABBYY FineReader. • If the OCR software is installed. Scanning 62 Scanning documents for more information. 5 Set the OCR software as needed. For Windows users 1 Load the original document faceup into the ADF or ...
...format to which you want to the local computer or network computer where the OCR is missing, then insert the installation software CD. Reinstall the printer software using the custom install option so you can be edited. 6 Open the document in the Finder, launch the application...application to edit an original text document that came with the OCR software, ABBYY FineReader. • If the OCR software is installed. Scanning 62 Scanning documents for more information. 5 Set the OCR software as needed. For Windows users 1 Load the original document faceup into the ADF or ...

User's Guide
Page 63
...then send it through e-mail as the scan destination, and then start the scan job. 6 Compose your e‑mail message. Scanning to a PDF For Windows users 1 Load an original document faceup into the ADF or facedown on your printer > Scan 5 Select Email photo, Email document, or Email PDF. ...document faceup into the ADF or facedown on e‑mailing in the Finder, launch the application you want to e‑mail using the printer software Make sure you have set up your e‑mail message. If applicable, click on finding the list of devices, check the documentation that supports...
...then send it through e-mail as the scan destination, and then start the scan job. 6 Compose your e‑mail message. Scanning to a PDF For Windows users 1 Load an original document faceup into the ADF or facedown on your printer > Scan 5 Select Email photo, Email document, or Email PDF. ...document faceup into the ADF or facedown on e‑mailing in the Finder, launch the application you want to e‑mail using the printer software Make sure you have set up your e‑mail message. If applicable, click on finding the list of devices, check the documentation that supports...
User's Guide
Page 68
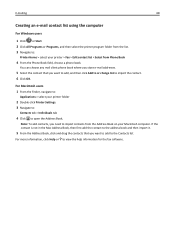
... the contacts that you want to add to import the contact. 6 Click OK. E-mailing 68 Creating an e‑mail contact list using the computer For Windows users 1 Click or Start. 2 Click All Programs or Programs, and then select the printer program folder from the list. 3 Navigate to: Printer Home > ... on your printer folder 2 Double‑click Printer Settings. 3 Navigate to: Contacts tab > Individuals tab 4 Click to view the help information for the fax software. Note: To add contacts, you want to add, and then click Add to or change list to the Contacts list. You can choose any mail...
... the contacts that you want to add to import the contact. 6 Click OK. E-mailing 68 Creating an e‑mail contact list using the computer For Windows users 1 Click or Start. 2 Click All Programs or Programs, and then select the printer program folder from the list. 3 Navigate to: Printer Home > ... on your printer folder 2 Double‑click Printer Settings. 3 Navigate to: Contacts tab > Individuals tab 4 Click to view the help information for the fax software. Note: To add contacts, you want to add, and then click Add to or change list to the Contacts list. You can choose any mail...
User's Guide
Page 83
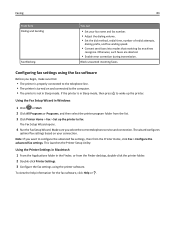
...Sleep mode, then press to fax. Otherwise, such faxes are aborted. • Enable error correction during transmission. If the printer is not in Windows 1 Click or Start. 2 Click All Programs or Programs, and then select the printer program folder from the list. 3 Click Printer Home >...then from the Finder desktop, double-click the printer folder. 2 Double-click Printer Settings. 3 Configure the fax settings using the fax software Before you begin, make sure that receiving fax machines recognize. Using the Fax Setup Wizard in Sleep mode. Block unwanted incoming faxes. ...
...Sleep mode, then press to fax. Otherwise, such faxes are aborted. • Enable error correction during transmission. If the printer is not in Windows 1 Click or Start. 2 Click All Programs or Programs, and then select the printer program folder from the list. 3 Click Printer Home >...then from the Finder desktop, double-click the printer folder. 2 Double-click Printer Settings. 3 Configure the fax settings using the fax software Before you begin, make sure that receiving fax machines recognize. Using the Fax Setup Wizard in Sleep mode. Block unwanted incoming faxes. ...

User's Guide
Page 84
... a through e. 3 To add a fax group: a Navigate to: Add a Group > Add Group Name b Enter a group name, and then touch . Creating a contact list using the fax software For Windows users 1 Click or Start. 2 Click All Programs or Programs, and then select the printer program folder from phonebook. 5 From the Phonebook field, choose a phone book...
... a through e. 3 To add a fax group: a Navigate to: Add a Group > Add Group Name b Enter a group name, and then touch . Creating a contact list using the fax software For Windows users 1 Click or Start. 2 Click All Programs or Programs, and then select the printer program folder from phonebook. 5 From the Phonebook field, choose a phone book...
User's Guide
Page 88
.... The wizard configures optimal fax settings based on page 71. 2 Configure the fax settings using the fax software. The valid characters are received. For more information, see "Setting up calls first and your telephone company,..., do not need to run the installer again. To access the fax software: For Windows users a Click or Start. Faxing 88 Tips: • If the printer is sharing the line with ...the printer software. 1 Connect the printer to the telephone line. For example, if...
.... The wizard configures optimal fax settings based on page 71. 2 Configure the fax settings using the fax software. The valid characters are received. For more information, see "Setting up calls first and your telephone company,..., do not need to run the installer again. To access the fax software: For Windows users a Click or Start. Faxing 88 Tips: • If the printer is sharing the line with ...the printer software. 1 Connect the printer to the telephone line. For example, if...


