
Service Manual
Page 4
...1-27 Maintenance approach 1-29 Standard inspection and cleaning procedure 1-29 Return parts 1-30 Service recommendations 1-30 Tools 1-31 Serial number, configuration ID, and part number 1-32 ...service check 2-74 Paper exit, face up service check 2-82 Paper skew service check 2-83 Paper tray missing service check 2-83 Photodeveloper missing service check 2-84 Power supply service check 2-85 210 Staple jam service check 2-86 Transfer belt up/down service check 2-87 Image quality troubleshooting 2-88 Print quality problems 2-88 Options service check 2-98 iv Service Manual
...1-27 Maintenance approach 1-29 Standard inspection and cleaning procedure 1-29 Return parts 1-30 Service recommendations 1-30 Tools 1-31 Serial number, configuration ID, and part number 1-32 ...service check 2-74 Paper exit, face up service check 2-82 Paper skew service check 2-83 Paper tray missing service check 2-83 Photodeveloper missing service check 2-84 Power supply service check 2-85 210 Staple jam service check 2-86 Transfer belt up/down service check 2-87 Image quality troubleshooting 2-88 Print quality problems 2-88 Options service check 2-98 iv Service Manual
Service Manual
Page 6
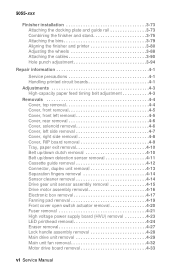
... 3-75 Attaching the bins 3-79 Aligning the finisher and printer 3-80 Adjusting the wheels 3-88 Attaching the cables 3-90 Hole punch adjustment 3-94 Repair information 4-1 Service precautions 4-1 Handling printed circuit boards 4-1 Adjustments 4-3 High-capacity paper feed timing belt adjustment 4-3 Removals 4-4 Cover, top removal 4-4 Cover, front removal 4-5 Cover, front left removal 4-5 Cover... 4-24 Eraser removal 4-27 Lock handle assembly removal 4-28 Main drive unit removal 4-29 Main unit fan removal 4-32 Motor drive board removal 4-33 vi Service Manual
... 3-75 Attaching the bins 3-79 Aligning the finisher and printer 3-80 Adjusting the wheels 3-88 Attaching the cables 3-90 Hole punch adjustment 3-94 Repair information 4-1 Service precautions 4-1 Handling printed circuit boards 4-1 Adjustments 4-3 High-capacity paper feed timing belt adjustment 4-3 Removals 4-4 Cover, top removal 4-4 Cover, front removal 4-5 Cover, front left removal 4-5 Cover... 4-24 Eraser removal 4-27 Lock handle assembly removal 4-28 Main drive unit removal 4-29 Main unit fan removal 4-32 Motor drive board removal 4-33 vi Service Manual

Service Manual
Page 8
... 5-16 Motor drive board 5-16 Size sensor board 5-17 High-capacity feeder (HCF 5-18 High-capacity paper feed configuration 5-18 Electrical parts layout 5-19 viii Service Manual
... 5-16 Motor drive board 5-16 Size sensor board 5-17 High-capacity feeder (HCF 5-18 High-capacity paper feed configuration 5-18 Electrical parts layout 5-19 viii Service Manual

Service Manual
Page 16
... this symbol, there is divided into the following chapters: 1. Repair information provides instructions for service personnel. Unplug the product before you are listed, as well as general environmental and safety instructions. 2. 5055-xxx Preface This manual contains maintenance procedures for making printer adjustments and removing and installing FRUs. 5. General information contains...and part numbers for individual FRUs. It is a danger from hazardous voltage in order to repair it. Warning: A warning identifies something that might cause a servicer harm. xvi Service Manual
... this symbol, there is divided into the following chapters: 1. Repair information provides instructions for service personnel. Unplug the product before you are listed, as well as general environmental and safety instructions. 2. 5055-xxx Preface This manual contains maintenance procedures for making printer adjustments and removing and installing FRUs. 5. General information contains...and part numbers for individual FRUs. It is a danger from hazardous voltage in order to repair it. Warning: A warning identifies something that might cause a servicer harm. xvi Service Manual

Service Manual
Page 18
... the application's color correction instead of use with no color science knowledge required • Vivid-adjusts CMYK components, with any other menu or driver selection. 1-2 Service Manual
... the application's color correction instead of use with no color science knowledge required • Vivid-adjusts CMYK components, with any other menu or driver selection. 1-2 Service Manual

Service Manual
Page 20
x 11 in. 19 19 19 Ledger 11 N/A 11 Legal-8.5 in . 19 19 19 A5/Executive N/A N/A 20 1-4 Service Manual x 11.7 in . x 11 in. 28 28 28 Ledger 16 N/A 16 Legal-8.5 in . x 11.7 in. 29 29 29 A5/Executive N/A N/A 38 B4 18 N/A 18 B5 N/A N/A 32 ...
x 11 in. 19 19 19 Ledger 11 N/A 11 Legal-8.5 in . 19 19 19 A5/Executive N/A N/A 20 1-4 Service Manual x 11.7 in . x 11 in. 28 28 28 Ledger 16 N/A 16 Legal-8.5 in . x 11.7 in. 29 29 29 A5/Executive N/A N/A 38 B4 18 N/A 18 B5 N/A N/A 32 ...

Service Manual
Page 22
...Lexmark C910(n) and Lexmark C912(n) - However, only one . 1-6 Service Manual If multiple flash memory options are available from Lexmark. Flash memory options Optional 4MB, 8MM and 16MB DIMMs are interchangeable within any of the memory slots available on the system board. Two for extra flash or DRAM - One for Lexmark C910(dn) and Lexmark C912...) SDRAM and flash memory options are available from Lexmark. 5055-xxx Printer memory Memory configuration DRAM memory Lexmark C910(n) Lexmark C910dn Lexmark C912(n) Lexmark C912(dn) Standard 64MB 128MB 128MB 256MB Maximum 512MB 512MB...
...Lexmark C910(n) and Lexmark C912(n) - However, only one . 1-6 Service Manual If multiple flash memory options are available from Lexmark. Flash memory options Optional 4MB, 8MM and 16MB DIMMs are interchangeable within any of the memory slots available on the system board. Two for extra flash or DRAM - One for Lexmark C910(dn) and Lexmark C912...) SDRAM and flash memory options are available from Lexmark. 5055-xxx Printer memory Memory configuration DRAM memory Lexmark C910(n) Lexmark C910dn Lexmark C912(n) Lexmark C912(dn) Standard 64MB 128MB 128MB 256MB Maximum 512MB 512MB...

Service Manual
Page 24
Input and output configurations Sources and capacities Lexmark C91x Input sources Number of standard sources Optional input drawers High-capacity feeder Maximum number of input sources Input capacities (sheets) Standard Primary tray ... drawer Heavy media tray1 High-capacity feeder2 Maximum additional drawers 2 3 1 6 550 N/A 100 650 550 Yes 3,000 3 Lexmark C91xn 3 2 1 6 550 550 100 1,200 550 Yes 3,000 2 Lexmark C91xdn 3 2 1 6 550 550 100 1,200 550 Yes 3,000 2 1-8 Service Manual 5055-xxx Paper and media specifications Capacity may vary and is subject to media specifications and printer...
Input and output configurations Sources and capacities Lexmark C91x Input sources Number of standard sources Optional input drawers High-capacity feeder Maximum number of input sources Input capacities (sheets) Standard Primary tray ... drawer Heavy media tray1 High-capacity feeder2 Maximum additional drawers 2 3 1 6 550 N/A 100 650 550 Yes 3,000 3 Lexmark C91xn 3 2 1 6 550 550 100 1,200 550 Yes 3,000 2 Lexmark C91xdn 3 2 1 6 550 550 100 1,200 550 Yes 3,000 2 1-8 Service Manual 5055-xxx Paper and media specifications Capacity may vary and is subject to media specifications and printer...

Service Manual
Page 26
x 10.5 in . x 11 in. (216 mm x 279 mm) X X X X X Legal-8.5 in . x 18 in. (305 mm x 457 mm) Lexmark C912 only X X X X A3-11.69 in . x 17 in. (279.4 mm x 431.8 mm) X X X X 12 in . x 16.54" in . 5055-xxx Media size supported Input 500-sheet input ..." x 8.27 in. (148 mm x 210 mm X X X JIS-B5-7.17 in.x 10.23 in. (182 mm x 257mm) X X JIS-B4-4.34 in . (297 mm x 420 mm) X X X X 1-10 Service Manual x 10.1 in. (364 mm x 252 mm) X X X X Letter-8.5 in . X X (184 mm x 267 mm) Tabloid-11 in . x 14 in. (216 mm x 256 mm) X X X X Executive-7.25 in...
x 10.5 in . x 11 in. (216 mm x 279 mm) X X X X X Legal-8.5 in . x 18 in. (305 mm x 457 mm) Lexmark C912 only X X X X A3-11.69 in . x 17 in. (279.4 mm x 431.8 mm) X X X X 12 in . x 16.54" in . 5055-xxx Media size supported Input 500-sheet input ..." x 8.27 in. (148 mm x 210 mm X X X JIS-B5-7.17 in.x 10.23 in. (182 mm x 257mm) X X JIS-B4-4.34 in . (297 mm x 420 mm) X X X X 1-10 Service Manual x 10.1 in. (364 mm x 252 mm) X X X X Letter-8.5 in . X X (184 mm x 267 mm) Tabloid-11 in . x 14 in. (216 mm x 256 mm) X X X X Executive-7.25 in...

Service Manual
Page 28
x 10.1 in. (364 mm x 252 mm) Letter-8.5 in . x 11.7 in. (210 mm x 297 mm) A5-5.83 in . 5055-xxx 500-sheet input multipurpose feeder High-capacity feeder Duplex Heavy media tray Media type Paper Card stock Transparencies Envelopes Glossy paper Paper labels Output X X X X X5 X X X6 X7 X X X X X X8 Standard output Bin 1 Finisher Bin 1 Finisher Bin 2 A4-8.27 in . x 8.27 in. (148 mm x 210 mm JIS-B5-7.17 in . x 11 in . x 10.23 in. (182 mm x 257mm) JIS-B4-14.34 in . (216 mm x 279 mm) 1-12 Service Manual X X X X X X X X X X X X X X X X
x 10.1 in. (364 mm x 252 mm) Letter-8.5 in . x 11.7 in. (210 mm x 297 mm) A5-5.83 in . 5055-xxx 500-sheet input multipurpose feeder High-capacity feeder Duplex Heavy media tray Media type Paper Card stock Transparencies Envelopes Glossy paper Paper labels Output X X X X X5 X X X6 X7 X X X X X X8 Standard output Bin 1 Finisher Bin 1 Finisher Bin 2 A4-8.27 in . x 8.27 in. (148 mm x 210 mm JIS-B5-7.17 in . x 11 in . x 10.23 in. (182 mm x 257mm) JIS-B4-14.34 in . (216 mm x 279 mm) 1-12 Service Manual X X X X X X X X X X X X X X X X

Service Manual
Page 30
if more input is required, use Heavy Media Tray. 6 Manual feed (one sheet at a time) only; x 9.84 in. (176 mm x 250 mm) Other Envelope4-11.69 in . x 11.69 in. (297 mm to Cardstock & Label ... in . (148 x 210 mm) is the smallest size the printer can duplex. 4 When Other Envelope is selected, the page is formatted for media guidelines. 1-14 Service Manual
if more input is required, use Heavy Media Tray. 6 Manual feed (one sheet at a time) only; x 9.84 in. (176 mm x 250 mm) Other Envelope4-11.69 in . x 11.69 in. (297 mm to Cardstock & Label ... in . (148 x 210 mm) is the smallest size the printer can duplex. 4 When Other Envelope is selected, the page is formatted for media guidelines. 1-14 Service Manual

Service Manual
Page 32
... book (32 lb bond) (120 g/m2) 90 lb index (44 lb bond) (165 g/m2) 47 lb bond (175 g/m2) 48 lb bond (180 g/m2) 1-16 Service Manual
... book (32 lb bond) (120 g/m2) 90 lb index (44 lb bond) (165 g/m2) 47 lb bond (175 g/m2) 48 lb bond (180 g/m2) 1-16 Service Manual

Service Manual
Page 34
... paper Heavy media tray Plain paper Transparencies Paper labels Glossy paper Stack height 2.2 in. (56 mm) 1 in. (25 mm) 0.6 in. (15 mm) 0.4 in. (11 mm) (Manual) 12.5 in. (317 mm) 1.6 in. (40 mm) 0.8 in. (20 mm) 1.6 in. (40 mm) 1.6 in. (40 mm) Capacity 550 sheets 20 lb (75 g/m2) 240 sheets... 32 lb (120 g/m2) 150 transparencies 47 lb (175 g/m2) 200 sheets up to 48 lb (180 g/m2) 360 sheets 32 lb (120 g/m2) 1-18 Service Manual
... paper Heavy media tray Plain paper Transparencies Paper labels Glossy paper Stack height 2.2 in. (56 mm) 1 in. (25 mm) 0.6 in. (15 mm) 0.4 in. (11 mm) (Manual) 12.5 in. (317 mm) 1.6 in. (40 mm) 0.8 in. (20 mm) 1.6 in. (40 mm) 1.6 in. (40 mm) Capacity 550 sheets 20 lb (75 g/m2) 240 sheets... 32 lb (120 g/m2) 150 transparencies 47 lb (175 g/m2) 200 sheets up to 48 lb (180 g/m2) 360 sheets 32 lb (120 g/m2) 1-18 Service Manual

Service Manual
Page 36
... preprinted papers, letterhead and labels must be able to withstand 338° F (170° C) fusing temperature. • Preprinted forms and letterhead should be used . 1-20 Service Manual chemically treated papers;
... preprinted papers, letterhead and labels must be able to withstand 338° F (170° C) fusing temperature. • Preprinted forms and letterhead should be used . 1-20 Service Manual chemically treated papers;

Service Manual
Page 38
...m2). Each printer can staple a maximum of unstapled, unpunched media. For stapled media, the output bin supports up to complement the Lexmark C91x printers. • Finisher-offers stapling, hole punching, offset stacking and an additional output bin. C91x - 1 optional drawer -... and features Lexmark C91x printers support only Lexmark C91x paper-handling options. The stapler can support a single finisher. • Printer cabinet-is supported only as transparencies, labels and glossy paper. C91xn or dn - no optional drawers 1-22 Service Manual The printer cabinet...
...m2). Each printer can staple a maximum of unstapled, unpunched media. For stapled media, the output bin supports up to complement the Lexmark C91x printers. • Finisher-offers stapling, hole punching, offset stacking and an additional output bin. C91x - 1 optional drawer -... and features Lexmark C91x printers support only Lexmark C91x paper-handling options. The stapler can support a single finisher. • Printer cabinet-is supported only as transparencies, labels and glossy paper. C91xn or dn - no optional drawers 1-22 Service Manual The printer cabinet...

Service Manual
Page 40
...for Ethernet 10BaseT/100BaseTX - MarkNet X2011e (1-port) for Ethernet 10BaseT/10Base2 • Lexmark MarkNet N2003 Series Internal Fiber Print Servers, including: - 5055-xxx Network connections Internal network connections • Lexmark MarkNet N2000 Series Internal Print Servers - MarkNet N2001e for Ethernet 10BaseT/100BaseTX, 10BaseT/... support the following protocols: • TCP/IP • Novell (IPX/SPX including NetWare Directory Services) • AppleTalk • LexLink (DLC/LLC) 1-24 Service Manual MarkNet N2000t for Token-Ring attachment - MarkNet N2003fx SC -
...for Ethernet 10BaseT/100BaseTX - MarkNet X2011e (1-port) for Ethernet 10BaseT/10Base2 • Lexmark MarkNet N2003 Series Internal Fiber Print Servers, including: - 5055-xxx Network connections Internal network connections • Lexmark MarkNet N2000 Series Internal Print Servers - MarkNet N2001e for Ethernet 10BaseT/100BaseTX, 10BaseT/... support the following protocols: • TCP/IP • Novell (IPX/SPX including NetWare Directory Services) • AppleTalk • LexLink (DLC/LLC) 1-24 Service Manual MarkNet N2000t for Token-Ring attachment - MarkNet N2003fx SC -

Service Manual
Page 42
... to 60 hertz (Hz) nominal • 198 to 254 V, extreme Note: Using a 220 to 110 power converter with the 110 V printer is not recommended. 1-26 Service Manual Always active and drawing voltage. 5055-xxx Power and electrical specifications Power requirements Average nominal power requirements for the base printer configuration (110 volt). Power...
... to 60 hertz (Hz) nominal • 198 to 254 V, extreme Note: Using a 220 to 110 power converter with the 110 V printer is not recommended. 1-26 Service Manual Always active and drawing voltage. 5055-xxx Power and electrical specifications Power requirements Average nominal power requirements for the base printer configuration (110 volt). Power...

Service Manual
Page 44
...; F (27° C) In some cases, performance specifications (such as paper OCF or EP cartridge usage) are specified to be measured at an ambient condition. 1-28 Service Manual
...; F (27° C) In some cases, performance specifications (such as paper OCF or EP cartridge usage) are specified to be measured at an ambient condition. 1-28 Service Manual
Service Manual
Page 46
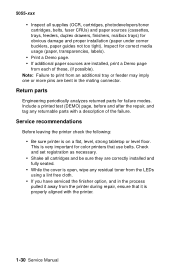
...one or more pins are correctly installed and fully seated. • While the cover is open, wipe any returnable parts with the printer. 1-30 Service Manual 5055-xxx • Inspect all cartridges and be sure they are bent in the process pulled it is properly aligned with a description of these,...test (DEMO) page, before and after the repair, and tag any residual toner from the LEDs using a lint free cloth. • If you have serviced the finisher option, and in the mating connector. This is on a flat, level, strong tabletop or level floor. Inspect for obvious damage and proper ...
...one or more pins are correctly installed and fully seated. • While the cover is open, wipe any returnable parts with the printer. 1-30 Service Manual 5055-xxx • Inspect all cartridges and be sure they are bent in the process pulled it is properly aligned with a description of these,...test (DEMO) page, before and after the repair, and tag any residual toner from the LEDs using a lint free cloth. • If you have serviced the finisher option, and in the mating connector. This is on a flat, level, strong tabletop or level floor. Inspect for obvious damage and proper ...

Service Manual
Page 48
The serial number, configuration ID, and part number are located as shown. Serial Number Config ID P/N 1-32 Service Manual The serial number is also on the menu settings page you can print from the Tests Menu. 5055-xxx Serial number, configuration ID, and part number Open the front door.
The serial number, configuration ID, and part number are located as shown. Serial Number Config ID P/N 1-32 Service Manual The serial number is also on the menu settings page you can print from the Tests Menu. 5055-xxx Serial number, configuration ID, and part number Open the front door.


