User's Guide
Page 3
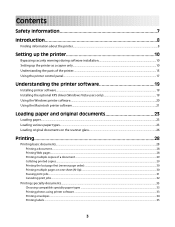
...printer 10 Bypassing security warnings during software installation 10 Setting up the printer as a copier only...10 Understanding the parts of the printer...15 Using the printer control panel...17 Understanding the printer software 19 Installing printer software...19 Installing the optional XPS ...driver (Windows Vista users only 19 Using the Windows printer software...20 Using the Macintosh printer software...21 Loading paper and original documents 23 Loading ...
...printer 10 Bypassing security warnings during software installation 10 Setting up the printer as a copier only...10 Understanding the parts of the printer...15 Using the printer control panel...17 Understanding the printer software 19 Installing printer software...19 Installing the optional XPS ...driver (Windows Vista users only 19 Using the Windows printer software...20 Using the Macintosh printer software...21 Loading paper and original documents 23 Loading ...
User's Guide
Page 4
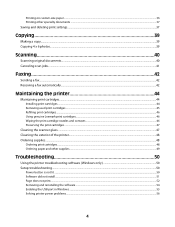
...printer 44 Maintaining print cartridges...44 Installing print cartridges...44 Removing used print cartridges...45 Refilling print cartridges...46 Using genuine Lexmark print cartridges...46 Wiping the print cartridge nozzles and contacts ...46 Preserving the print cartridges ...47 Cleaning the scanner glass... supplies...49 Troubleshooting 50 Using the printer troubleshooting software (Windows only 50 Setup troubleshooting...50 Power button is not lit ...50 Software did not install...51 Page does not print...52 Removing and reinstalling the software ...54 Enabling the USB port in Windows ...55...
...printer 44 Maintaining print cartridges...44 Installing print cartridges...44 Removing used print cartridges...45 Refilling print cartridges...46 Using genuine Lexmark print cartridges...46 Wiping the print cartridge nozzles and contacts ...46 Preserving the print cartridges ...47 Cleaning the scanner glass... supplies...49 Troubleshooting 50 Using the printer troubleshooting software (Windows only 50 Setup troubleshooting...50 Power button is not lit ...50 Software did not install...51 Page does not print...52 Removing and reinstalling the software ...54 Enabling the USB port in Windows ...55...
User's Guide
Page 8
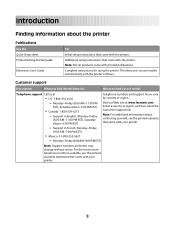
... printer. - Customer support Description Where to find (North America) Where to find (rest of world) Telephone support Call us at www.lexmark.com. Monday-Friday (8:00 AM-11:00 PM EST), Saturday (Noon-6:00 PM EST) • Canada: 1-800-539-6275 - ... or region. The electronic version installs automatically with printed publications. Note: Not all products come with the printer software. Introduction Finding information about contacting Lexmark, see the printed warranty statement that came with your printer. 8 Additional setup instructions that came with the printer...
... printer. - Customer support Description Where to find (North America) Where to find (rest of world) Telephone support Call us at www.lexmark.com. Monday-Friday (8:00 AM-11:00 PM EST), Saturday (Noon-6:00 PM EST) • Canada: 1-800-539-6275 - ... or region. The electronic version installs automatically with printed publications. Note: Not all products come with the printer software. Introduction Finding information about contacting Lexmark, see the printed warranty statement that came with your printer. 8 Additional setup instructions that came with the printer...
User's Guide
Page 10
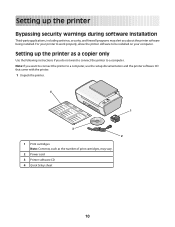
... be installed on your computer. Setting up the printer Bypassing security warnings during software installation Third-party applications, including antivirus, security, and firewall programs may vary. 2 Power cord 3 Printer software CD 4 Quick Setup sheet 10 Note: If you want to connect the printer to a computer.... as a copier only Use the following instructions if you do not want to connect the printer to a computer, use the setup documentation and the printer software CD that came with the printer. 1 Unpack the printer. 4 1 2 1 3 3 2 1 Print cartridges Note: Contents, such as the number ...
... be installed on your computer. Setting up the printer Bypassing security warnings during software installation Third-party applications, including antivirus, security, and firewall programs may vary. 2 Power cord 3 Printer software CD 4 Quick Setup sheet 10 Note: If you want to connect the printer to a computer.... as a copier only Use the following instructions if you do not want to connect the printer to a computer, use the setup documentation and the printer software CD that came with the printer. 1 Unpack the printer. 4 1 2 1 3 3 2 1 Print cartridges Note: Contents, such as the number ...

User's Guide
Page 19
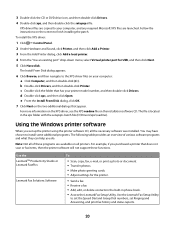
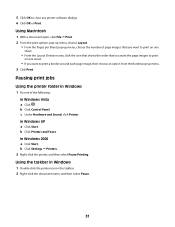
To use of the advanced XPS color and graphics features that automatically appears. 4 Double-click the Install icon. 5 Follow the instructions on the screens. Using Macintosh 1 Close all open software applications. 2 Insert the printer software CD. 3 From the Finder desktop, double-click ...the printer software Installing printer software Using Windows 1 Close all open software programs. 2 Insert the printer software CD. 3 From the main installation screen, click Install. 4 Follow the instructions on the screens. Using the World Wide Web 1 Go to the Lexmark Web site at www.lexmark.com. ...
To use of the advanced XPS color and graphics features that automatically appears. 4 Double-click the Install icon. 5 Follow the instructions on the screens. Using Macintosh 1 Close all open software applications. 2 Insert the printer software CD. 3 From the Finder desktop, double-click ...the printer software Installing printer software Using Windows 1 Close all open software programs. 2 Insert the printer software CD. 3 From the main installation screen, click Install. 4 Follow the instructions on the screens. Using the World Wide Web 1 Go to the Lexmark Web site at www.lexmark.com. ...
User's Guide
Page 20
... these programs are launched. The file is located in phone book. • Access the Lexmark Fax Setup Utility. Using the Windows printer software When you do. Use the LexmarkTM Productivity Studio or Lexmark FastPics Lexmark Fax Solutions Software To • Scan, copy, fax, e-mail, or print a photo or document. ...the screen to finish installing the patch. You may have chosen to the XPS driver files on all the necessary software was installed. Use the Lexmark Fax Setup Utility to your computer, and any required Microsoft XPS files are available on your printer model number,...
... these programs are launched. The file is located in phone book. • Access the Lexmark Fax Setup Utility. Using the Windows printer software When you do. Use the LexmarkTM Productivity Studio or Lexmark FastPics Lexmark Fax Solutions Software To • Scan, copy, fax, e-mail, or print a photo or document. ...the screen to finish installing the patch. You may have chosen to the XPS driver files on all the necessary software was installed. Use the Lexmark Fax Setup Utility to your computer, and any required Microsoft XPS files are available on your printer model number,...
User's Guide
Page 21
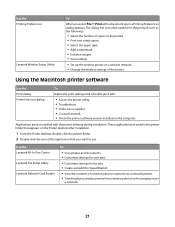
Using the Macintosh printer software Use the To Print dialog Adjust the print settings and schedule print jobs. Use the Lexmark All-In-One Center Lexmark Fax Setup Utility Lexmark Network Card Reader To • Scan photos and documents. • Customize settings for scan jobs. ...Printer Services dialog • Access the printer utility. • Troubleshoot. • Order ink or supplies. • Contact Lexmark. • Check the printer software version installed on a wireless network. • Change the wireless settings of the application that you select File Œ Print ...
Using the Macintosh printer software Use the To Print dialog Adjust the print settings and schedule print jobs. Use the Lexmark All-In-One Center Lexmark Fax Setup Utility Lexmark Network Card Reader To • Scan photos and documents. • Customize settings for scan jobs. ...Printer Services dialog • Access the printer utility. • Troubleshoot. • Order ink or supplies. • Contact Lexmark. • Check the printer software version installed on a wireless network. • Change the wireless settings of the application that you select File Œ Print ...
User's Guide
Page 28
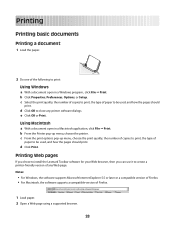
...a compatible version of Firefox. • For Macintosh, the software supports a compatible version of Firefox. 1 Load paper. 2 Open a Web page using a supported browser. 28 Printing Web pages If you chose to install the Lexmark Toolbar software for your Web browser, then you can use it to ...create a printer-friendly version of any printer software dialogs. e Click OK or Print. d Click Print. Using Macintosh a With a document...
...a compatible version of Firefox. • For Macintosh, the software supports a compatible version of Firefox. 1 Load paper. 2 Open a Web page using a supported browser. 28 Printing Web pages If you chose to install the Lexmark Toolbar software for your Web browser, then you can use it to ...create a printer-friendly version of any printer software dialogs. e Click OK or Print. d Click Print. Using Macintosh a With a document...

User's Guide
Page 29
Note: The collate option is available only when you want to print. 4 Click OK to close any printer software dialogs. 5 Click OK or Print. Using Macintosh 1 With a document open , click File ΠPrint. 2 From the Printer pop-up menu, choose the printer. ... a set (collated) or to print the copies as groups of copies that you want to print. 4 Click Print. 3 Select a print option to close any printer software dialogs. 5 Click OK or Print. Printing multiple copies of a document Using Windows 1 With a document open , click File ΠPrint. 2 Click Properties, Preferences, ...
Note: The collate option is available only when you want to print. 4 Click OK to close any printer software dialogs. 5 Click OK or Print. Using Macintosh 1 With a document open , click File ΠPrint. 2 From the Printer pop-up menu, choose the printer. ... a set (collated) or to print the copies as groups of copies that you want to print. 4 Click Print. 3 Select a print option to close any printer software dialogs. 5 Click OK or Print. Printing multiple copies of a document Using Windows 1 With a document open , click File ΠPrint. 2 Click Properties, Preferences, ...

User's Guide
Page 30
... 10.4 a From the print options pop-up menu, choose Layout. Note: To prevent smudging when printing photos, remove each page image to close any printer software dialogs. 5 Click OK or Print. b Select Reverse Page Orientation. b From the Page Order menu, select Reverse. For Mac OS X version 10.3 a From the print options...
... 10.4 a From the print options pop-up menu, choose Layout. Note: To prevent smudging when printing photos, remove each page image to close any printer software dialogs. 5 Click OK or Print. b Select Reverse Page Orientation. b From the Page Order menu, select Reverse. For Mac OS X version 10.3 a From the print options...
User's Guide
Page 31
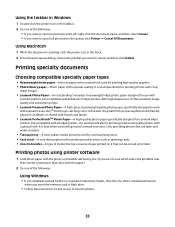
... the icon that shows the order that you want the page images to print on one sheet. • If you want to close any printer software dialogs. 6 Click OK or Print. b Click Control Panel. In Windows XP a Click Start. c Under Hardware and Sound, click Printer. b Click Settings Œ Printers. 2 Right-click...
... the icon that shows the order that you want the page images to print on one sheet. • If you want to close any printer software dialogs. 6 Click OK or Print. b Click Control Panel. In Windows XP a Click Start. c Under Hardware and Sound, click Printer. b Click Settings Œ Printers. 2 Right-click...
User's Guide
Page 33
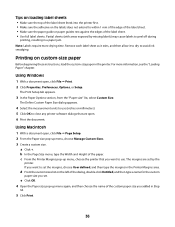
...outstanding "everyday" heavyweight inkjet photo paper designed for use with Lexmark printers, but compatible with all inkjet printers. and water-resistant. • Transparency-A clear, plastic media primarily used for overhead projectors. • Card stock-A very thick paper used for eye-catching, color-rich results. Using Macintosh... click Delete. It is best when used specifically for those special photos to be ironed onto fabric. Printing photos using printer software 1 Load photo paper with the glossy or printable side facing you. (If you are fade- Using the taskbar in Windows...
...outstanding "everyday" heavyweight inkjet photo paper designed for use with Lexmark printers, but compatible with all inkjet printers. and water-resistant. • Transparency-A clear, plastic media primarily used for overhead projectors. • Card stock-A very thick paper used for eye-catching, color-rich results. Using Macintosh... click Delete. It is best when used specifically for those special photos to be ironed onto fabric. Printing photos using printer software 1 Load photo paper with the glossy or printable side facing you. (If you are fade- Using the taskbar in Windows...
User's Guide
Page 34
... tab, select Plain. Otherwise, proceed to the next step. 4 From the Copies & Pages pop-up menu, type the number of copies to close any printer software dialogs. Note: To print on a custom-size envelope, select Custom Size, and then specify the height and width of paper that you are using. •...
... tab, select Plain. Otherwise, proceed to the next step. 4 From the Copies & Pages pop-up menu, type the number of copies to close any printer software dialogs. Note: To print on a custom-size envelope, select Custom Size, and then specify the height and width of paper that you are using. •...
User's Guide
Page 35
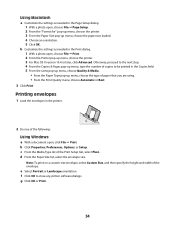
.... 1 With a document open , choose File Œ Page Setup. 2 From the "Format for " pop-up menu, choose a paper size that you want to close any printer software dialogs. Notes: • Most envelopes use . 3 From the Paper Size pop-up menu, choose the envelope size. Using Macintosh a Customize the settings as needed in...
.... 1 With a document open , choose File Œ Page Setup. 2 From the "Format for " pop-up menu, choose a paper size that you want to close any printer software dialogs. Notes: • Most envelopes use . 3 From the Paper Size pop-up menu, choose the envelope size. Using Macintosh a Customize the settings as needed in...
User's Guide
Page 36
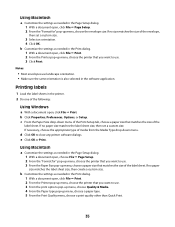
For more drying time. If you want to use (inches or millimeters). 5 Click OK to close any printer software dialogs that are set by missing labels) may cause labels to peel off during printing, resulting in the Printer Margins area. The Print Setup tab ...
For more drying time. If you want to use (inches or millimeters). 5 Click OK to close any printer software dialogs that are set by missing labels) may cause labels to peel off during printing, resulting in the Printer Margins area. The Print Setup tab ...

User's Guide
Page 37
... Do one of the profile that you want to delete, and then click Delete. 37 b Choose Library Œ Printers Œ YYYY Œ Lexmark, and then select your print settings, click Profiles Œ Restore a Profile, and then select the name of the following: • In Windows Vista... settings. 5 Select an empty location for your setting, and then assign a name. Saving and deleting print settings Using Windows 1 With a document open software dialogs. Notes: • To retrieve your printer model. Select the setting that you want to use. • To delete a setting, click Profiles ...
... Do one of the profile that you want to delete, and then click Delete. 37 b Choose Library Œ Printers Œ YYYY Œ Lexmark, and then select your print settings, click Profiles Œ Restore a Profile, and then select the name of the following: • In Windows Vista... settings. 5 Select an empty location for your setting, and then assign a name. Saving and deleting print settings Using Windows 1 With a document open software dialogs. Notes: • To retrieve your printer model. Select the setting that you want to use. • To delete a setting, click Profiles ...
User's Guide
Page 41
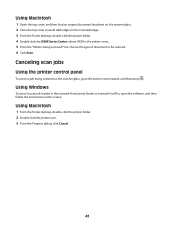
... Center, where XXXX is the printer series. 5 From the "What is being scanned?" Using Windows To cancel a scan job started in the Lexmark Productivity Studio or Lexmark FastPics, open the software, and then follow the instructions on the screen. Using Macintosh 1 From the Finder desktop, double-click the printer folder. 2 Double-click the...
... Center, where XXXX is the printer series. 5 From the "What is being scanned?" Using Windows To cancel a scan job started in the Lexmark Productivity Studio or Lexmark FastPics, open the software, and then follow the instructions on the screen. Using Macintosh 1 From the Finder desktop, double-click the printer folder. 2 Double-click the...
User's Guide
Page 42
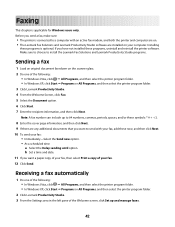
... sure to choose to send with an active fax modem, and both the printer and computer are on. • The Lexmark Fax Solutions and Lexmark Productivity Studio software are installed on the scanner glass. 2 Do one of the following : • In Windows Vista, click Œ ...then select the printer program folder. 3 Click Lexmark Productivity Studio. 4 From the Welcome Screen, click Fax. 5 Select the Document option. 6 Click Start. 7 Enter the recipient information, and then click Next. Installing these programs, uninstall and reinstall the printer software. Note: A fax number can include up...
... sure to choose to send with an active fax modem, and both the printer and computer are on. • The Lexmark Fax Solutions and Lexmark Productivity Studio software are installed on the scanner glass. 2 Do one of the following : • In Windows Vista, click Œ ...then select the printer program folder. 3 Click Lexmark Productivity Studio. 4 From the Welcome Screen, click Fax. 5 Select the Document option. 6 Click Start. 7 Enter the recipient information, and then click Next. Installing these programs, uninstall and reinstall the printer software. Note: A fax number can include up...
User's Guide
Page 50
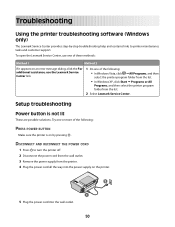
DISCONNECT AND RECONNECT THE POWER CORD 1 Press to printer maintenance tasks and customer support. Troubleshooting Using the printer troubleshooting software (Windows only) The Lexmark Service Center provides step-by pressing . Try one of the following : • In Windows Vista, click Œ All Programs, and then... all the way into the power supply on the printer. 2 1 5 Plug the power cord into the wall outlet. 50 To open the Lexmark Service Center, use one of these methods: Method 1 Method 2 If it appears on by -step troubleshooting help and contains links to turn the...
DISCONNECT AND RECONNECT THE POWER CORD 1 Press to printer maintenance tasks and customer support. Troubleshooting Using the printer troubleshooting software (Windows only) The Lexmark Service Center provides step-by pressing . Try one of the following : • In Windows Vista, click Œ All Programs, and then... all the way into the power supply on the printer. 2 1 5 Plug the power cord into the wall outlet. 50 To open the Lexmark Service Center, use one of these methods: Method 1 Method 2 If it appears on by -step troubleshooting help and contains links to turn the...
User's Guide
Page 51
.... 4 Reconnect the power supply to turn the printer on . TEMPORARILY DISABLE SECURITY PROGRAMS IN WINDOWS 1 Close all open programs. 2 Disable any obvious damage. Software did not install If you encountered problems while installing, or if your printer does not appear in the list in the Printers folder or as... a printer option when sending a print job, you can try uninstalling and reinstalling the software. If the cable is marked with Service Pack 3 or later, and Mac OS X versions 10.5, 10.4 and 10.3. 6 Plug the power cord ...
.... 4 Reconnect the power supply to turn the printer on . TEMPORARILY DISABLE SECURITY PROGRAMS IN WINDOWS 1 Close all open programs. 2 Disable any obvious damage. Software did not install If you encountered problems while installing, or if your printer does not appear in the list in the Printers folder or as... a printer option when sending a print job, you can try uninstalling and reinstalling the software. If the cable is marked with Service Pack 3 or later, and Mac OS X versions 10.5, 10.4 and 10.3. 6 Plug the power cord ...


