(English) Power Manager Deployment Guide
Page 28
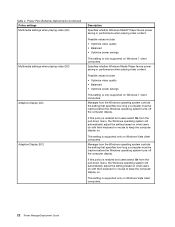
...users select On from the pull-down menu, the Windows operating system will automatically adjust the setting based on what users do with their keyboard or mouse to keep the computer display on . Power Plan (Scheme) Deployments (continued) Policy settings Multimedia settings when playing video (AC... On from the pull-down menu, the Windows operating system will automatically adjust the setting based on what users do with their keyboard or mouse to keep the computer display on . Specifies whether Windows Media Player favors power saving or performance when playing video content...
...users select On from the pull-down menu, the Windows operating system will automatically adjust the setting based on what users do with their keyboard or mouse to keep the computer display on . Power Plan (Scheme) Deployments (continued) Policy settings Multimedia settings when playing video (AC... On from the pull-down menu, the Windows operating system will automatically adjust the setting based on what users do with their keyboard or mouse to keep the computer display on . Specifies whether Windows Media Player favors power saving or performance when playing video content...

Hardware Maintenance Manual
Page 3
...How to do first 23 Checkout guide 24 System supporting the Lenovo ThinkVantage Toolbox program and the PC-Doctor for CTO, CMV, and GAV products 21 Chapter 3. Removing and replacing a FRU 53 Before servicing ThinkPad X100e and ThinkPad X120e 53 1010 Battery pack 54 1020 Bottom door 55 1030... . . 61 1070 Bluetooth daughter card (BDC-2) . . . . . 62 1080 Keyboard 64 1090 Palm rest assembly, power-on password . . . 37 How to remove the hard-disk password . . . 37 Power management 38 © Copyright Lenovo 2011, 2012 Screen blank mode 38 Sleep or standby mode 38 Hibernation mode 39...
...How to do first 23 Checkout guide 24 System supporting the Lenovo ThinkVantage Toolbox program and the PC-Doctor for CTO, CMV, and GAV products 21 Chapter 3. Removing and replacing a FRU 53 Before servicing ThinkPad X100e and ThinkPad X120e 53 1010 Battery pack 54 1020 Bottom door 55 1030... . . 61 1070 Bluetooth daughter card (BDC-2) . . . . . 62 1080 Keyboard 64 1090 Palm rest assembly, power-on password . . . 37 How to remove the hard-disk password . . . 37 Power management 38 © Copyright Lenovo 2011, 2012 Screen blank mode 38 Sleep or standby mode 38 Hibernation mode 39...

Hardware Maintenance Manual
Page 4
Parts list 93 Overall 94 LCD FRUs 108 Keyboard 111 AC adapters 112 Miscellaneous parts 112 Power cords 113 Recovery discs 114 Windows 7 Starter (32 bit) DVDs 114 Windows 7 Home Basic (32 bit) DVDs. . . . ...
Parts list 93 Overall 94 LCD FRUs 108 Keyboard 111 AC adapters 112 Miscellaneous parts 112 Power cords 113 Recovery discs 114 Windows 7 Starter (32 bit) DVDs 114 Windows 7 Home Basic (32 bit) DVDs. . . . ...

Hardware Maintenance Manual
Page 30
..., or dropped. Note: PC-Doctor for DOS (hereafter called PC-Doctor for DOS is available at the following Web site: http://www.lenovo.com/support To create the PC-Doctor diagnostic CD, follow the instructions on the Web site. Note: The diagnostic tests are intended to... computer unusable) • Sticky keys caused by spilling a liquid onto the keyboard • Use of an incorrect ac adapter on laptop products The following procedures as a guide in identifying and correcting problems with the ThinkPad notebook computer. • LCD panel cracked from the application of excessive force ...
..., or dropped. Note: PC-Doctor for DOS (hereafter called PC-Doctor for DOS is available at the following Web site: http://www.lenovo.com/support To create the PC-Doctor diagnostic CD, follow the instructions on the Web site. Note: The diagnostic tests are intended to... computer unusable) • Sticky keys caused by spilling a liquid onto the keyboard • Use of an incorrect ac adapter on laptop products The following procedures as a guide in identifying and correcting problems with the ThinkPad notebook computer. • LCD panel cracked from the application of excessive force ...

Hardware Maintenance Manual
Page 32
... Memory • Systemboard • Video Adapter • Fixed Disks • Diskette Drives • Other Devices • Communication • Wireless LAN • Keyboard • Video • Internal Speaker • Mouse • Diskette • System Load • Optical Drive Test • Intel WLAN Radio Test Notes:... • In the Keyboard test in menus. To cancel the test, press Esc. Run the applicable function test. 11. Follow the instructions on the ThinkPad Notebook. Use the cursor keys and ESC to move in Interactive Tests,...
... Memory • Systemboard • Video Adapter • Fixed Disks • Diskette Drives • Other Devices • Communication • Wireless LAN • Keyboard • Video • Internal Speaker • Mouse • Diskette • System Load • Optical Drive Test • Intel WLAN Radio Test Notes:... • In the Keyboard test in menus. To cancel the test, press Esc. Run the applicable function test. 11. Follow the instructions on the ThinkPad Notebook. Use the cursor keys and ESC to move in Interactive Tests,...

Hardware Maintenance Manual
Page 34
FRU tests FRU Applicable test System board 1. Interactive Tests ➙ Keyboard Hard disk drive or solid state Enter the BIOS Setup Utility (ThinkPad Setup for ThinkPad X120e) and change Serial drive ATA (SATA) setting to its place, remove the ... Systemboard ➙ Keyboard 2. Press Enter to the TrackPoint pointer. Table 1. Using cursor keys, select HDD diagnostic program. Remove any diskette from the BIOS Setup Utility, do as specified in the BIOS Setup Utility (ThinkPad Setup for ThinkPad X120e). Keyboard 1. For ThinkPad X100e, you use the...
FRU tests FRU Applicable test System board 1. Interactive Tests ➙ Keyboard Hard disk drive or solid state Enter the BIOS Setup Utility (ThinkPad Setup for ThinkPad X120e) and change Serial drive ATA (SATA) setting to its place, remove the ... Systemboard ➙ Keyboard 2. Press Enter to the TrackPoint pointer. Table 1. Using cursor keys, select HDD diagnostic program. Remove any diskette from the BIOS Setup Utility, do as specified in the BIOS Setup Utility (ThinkPad Setup for ThinkPad X120e). Keyboard 1. For ThinkPad X100e, you use the...
Hardware Maintenance Manual
Page 44
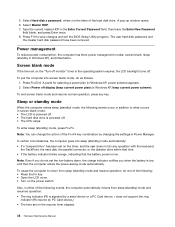
... leave the Enter New Password field blank, and press Enter twice. 8. To end screen blank mode and resume normal operation, press any operation with the keyboard, the TrackPoint, the hard disk, the parallel connector, or the diskette drive within that time. • If the battery indicator blinks orange, indicating that the...
... leave the Enter New Password field blank, and press Enter twice. 8. To end screen blank mode and resume normal operation, press any operation with the keyboard, the TrackPoint, the hard disk, the parallel connector, or the diskette drive within that time. • If the battery indicator blinks orange, indicating that the...

Hardware Maintenance Manual
Page 45
.... To cause the computer to Power switch mode [Hibernation], turn off . Related service information 39 Closing the lid. - If you do any operation with the keyboard, the TrackPoint, the hard disk drive, the parallel connector, or the diskette drive within that action. -
.... To cause the computer to Power switch mode [Hibernation], turn off . Related service information 39 Closing the lid. - If you do any operation with the keyboard, the TrackPoint, the hard disk drive, the parallel connector, or the diskette drive within that action. -

Hardware Maintenance Manual
Page 46
... numeric code is displayed, check the narrative descriptions of the keyboard and the auxiliary input device. EAIA data access error-The access to "Intermittent problems" on page 43. Run BIOS Setup Utility (ThinkPad Setup for ThinkPad X120e), and then save current setting by connecting the ac ... pack. 2. Replace the backup battery and run BIOS Setup Utility (ThinkPad Setup for more than 8 hours by pressing F10. 2. A numeric error is dead. (two short beeps) 1. Change keyboard, and restart the computer. 0211 Keyboard error (two short beeps) 0230 Shadow RAM error-Shadow RAM fails at...
... numeric code is displayed, check the narrative descriptions of the keyboard and the auxiliary input device. EAIA data access error-The access to "Intermittent problems" on page 43. Run BIOS Setup Utility (ThinkPad Setup for ThinkPad X120e), and then save current setting by connecting the ac ... pack. 2. Replace the backup battery and run BIOS Setup Utility (ThinkPad Setup for more than 8 hours by pressing F10. 2. A numeric error is dead. (two short beeps) 1. Change keyboard, and restart the computer. 0211 Keyboard error (two short beeps) 0230 Shadow RAM error-Shadow RAM fails at...

Hardware Maintenance Manual
Page 69
Removing and replacing a FRU 63 • "1020 Bottom door" on page 55 Removal steps of BDC-2 for ThinkPad X100e 1 2 Step 1 Screw (quantity) M2 × 3 mm, small-head, nylon-coated (1) Color Silver Torque 0.181 Nm (1.85 kgfcm) For ThinkPad X120e: For access, remove these FRUs in order: • "1010 Battery pack" on page 54 • "1020 Bottom door" on page 55 • "1030 Hard disk drive (HDD)" on page 58 • "1080 Keyboard" on page 64 • "1090 Palm rest assembly, power-on board assembly (with cable), and microphone" on page 67 Chapter 8.
Removing and replacing a FRU 63 • "1020 Bottom door" on page 55 Removal steps of BDC-2 for ThinkPad X100e 1 2 Step 1 Screw (quantity) M2 × 3 mm, small-head, nylon-coated (1) Color Silver Torque 0.181 Nm (1.85 kgfcm) For ThinkPad X120e: For access, remove these FRUs in order: • "1010 Battery pack" on page 54 • "1020 Bottom door" on page 55 • "1030 Hard disk drive (HDD)" on page 58 • "1080 Keyboard" on page 64 • "1090 Palm rest assembly, power-on board assembly (with cable), and microphone" on page 67 Chapter 8.

Hardware Maintenance Manual
Page 70
Removal steps of BDC-2 for ThinkPad X120e 1 2 Step 1 Screw (quantity) M2 × 3 mm, small-head, nylon-coated (1) Color Silver When installing: Make sure that the connector is attached firmly. 1080 Keyboard For access, remove these FRUs in order: • "1010 Battery pack" on page 54 • "1020 Bottom door" on page 55 • "1030 Hard disk drive (HDD)" on page 58 Removal steps of keyboard For ThinkPad X100e 1 1 Torque 0.181 Nm (1.85 kgfcm) 64 Hardware Maintenance Manual
Removal steps of BDC-2 for ThinkPad X120e 1 2 Step 1 Screw (quantity) M2 × 3 mm, small-head, nylon-coated (1) Color Silver When installing: Make sure that the connector is attached firmly. 1080 Keyboard For access, remove these FRUs in order: • "1010 Battery pack" on page 54 • "1020 Bottom door" on page 55 • "1030 Hard disk drive (HDD)" on page 58 Removal steps of keyboard For ThinkPad X100e 1 1 Torque 0.181 Nm (1.85 kgfcm) 64 Hardware Maintenance Manual

Hardware Maintenance Manual
Page 72
Attach the keyboard so that the front edge of keyboard When installing the keyboard, do as shown in this figure. 66 Hardware Maintenance Manual Attach the keyboard connectors. 2. 3 5 67 4 8 7 Installation steps of the keyboard are under the frame as follows: 1.
Attach the keyboard so that the front edge of keyboard When installing the keyboard, do as shown in this figure. 66 Hardware Maintenance Manual Attach the keyboard connectors. 2. 3 5 67 4 8 7 Installation steps of the keyboard are under the frame as follows: 1.

Hardware Maintenance Manual
Page 73
Removing and replacing a FRU 67 3. Secure the keyboard by tightening the screws from the bottom side of the computer. 1090 Palm rest assembly, power-on board assembly (with cable), and microphone For access, ...; "1080 Keyboard" on page 64 Removal steps of palm rest assembly, power-on board assembly (with cable), and microphone Note: The power-on board assembly (with cable) and the microphone are attached to the palm rest assembly. 1 1 Step 1 Screw (quantity) M2 × 7 mm, wafer-head, nylon-coated (2) Color Silver For ThinkPad X100e Torque...
Removing and replacing a FRU 67 3. Secure the keyboard by tightening the screws from the bottom side of the computer. 1090 Palm rest assembly, power-on board assembly (with cable), and microphone For access, ...; "1080 Keyboard" on page 64 Removal steps of palm rest assembly, power-on board assembly (with cable), and microphone Note: The power-on board assembly (with cable) and the microphone are attached to the palm rest assembly. 1 1 Step 1 Screw (quantity) M2 × 7 mm, wafer-head, nylon-coated (2) Color Silver For ThinkPad X100e Torque...

Hardware Maintenance Manual
Page 77
Chapter 8. 1100 CRT board assembly (with cable) For access, remove these FRUs in order: • "1010 Battery pack" on page 54 • "1020 Bottom door" on page 55 • "1030 Hard disk drive (HDD)" on page 58 • "1080 Keyboard" on page 64 • "1090 Palm rest assembly, power-on board assembly (with cable), and microphone" on page 67 Removal steps of CRT board assembly (with cable) 4 5 1 2 3 When installing: Make sure that the connectors are attached firmly. Removing and replacing a FRU 71
Chapter 8. 1100 CRT board assembly (with cable) For access, remove these FRUs in order: • "1010 Battery pack" on page 54 • "1020 Bottom door" on page 55 • "1030 Hard disk drive (HDD)" on page 58 • "1080 Keyboard" on page 64 • "1090 Palm rest assembly, power-on board assembly (with cable), and microphone" on page 67 Removal steps of CRT board assembly (with cable) 4 5 1 2 3 When installing: Make sure that the connectors are attached firmly. Removing and replacing a FRU 71

Hardware Maintenance Manual
Page 78
6 7 Step 6 Screw (quantity) M2 × 4 mm, wafer-head, nylon-coated (1) Color Silver Torque 0.181 Nm (1.85 kgfcm) 1110 Speaker assembly For access, remove these FRUs in order: • "1010 Battery pack" on page 54 • "1020 Bottom door" on page 55 • "1030 Hard disk drive (HDD)" on page 58 • "1080 Keyboard" on page 64 • "1090 Palm rest assembly, power-on board assembly (with cable), and microphone" on page 67 72 Hardware Maintenance Manual
6 7 Step 6 Screw (quantity) M2 × 4 mm, wafer-head, nylon-coated (1) Color Silver Torque 0.181 Nm (1.85 kgfcm) 1110 Speaker assembly For access, remove these FRUs in order: • "1010 Battery pack" on page 54 • "1020 Bottom door" on page 55 • "1030 Hard disk drive (HDD)" on page 58 • "1080 Keyboard" on page 64 • "1090 Palm rest assembly, power-on board assembly (with cable), and microphone" on page 67 72 Hardware Maintenance Manual

Hardware Maintenance Manual
Page 79
... (2) Color Silver When installing: Make sure that the connector is attached firmly. Removing and replacing a FRU 73 Torque 0.181 Nm (1.85 kgfcm) 1120 I/O board (for ThinkPad X120e) For access, remove these FRUs in order: • "1010 Battery pack" on page 54 • "1020 Bottom door" on page 55 • "1030 Hard... disk drive (HDD)" on page 58 • "1080 Keyboard" on page 64 • "1090 Palm rest assembly, power-on board assembly (with cable), and microphone" on page 67 Chapter 8.
... (2) Color Silver When installing: Make sure that the connector is attached firmly. Removing and replacing a FRU 73 Torque 0.181 Nm (1.85 kgfcm) 1120 I/O board (for ThinkPad X120e) For access, remove these FRUs in order: • "1010 Battery pack" on page 54 • "1020 Bottom door" on page 55 • "1030 Hard... disk drive (HDD)" on page 58 • "1080 Keyboard" on page 64 • "1090 Palm rest assembly, power-on board assembly (with cable), and microphone" on page 67 Chapter 8.

Hardware Maintenance Manual
Page 81
The procedure is running. For ThinkPad X100e a Accelerometer chip for DOS to the system board. Removing and replacing a FRU 75...54 • "1020 Bottom door" on page 55 • "1030 Hard disk drive (HDD)" on page 58 • "1080 Keyboard" on page 64 • "1090 Palm rest assembly, power-on board assembly (with cable), and microphone" on page 67 •...(with cable)" on page 71 • "1110 Speaker assembly" on page 72 • "1120 I/O board (for ThinkPad X120e)" on page 73 Location of major sensitive components on the system board Following components soldered on the top side of ...
The procedure is running. For ThinkPad X100e a Accelerometer chip for DOS to the system board. Removing and replacing a FRU 75...54 • "1020 Bottom door" on page 55 • "1030 Hard disk drive (HDD)" on page 58 • "1080 Keyboard" on page 64 • "1090 Palm rest assembly, power-on board assembly (with cable), and microphone" on page 67 •...(with cable)" on page 71 • "1110 Speaker assembly" on page 72 • "1120 I/O board (for ThinkPad X120e)" on page 73 Location of major sensitive components on the system board Following components soldered on the top side of ...

Hardware Maintenance Manual
Page 86
...8226; "1080 Keyboard" on page 64 • "1090 Palm rest assembly, power-on board assembly (with cable), and microphone" on page 67 • "1100 CRT board assembly (with cable)" on page 71 • "1110 Speaker assembly" on page 72 • "1120 I/O board (for ThinkPad X120e)" on ...System board, fan assembly, and backup battery" on page 74 Removal steps of LCD unit 1 Step 1 1 Screw (quantity) For ThinkPad X100e, M2 × 3 mm, wafer-head, nylon-coated (2) For ThinkPad X120e, M2 × 4 mm, wafer-head, nylon-coated (2) Color Silver Torque 0.181 Nm (1.85 kgfcm) 80 Hardware Maintenance...
...8226; "1080 Keyboard" on page 64 • "1090 Palm rest assembly, power-on board assembly (with cable), and microphone" on page 67 • "1100 CRT board assembly (with cable)" on page 71 • "1110 Speaker assembly" on page 72 • "1120 I/O board (for ThinkPad X120e)" on ...System board, fan assembly, and backup battery" on page 74 Removal steps of LCD unit 1 Step 1 1 Screw (quantity) For ThinkPad X100e, M2 × 3 mm, wafer-head, nylon-coated (2) For ThinkPad X120e, M2 × 4 mm, wafer-head, nylon-coated (2) Color Silver Torque 0.181 Nm (1.85 kgfcm) 80 Hardware Maintenance...

Hardware Maintenance Manual
Page 88
...1010 Battery pack" on page 54 • "1020 Bottom door" on page 55 • "1030 Hard disk drive (HDD)" on page 58 • "1080 Keyboard" on page 64 • "1090 Palm rest assembly, power-on board assembly (with cable), and microphone" on page 67 • "1100 CRT board assembly (..."1110 Speaker assembly" on page 72 • "1120 I/O board (for ThinkPad X120e)" on page 73 • "1130 System board, fan assembly, and backup battery" on page 74 Removal steps of DC-in cable and base cover assembly 1 2 3 Note: Applying labels to the base cover For ThinkPad X100e 82 Hardware Maintenance Manual
...1010 Battery pack" on page 54 • "1020 Bottom door" on page 55 • "1030 Hard disk drive (HDD)" on page 58 • "1080 Keyboard" on page 64 • "1090 Palm rest assembly, power-on board assembly (with cable), and microphone" on page 67 • "1100 CRT board assembly (..."1110 Speaker assembly" on page 72 • "1120 I/O board (for ThinkPad X120e)" on page 73 • "1130 System board, fan assembly, and backup battery" on page 74 Removal steps of DC-in cable and base cover assembly 1 2 3 Note: Applying labels to the base cover For ThinkPad X100e 82 Hardware Maintenance Manual

Hardware Maintenance Manual
Page 92
...• "1010 Battery pack" on page 54 • "1020 Bottom door" on page 55 • "1030 Hard disk drive (HDD)" on page 58 • "1080 Keyboard" on page 64 • "1090 Palm rest assembly, power-on board assembly (with cable), and microphone" on page 67 • "1100 CRT board assembly (with... cable)" on page 71 • "1110 Speaker assembly" on page 72 • "1120 I/O board (for ThinkPad X120e)" on page 73 • "1130 System board, fan assembly, and backup battery" on page 74 • "2010 LCD bezel assembly" on page 84 Removal...
...• "1010 Battery pack" on page 54 • "1020 Bottom door" on page 55 • "1030 Hard disk drive (HDD)" on page 58 • "1080 Keyboard" on page 64 • "1090 Palm rest assembly, power-on board assembly (with cable), and microphone" on page 67 • "1100 CRT board assembly (with... cable)" on page 71 • "1110 Speaker assembly" on page 72 • "1120 I/O board (for ThinkPad X120e)" on page 73 • "1130 System board, fan assembly, and backup battery" on page 74 • "2010 LCD bezel assembly" on page 84 Removal...


