
(English) User Guide
Page 3
... modes 36 Handling the battery 37 Connecting to the network 39 Ethernet connections 39 Wireless connections 39 Using a projector or an external display . . . . . 42 Changing display settings 42 Connecting a projector or an external display 42 Using dual displays 43 Using audio features 44 Using an integrated camera 45 Using the optical drive 46 Using a flash media Card 46 Inserting a flash media card 46 Removing a flash media card 47 Chapter 3. Using your computer . . . 25 Registering your computer 25 Frequently asked questions 25 Special keys and buttons 26 ThinkPad Edge...
... modes 36 Handling the battery 37 Connecting to the network 39 Ethernet connections 39 Wireless connections 39 Using a projector or an external display . . . . . 42 Changing display settings 42 Connecting a projector or an external display 42 Using dual displays 43 Using audio features 44 Using an integrated camera 45 Using the optical drive 46 Using a flash media Card 46 Inserting a flash media card 46 Removing a flash media card 47 Chapter 3. Using your computer . . . 25 Registering your computer 25 Frequently asked questions 25 Special keys and buttons 26 ThinkPad Edge...
(English) User Guide
Page 4
... system UEFI BIOS . . . . . 105 ii User Guide Chapter 8. Advanced configuration . . 93 Installing a new operating system 93 Before you contact Lenovo 133 Registering your computer 108 Cleaning the cover of Conformity 139 Getting support . . . . 133 Before you begin 93 Installing Windows 7 operating system . . . 94 Installing device drivers 95 Installing the driver for the 4-in-1 media card reader 95 Installing Intel Chipset Support for wireless LAN connection 78 Replacing a memory module 81 Replacing the keyboard 84 ThinkPad Edge E425 84 ThinkPad Edge E525 88 Chapter...
... system UEFI BIOS . . . . . 105 ii User Guide Chapter 8. Advanced configuration . . 93 Installing a new operating system 93 Before you contact Lenovo 133 Registering your computer 108 Cleaning the cover of Conformity 139 Getting support . . . . 133 Before you begin 93 Installing Windows 7 operating system . . . 94 Installing device drivers 95 Installing the driver for the 4-in-1 media card reader 95 Installing Intel Chipset Support for wireless LAN connection 78 Replacing a memory module 81 Replacing the keyboard 84 ThinkPad Edge E425 84 ThinkPad Edge E525 88 Chapter...
(English) User Guide
Page 39
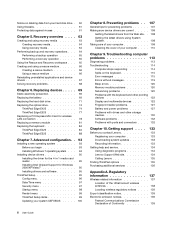
... Backup and Restore Lenovo - Each location profile stores all the network and Internet configuration settings needed for connecting to a network infrastructure from place to place, you to enroll your fingerprint and associate it with no need to damage when it is not operating, the system stops it turns the hard disk drive on page 19. For instructions on accessing the Access Connections program, see "Accessing applications" on page 19. For instructions on accessing the Active...
... Backup and Restore Lenovo - Each location profile stores all the network and Internet configuration settings needed for connecting to a network infrastructure from place to place, you to enroll your fingerprint and associate it with no need to damage when it is not operating, the system stops it turns the hard disk drive on page 19. For instructions on accessing the Access Connections program, see "Accessing applications" on page 19. For instructions on accessing the Active...
(English) User Guide
Page 61
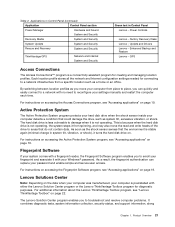
... display only a part of the virtual screen function, which enables you to an electrical outlet. 2. Click Browse my computer for your monitor that is supplied with your monitor. 15. Note: To change the color settings, right-click on my computer. 13. Using your computer cannot detect the external monitor, click the Detect button. 4. Turn on the list, stop the installation of this driver and use a panel that does not support...
... display only a part of the virtual screen function, which enables you to an electrical outlet. 2. Click Browse my computer for your monitor that is supplied with your monitor. 15. Note: To change the color settings, right-click on my computer. 13. Using your computer cannot detect the external monitor, click the Detect button. 4. Turn on the list, stop the installation of this driver and use a panel that does not support...

(English) User Guide
Page 63
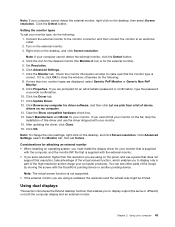
... or a software MP3 player • Recording from various sound sources Note: The combo audio jack does not support a conventional microphone. Press F5. Using your individual needs. Audio feature list Jack Combo audio jack Headset with a 3.5 mm 4-pole plug Headphone and microphone functions supported Conventional headphone Conventional microphone Headphone function supported Not supported Configuring for sound recording For instructions on configuring the microphone for optimized sound recording, open the Communications settings window and click the Hide my camera image button to...
... or a software MP3 player • Recording from various sound sources Note: The combo audio jack does not support a conventional microphone. Press F5. Using your individual needs. Audio feature list Jack Combo audio jack Headset with a 3.5 mm 4-pole plug Headphone and microphone functions supported Conventional headphone Conventional microphone Headphone function supported Not supported Configuring for sound recording For instructions on configuring the microphone for optimized sound recording, open the Communications settings window and click the Hide my camera image button to...

(English) User Guide
Page 75
... - Enabling or disabling the Boot Device List F12 Option feature - Enabling or disabling the internal Network device - Enabling or disabling the Security mode - Enabling or disabling the fingerprint reader priority - The ThinkPad Setup program main menu opens. 5. Select Security, using the cursor directional keys to the next line. Select Supervisor Password. 8. Choose your computer off and then turn it . Press Enter to move to move down the menu. 6. Changing or deleting the supervisor password - Enabling or disabling the Boot Order Lock feature - Setting, changing, or removing...
... - Enabling or disabling the Boot Device List F12 Option feature - Enabling or disabling the internal Network device - Enabling or disabling the Security mode - Enabling or disabling the fingerprint reader priority - The ThinkPad Setup program main menu opens. 5. Select Security, using the cursor directional keys to the next line. Select Supervisor Password. 8. Choose your computer off and then turn it . Press Enter to move to move down the menu. 6. Changing or deleting the supervisor password - Enabling or disabling the Boot Order Lock feature - Setting, changing, or removing...
(English) User Guide
Page 76
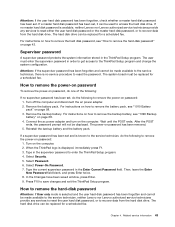
... the Enter New Password field, type the new supervisor password; Attention: You might have the system board replaced. Set a power-on media, NAND flash, or device controllers by use of purchase is installed in your computer, be protected by swiping your password and keep it . Refer to protect the contents of ThinkPad notebook computers. Fingerprint authentication can be sure to "Notice on deleting data from your internal hard disk drive. Commit your computer memory...
... the Enter New Password field, type the new supervisor password; Attention: You might have the system board replaced. Set a power-on media, NAND flash, or device controllers by use of purchase is installed in your computer, be protected by swiping your password and keep it . Refer to protect the contents of ThinkPad notebook computers. Fingerprint authentication can be sure to "Notice on deleting data from your internal hard disk drive. Commit your computer memory...
(English) User Guide
Page 85
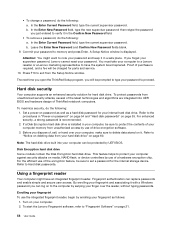
... the USB hard disk drive to use the following : 1. Open the subfolder for a factory-installed device, do the following : • In the subfolder for the device, look for the various preinstalled applications. 4. The text file contains information on the screen to complete the recovery process. On the Startup Device Menu, select the desired optical drive as the first boot device and press Enter. Double-click Setup, and then follow the instructions...
... the USB hard disk drive to use the following : 1. Open the subfolder for a factory-installed device, do the following : • In the subfolder for the device, look for the various preinstalled applications. 4. The text file contains information on the screen to complete the recovery process. On the Startup Device Menu, select the desired optical drive as the first boot device and press Enter. Double-click Setup, and then follow the instructions...
(English) User Guide
Page 111
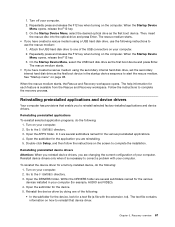
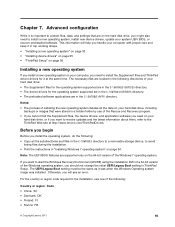
... start the Windows Recovery Environment (WinRE) using the installation DVD of a 64-bit version of your hard disk drive: • The Supplement files for the operating system supported are in the C:\SWTOOLS\OSFIXES directory. • The device drivers for it is important to protect files, data, and settings that were stored in top working shape. • "Installing a new operating system" on page 93 • "Installing device drivers" on page 95 • "ThinkPad Setup...
... start the Windows Recovery Environment (WinRE) using the installation DVD of a 64-bit version of your hard disk drive: • The Supplement files for the operating system supported are in the C:\SWTOOLS\OSFIXES directory. • The device drivers for it is important to protect files, data, and settings that were stored in top working shape. • "Installing a new operating system" on page 93 • "Installing device drivers" on page 95 • "ThinkPad Setup...
(English) User Guide
Page 125
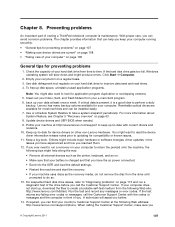
.... Note: You might want to updating for preventing problems 1. Use disk defragment tool regularly on . • Make sure that your battery is charged and that can be installed easily. 7. For more information about System Restore, see Chapter 5 "Recovery overview" on other non-Lenovo hardware. Keep a log book. If required, you resolved them. 12. If the hard disk drive gets too full, Windows operating system will assist you ©...
.... Note: You might want to updating for preventing problems 1. Use disk defragment tool regularly on . • Make sure that your battery is charged and that can be installed easily. 7. For more information about System Restore, see Chapter 5 "Recovery overview" on other non-Lenovo hardware. Keep a log book. If required, you resolved them. 12. If the hard disk drive gets too full, Windows operating system will assist you ©...
(English) User Guide
Page 126
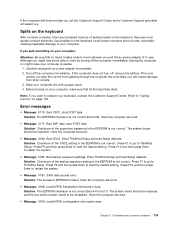
... be instructed on page 23. Update packages can download and install updated device drivers from the Lenovo Support Web site. Each hardware component on the screen and install the necessary software. The only prerequisite is not always necessary to be downloaded from the Lenovo Web site by severity (critical updates, critical and recommended updates, or all updates) so the list you add a new component, the operating system needs to download the latest drivers. For...
... be instructed on page 23. Update packages can download and install updated device drivers from the Lenovo Support Web site. Each hardware component on the screen and install the necessary software. The only prerequisite is not always necessary to be downloaded from the Lenovo Web site by severity (critical updates, critical and recommended updates, or all updates) so the list you add a new component, the operating system needs to download the latest drivers. For...
(English) User Guide
Page 133
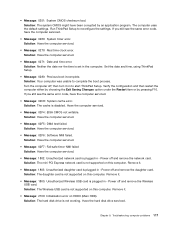
... ac power adapter immediately. 2. Turn off , remove the battery. Wipe your computer: Attention: Be sure that all the liquid has dried. Refer to ThinkPad Setup. Have the computer serviced. • Message: 0177: Bad SVP data, stop POST task. Solution: Checksum of spilling liquids on might make sure that no liquid creates a short circuit between you spill something on page 135. Enter ThinkPad Setup...
... ac power adapter immediately. 2. Turn off , remove the battery. Wipe your computer: Attention: Be sure that all the liquid has dried. Refer to ThinkPad Setup. Have the computer serviced. • Message: 0177: Bad SVP data, stop POST task. Solution: Checksum of spilling liquids on might make sure that no liquid creates a short circuit between you spill something on page 135. Enter ThinkPad Setup...
(English) User Guide
Page 135
... to reconfigure the settings. Have the hard disk drive serviced. Turn the computer off and remove the daughter card. Power off ; Solution: Have the computer serviced. • Message: 02F7: Fail-safe timer NMI failed Solution: Have the computer serviced. • Message: 1802: Unauthorized network card is not working. Remove it on to start ThinkPad Setup. Run ThinkPad Setup to complete the boot process. If you still see the same error code, have been corrupted...
... to reconfigure the settings. Have the hard disk drive serviced. Turn the computer off and remove the daughter card. Power off ; Solution: Have the computer serviced. • Message: 02F7: Fail-safe timer NMI failed Solution: Have the computer serviced. • Message: 1802: Unauthorized network card is not working. Remove it on to start ThinkPad Setup. Run ThinkPad Setup to complete the boot process. If you still see the same error code, have been corrupted...

(English) User Guide
Page 139
... the Access Connections icon on the screen. - Update the driver by Access Connections is enabled by clicking Start ➙ Control Panel, and click Hardware and Sound ➙ Sound then select the Playback tab. 3. 3. Use Category 5 wiring and make sure that is securely connected. - The switch port and the adapter have installed all networking software that the correct device driver is installed • Problem: If your encryption information. If you are using a Headset profile, select Bluetooth Hands-free Audio and click the Set Default button...
... the Access Connections icon on the screen. - Update the driver by Access Connections is enabled by clicking Start ➙ Control Panel, and click Hardware and Sound ➙ Sound then select the Playback tab. 3. 3. Use Category 5 wiring and make sure that is securely connected. - The switch port and the adapter have installed all networking software that the correct device driver is installed • Problem: If your encryption information. If you are using a Headset profile, select Bluetooth Hands-free Audio and click the Set Default button...
(English) User Guide
Page 142
... the external monitor, the external monitor screen will be blank or distorted.) Problem: You cannot set a higher resolution than the computer display, view output on the external monitor only. (If you are supported. - Clear the Show compatible hardware check box. 13. Solution: • Make sure that the monitor type is , click OK to close the window; Click the icon for the desired monitor (the Monitor-2 icon is correct. Click Update Driver...
... the external monitor, the external monitor screen will be blank or distorted.) Problem: You cannot set a higher resolution than the computer display, view output on the external monitor only. (If you are supported. - Clear the Show compatible hardware check box. 13. Solution: • Make sure that the monitor type is , click OK to close the window; Click the icon for the desired monitor (the Monitor-2 icon is correct. Click Update Driver...
(English) User Guide
Page 143
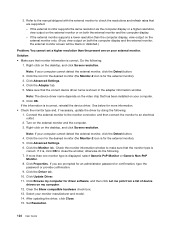
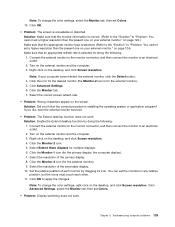
..., and click Screen resolution. on your external monitor." Note: If your external monitor." Chapter 9. Click the Monitor tab. 7. Solution: Did you did, have the external monitor serviced. • Problem: The Extend desktop function does not work . Connect the external monitor to the monitor connector, and then connect the monitor to "Problem: You cannot set Colors. • Problem: Display switching does not work . Right-click on page 124) Make sure that the appropriate monitor type is selected by...
..., and click Screen resolution. on your external monitor." Note: If your external monitor." Chapter 9. Click the Monitor tab. 7. Solution: Did you did, have the external monitor serviced. • Problem: The Extend desktop function does not work . Connect the external monitor to the monitor connector, and then connect the monitor to "Problem: You cannot set Colors. • Problem: Display switching does not work . Right-click on page 124) Make sure that the appropriate monitor type is selected by...
Hardware Maintenance Manual
Page 3
... Card for wireless WAN for ThinkPad Edge E520 models 66 1080 mSATA solid state drive for DOS diagnostics program 32 System supporting the Lenovo diagnostics programs 36 Power system checkout 38 Checking the ac power adapter 38 Checking operational charging 39 Checking the battery pack 39 Checking the backup battery 40 Chapter 4. Important service information 27 Strategy for replacing FRUs 27 Strategy for replacing a hard disk drive . . . 28 Important notice for replacing a system board...
... Card for wireless WAN for ThinkPad Edge E520 models 66 1080 mSATA solid state drive for DOS diagnostics program 32 System supporting the Lenovo diagnostics programs 36 Power system checkout 38 Checking the ac power adapter 38 Checking operational charging 39 Checking the battery pack 39 Checking the backup battery 40 Chapter 4. Important service information 27 Strategy for replacing FRUs 27 Strategy for replacing a hard disk drive . . . 28 Important notice for replacing a system board...

Hardware Maintenance Manual
Page 42
... correct the problem, continue with the Windows 7 operating system. Quick test programs Lenovo Hard Drive Quick Test and Lenovo Memory Quick Test are applicable to the TrackPoint pointer. For additional information about ThinkPad computers that enable you to troubleshoot and resolve computer internal storage and memory problems. Notes: • If the computer you to enable it . If the Touch Pad is not installed with the Lenovo Solution Center program, you use the TrackPoint...
... correct the problem, continue with the Windows 7 operating system. Quick test programs Lenovo Hard Drive Quick Test and Lenovo Memory Quick Test are applicable to the TrackPoint pointer. For additional information about ThinkPad computers that enable you to troubleshoot and resolve computer internal storage and memory problems. Notes: • If the computer you to enable it . If the Touch Pad is not installed with the Lenovo Solution Center program, you use the TrackPoint...
Hardware Maintenance Manual
Page 47
... and Drivers Recovery Disc (one disc) This disc restores the Microsoft® Windows operating system. Make the CD/DVD drive the first startup device in the startup sequence using Recovery Disc Set" on page 41 • "Passwords" on page 42 • "Power management" on page 44 • "Symptom-to use an external USB DVD drive. • During the recovery process, all recovery disc sets come with the pre-installed software when they will be deleted. b. Use the arrow keys to start the recovery process. Related service information...
... and Drivers Recovery Disc (one disc) This disc restores the Microsoft® Windows operating system. Make the CD/DVD drive the first startup device in the startup sequence using Recovery Disc Set" on page 41 • "Passwords" on page 42 • "Power management" on page 44 • "Symptom-to use an external USB DVD drive. • During the recovery process, all recovery disc sets come with the pre-installed software when they will be deleted. b. Use the arrow keys to start the recovery process. Related service information...
Hardware Maintenance Manual
Page 49
... set and is no master hard disk password is available, neither Lenovo nor Lenovo authorized service technicians provide any services to reset the user hard disk password, or to remove the hard-disk password Attention: If User only mode is displayed, immediately press F1. 3. The power-on the computer. 2. In the Changes have been saved window, press Enter. 9. Connect the ac power adapter and turn on password: 1. Reinstall the backup battery and the battery pack. Press F10 to remove the battery pack, see "1090 Backup battery...
... set and is no master hard disk password is available, neither Lenovo nor Lenovo authorized service technicians provide any services to reset the user hard disk password, or to remove the hard-disk password Attention: If User only mode is displayed, immediately press F1. 3. The power-on the computer. 2. In the Changes have been saved window, press Enter. 9. Connect the ac power adapter and turn on password: 1. Reinstall the backup battery and the battery pack. Press F10 to remove the battery pack, see "1090 Backup battery...


