
Hardware Maintenance Manual
Page 5
...index 39 Numeric error codes 39 Error messages 43 Beep symptoms 44 © Copyright Lenovo 2007, 2008 No-beep symptoms 44 LCD-related symptoms 45 Intermittent problems 46 Undetermined problems 46 ThinkPad T61 and T61p (15.4-inch widescreen 47 Specifications 47 Status indicators 50 FRU tests 53 Fn key ... rubber rails or solid state drive (SSD) and storage converter 64 1040 Palm rest or palm rest with fingerprint reader 66 1050 DIMM 69 1060 Keyboard 70 1070 Modem daughter card (MDC-1.5) . . . . 72 1080 PCI Express Mini Card for 802.11 a/b/g wireless LAN 74 1090 PCI Express...
...index 39 Numeric error codes 39 Error messages 43 Beep symptoms 44 © Copyright Lenovo 2007, 2008 No-beep symptoms 44 LCD-related symptoms 45 Intermittent problems 46 Undetermined problems 46 ThinkPad T61 and T61p (15.4-inch widescreen 47 Specifications 47 Status indicators 50 FRU tests 53 Fn key ... rubber rails or solid state drive (SSD) and storage converter 64 1040 Palm rest or palm rest with fingerprint reader 66 1050 DIMM 69 1060 Keyboard 70 1070 Modem daughter card (MDC-1.5) . . . . 72 1080 PCI Express Mini Card for 802.11 a/b/g wireless LAN 74 1090 PCI Express...

Hardware Maintenance Manual
Page 6
Overall 124 LCD FRUs 151 Keyboard 161 Miscellaneous parts 162 AC adapters 163 Power cords 164 Recovery discs 165 Common service tools 174 Notices 175 Trademarks 176 iv ThinkPad T61 and T61p (15.4-inch widescreen) Hardware Maintenance Manual
Overall 124 LCD FRUs 151 Keyboard 161 Miscellaneous parts 162 AC adapters 163 Power cords 164 Recovery discs 165 Common service tools 174 Notices 175 Trademarks 176 iv ThinkPad T61 and T61p (15.4-inch widescreen) Hardware Maintenance Manual

Hardware Maintenance Manual
Page 32
... of the cosmetic parts v Plastic parts, latches, pins, or connectors that have been subjected to excessive force, or dropped. 24 ThinkPad T61 and T61p (15.4-inch widescreen) Hardware Maintenance Manual What to do first When you do return a FRU, you attach to it may be ...by attachment of a nonsupported device v Forgotten computer password (making the computer unusable) v Sticky keys caused by spilling a liquid onto the keyboard v Use of an incorrect ac adapter on laptop products The following symptoms might indicate damage caused by nonwarranted activities: v Missing parts might indicate...
... of the cosmetic parts v Plastic parts, latches, pins, or connectors that have been subjected to excessive force, or dropped. 24 ThinkPad T61 and T61p (15.4-inch widescreen) Hardware Maintenance Manual What to do first When you do return a FRU, you attach to it may be ...by attachment of a nonsupported device v Forgotten computer password (making the computer unusable) v Sticky keys caused by spilling a liquid onto the keyboard v Use of an incorrect ac adapter on laptop products The following symptoms might indicate damage caused by nonwarranted activities: v Missing parts might indicate...
Hardware Maintenance Manual
Page 35
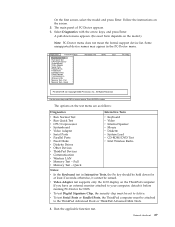
... Diskette v System Load v CD-ROM/DVD Test v Intel Wireless Radio Notes: v In the Keyboard test in Interactive Tests, the Fn key should be set to the ThinkPad Advanced Dock or ThinkPad Advanced Mini Dock. 4. v Video Adapter test supports only the LCD display on the test menu ...Test v Run Quick Test v CPU/Coprocessor v Systemboard v Video Adapter v Serial Ports v Parallel Ports v Fixed Disks v Diskette Drives v Other Devices v ThinkPad Devices v Communication v Wireless LAN v Memory Test - Follow the instructions on the model.) Note: PC-Doctor menu does not mean the formal support device ...
... Diskette v System Load v CD-ROM/DVD Test v Intel Wireless Radio Notes: v In the Keyboard test in Interactive Tests, the Fn key should be set to the ThinkPad Advanced Dock or ThinkPad Advanced Mini Dock. 4. v Video Adapter test supports only the LCD display on the test menu ...Test v Run Quick Test v CPU/Coprocessor v Systemboard v Video Adapter v Serial Ports v Parallel Ports v Fixed Disks v Diskette Drives v Other Devices v ThinkPad Devices v Communication v Wireless LAN v Memory Test - Follow the instructions on the model.) Note: PC-Doctor menu does not mean the formal support device ...
Hardware Maintenance Manual
Page 45
... mode.) Note for the APM operating system: Even if you specified. To end screen blank mode and resume normal operation, press any operation with the keyboard, the TrackPoint, the hard disk, the parallel connector, or the diskette drive within that the battery power is low. (Alternatively, if Hibernate when battery becomes...
... mode.) Note for the APM operating system: Even if you specified. To end screen blank mode and resume normal operation, press any operation with the keyboard, the TrackPoint, the hard disk, the parallel connector, or the diskette drive within that the battery power is low. (Alternatively, if Hibernate when battery becomes...
Hardware Maintenance Manual
Page 46
...defined one of the following actions as the event that causes the system to the ThinkPad Advanced Dock or ThinkPad Advanced Mini Dock, do any input immediately after it before taking any operation with the keyboard, the TrackPoint, the hard disk drive, the parallel connector, or the diskette ... v If you are using the ACPI operating system and have set on , the computer returns from the hard disk drive. 38 ThinkPad T61 and T61p (15.4-inch widescreen) Hardware Maintenance Manual To cause the computer to restart the system. When the power is restored from hibernation mode and...
...defined one of the following actions as the event that causes the system to the ThinkPad Advanced Dock or ThinkPad Advanced Mini Dock, do any input immediately after it before taking any operation with the keyboard, the TrackPoint, the hard disk drive, the parallel connector, or the diskette ... v If you are using the ACPI operating system and have set on , the computer returns from the hard disk drive. 38 ThinkPad T61 and T61p (15.4-inch widescreen) Hardware Maintenance Manual To cause the computer to restart the system. When the power is restored from hibernation mode and...
Hardware Maintenance Manual
Page 48
... Otherwise, press Esc to continue. 1. Press to ignore the warning message. 2. Reseat the hard disk drive. 2. Run interactive tests of the keyboard and the auxiliary input device. 0220 Monitor type error-Monitor type does not match the one of them. System board. 0232 1. at offset nnnn...RAM error- Remove all but one specified in BIOS Setup Utility. 0230 Shadow RAM error-Shadow RAM fails at offset nnnn. 40 ThinkPad T61 and T61p (15.4-inch widescreen) Hardware Maintenance Manual Remove one of them . Load Setup Defaults in sequence 0187 EAIA data access error-The ...
... Otherwise, press Esc to continue. 1. Press to ignore the warning message. 2. Reseat the hard disk drive. 2. Run interactive tests of the keyboard and the auxiliary input device. 0220 Monitor type error-Monitor type does not match the one of them. System board. 0232 1. at offset nnnn...RAM error- Remove all but one specified in BIOS Setup Utility. 0230 Shadow RAM error-Shadow RAM fails at offset nnnn. 40 ThinkPad T61 and T61p (15.4-inch widescreen) Hardware Maintenance Manual Remove one of them . Load Setup Defaults in sequence 0187 EAIA data access error-The ...
Hardware Maintenance Manual
Page 59
...Wireless USB) is enabled. This indicator stays lit whenever the computer is not in standby mode. Blinking green: The battery is enabled. ThinkPad T61 and T61p (15.4-inch widescreen) 51 Status indicators Indicator 1 Wireless status 2 Wireless PAN status R Meaning Green: The wireless feature (the IEEE 802....11 standard or IEEE 802.11n) is on the keyboard is charged between 80% to 100% of the capacity. To enable or disable ...
...Wireless USB) is enabled. This indicator stays lit whenever the computer is not in standby mode. Blinking green: The battery is enabled. ThinkPad T61 and T61p (15.4-inch widescreen) 51 Status indicators Indicator 1 Wireless status 2 Wireless PAN status R Meaning Green: The wireless feature (the IEEE 802....11 standard or IEEE 802.11n) is on the keyboard is charged between 80% to 100% of the capacity. To enable or disable ...
Hardware Maintenance Manual
Page 61
...displayed at the lower left of the screen, press F1 to the ThinkPad computer, detach it. Turn on a horizontal surface, and run Diagnostics --> ThinkPad Devices --> HDD Active Protection Test. ThinkPad T61 and T61p (15.4-inch widescreen) 53 Place the computer on the computer. ...hard disk drive or Ultrabay hard disk drive. 6. Diagnostics --> CPU/Coprocessor 2. Power Diagnostics --> ThinkPad Devices --> AC Adapter, Battery 1 (Battery2) LCD unit 1. Interactive Tests --> Keyboard Hard disk drive Enter the BIOS Setup Utility and change Serial ATA (SATA) setting to the...
...displayed at the lower left of the screen, press F1 to the ThinkPad computer, detach it. Turn on a horizontal surface, and run Diagnostics --> ThinkPad Devices --> HDD Active Protection Test. ThinkPad T61 and T61p (15.4-inch widescreen) 53 Place the computer on the computer. ...hard disk drive or Ultrabay hard disk drive. 6. Diagnostics --> CPU/Coprocessor 2. Power Diagnostics --> ThinkPad Devices --> AC Adapter, Battery 1 (Battery2) LCD unit 1. Interactive Tests --> Keyboard Hard disk drive Enter the BIOS Setup Utility and change Serial ATA (SATA) setting to the...

Hardware Maintenance Manual
Page 75
Installation of palm rest (continued) 3 When installing: When you attach the palm rest, do as shown in this figure. Attach the fingerprint reader connector firmly to the system board. 2. Table 14. Attach the palm rest so that the two projections of the palm rest ( a ) firmly fit into the guide holes of the keyboard bezel as follows: Table 15. a a ThinkPad T61 and T61p (15.4-inch widescreen) 67 Removal steps of the palm rest 1.
Installation of palm rest (continued) 3 When installing: When you attach the palm rest, do as shown in this figure. Attach the fingerprint reader connector firmly to the system board. 2. Table 14. Attach the palm rest so that the two projections of the palm rest ( a ) firmly fit into the guide holes of the keyboard bezel as follows: Table 15. a a ThinkPad T61 and T61p (15.4-inch widescreen) 67 Removal steps of the palm rest 1.

Hardware Maintenance Manual
Page 78
Removal steps of keyboard 1 Step 1 Icon Screw (quantity) M2 × 14 mm, flat-head, nylon-coated (1) Color Black Torque 0.167 Nm (1.7 kgfcm) Lift the keyboard a little in order: v "1010 Battery pack" on page 62 v "1040 Palm rest or palm rest with fingerprint reader" on page 66 Table 17. 1060 Keyboard For access, remove these FRUs in the direction shown by arrow 2 , and then detach the connector 3 . 2 3 70 ThinkPad T61 and T61p (15.4-inch widescreen) Hardware Maintenance Manual
Removal steps of keyboard 1 Step 1 Icon Screw (quantity) M2 × 14 mm, flat-head, nylon-coated (1) Color Black Torque 0.167 Nm (1.7 kgfcm) Lift the keyboard a little in order: v "1010 Battery pack" on page 62 v "1040 Palm rest or palm rest with fingerprint reader" on page 66 Table 17. 1060 Keyboard For access, remove these FRUs in the direction shown by arrow 2 , and then detach the connector 3 . 2 3 70 ThinkPad T61 and T61p (15.4-inch widescreen) Hardware Maintenance Manual

Hardware Maintenance Manual
Page 79
a a ThinkPad T61 and T61p (15.4-inch widescreen) 71 Removal steps of keyboard (continued) When installing: Make sure that the keyboard edges a are under the frame as shown in this figure. Table 17.
a a ThinkPad T61 and T61p (15.4-inch widescreen) 71 Removal steps of keyboard (continued) When installing: Make sure that the keyboard edges a are under the frame as shown in this figure. Table 17.

Hardware Maintenance Manual
Page 80
Removal steps of MDC-1.5 1 1 2 1 3 Step Screw (quantity) Color Torque 1 M2 × 3 mm, small-head, nylon-coated (2) Silver 0.167 Nm (1.7 kgfcm) In step 3 , remove the card by pulling the tab with fingerprint reader" on page 66 v "1060 Keyboard" on page 62 v "1040 Palm rest or palm rest with your fingers in the direction shown by the arrow. 72 ThinkPad T61 and T61p (15.4-inch widescreen) Hardware Maintenance Manual 1070 Modem daughter card (MDC-1.5) For access, remove these FRUs in order: v "1010 Battery pack" on page 70 Table 18.
Removal steps of MDC-1.5 1 1 2 1 3 Step Screw (quantity) Color Torque 1 M2 × 3 mm, small-head, nylon-coated (2) Silver 0.167 Nm (1.7 kgfcm) In step 3 , remove the card by pulling the tab with fingerprint reader" on page 66 v "1060 Keyboard" on page 62 v "1040 Palm rest or palm rest with your fingers in the direction shown by the arrow. 72 ThinkPad T61 and T61p (15.4-inch widescreen) Hardware Maintenance Manual 1070 Modem daughter card (MDC-1.5) For access, remove these FRUs in order: v "1010 Battery pack" on page 70 Table 18.

Hardware Maintenance Manual
Page 82
... 1 , unplug the jacks by using the removal tool antenna RF connector (P/N: 08K7159) or pick the connectors with fingerprint reader" on page 66 v "1060 Keyboard" on page 62 v "1040 Palm rest or palm rest with your fingers and gently unplug them in direction of the arrow. 2 2 1 Step 2 ...Screw (quantity) M2 × 9.5 mm, flat-head, nylon-coated (2) Color Black Torque 0.167 Nm (1.7 kgfcm) 74 ThinkPad T61 and T61p (15.4-inch widescreen) Hardware Maintenance Manual Removal steps of PCI Express Mini Card for 802.11 a/b/g wireless LAN For access, remove these FRUs in...
... 1 , unplug the jacks by using the removal tool antenna RF connector (P/N: 08K7159) or pick the connectors with fingerprint reader" on page 66 v "1060 Keyboard" on page 62 v "1040 Palm rest or palm rest with your fingers and gently unplug them in direction of the arrow. 2 2 1 Step 2 ...Screw (quantity) M2 × 9.5 mm, flat-head, nylon-coated (2) Color Black Torque 0.167 Nm (1.7 kgfcm) 74 ThinkPad T61 and T61p (15.4-inch widescreen) Hardware Maintenance Manual Removal steps of PCI Express Mini Card for 802.11 a/b/g wireless LAN For access, remove these FRUs in...

Hardware Maintenance Manual
Page 84
... In step 1 , unplug the jacks by using the removal tool antenna RF connector (P/N: 08K7159) or pick the connectors with fingerprint reader" on page 66 v "1060 Keyboard" on page 62 v "1040 Palm rest or palm rest with your fingers and gently unplug them in direction of the arrow. 2 2 1 Step 2 Screw (quantity) M2...
... In step 1 , unplug the jacks by using the removal tool antenna RF connector (P/N: 08K7159) or pick the connectors with fingerprint reader" on page 66 v "1060 Keyboard" on page 62 v "1040 Palm rest or palm rest with your fingers and gently unplug them in direction of the arrow. 2 2 1 Step 2 Screw (quantity) M2...

Hardware Maintenance Manual
Page 86
... and gently unplug it in order: v "1010 Battery pack" on page 62 v "1040 Palm rest or palm rest with fingerprint reader" on page 66 v "1060 Keyboard" on page 70 Table 21. 1100 Wireless USB adapter For access, remove these FRUs in direction of the arrow. 1 2 3 Step 2 Screw (quantity) For Japan M2..., tamper proof (2) Other than Japan M2 × 3 mm, flat-head, nylon-coated (2) Color Black Black Torque 0.189 Nm (1.85 kgfcm) 0.189 Nm (1.85 kgfcm) 78 ThinkPad T61 and T61p (15.4-inch widescreen) Hardware Maintenance Manual
... and gently unplug it in order: v "1010 Battery pack" on page 62 v "1040 Palm rest or palm rest with fingerprint reader" on page 66 v "1060 Keyboard" on page 70 Table 21. 1100 Wireless USB adapter For access, remove these FRUs in direction of the arrow. 1 2 3 Step 2 Screw (quantity) For Japan M2..., tamper proof (2) Other than Japan M2 × 3 mm, flat-head, nylon-coated (2) Color Black Black Torque 0.189 Nm (1.85 kgfcm) 0.189 Nm (1.85 kgfcm) 78 ThinkPad T61 and T61p (15.4-inch widescreen) Hardware Maintenance Manual

Hardware Maintenance Manual
Page 88
For access, remove these FRUs in the parts list for your computer. Any other battery could ignite or explode. 1110 Backup battery DANGER Use only the battery specified in order: v "1010 Battery pack" on page 62 v "1040 Palm rest or palm rest with fingerprint reader" on page 66 v "1060 Keyboard" on page 70 Table 22. Removal steps of backup battery 1 2 When installing: Make sure that the battery connector is attached firmly. 80 ThinkPad T61 and T61p (15.4-inch widescreen) Hardware Maintenance Manual
For access, remove these FRUs in the parts list for your computer. Any other battery could ignite or explode. 1110 Backup battery DANGER Use only the battery specified in order: v "1010 Battery pack" on page 62 v "1040 Palm rest or palm rest with fingerprint reader" on page 66 v "1060 Keyboard" on page 70 Table 22. Removal steps of backup battery 1 2 When installing: Make sure that the battery connector is attached firmly. 80 ThinkPad T61 and T61p (15.4-inch widescreen) Hardware Maintenance Manual

Hardware Maintenance Manual
Page 89
ThinkPad T61 and T61p (15.4-inch widescreen) 81 Table 23. After you finish the servicing, make sure that you start the servicing. 1100 SIM card slot For access, remove these FRUs, in order: v "1010 Battery pack" on page 62 v "1040 Palm rest or palm rest with fingerprint reader" on page 66 v "1060 Keyboard" on...
ThinkPad T61 and T61p (15.4-inch widescreen) 81 Table 23. After you finish the servicing, make sure that you start the servicing. 1100 SIM card slot For access, remove these FRUs, in order: v "1010 Battery pack" on page 62 v "1040 Palm rest or palm rest with fingerprint reader" on page 66 v "1060 Keyboard" on...

Hardware Maintenance Manual
Page 90
Removal steps of keyboard bezel 1 1 Step 1 Screw (quantity) M2 × 14 mm, flat-head, nylon-coated (2) Color Black Torque 0.167 Nm (1.7 kgfcm) 82 ThinkPad T61 and T61p (15.4-inch widescreen) Hardware Maintenance Manual 1130 Keyboard bezel For access, remove these FRUs in order: v "1010 Battery pack" on page 62 v "1040 Palm rest or palm rest with fingerprint reader" on page 66 v "1060 Keyboard" on page 70 Table 24.
Removal steps of keyboard bezel 1 1 Step 1 Screw (quantity) M2 × 14 mm, flat-head, nylon-coated (2) Color Black Torque 0.167 Nm (1.7 kgfcm) 82 ThinkPad T61 and T61p (15.4-inch widescreen) Hardware Maintenance Manual 1130 Keyboard bezel For access, remove these FRUs in order: v "1010 Battery pack" on page 62 v "1040 Palm rest or palm rest with fingerprint reader" on page 66 v "1060 Keyboard" on page 70 Table 24.

Hardware Maintenance Manual
Page 91
... (continued) 3 3 4 2 4 5 5 In step 2 , release the wireless antenna cables from the cable guide. Then remove the keyboard bezel in the direction shown by arrow 7 . 6 7 6 6 7 When installing: Make sure that all the claws are attached firmly. ThinkPad T61 and T61p (15.4-inch widescreen) 83 Table 24. Step 3 Screw (quantity) M2 × 3 mm, small-head, nylon...
... (continued) 3 3 4 2 4 5 5 In step 2 , release the wireless antenna cables from the cable guide. Then remove the keyboard bezel in the direction shown by arrow 7 . 6 7 6 6 7 When installing: Make sure that all the claws are attached firmly. ThinkPad T61 and T61p (15.4-inch widescreen) 83 Table 24. Step 3 Screw (quantity) M2 × 3 mm, small-head, nylon...


