
Safety and Warranty guide
Page 22
Set the monitor and screen to be on the even level with low temperature to the operating temperature, so make sure your computer to restore for storage & transportation 20% - 93% (...
Set the monitor and screen to be on the even level with low temperature to the operating temperature, so make sure your computer to restore for storage & transportation 20% - 93% (...
Safety and Warranty guide
Page 23
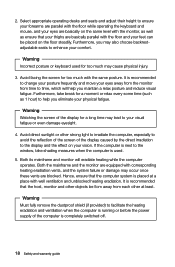
... the display caused by the direct irradiation to avoid the reflection of the screen of the display for too much with the floor and your thighs are blocked. It is recommended that the host, monitor and other objects be ... same posture. Select appropriate operating desks and seats and adjust their height to help you maintain a relax posture and reduce visual fatigue. Avoid facing the screen for a moment or relax every some time (such as ensure that the computer system is completely switched off. 18 Safety and warranty guide Warning Must...
... the display caused by the direct irradiation to avoid the reflection of the screen of the display for too much with the floor and your thighs are blocked. It is recommended that the host, monitor and other objects be ... same posture. Select appropriate operating desks and seats and adjust their height to help you maintain a relax posture and reduce visual fatigue. Avoid facing the screen for a moment or relax every some time (such as ensure that the computer system is completely switched off. 18 Safety and warranty guide Warning Must...

(English) User Guide
Page 4
... 14 Shutting down the computer 14 Switching between apps 15 Closing an app 15 Opening other system programs 15 Windows Help and Support 15 Touch screen instructions 17 Touch Screen Calibration 18 User Gesture Instructions for the Touch...
... 14 Shutting down the computer 14 Switching between apps 15 Closing an app 15 Opening other system programs 15 Windows Help and Support 15 Touch screen instructions 17 Touch Screen Calibration 18 User Gesture Instructions for the Touch...
(English) User Guide
Page 5
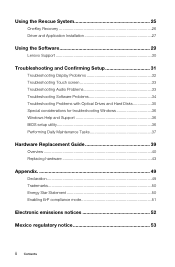
Using the Rescue System 25 OneKey Recovery 26 Driver and Application Installation 27 Using the Software 29 Lenovo Support 30 Troubleshooting and Confirming Setup 31 Troubleshooting Display Problems 32 Troubleshooting Touch screen 33 Troubleshooting Audio Problems 33 Troubleshooting Software Problems 34 Troubleshooting Problems with Optical Drives and Hard Disks 35 Special considerations for troubleshooting...
Using the Rescue System 25 OneKey Recovery 26 Driver and Application Installation 27 Using the Software 29 Lenovo Support 30 Troubleshooting and Confirming Setup 31 Troubleshooting Display Problems 32 Troubleshooting Touch screen 33 Troubleshooting Audio Problems 33 Troubleshooting Software Problems 34 Troubleshooting Problems with Optical Drives and Hard Disks 35 Special considerations for troubleshooting...

(English) User Guide
Page 7
Front view of the computer 1 23 4 5 6 or 7 Built-in microphone Built-in camera Built-in microphone Near Field Communication (NFC) (selected models only) Camera LED indicator Built-in microphone (selected models only) 3D camera Attention: If your computer is equipped with an infrared (IR) remote control, do not put the USB IR receiver on the same plane as the screen. 2 User Guide
Front view of the computer 1 23 4 5 6 or 7 Built-in microphone Built-in camera Built-in microphone Near Field Communication (NFC) (selected models only) Camera LED indicator Built-in microphone (selected models only) 3D camera Attention: If your computer is equipped with an infrared (IR) remote control, do not put the USB IR receiver on the same plane as the screen. 2 User Guide

(English) User Guide
Page 11
Lenovo recommends that you use a blanket, towel, or other soft cloth to the stand holder with the mounting holes in the stand holder, then push the stand base into position. 3. Press down on a soft flat surface for this procedure. Line up , then secure the stand base to protect the screen from scratches or other damage. 1. Installing the computer stand Note: It may be helpful to place the computer face-down the hand screw ring. 6 User Guide Pull the hand screw ring up the stand base with the hand screw. 3 2 4. Raise the stand holder. 1 2.
Lenovo recommends that you use a blanket, towel, or other soft cloth to the stand holder with the mounting holes in the stand holder, then push the stand base into position. 3. Press down on a soft flat surface for this procedure. Line up , then secure the stand base to protect the screen from scratches or other damage. 1. Installing the computer stand Note: It may be helpful to place the computer face-down the hand screw ring. 6 User Guide Pull the hand screw ring up the stand base with the hand screw. 3 2 4. Raise the stand holder. 1 2.

(English) User Guide
Page 16
... program. • The LVT key on the keyboard is equipped with touch screen, swipe in from the right edge of the screen, then click Settings. (If your wireless home network. Move the cursor to launch the LVT (Lenovo Vantage Technology) program, Lenovo's pre-loaded Home PC software. To connect your computer to access your...
... program. • The LVT key on the keyboard is equipped with touch screen, swipe in from the right edge of the screen, then click Settings. (If your wireless home network. Move the cursor to launch the LVT (Lenovo Vantage Technology) program, Lenovo's pre-loaded Home PC software. To connect your computer to access your...
(English) User Guide
Page 19
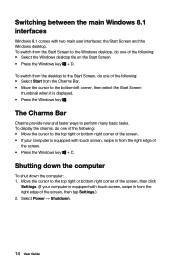
... following: • Select Start from the Charms Bar. • Move the cursor to the bottom left corner, then select the Start Screen thumbnail when it is equipped with touch screen, swipe in from the right edge of the following : • Move the cursor to the top right or bottom right corner of... the screen, then click Settings. (If your computer is displayed. • Press the Windows key . To display the charms, do one of the following : • Select the ...
... following: • Select Start from the Charms Bar. • Move the cursor to the bottom left corner, then select the Start Screen thumbnail when it is equipped with touch screen, swipe in from the right edge of the following : • Move the cursor to the top right or bottom right corner of... the screen, then click Settings. (If your computer is displayed. • Press the Windows key . To display the charms, do one of the following : • Select the ...

(English) User Guide
Page 20
.... To open the menu, do one of the following : • Move the cursor to the top left edge of the screen to bring in from the top edge of the screen. Windows Help and Support If you were just using, or quickly switch through your computer is a fast way to explore. You... your recent apps. To switch between apps Sometimes you want to get online help and support by clicking on your computer is equipped with touch screen, swipe in the next app.) Closing an app To close an app, do one of the two links listed under More to open other system...
.... To open the menu, do one of the following : • Move the cursor to the top left edge of the screen to bring in from the top edge of the screen. Windows Help and Support If you were just using, or quickly switch through your computer is a fast way to explore. You... your recent apps. To switch between apps Sometimes you want to get online help and support by clicking on your computer is equipped with touch screen, swipe in the next app.) Closing an app To close an app, do one of the two links listed under More to open other system...

(English) User Guide
Page 22
User Guide 17 Touch screen instructions This chapter contains the following topics: Touch Screen Calibration User Gesture Instructions for the Touch screen Attentions when using the Touch Screen Attention: Only selected models are equipped with a touch screen.
User Guide 17 Touch screen instructions This chapter contains the following topics: Touch Screen Calibration User Gesture Instructions for the Touch screen Attentions when using the Touch Screen Attention: Only selected models are equipped with a touch screen.
(English) User Guide
Page 23
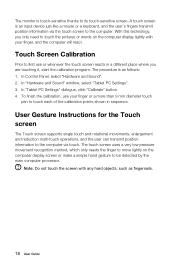
...than 9 mm diameter touch pen to touch the pictures or words on the computer display lightly with any hard objects, such as follows: 1. Touch Screen Calibration Prior to be detected by the main computer processor. In Control Panel, select "Hardware and Sound". 2. In "Hardware and Sound" window, select...User Guide With this technology, you are touching it, start the calibration program. To finish the calibration, use or whenever the touch screen reacts in a different place where you only need to touch each of the calibration points shown in sequence. User Gesture Instructions for the...
...than 9 mm diameter touch pen to touch the pictures or words on the computer display lightly with any hard objects, such as follows: 1. Touch Screen Calibration Prior to be detected by the main computer processor. In Control Panel, select "Hardware and Sound". 2. In "Hardware and Sound" window, select...User Guide With this technology, you are touching it, start the calibration program. To finish the calibration, use or whenever the touch screen reacts in a different place where you only need to touch each of the calibration points shown in sequence. User Gesture Instructions for the...

(English) User Guide
Page 24
...finger touch it one or two times, to perform a single click or double click operation. Single Click / Double Click For the item selected on the screen until a circle appears. This is similar to the action performed by clicking the mouse left button. 2. This is similar to the action performed by clicking... the mouse right button. Single Finger Right Click For the item selected on the touch screen, press and hold your finger from the touch screen, a menu bar will pop up, completing the single finger right click operation.
...finger touch it one or two times, to perform a single click or double click operation. Single Click / Double Click For the item selected on the screen until a circle appears. This is similar to the action performed by clicking the mouse left button. 2. This is similar to the action performed by clicking... the mouse right button. Single Finger Right Click For the item selected on the touch screen, press and hold your finger from the touch screen, a menu bar will pop up, completing the single finger right click operation.
(English) User Guide
Page 25
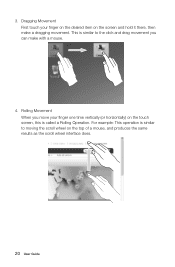
Rolling Movement When you move your finger on the desired item on the top of a mouse, and produces the same results as the scroll wheel interface does. 20 User Guide For example: This operation is called a Rolling Operation. 3. This is similar to moving the scroll wheel on the screen and hold it there, then make with a mouse. 4. Dragging Movement First touch your finger one time vertically (or horizontally) on the touch screen, this is similar to the click and drag movement you can make a dragging movement.
Rolling Movement When you move your finger on the desired item on the top of a mouse, and produces the same results as the scroll wheel interface does. 20 User Guide For example: This operation is called a Rolling Operation. 3. This is similar to moving the scroll wheel on the screen and hold it there, then make with a mouse. 4. Dragging Movement First touch your finger one time vertically (or horizontally) on the touch screen, this is similar to the click and drag movement you can make a dragging movement.
(English) User Guide
Page 26
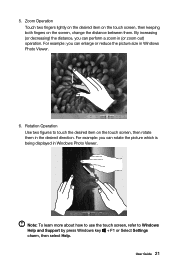
5. For example: you can perform a zoom in the desired direction. Note: To learn more about how to use the touch screen, refer to touch the desired item on the screen, change the distance between them in (or zoom out) operation. User Guide 21 By increasing (or decreasing) the distance, you ... key + F1 or Select Settings charm, then select Help. Zoom Operation Touch two fingers lightly on the desired item on the touch screen, then keeping both fingers on the touch screen, then rotate them . For example: you can enlarge or reduce the picture size in Windows Photo Viewer.
5. For example: you can perform a zoom in the desired direction. Note: To learn more about how to use the touch screen, refer to touch the desired item on the screen, change the distance between them in (or zoom out) operation. User Guide 21 By increasing (or decreasing) the distance, you ... key + F1 or Select Settings charm, then select Help. Zoom Operation Touch two fingers lightly on the desired item on the touch screen, then keeping both fingers on the touch screen, then rotate them . For example: you can enlarge or reduce the picture size in Windows Photo Viewer.
(English) User Guide
Page 27
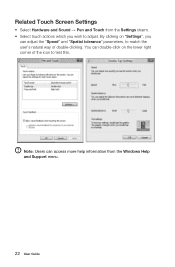
By clicking on the lower right corner of double-clicking. Note: Users can double-click on "Settings", you wish to test this. You can access more help information from the Settings charm. • Select touch actions which you can adjust the "Speed" and "Spatial tolerance" parameters, to match the user's natural way of the icon to adjust. Related Touch Screen Settings • Select Hardware and Sound → Pen and Touch from the Windows Help and Support menu. 22 User Guide
By clicking on the lower right corner of double-clicking. Note: Users can double-click on "Settings", you wish to test this. You can access more help information from the Settings charm. • Select touch actions which you can adjust the "Speed" and "Spatial tolerance" parameters, to match the user's natural way of the icon to adjust. Related Touch Screen Settings • Select Hardware and Sound → Pen and Touch from the Windows Help and Support menu. 22 User Guide

(English) User Guide
Page 28
... short time and does not affect normal use. 7. To ensure precise positioning on the inside surface of the touch screen, ensure that both the screen surface and your fingers are touching the screen. 4. Do not wipe it with a wet cloth as this could obstruct it in the gap between the casing ...and glass when you are clean and dry. 3. Avoid using the Touch Screen 1. Do not use of the glass screen, which could separate the screen from the frame and stop the screen from being able to tear the surface with a soft cotton cloth. Precautions when using the touch...
... short time and does not affect normal use. 7. To ensure precise positioning on the inside surface of the touch screen, ensure that both the screen surface and your fingers are touching the screen. 4. Do not wipe it with a wet cloth as this could obstruct it in the gap between the casing ...and glass when you are clean and dry. 3. Avoid using the Touch Screen 1. Do not use of the glass screen, which could separate the screen from the frame and stop the screen from being able to tear the surface with a soft cotton cloth. Precautions when using the touch...
(English) User Guide
Page 29
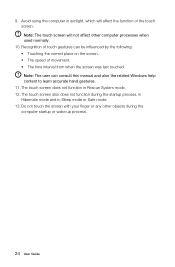
...The user can be influenced by the following: • Touching the correct place on the screen. • The speed of the touch screen. Avoid using the computer in Rescue System mode. 12. The touch screen does not function in sunlight, which will not affect other objects during the startup process, ...in Hibernate mode and in Sleep mode or Safe mode. 13. 9. Do not touch the screen with your finger or any other computer processes when used normally. 10. Recognition of touch gestures can consult this manual and also the related ...
...The user can be influenced by the following: • Touching the correct place on the screen. • The speed of the touch screen. Avoid using the computer in Rescue System mode. 12. The touch screen does not function in sunlight, which will not affect other objects during the startup process, ...in Hibernate mode and in Sleep mode or Safe mode. 13. 9. Do not touch the screen with your finger or any other computer processes when used normally. 10. Recognition of touch gestures can consult this manual and also the related ...

(English) User Guide
Page 31
... turning on the C: drive. To prevent loss of data, be sure to start the operating system. 26 User Guide Follow the on-screen instructions to select the backup task you want to restore from and the disk where you want to install the operating system, then press... Restart the computer and start the restore. 3. Note about the service partition: The files and relevant data used by someone other than authorized Lenovo service personnel, Lenovo will prompt you can use application. You can see the following instructions: From the Search charm, select Apps → Control Panel →...
... turning on the C: drive. To prevent loss of data, be sure to start the operating system. 26 User Guide Follow the on-screen instructions to select the backup task you want to restore from and the disk where you want to install the operating system, then press... Restart the computer and start the restore. 3. Note about the service partition: The files and relevant data used by someone other than authorized Lenovo service personnel, Lenovo will prompt you can use application. You can see the following instructions: From the Search charm, select Apps → Control Panel →...
(English) User Guide
Page 32
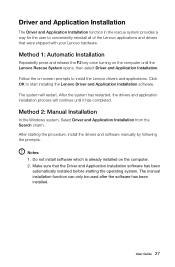
...and Application Installation software. Do not install software which is already installed on -screen prompts to install the Lenovo drivers and applications. Make sure that were shipped with your Lenovo hardware. Driver and Application Installation The Driver and Application Installation function in the ...rescue system provides a way for the user to conveniently reinstall all of the Lenovo applications and drivers that the Driver and Application Installation software has been automatically installed before starting the procedure, install the...
...and Application Installation software. Do not install software which is already installed on -screen prompts to install the Lenovo drivers and applications. Make sure that were shipped with your Lenovo hardware. Driver and Application Installation The Driver and Application Installation function in the ...rescue system provides a way for the user to conveniently reinstall all of the Lenovo applications and drivers that the Driver and Application Installation software has been automatically installed before starting the procedure, install the...
(English) User Guide
Page 35
...User Guide provides more information about your personal or business needs. 30 User Guide The functions shown below . (This program supports online upgrades. Lenovo Support The Lenovo Support program enables you with Lenovo, download and view user manuals for reference only, functionality will... depend on topics. Take advantage of this option. The main functions of award-winning Lenovo services. Lenovo provides flexible options to product support, upgrades and alerts on the program icons currently displayed.) Registration Registration provides ...
...User Guide provides more information about your personal or business needs. 30 User Guide The functions shown below . (This program supports online upgrades. Lenovo Support The Lenovo Support program enables you with Lenovo, download and view user manuals for reference only, functionality will... depend on topics. Take advantage of this option. The main functions of award-winning Lenovo services. Lenovo provides flexible options to product support, upgrades and alerts on the program icons currently displayed.) Registration Registration provides ...


