
Safety and Warranty guide
Page 9
... power adapters supplied by objects. 4 Safety and warranty guide The power cords shall be used accordingly. Always route power cords so that can present a safety hazard. When you unpack an option or CRU, do not open the staticprotective package containing the part until the instructions direct you install a static-sensitive option or CRU, touch the static-protective package containing the part to a metal expansion-slot cover...
... power adapters supplied by objects. 4 Safety and warranty guide The power cords shall be used accordingly. Always route power cords so that can present a safety hazard. When you unpack an option or CRU, do not open the staticprotective package containing the part until the instructions direct you install a static-sensitive option or CRU, touch the static-protective package containing the part to a metal expansion-slot cover...

Safety and Warranty guide
Page 11
... obtain a replacement. otherwise, unstable voltage might damage your computer. This plug fits only into a grounded electrical outlet. Be sure that the power outlet you might damage your computer equipment appears to be damaged or corroded, do not use the outlet until it into a non-grounded outlet. External devices Do not connect or disconnect any external device cables other home...
... obtain a replacement. otherwise, unstable voltage might damage your computer. This plug fits only into a grounded electrical outlet. Be sure that the power outlet you might damage your computer equipment appears to be damaged or corroded, do not use the outlet until it into a non-grounded outlet. External devices Do not connect or disconnect any external device cables other home...

Safety and Warranty guide
Page 17
... installer's attention to be connected 12 Safety and warranty guide Users and installers in North America. Products with optical instruments, and avoid direct exposure to external antennas and cable/CATV systems. If local codes are no serviceable parts inside any part that follow guidelines similar to cable/CATV systems, or both, and that has this label attached. Power supply statement Never remove the cover on a power...
... installer's attention to be connected 12 Safety and warranty guide Users and installers in North America. Products with optical instruments, and avoid direct exposure to external antennas and cable/CATV systems. If local codes are no serviceable parts inside any part that follow guidelines similar to cable/CATV systems, or both, and that has this label attached. Power supply statement Never remove the cover on a power...
Safety and Warranty guide
Page 18
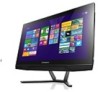
... en galvanisk isolator mellom utstyret og kabel- Safety and warranty guide 13 Proper grounding for the cable Power service grounding electrode system (NEC Article 250, Part H) Ground clamps Electronic service equipment Special note for årsake brannfare. og er tilkoplet et kabel-TV nett, kan for users in wire Antenna discharge unit (NEC Section 810-20) Grounding...
... en galvanisk isolator mellom utstyret og kabel- Safety and warranty guide 13 Proper grounding for the cable Power service grounding electrode system (NEC Article 250, Part H) Ground clamps Electronic service equipment Special note for årsake brannfare. og er tilkoplet et kabel-TV nett, kan for users in wire Antenna discharge unit (NEC Section 810-20) Grounding...
Safety and Warranty guide
Page 21
... device. Remote control Caution: Do not use rechargeable batteries in the liquid crystal display contains mercury; Handling: • If your requirement. 16 Safety and warranty guide dispose according to the instructions. Your Additional Responsibilities Selection of explosion if battery is replaced by two people. Liquid crystal display (LCD) notice DANGER To avoid shock hazard: • Do not remove the covers. • Do not operate...
... device. Remote control Caution: Do not use rechargeable batteries in the liquid crystal display contains mercury; Handling: • If your requirement. 16 Safety and warranty guide dispose according to the instructions. Your Additional Responsibilities Selection of explosion if battery is replaced by two people. Liquid crystal display (LCD) notice DANGER To avoid shock hazard: • Do not remove the covers. • Do not operate...

Safety and Warranty guide
Page 30
... starts on your product are set forth below in writing. Part 2 - Telephone: +61 2 8003 8200. The warranty period and type of purchase specified on the original date of warranty service that you a remedy under this Warranty Covers: Lenovo warrants that each hardware product that apply to a covered defect during the warranty period. Warranty Service Information. Email: lensyd_au@lenovo.com The following replaces...
... starts on your product are set forth below in writing. Part 2 - Telephone: +61 2 8003 8200. The warranty period and type of purchase specified on the original date of warranty service that you a remedy under this Warranty Covers: Lenovo warrants that each hardware product that apply to a covered defect during the warranty period. Warranty Service Information. Email: lensyd_au@lenovo.com The following replaces...

Safety and Warranty guide
Page 31
..., 26 Safety and warranty guide Products and parts presented for repair may be replaced by Lenovo may result in good working order and at least functionally equivalent to repair the product; The following replaces the same section in Part 1: Replacement Products and Parts: When warranty service involves the replacement of a product or part, the replaced product or part becomes Lenovo's property and the replacement product or part becomes your personal contact...
..., 26 Safety and warranty guide Products and parts presented for repair may be replaced by Lenovo may result in good working order and at least functionally equivalent to repair the product; The following replaces the same section in Part 1: Replacement Products and Parts: When warranty service involves the replacement of a product or part, the replaced product or part becomes Lenovo's property and the replacement product or part becomes your personal contact...

Safety and Warranty guide
Page 38
... service center at a service center. and 2) you . A courier will be installed for you may need to be included with your product or at a designated service center, with a replacement CRU. If you fail to collect the product, the Service Provider may be available for purchase from you at your product and deliver it will pick up your location. An optional service...
... service center at a service center. and 2) you . A courier will be installed for you may need to be included with your product or at a designated service center, with a replacement CRU. If you fail to collect the product, the Service Provider may be available for purchase from you at your product and deliver it will pick up your location. An optional service...
(English) User Guide
Page 5
... System 25 OneKey Recovery 26 Driver and Application Installation 27 Using the Software 29 Lenovo Support 30 Troubleshooting and Confirming Setup 31 Troubleshooting Display Problems 32 Troubleshooting Touch screen 33 Troubleshooting Audio Problems 33 Troubleshooting Software Problems 34 Troubleshooting Problems with Optical Drives and Hard Disks 35 Special considerations for troubleshooting Windows 36 Windows Help and Support 36 BIOS setup utility 36 Performing Daily Maintenance Tasks 37 Hardware Replacement Guide 39 Overview 40 Replacing hardware 43 Appendix 49 Declaration...
... System 25 OneKey Recovery 26 Driver and Application Installation 27 Using the Software 29 Lenovo Support 30 Troubleshooting and Confirming Setup 31 Troubleshooting Display Problems 32 Troubleshooting Touch screen 33 Troubleshooting Audio Problems 33 Troubleshooting Software Problems 34 Troubleshooting Problems with Optical Drives and Hard Disks 35 Special considerations for troubleshooting Windows 36 Windows Help and Support 36 BIOS setup utility 36 Performing Daily Maintenance Tasks 37 Hardware Replacement Guide 39 Overview 40 Replacing hardware 43 Appendix 49 Declaration...
(English) User Guide
Page 8
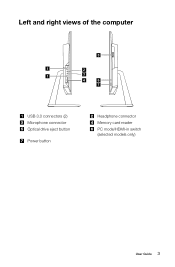
Left and right views of the computer 5 1 2 1 3 4 6 7 USB 3.0 connectors (2) Microphone connector Optical drive eject button Power button Headphone connector Memory card reader PC mode/HDMI-in switch (selected models only) User Guide 3
Left and right views of the computer 5 1 2 1 3 4 6 7 USB 3.0 connectors (2) Microphone connector Optical drive eject button Power button Headphone connector Memory card reader PC mode/HDMI-in switch (selected models only) User Guide 3
(English) User Guide
Page 23
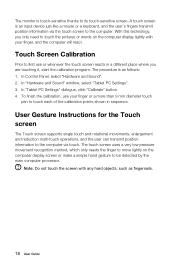
A touch screen is an input device just like a mouse or a keyboard, and the user's fingers transmit position information via touch. In "Hardware and Sound" window, select "Tablet PC Settings". 3. The touch screen uses a very low pressure movement recognition method, which only needs the finger to move lightly on the computer display lightly with any hard objects, such as follows: 1. The monitor is touch-sensitive thanks to touch each of the calibration points shown...
A touch screen is an input device just like a mouse or a keyboard, and the user's fingers transmit position information via touch. In "Hardware and Sound" window, select "Tablet PC Settings". 3. The touch screen uses a very low pressure movement recognition method, which only needs the finger to move lightly on the computer display lightly with any hard objects, such as follows: 1. The monitor is touch-sensitive thanks to touch each of the calibration points shown...
(English) User Guide
Page 26
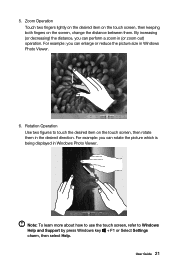
... to use the touch screen, refer to touch the desired item on the screen, change the distance between them in Windows Photo Viewer. Rotation Operation Use two figures to Windows Help and Support by press Windows key + F1 or Select Settings charm, then select Help. Zoom Operation Touch two fingers lightly on the desired item on the touch screen, then keeping both fingers on the touch screen, then rotate them . User Guide 21...
... to use the touch screen, refer to touch the desired item on the screen, change the distance between them in Windows Photo Viewer. Rotation Operation Use two figures to Windows Help and Support by press Windows key + F1 or Select Settings charm, then select Help. Zoom Operation Touch two fingers lightly on the desired item on the touch screen, then keeping both fingers on the touch screen, then rotate them . User Guide 21...
(English) User Guide
Page 27
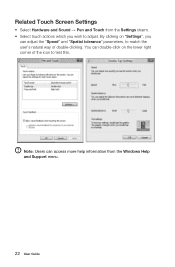
Note: Users can access more help information from the Settings charm. • Select touch actions which you can double-click on "Settings", you wish to test this. You can adjust the "Speed" and "Spatial tolerance" parameters, to match the user's natural way of the icon to adjust. By clicking on the lower right corner of double-clicking. Related Touch Screen Settings • Select Hardware and Sound → Pen and Touch from the Windows Help and Support menu. 22 User Guide
Note: Users can access more help information from the Settings charm. • Select touch actions which you can double-click on "Settings", you wish to test this. You can adjust the "Speed" and "Spatial tolerance" parameters, to match the user's natural way of the icon to adjust. By clicking on the lower right corner of double-clicking. Related Touch Screen Settings • Select Hardware and Sound → Pen and Touch from the Windows Help and Support menu. 22 User Guide
(English) User Guide
Page 32
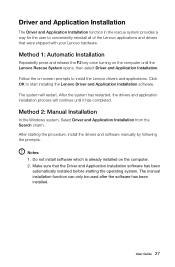
... already installed on -screen prompts to start installing the Lenovo Driver and Application Installation software. User Guide 27 Method 2: Manual Installation In the Windows system, Select Driver and Application Installation from the Search charm. The manual installation function can only be used after the software has been installed. Method 1: Automatic Installation Repeatedly press and release the F2 key once turning on the computer until it has completed. Follow the on the computer. 2. After starting the operating...
... already installed on -screen prompts to start installing the Lenovo Driver and Application Installation software. User Guide 27 Method 2: Manual Installation In the Windows system, Select Driver and Application Installation from the Search charm. The manual installation function can only be used after the software has been installed. Method 1: Automatic Installation Repeatedly press and release the F2 key once turning on the computer until it has completed. Follow the on the computer. 2. After starting the operating...
(English) User Guide
Page 37
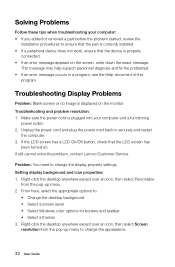
.../Off button, check that the device is correctly installed. • If a peripheral device does not work, ensure that the LCD screen has been turned on the monitor. Right-click the desktop anywhere except over an icon, then select Personalize from the pop-up menu. 2. Make sure the power cord is displayed on . This message may help support personnel diagnose and fix the problem(s). • If an error...
.../Off button, check that the device is correctly installed. • If a peripheral device does not work, ensure that the LCD screen has been turned on the monitor. Right-click the desktop anywhere except over an icon, then select Personalize from the pop-up menu. 2. Make sure the power cord is displayed on . This message may help support personnel diagnose and fix the problem(s). • If an error...
(English) User Guide
Page 38
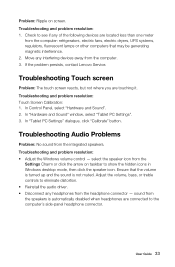
... in Windows desktop mode, then click the speaker icon. Troubleshooting Audio Problems Problem: No sound from the computer. 3. Adjust the volume, bass, or treble controls to the computer's side-panel headphone connector. In "Tablet PC Settings" dialogue, click "Calibrate" button. User Guide 33 If the problem persists, contact Lenovo Service. select the speaker icon from the Settings Charm or click the arrow on screen. In "Hardware and Sound" window, select "Tablet PC Settings". 3. Ensure...
... in Windows desktop mode, then click the speaker icon. Troubleshooting Audio Problems Problem: No sound from the computer. 3. Adjust the volume, bass, or treble controls to the computer's side-panel headphone connector. In "Tablet PC Settings" dialogue, click "Calibrate" button. User Guide 33 If the problem persists, contact Lenovo Service. select the speaker icon from the Settings Charm or click the arrow on screen. In "Hardware and Sound" window, select "Tablet PC Settings". 3. Ensure...
(English) User Guide
Page 41
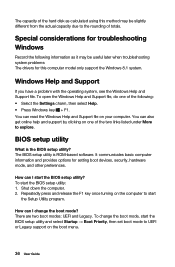
Windows Help and Support If you have a problem with the operating system, see the Windows Help and Support file. You can I change the boot mode, start the BIOS setup utility: 1. The BIOS setup utility is the BIOS setup utility? Shut down the computer. 2. BIOS setup utility What is ROM-based software. To start the BIOS setup utility and select Startup → Boot Priority, then set boot mode to the rounding of totals. To change the boot mode? You can I start the Setup Utility program. How can also get online help...
Windows Help and Support If you have a problem with the operating system, see the Windows Help and Support file. You can I change the boot mode, start the BIOS setup utility: 1. The BIOS setup utility is the BIOS setup utility? Shut down the computer. 2. BIOS setup utility What is ROM-based software. To start the BIOS setup utility and select Startup → Boot Priority, then set boot mode to the rounding of totals. To change the boot mode? You can I start the Setup Utility program. How can also get online help...
(English) User Guide
Page 45
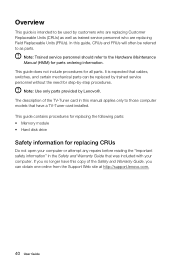
... card installed. Overview This guide is expected that cables, switches, and certain mechanical parts can obtain one online from the Support Web site at http://support.lenovo.com. 40 User Guide Note: Use only parts provided by -step procedures. This guide contains procedures for replacing the following parts: • Memory module • Hard disk drive Safety information for step-by Lenovo®. Note: Trained service personnel should refer to the Hardware Maintenance Manual (HMM) for all parts...
... card installed. Overview This guide is expected that cables, switches, and certain mechanical parts can obtain one online from the Support Web site at http://support.lenovo.com. 40 User Guide Note: Use only parts provided by -step procedures. This guide contains procedures for replacing the following parts: • Memory module • Hard disk drive Safety information for step-by Lenovo®. Note: Trained service personnel should refer to the Hardware Maintenance Manual (HMM) for all parts...
(English) User Guide
Page 47
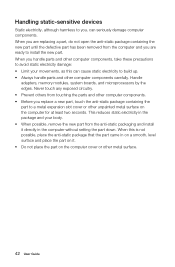
... static-sensitive devices Static electricity, although harmless to install the new part. When you are replacing a part, do not open the anti-static package containing the new part until the defective part has been removed from the computer and you are ready to you replace a new part, touch the anti-static package containing the part to build up. • Always handle parts and other metal surface. 42 User Guide
... static-sensitive devices Static electricity, although harmless to install the new part. When you are replacing a part, do not open the anti-static package containing the new part until the defective part has been removed from the computer and you are ready to you replace a new part, touch the anti-static package containing the part to build up. • Always handle parts and other metal surface. 42 User Guide
(English) User Guide
Page 54
... list, or consult the distributor for using Lenovo products. This manual could include technical inaccuracies or typographical errors. these changes will be reproduced or transcribed by Lenovo professional service personnel. Lenovo is protected by copyright laws and rules. The manuals...instructions and requirements in the manuals included with your computer are welcome to the information herein; The content of the computer that you install and use Lenovo's products appropriately. The software interface and function and hardware configuration described in the manuals...
... list, or consult the distributor for using Lenovo products. This manual could include technical inaccuracies or typographical errors. these changes will be reproduced or transcribed by Lenovo professional service personnel. Lenovo is protected by copyright laws and rules. The manuals...instructions and requirements in the manuals included with your computer are welcome to the information herein; The content of the computer that you install and use Lenovo's products appropriately. The software interface and function and hardware configuration described in the manuals...


