
KM-NET ADMIN Operation Guide for Ver 2.0
Page 2
and/or other countries. • All other brand and product names herein are registered trademarks or trademarks of the information herein. Copyright © 2009 KYOCERA MITA Corporation All rights reserved. Legal Notes Unauthorized reproduction of all or part of this guide is a registered trademark of Microsoft Corporation in this guide ...
and/or other countries. • All other brand and product names herein are registered trademarks or trademarks of the information herein. Copyright © 2009 KYOCERA MITA Corporation All rights reserved. Legal Notes Unauthorized reproduction of all or part of this guide is a registered trademark of Microsoft Corporation in this guide ...
KM-NET ADMIN Operation Guide for Ver 2.0
Page 3
Table of Contents Chapter 1 Installation System Requirements ...1-1 Host Agent for Print Job Manager 1-3 Installing the Host Agent for Print Job Manager 1-3 Maintaining Host Agent Features 1-3 Job Release for Print Job Manager 1-4 Installing the Job Release for Print Job Manager 1-4 Maintaining Job Release Features 1-4 Chapter 2 Administration Roles and Users ...2-1 Adding a Role ...2-1 Deleting a Role ...2-2 Adding a User ...2-2 Deleting a User ...2-2 Properties View ...2-3 Changing the Password ...2-3 Subscription View ...2-3 Subscriptions ...2-3 Subscriptions, Groups, and ...
Table of Contents Chapter 1 Installation System Requirements ...1-1 Host Agent for Print Job Manager 1-3 Installing the Host Agent for Print Job Manager 1-3 Maintaining Host Agent Features 1-3 Job Release for Print Job Manager 1-4 Installing the Job Release for Print Job Manager 1-4 Maintaining Job Release Features 1-4 Chapter 2 Administration Roles and Users ...2-1 Adding a Role ...2-1 Deleting a Role ...2-2 Adding a User ...2-2 Deleting a User ...2-2 Properties View ...2-3 Changing the Password ...2-3 Subscription View ...2-3 Subscriptions ...2-3 Subscriptions, Groups, and ...
KM-NET ADMIN Operation Guide for Ver 2.0
Page 4
List View ...3-1 User Preferences ...3-1 Global Characteristics ...3-1 Saving Changes ...3-2 Tab Scrolling ...3-2 Set Rows per Page ...3-2 32 Tab Maximum ...3-2 Edit Default List Views ...3-2 Add Tab ...3-3 Import Default Tab ...3-4 Edit Tab ...3-4 Deleting a Tab ...3-6 Set Rows per Page ...3-6 Managing Devices ...3-6 Add Group ...3-7 Manual Groups ...3-7 Dynamic Groups ...3-8 Map View ...3-9 Map View Toolbar ...3-9 Map Background ...3-10 Selecting Icon Properties ...3-11 Links ...3-12 Saving Map Settings ...3-12 Subscription View ...3-13 Adding Devices ...3-13 Refresh ...3-14 Select All ...3-...
List View ...3-1 User Preferences ...3-1 Global Characteristics ...3-1 Saving Changes ...3-2 Tab Scrolling ...3-2 Set Rows per Page ...3-2 32 Tab Maximum ...3-2 Edit Default List Views ...3-2 Add Tab ...3-3 Import Default Tab ...3-4 Edit Tab ...3-4 Deleting a Tab ...3-6 Set Rows per Page ...3-6 Managing Devices ...3-6 Add Group ...3-7 Manual Groups ...3-7 Dynamic Groups ...3-8 Map View ...3-9 Map View Toolbar ...3-9 Map Background ...3-10 Selecting Icon Properties ...3-11 Links ...3-12 Saving Map Settings ...3-12 Subscription View ...3-13 Adding Devices ...3-13 Refresh ...3-14 Select All ...3-...
KM-NET ADMIN Operation Guide for Ver 2.0
Page 5
Create Report Subscriptions 3-34 Search ...3-34 Searching for Printing Devices 3-34 Chapter 4 Accounting Manager Console Settings ...4-1 Selecting Device and Account IDs 4-1 View Devices and Accounts ...4-2 List View ...4-2 Form View ...4-2 Diagram View ...4-3 Subscription View ...4-3 Manage Views ...4-3 Managing the List View ...4-3 Managing the Diagram View 4-4 Groups ...4-4 Adding or Editing a Printing Device Group 4-4 Adding or Editing an Account Group 4-5 Deleting a Group ...4-5 Copying a Group ...4-5 Adding or Editing an Account 4-6 Deleting an Account ...4-7 Editing a Printing ...
Create Report Subscriptions 3-34 Search ...3-34 Searching for Printing Devices 3-34 Chapter 4 Accounting Manager Console Settings ...4-1 Selecting Device and Account IDs 4-1 View Devices and Accounts ...4-2 List View ...4-2 Form View ...4-2 Diagram View ...4-3 Subscription View ...4-3 Manage Views ...4-3 Managing the List View ...4-3 Managing the Diagram View 4-4 Groups ...4-4 Adding or Editing a Printing Device Group 4-4 Adding or Editing an Account Group 4-5 Deleting a Group ...4-5 Copying a Group ...4-5 Adding or Editing an Account 4-6 Deleting an Account ...4-7 Editing a Printing ...
KM-NET ADMIN Operation Guide for Ver 2.0
Page 6
... ...5-10 All User Groups ...5-10 All Users ...5-10 User-defined user groups ...5-10 Hosts ...5-12 All Hosts ...5-12 Host (Print Server) ...5-12 Host Agent ...5-12 KM Service Manager ...5-13 Configure Queues ...5-14 Consoles ...5-14 Choosing a Console ...5-14 Changing the Default Console 5-15 Log Off ...5-15 Chapter 6 My Print Jobs Logging on...
... ...5-10 All User Groups ...5-10 All Users ...5-10 User-defined user groups ...5-10 Hosts ...5-12 All Hosts ...5-12 Host (Print Server) ...5-12 Host Agent ...5-12 KM Service Manager ...5-13 Configure Queues ...5-14 Consoles ...5-14 Choosing a Console ...5-14 Changing the Default Console 5-15 Log Off ...5-15 Chapter 6 My Print Jobs Logging on...
KM-NET ADMIN Operation Guide for Ver 2.0
Page 7
1 Installation This guide has installation information for KMnet Admin, its related components, and required third-party software: Java 2 SDK 5.0 A collection of KMnet Admin: Administration and Device Manager. Host Agent Software that lets user print jobs from Add or Remove Programs. Consoles Administration A console for monitoring all counters in your network printing devices. During installation, a password for the new Windows User account which the application stores printer data. The password must be installed along with Service Pack 3 or newer KMnet Admin 2.0 1-1 Two other ...
1 Installation This guide has installation information for KMnet Admin, its related components, and required third-party software: Java 2 SDK 5.0 A collection of KMnet Admin: Administration and Device Manager. Host Agent Software that lets user print jobs from Add or Remove Programs. Consoles Administration A console for monitoring all counters in your network printing devices. During installation, a password for the new Windows User account which the application stores printer data. The password must be installed along with Service Pack 3 or newer KMnet Admin 2.0 1-1 Two other ...

KM-NET ADMIN Operation Guide for Ver 2.0
Page 8
Installation 1-2 Microsoft Windows® 2000 Server with Service Pack 3 or newer Microsoft Windows® Server 2003/2008 Microsoft Windows® XP Professional 32 bit Microsoft Windows® XP Professional 64 bit with Service Pack 2 or newer Windows Vista™ 32 bit Windows Vista™ 64 bit with Service Pack 1 or newer User Guide The following examples provide rough estimates for minimum system requirements for various environments. Medium to Large Devices: Up to 400 Consoles: Administration, Device Manager, Print Job Manager, Accounting Manager System Requirements: CPU: 2.0 GHz,...
Installation 1-2 Microsoft Windows® 2000 Server with Service Pack 3 or newer Microsoft Windows® Server 2003/2008 Microsoft Windows® XP Professional 32 bit Microsoft Windows® XP Professional 64 bit with Service Pack 2 or newer Windows Vista™ 32 bit Windows Vista™ 64 bit with Service Pack 1 or newer User Guide The following examples provide rough estimates for minimum system requirements for various environments. Medium to Large Devices: Up to 400 Consoles: Administration, Device Manager, Print Job Manager, Accounting Manager System Requirements: CPU: 2.0 GHz,...
KM-NET ADMIN Operation Guide for Ver 2.0
Page 9
... print queues. A managed queue is already installed, and you run the Host Agent installation program, a maintenance page appears letting you exit the installer. Supported Printers Kyocera network printers and most third party network printers that support the standard printer MIB Maximum Validated Configuration Device Manager Up to 2000 managed devices, 45...
... print queues. A managed queue is already installed, and you run the Host Agent installation program, a maintenance page appears letting you exit the installer. Supported Printers Kyocera network printers and most third party network printers that support the standard printer MIB Maximum Validated Configuration Device Manager Up to 2000 managed devices, 45...
KM-NET ADMIN Operation Guide for Ver 2.0
Page 10
Installation The Host Agent is completely reinstalled as it was installed in the previous setup. To exit the uninstaller, click Finish. Installing the Job Release for Print Job Manager Installation of Job Release software is only necessary if you plan to use the Secure Job Release feature of the following options: Repair Job Release Job Release is already installed, and you run the Job Release installation program, a maintenance page appears letting you repair or remove Job release features. To exit the installer, click Finish. Remove The Host Agent is completely uninstalled. Remove...
Installation The Host Agent is completely reinstalled as it was installed in the previous setup. To exit the uninstaller, click Finish. Installing the Job Release for Print Job Manager Installation of Job Release software is only necessary if you plan to use the Secure Job Release feature of the following options: Repair Job Release Job Release is already installed, and you run the Job Release installation program, a maintenance page appears letting you repair or remove Job release features. To exit the installer, click Finish. Remove The Host Agent is completely uninstalled. Remove...
KM-NET ADMIN Operation Guide for Ver 2.0
Page 11
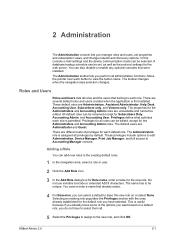
A database backup schedule can be edited, except for each role is first installed. The name has to the existing default roles. 1 In the navigation area, select a role or user. 2 Click the Add Role icon. 3 In the Add Role dialog box for Role name, enter a name for the web server. Move the pointer over each role. There are Administrators, Assistant Administrator, Help Desk, Accounting User, Subscribers only, and Viewers only. Adding a Role You can also disable or enable any optional consoles that belong to each button to the new role, and click OK....
A database backup schedule can be edited, except for each role is first installed. The name has to the existing default roles. 1 In the navigation area, select a role or user. 2 Click the Add Role icon. 3 In the Add Role dialog box for Role name, enter a name for the web server. Move the pointer over each role. There are Administrators, Assistant Administrator, Help Desk, Accounting User, Subscribers only, and Viewers only. Adding a Role You can also disable or enable any optional consoles that belong to each button to the new role, and click OK....
KM-NET ADMIN Operation Guide for Ver 2.0
Page 12
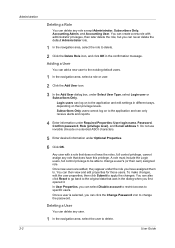
Do not use invisible Unicode or extended ASCII characters. 5 Enter desired information under Required Properties: User login name, Password, Confirm password, Role (privilege level), and E-mail address 1. A role must include the Login users, full control privilege to be able to delete. 2 Click the Delete Role icon, and click OK in the confirmation message. You can create a new role with a role that does not have the roles, full control privilege, cannot assign any role that was in different ways, depending on their own) assigned role. Login users can also click Reset to go ...
Do not use invisible Unicode or extended ASCII characters. 5 Enter desired information under Required Properties: User login name, Password, Confirm password, Role (privilege level), and E-mail address 1. A role must include the Login users, full control privilege to be able to delete. 2 Click the Delete Role icon, and click OK in the confirmation message. You can create a new role with a role that does not have the roles, full control privilege, cannot assign any role that was in different ways, depending on their own) assigned role. Login users can also click Reset to go ...
KM-NET ADMIN Operation Guide for Ver 2.0
Page 13
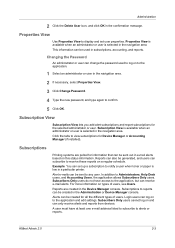
Properties View is available when an administrator or user is selected in the navigation area. 2 If necessary, select Properties View. 3 Click Change Password. 4 Type the new password, and type again to any user. Subscription View Subscription View lets you add alert subscriptions and report subscriptions for all the different types of users, see Users. Reports can also be generated, and users can be created for the selected administrator or user. Alert e-mails can be sent to confirm. 5 Click OK. For more information on a regular schedule. Alerts can subscribe to the ...
Properties View is available when an administrator or user is selected in the navigation area. 2 If necessary, select Properties View. 3 Click Change Password. 4 Type the new password, and type again to any user. Subscription View Subscription View lets you add alert subscriptions and report subscriptions for all the different types of users, see Users. Reports can also be generated, and users can be created for the selected administrator or user. Alert e-mails can be sent to confirm. 5 Click OK. For more information on a regular schedule. Alerts can subscribe to the ...
KM-NET ADMIN Operation Guide for Ver 2.0
Page 14
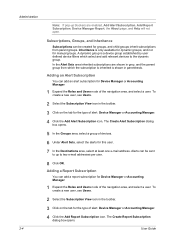
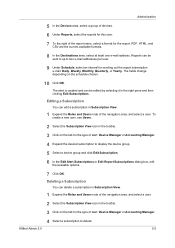
Administration 2-4 Note: If pop-up to two e-mail addresses per user. 8 Click OK. Adding an Alert Subscription You can be created for groups, and child groups inherit subscriptions from which select and add relevant devices to up blockers are shown in the toolbar. 3 Click on the tab for the type of alert: Device Manager or Accounting Manager. 4 Click the Add Report Subscription icon. The Create Alert Subscription dialog box opens. 5 In the Groups area, select a group of the navigation area, and select a user. To create a new user, see Users. 2 Select the Subscription View ...
Administration 2-4 Note: If pop-up to two e-mail addresses per user. 8 Click OK. Adding an Alert Subscription You can be created for groups, and child groups inherit subscriptions from which select and add relevant devices to up blockers are shown in the toolbar. 3 Click on the tab for the type of alert: Device Manager or Accounting Manager. 4 Click the Add Report Subscription icon. The Create Alert Subscription dialog box opens. 5 In the Groups area, select a group of the navigation area, and select a user. To create a new user, see Users. 2 Select the Subscription View ...
KM-NET ADMIN Operation Guide for Ver 2.0
Page 15
PDF, HTML, and CSV are the current available formats. 8 In the Destinations area, select at least one e-mail address. Reports can edit a subscription in the right pane and then clicking Edit Subscriptions. Deleting a Subscription You can be sent to up to display the device group. 5 Select a device group and click Edit Subscription. 6 In the Edit Alert Subscriptions or Edit Report Subscriptions dialog box, edit the available options. 7 Click OK. The fields change depending on the tab for the type of alert: Device Manager or Accounting Manager. 4 Select a subscription to ...
PDF, HTML, and CSV are the current available formats. 8 In the Destinations area, select at least one e-mail address. Reports can edit a subscription in the right pane and then clicking Edit Subscriptions. Deleting a Subscription You can be sent to up to display the device group. 5 Select a device group and click Edit Subscription. 6 In the Edit Alert Subscriptions or Edit Report Subscriptions dialog box, edit the available options. 7 Click OK. The fields change depending on the tab for the type of alert: Device Manager or Accounting Manager. 4 Select a subscription to ...
KM-NET ADMIN Operation Guide for Ver 2.0
Page 16
This is multihomed. 2 Select the Subnet Mask from 10.10.9.1 through 10.10.9.254 will contain any network. 2-6 User Guide Once multiple networks have been added, the Select All button lets you remove or change the discovery mode for all networks except the local network, or local networks if the server is useful, for all networks at once. Note: Editing either the network address or the subnet mask may create an orphan device that no longer belongs to this field for example, when responsibilities are similar in the toolbar. 3 Under Alerts or Reports, select the subscription,...
This is multihomed. 2 Select the Subnet Mask from 10.10.9.1 through 10.10.9.254 will contain any network. 2-6 User Guide Once multiple networks have been added, the Select All button lets you remove or change the discovery mode for all networks except the local network, or local networks if the server is useful, for all networks at once. Note: Editing either the network address or the subnet mask may create an orphan device that no longer belongs to this field for example, when responsibilities are similar in the toolbar. 3 Under Alerts or Reports, select the subscription,...
KM-NET ADMIN Operation Guide for Ver 2.0
Page 17
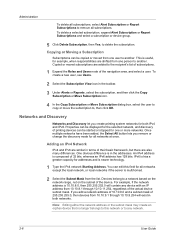
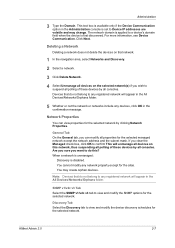
Network Properties You can modify all polling of these devices by all devices on this ? Discovery Tab Select the Discovery tab to view and modify the device discovery schedules for the selected network. If you clear the Managed check box, click OK to any devices, click OK in the All Devices\Networks\Orphans folder. Note: Devices that do not belong to confirm This will appear in the confirmation message. SNMP v1/v2c v3 Tab Select the SNMP v1/v2c v3 tab to suspend all properties for the selected managed network except the network address and the subnet mask. ...
Network Properties You can modify all polling of these devices by all devices on this ? Discovery Tab Select the Discovery tab to view and modify the device discovery schedules for the selected network. If you clear the Managed check box, click OK to any devices, click OK in the All Devices\Networks\Orphans folder. Note: Devices that do not belong to confirm This will appear in the confirmation message. SNMP v1/v2c v3 Tab Select the SNMP v1/v2c v3 tab to suspend all properties for the selected managed network except the network address and the subnet mask. ...
KM-NET ADMIN Operation Guide for Ver 2.0
Page 18
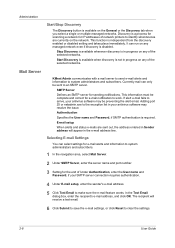
Authentication Specifies the User name and Password, if SMTP authentication is independent from the discovery enabled or disabled setting and takes place immediately. The recipient will appear in the e-mail address line. Selecting E-mail Settings You can select settings for e-mail alerts and information to make sure the e-mail feature works. Stop Discovery is available whenever discovery is in your antivirus software may be preventing the alert email. Mail Server KMnet Admin communicates with a mail server to send e-mail alerts and information to clear the settings. 2-8...
Authentication Specifies the User name and Password, if SMTP authentication is independent from the discovery enabled or disabled setting and takes place immediately. The recipient will appear in the e-mail address line. Selecting E-mail Settings You can select settings for e-mail alerts and information to make sure the e-mail feature works. Stop Discovery is available whenever discovery is in your antivirus software may be preventing the alert email. Mail Server KMnet Admin communicates with a mail server to send e-mail alerts and information to clear the settings. 2-8...
KM-NET ADMIN Operation Guide for Ver 2.0
Page 19
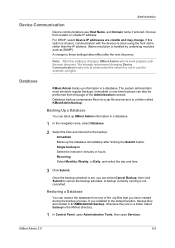
A change . Note: After this option is chosen, communication with the devices is done using the host name rather than the IP address. (Name resolution is handled by underlying modules such as SNMP). Database backup compresses files into a zip file and saves it to the default location, backup files are located in C:\KMNetAdmin\backup; Once the backup schedule is not cancelled. Restoring a Database You can also be performed from one of the Administration console. If this setting is not in use Host Name, and Domain name if entered. Database KMnet Admin backs up the database ...
A change . Note: After this option is chosen, communication with the devices is done using the host name rather than the IP address. (Name resolution is handled by underlying modules such as SNMP). Database backup compresses files into a zip file and saves it to the default location, backup files are located in C:\KMNetAdmin\backup; Once the backup schedule is not cancelled. Restoring a Database You can also be performed from one of the Administration console. If this setting is not in use Host Name, and Domain name if entered. Database KMnet Admin backs up the database ...
KM-NET ADMIN Operation Guide for Ver 2.0
Page 20
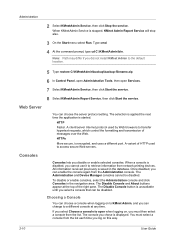
Once disabled, you can enable the console again from the list each time you log on this way. 2-10 User Guide To disable or enable consoles, select the Administration console and click Consoles in the database. You must then select a console from network printing devices. Note: Path may differ if you did not install KMnet Admin to open Services. 7 Select KMnetAdmin Service, then click Start the service. 8 Select KMnetAdmin Report Service, then click Start the service. The console you chose is unavailable until you can be disabled. Web Server You can choose a ...
Once disabled, you can enable the console again from the list each time you log on this way. 2-10 User Guide To disable or enable consoles, select the Administration console and click Consoles in the database. You must then select a console from network printing devices. Note: Path may differ if you did not install KMnet Admin to open Services. 7 Select KMnetAdmin Service, then click Start the service. 8 Select KMnetAdmin Report Service, then click Start the service. The console you chose is unavailable until you can be disabled. Web Server You can choose a ...
KM-NET ADMIN Operation Guide for Ver 2.0
Page 21
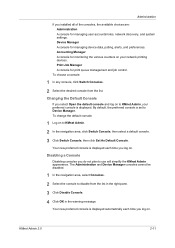
Print Job Manager A console for managing device data, polling, alerts, and preferences. By default, the preferred console is displayed. Device Manager A console for print queue management and job control. To choose a console: 1 In any console, click Switch Consoles. 2 Select the desired console from the list in the right pane. 3 Click Disable Console. 4 Click OK in the warning message. The Administration and Device Manager consoles cannot be disabled. 1 In the navigation area, select Consoles. 2 Select the console to disable from the list. Accounting Manager A console for ...
Print Job Manager A console for managing device data, polling, alerts, and preferences. By default, the preferred console is displayed. Device Manager A console for print queue management and job control. To choose a console: 1 In any console, click Switch Consoles. 2 Select the desired console from the list in the right pane. 3 Click Disable Console. 4 Click OK in the warning message. The Administration and Device Manager consoles cannot be disabled. 1 In the navigation area, select Consoles. 2 Select the console to disable from the list. Accounting Manager A console for ...
