PRESCRIBE Commands Technical Reference Manual - Rev. 4.7
Page 111
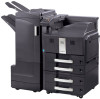
... error message and pause the job when running out of staples. 3: Combination of value 1 and 2. 4: Displays an error message and pause the job when the waste punch box is full. 5: Combination of value 1 and 4. 6: Combination of value 2 and 4. 7: Combination of value 1, 2 and 4. 8: Displays an error message and pause the job when... message. 3: Prints the error report and displays the error message. Loads Letter, A4 or A3 size paper depending on the image size. a Supported only by FS-1500 series, FS-1600 series, FS-3400 series, and FS-3600 series. 6-11
... error message and pause the job when running out of staples. 3: Combination of value 1 and 2. 4: Displays an error message and pause the job when the waste punch box is full. 5: Combination of value 1 and 4. 6: Combination of value 2 and 4. 7: Combination of value 1, 2 and 4. 8: Displays an error message and pause the job when... message. 3: Prints the error report and displays the error message. Loads Letter, A4 or A3 size paper depending on the image size. a Supported only by FS-1500 series, FS-1600 series, FS-3400 series, and FS-3600 series. 6-11

FS-C8500DN Installation Instructions
Page 1
... and gently push it from side to side several times so that color. 5 Press the release button and pull out the waste toner tray. 6 Open the cap of the new waste toner box to lock it to the storage location. Cap Black (K) Cyan (C) Yellow (Y) Magenta (M) 8 Press on the left edge ... sound. 10 Close the front cover. CD-ROMs Manuals and Other Printed Materials 2 Removing the Lift Plate Stoppers 1 Pull out the paper cassettes 1 and 2. Clearance FS-C8500DN 400 mm (15-3/4") 300 mm (11-13/16") 300 mm (11-13/16") 100 mm (3-15/16") 1,000 mm (39-3/8") Installation Guide Environment •...
... and gently push it from side to side several times so that color. 5 Press the release button and pull out the waste toner tray. 6 Open the cap of the new waste toner box to lock it to the storage location. Cap Black (K) Cyan (C) Yellow (Y) Magenta (M) 8 Press on the left edge ... sound. 10 Close the front cover. CD-ROMs Manuals and Other Printed Materials 2 Removing the Lift Plate Stoppers 1 Pull out the paper cassettes 1 and 2. Clearance FS-C8500DN 400 mm (15-3/4") 300 mm (11-13/16") 300 mm (11-13/16") 100 mm (3-15/16") 1,000 mm (39-3/8") Installation Guide Environment •...

FS-C8500DN Operation Guide
Page 3
... Account.Set. (Job Account setting 4-94 Administrator (Administrator settings 4-102 Adjust/Maint. (Adjust/Maintenance selection/setting) ........ 4-105 5 Maintenance General Information 5-2 Toner Container Replacement 5-2 Replacing the Waste Toner Box 5-6 Cleaning the Printer 5-8 6 Troubleshooting General Guidelines 6-2 Print Quality Problems 6-3 Error Messages 6-5 Clearing Paper Jams 6-15 iii
... Account.Set. (Job Account setting 4-94 Administrator (Administrator settings 4-102 Adjust/Maint. (Adjust/Maintenance selection/setting) ........ 4-105 5 Maintenance General Information 5-2 Toner Container Replacement 5-2 Replacing the Waste Toner Box 5-6 Cleaning the Printer 5-8 6 Troubleshooting General Guidelines 6-2 Print Quality Problems 6-3 Error Messages 6-5 Clearing Paper Jams 6-15 iii

FS-C8500DN Operation Guide
Page 24
Internal Components 23 24 25 26 27 28 29 30 31 32 33 34 23 Black Toner Container (K) 24 Black Toner Container (K) Release Lever 25 Yellow Toner Container (Y) 26 Yellow Toner Container (Y) Release Lever 27 Cyan Toner Container (C) 28 Cyan Toner Container (C) Release Lever 29 Magenta Toner Container (M) 30 Magenta Toner Container (M) Release Lever 31 Cleaning Brush 32 Waste Toner Box 33 Waste Toner Tray 34 Release button 36 35 37 38 39 35 Paper Feed Unit Cover 36 Paper Feed Unit 37 Green Knob 38 Paper Width Adjusting Tab 39 Paper Length Guide 1-4 Machine Parts
Internal Components 23 24 25 26 27 28 29 30 31 32 33 34 23 Black Toner Container (K) 24 Black Toner Container (K) Release Lever 25 Yellow Toner Container (Y) 26 Yellow Toner Container (Y) Release Lever 27 Cyan Toner Container (C) 28 Cyan Toner Container (C) Release Lever 29 Magenta Toner Container (M) 30 Magenta Toner Container (M) Release Lever 31 Cleaning Brush 32 Waste Toner Box 33 Waste Toner Tray 34 Release button 36 35 37 38 39 35 Paper Feed Unit Cover 36 Paper Feed Unit 37 Green Knob 38 Paper Width Adjusting Tab 39 Paper Length Guide 1-4 Machine Parts

FS-C8500DN Operation Guide
Page 42
... corners 90° ±0.2° Moisture content 4 % to 44 pounds). Using the wrong paper can result in paper jams, curling, poor print quality, and paper waste, and in extreme cases can also affect the machine's performance. There are given on the following table summarizes the basic paper specifications. This is affected...
... corners 90° ±0.2° Moisture content 4 % to 44 pounds). Using the wrong paper can result in paper jams, curling, poor print quality, and paper waste, and in extreme cases can also affect the machine's performance. There are given on the following table summarizes the basic paper specifications. This is affected...

FS-C8500DN Operation Guide
Page 133
...; Press [Stop] to cancel the printing itself. 1-sided • To print onto one-side of sheets exceeds the stapling limit) • Punch Waste Full (Setting when the punch waste box is full) • Paper Mismatch (Detection settings for duplex printing, the Duplex disabled error message will be displayed and printing will stop...
...; Press [Stop] to cancel the printing itself. 1-sided • To print onto one-side of sheets exceeds the stapling limit) • Punch Waste Full (Setting when the punch waste box is full) • Paper Mismatch (Detection settings for duplex printing, the Duplex disabled error message will be displayed and printing will stop...

FS-C8500DN Operation Guide
Page 135
...without punching. 1 In the Error Handling menu, press U or V to select Stapling Limit. 2 Press [OK]. Punch Waste Full (Setting when the punch waste box is full) This setting can be specified when a punch unit is replaced in the punch unit. Printing Error automatically ...resumes when the punch waste is discarded and the punch waste box is installed on the optional 3,000 Sheet Document Finisher. Punch Waste Full: a b 1 *Ignore 2 Display Error 3 Press U or V to select the setting ...
...without punching. 1 In the Error Handling menu, press U or V to select Stapling Limit. 2 Press [OK]. Punch Waste Full (Setting when the punch waste box is full) This setting can be specified when a punch unit is replaced in the punch unit. Printing Error automatically ...resumes when the punch waste is discarded and the punch waste box is installed on the optional 3,000 Sheet Document Finisher. Punch Waste Full: a b 1 *Ignore 2 Display Error 3 Press U or V to select the setting ...

FS-C8500DN Operation Guide
Page 175
5 Maintenance This chapter contains explanations on the following topics: General Information 5-2 Toner Container Replacement 5-2 Replacing the Waste Toner Box 5-6 Cleaning the Printer 5-8 Maintenance 5-1
5 Maintenance This chapter contains explanations on the following topics: General Information 5-2 Toner Container Replacement 5-2 Replacing the Waste Toner Box 5-6 Cleaning the Printer 5-8 Maintenance 5-1
FS-C8500DN Operation Guide
Page 176
... of Toner Container Replacement The life of the first toner kits can replace the following component according to the printer's display: • Toner Kits • Waste Toner Box Also, the following parts need periodic cleaning: • Separator • Transfer Roller Note Information Collection on Memory Chips - According to ISO/IEC 19798...
... of Toner Container Replacement The life of the first toner kits can replace the following component according to the printer's display: • Toner Kits • Waste Toner Box Also, the following parts need periodic cleaning: • Separator • Transfer Roller Note Information Collection on Memory Chips - According to ISO/IEC 19798...

FS-C8500DN Operation Guide
Page 177
... any damages or problems arising from the use genuine Kyocera Mita Parts and Supplies. CAUTION Do not attempt to Cleaning the Printer on page 5-8. For optimum performance, it is not liable against any color, always replace the waste toner box at the same time. In this box..., temporarily move storage media and computer supplies (such as original Kyocera Mita toner containers. If this example, it in the printer will stop printing. Kyocera Mita Corporation is also recommended to avoid damaging media by the waste toner that you only use of toner. Any data that you...
... any damages or problems arising from the use genuine Kyocera Mita Parts and Supplies. CAUTION Do not attempt to Cleaning the Printer on page 5-8. For optimum performance, it is not liable against any color, always replace the waste toner box at the same time. In this box..., temporarily move storage media and computer supplies (such as original Kyocera Mita toner containers. If this example, it in the printer will stop printing. Kyocera Mita Corporation is also recommended to avoid damaging media by the waste toner that you only use of toner. Any data that you...

FS-C8500DN Operation Guide
Page 179
Maintenance 5-5 Proceed to the horizontal position. 7 Hold the new toner container with Federal, State and Local rules and regulations. Note After use, always dispose of the other colors. 9 Close the front cover. Use the same procedure to replace the toner containers of the toner container and the waste toner box in accordance with both hands and gently push it in. 8 Turn the toner container release lever to the next section.
Maintenance 5-5 Proceed to the horizontal position. 7 Hold the new toner container with Federal, State and Local rules and regulations. Note After use, always dispose of the other colors. 9 Close the front cover. Use the same procedure to replace the toner containers of the toner container and the waste toner box in accordance with both hands and gently push it in. 8 Turn the toner container release lever to the next section.

FS-C8500DN Operation Guide
Page 180
Message is included with the toner kit. A new waste toner box is displayed. The waste toner box needs to be replaced before the printer will operate. 1 Open the front cover. 2 Press the release button and pull out the waste toner tray. 3 Cap the old waste toner box. 4 Remove the old waste toner box diagonally. 5 Place the old waste toner box in the provided plastic disposal bag. 5-6 Maintenance Replacing the Waste Toner Box Replace the waste toner box when the Check waste toner box.
Message is included with the toner kit. A new waste toner box is displayed. The waste toner box needs to be replaced before the printer will operate. 1 Open the front cover. 2 Press the release button and pull out the waste toner tray. 3 Cap the old waste toner box. 4 Remove the old waste toner box diagonally. 5 Place the old waste toner box in the provided plastic disposal bag. 5-6 Maintenance Replacing the Waste Toner Box Replace the waste toner box when the Check waste toner box.

FS-C8500DN Operation Guide
Page 181
When the tray reaches the correct position, it . 9 Press the specified position to lock it locks into place with a "click" sound. 10 Close the front cover. For instructions, refer to Cleaning the Printer on the left edge of the new waste toner box. 7 Install the new waste toner box. 8 Press on page 5-8. 6 Open the cap of the new waste toner box to set the waste toner tray. Maintenance 5-7 After replacing the toner containers and the waste toner box, clean the paper transfer unit.
When the tray reaches the correct position, it . 9 Press the specified position to lock it locks into place with a "click" sound. 10 Close the front cover. For instructions, refer to Cleaning the Printer on the left edge of the new waste toner box. 7 Install the new waste toner box. 8 Press on page 5-8. 6 Open the cap of the new waste toner box to set the waste toner tray. Maintenance 5-7 After replacing the toner containers and the waste toner box, clean the paper transfer unit.

FS-C8500DN Operation Guide
Page 182
... as well as when the toner container is replaced to side along the separator as soiling of the printer whenever the toner container or the waste toner box is replaced. Follow the steps below to clean the separator. 1 Open the front cover. 2 Remove the cleaning brush (blue). 3 Pull up the left...
... as well as when the toner container is replaced to side along the separator as soiling of the printer whenever the toner container or the waste toner box is replaced. Follow the steps below to clean the separator. 1 Open the front cover. 2 Remove the cleaning brush (blue). 3 Pull up the left...

FS-C8500DN Operation Guide
Page 196
... the color (cyan, magenta, yellow) toner container. Replace the toner. For details, refer to Replacing the Waste Toner Box on page 5-6. To print without punching, press [OK]. Replace the waste toner box. For details, refer to ColorToner Empty (Setting when color toner runs out) on page 4-80.... Corrective Action Stapling is not possible because a paper size that tray # is not installed. Newly added jobs are printed in . Check waste toner box. The waste toner box is not correctly installed. To print without offsetting, press [OK]. For details, refer to Replacing the...
... the color (cyan, magenta, yellow) toner container. Replace the toner. For details, refer to Replacing the Waste Toner Box on page 5-6. To print without punching, press [OK]. Replace the waste toner box. For details, refer to ColorToner Empty (Setting when color toner runs out) on page 4-80.... Corrective Action Stapling is not possible because a paper size that tray # is not installed. Newly added jobs are printed in . Check waste toner box. The waste toner box is not correctly installed. To print without offsetting, press [OK]. For details, refer to Replacing the...

FS-C8500DN Operation Guide
Page 197
... finisher is empty again, the printer will continue printing into the folding unit. Set the punch waste box. Remove paper from the inner tray. Correctly install the punch waste box as explained in the 3,000 Sheet Document Finisher Operation Guide. The inner tray of the optional... Action Tray # of the optional 3,000 Sheet Document Finisher is full. Remove paper under the folding tray of Paper. Empty the punch waste box. Message Mailbox tray # is full of the finisher. Replace the staple case as explained in the 3,000 Sheet Document Finisher Operation Guide...
... finisher is empty again, the printer will continue printing into the folding unit. Set the punch waste box. Remove paper from the inner tray. Correctly install the punch waste box as explained in the 3,000 Sheet Document Finisher Operation Guide. The inner tray of the optional... Action Tray # of the optional 3,000 Sheet Document Finisher is full. Remove paper under the folding tray of Paper. Empty the punch waste box. Message Mailbox tray # is full of the finisher. Replace the staple case as explained in the 3,000 Sheet Document Finisher Operation Guide...

FS-C8500DN Operation Guide
Page 233
Top Tray 1-2 Transfer Roller Cleaning 5-9 Transparency 3-8 Troubleshooting 6-1 U USB Interface 1-3 USB Memory Print 4-16 Remove 4-21 Slot 1-2, 1-5 W Waste Toner Box 1-4 Replacing 5-6 Wide A4 4-63 X XPS Fit to Page 4-63 Index-3
Top Tray 1-2 Transfer Roller Cleaning 5-9 Transparency 3-8 Troubleshooting 6-1 U USB Interface 1-3 USB Memory Print 4-16 Remove 4-21 Slot 1-2, 1-5 W Waste Toner Box 1-4 Replacing 5-6 Wide A4 4-63 X XPS Fit to Page 4-63 Index-3


