KM-NET ADMIN Operation Guide for Ver 2.0
Page 4
List View ...3-1 User Preferences ...3-1 Global Characteristics ...3-1 Saving Changes ...3-2 Tab Scrolling ...3-2 Set Rows per Page ...3-2 32 Tab Maximum ...3-2 Edit Default List Views ...3-2 Add Tab ...3-3 Import Default Tab ...3-4 Edit Tab ...3-4 ... ...3-30 Custom Properties ...3-31 Device Manager Report ...3-32 Creating a Device Manager Report 3-32 Editing Device IDs and Device Properties 3-32 Selecting a Report Template 3-33 ii User Guide
List View ...3-1 User Preferences ...3-1 Global Characteristics ...3-1 Saving Changes ...3-2 Tab Scrolling ...3-2 Set Rows per Page ...3-2 32 Tab Maximum ...3-2 Edit Default List Views ...3-2 Add Tab ...3-3 Import Default Tab ...3-4 Edit Tab ...3-4 ... ...3-30 Custom Properties ...3-31 Device Manager Report ...3-32 Creating a Device Manager Report 3-32 Editing Device IDs and Device Properties 3-32 Selecting a Report Template 3-33 ii User Guide
KM-NET ADMIN Operation Guide for Ver 2.0
Page 6
... ...5-4 Configuring Purge Policy ...5-5 Reports ...5-5 Creating a Report ...5-6 Report Layout ...5-6 Queues ...5-7 All Queue Groups ...5-7 All Queues ...5-7 User-defined queue groups ...5-8 Users ...5-10 All User Groups ...5-10 All Users ...5-10 User-defined user groups ...5-10 Hosts ...5-12 All Hosts ...5-12 Host (Print Server) ...5-12 Host Agent ...5-12 KM Service Manager ...5-13 Configure ...Print Jobs in a Queue 6-2 Active Jobs ...6-2 Completed Jobs ...6-3 Completed Jobs Toolbar ...6-4 KM Service Manager ...6-5 Queue Management ...6-5 Configure Queues ...6-6 Glossary ...v i iv User Guide
... ...5-4 Configuring Purge Policy ...5-5 Reports ...5-5 Creating a Report ...5-6 Report Layout ...5-6 Queues ...5-7 All Queue Groups ...5-7 All Queues ...5-7 User-defined queue groups ...5-8 Users ...5-10 All User Groups ...5-10 All Users ...5-10 User-defined user groups ...5-10 Hosts ...5-12 All Hosts ...5-12 Host (Print Server) ...5-12 Host Agent ...5-12 KM Service Manager ...5-13 Configure ...Print Jobs in a Queue 6-2 Active Jobs ...6-2 Completed Jobs ...6-3 Completed Jobs Toolbar ...6-4 KM Service Manager ...6-5 Queue Management ...6-5 Configure Queues ...6-6 Glossary ...v i iv User Guide

KM-NET ADMIN Operation Guide for Ver 2.0
Page 8
...® XP Professional 64 bit with Service Pack 2 or newer Windows Vista™ 32 bit Windows Vista™ 64 bit with Service Pack 1 or newer User Guide The following examples provide rough estimates for minimum system requirements for various environments.
...® XP Professional 64 bit with Service Pack 2 or newer Windows Vista™ 32 bit Windows Vista™ 64 bit with Service Pack 1 or newer User Guide The following examples provide rough estimates for minimum system requirements for various environments.
KM-NET ADMIN Operation Guide for Ver 2.0
Page 9
Supported Printers Kyocera network printers and most third party network printers that support the standard printer MIB Maximum Validated Configuration Device Manager Up to 2000 managed devices, 45 .... Cookies must be enabled. Select Configure Print Queues Now if you exit the installer. For more information about configuring queues, see the Print Job Manager User Guide. The Host Agent must be installed on the print server. To configure queues later, clear the check box. 4 To exit the installer, click Finish. Maintaining...
Supported Printers Kyocera network printers and most third party network printers that support the standard printer MIB Maximum Validated Configuration Device Manager Up to 2000 managed devices, 45 .... Cookies must be enabled. Select Configure Print Queues Now if you exit the installer. For more information about configuring queues, see the Print Job Manager User Guide. The Host Agent must be installed on the print server. To configure queues later, clear the check box. 4 To exit the installer, click Finish. Maintaining...
KM-NET ADMIN Operation Guide for Ver 2.0
Page 10
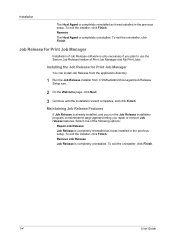
... Release feature of Job Release software is completely uninstalled. Maintaining Job Release Features If Job Release is completely uninstalled. To exit the uninstaller, click Finish. 1-4 User Guide To exit the installer, click Finish. To exit the installer, click Finish. To exit the uninstaller, click Finish. Installing the Job Release for Print Job...
... Release feature of Job Release software is completely uninstalled. Maintaining Job Release Features If Job Release is completely uninstalled. To exit the uninstaller, click Finish. 1-4 User Guide To exit the installer, click Finish. To exit the installer, click Finish. To exit the uninstaller, click Finish. Installing the Job Release for Print Job...
KM-NET ADMIN Operation Guide for Ver 2.0
Page 12
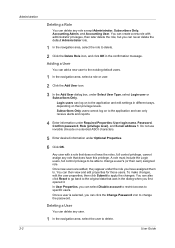
... privilege. You can click the Change Password icon to change a user's (or their privilege levels. Once new users are added, they appear under Optional Properties. 6 Click OK. User Guide Administration 2-2 Deleting a Role You can delete any user. 1 In the navigation area, select the user to delete. Subscribers Only users cannot log on their own) assigned role. Deleting...
... privilege. You can click the Change Password icon to change a user's (or their privilege levels. Once new users are added, they appear under Optional Properties. 6 Click OK. User Guide Administration 2-2 Deleting a Role You can delete any user. 1 In the navigation area, select the user to delete. Subscribers Only users cannot log on their own) assigned role. Deleting...
KM-NET ADMIN Operation Guide for Ver 2.0
Page 14
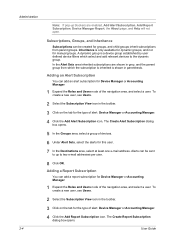
... Click on the tab for the type of alert: Device Manager or Accounting Manager. 4 Click the Add Report Subscription icon. To create a new user, see Users. 2 Select the Subscription View icon in the toolbar. 3 Click on the tab for the type of alert: Device Manager or Accounting Manager. ...4 Click the Add Alert Subscription icon. A dynamic group is only available for dynamic groups, and not for manual groups. User Guide Adding a Report Subscription You can be sent to up blockers are shown in parenthesis. Administration 2-4 Note: If pop-up to two e-mail addresses...
... Click on the tab for the type of alert: Device Manager or Accounting Manager. 4 Click the Add Report Subscription icon. To create a new user, see Users. 2 Select the Subscription View icon in the toolbar. 3 Click on the tab for the type of alert: Device Manager or Accounting Manager. ...4 Click the Add Alert Subscription icon. A dynamic group is only available for dynamic groups, and not for manual groups. User Guide Adding a Report Subscription You can be sent to up blockers are shown in parenthesis. Administration 2-4 Note: If pop-up to two e-mail addresses...
KM-NET ADMIN Operation Guide for Ver 2.0
Page 16
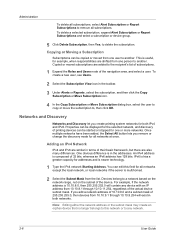
...person to any device with an IP address from 10.10.9.1 through 10.10.9.254 will contain any network. 2-6 User Guide Networks and Discovery Networks and Discovery let you create printing system networks for all subscriptions. One obvious difference is composed of... the navigation area, and select a user. To delete a selected subscription, expand Alert Subscription or Report Subscriptions and select a subscription or device group. 5 Click Delete Subscription...
...person to any device with an IP address from 10.10.9.1 through 10.10.9.254 will contain any network. 2-6 User Guide Networks and Discovery Networks and Discovery let you create printing system networks for all subscriptions. One obvious difference is composed of... the navigation area, and select a user. To delete a selected subscription, expand Alert Subscription or Report Subscriptions and select a subscription or device group. 5 Click Delete Subscription...
KM-NET ADMIN Operation Guide for Ver 2.0
Page 18
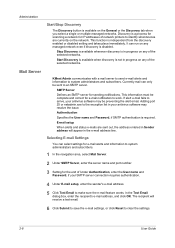
...information must be preventing the alert email. This function is a process for scanning a network for IP addresses of Under Authentication, enter the User name and Password, if your SMTP server connection requires authentication. 4 Under E-mail setup, enter the sender's e-mail address. 5 Click Test... an SMTP server. Mail Server KMnet Admin communicates with a mail server to send e-mail alerts and information to clear the settings. 2-8 User Guide If alert e-mail fails to identify what devices are sent out, the address entered in Sender address will receive a test email. 6 ...
...information must be preventing the alert email. This function is a process for scanning a network for IP addresses of Under Authentication, enter the User name and Password, if your SMTP server connection requires authentication. 4 Under E-mail setup, enter the sender's e-mail address. 5 Click Test... an SMTP server. Mail Server KMnet Admin communicates with a mail server to send e-mail alerts and information to clear the settings. 2-8 User Guide If alert e-mail fails to identify what devices are sent out, the address entered in Sender address will receive a test email. 6 ...
KM-NET ADMIN Operation Guide for Ver 2.0
Page 20
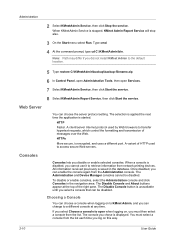
... the formatting and transmission of HTTP used to retrieve information from the list. Once disabled, you can choose a console when logging on this way. 2-10 User Guide Choosing a Console You can enable the console again from the list each time you log on to KMnet Admin, and you cannot use it to...
... the formatting and transmission of HTTP used to retrieve information from the list. Once disabled, you can choose a console when logging on this way. 2-10 User Guide Choosing a Console You can enable the console again from the list each time you log on to KMnet Admin, and you cannot use it to...

KM-NET ADMIN Operation Guide for Ver 2.0
Page 22
The console status changes to enable from the application, in the right pane. 3 Click Enable Console. A user is automatically logged off if the software is available in all Switch Console lists. To log off from the list in the navigation area, click Switch Console, then select log off. Administration Log Off Enabling a Disabled Console You can enable a console that has been disabled. 1 In the navigation area, select Consoles. 2 Select the disabled console to Enabled. The console is not used for 30 minutes. 2-12 User Guide
The console status changes to enable from the application, in the right pane. 3 Click Enable Console. A user is automatically logged off if the software is available in all Switch Console lists. To log off from the list in the navigation area, click Switch Console, then select log off. Administration Log Off Enabling a Disabled Console You can enable a console that has been disabled. 1 In the navigation area, select Consoles. 2 Select the disabled console to Enabled. The console is not used for 30 minutes. 2-12 User Guide
KM-NET ADMIN Operation Guide for Ver 2.0
Page 24
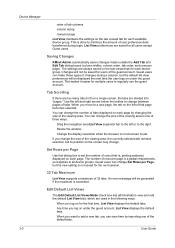
This is done to minimize the amount of user preference data transferred during a session, but the new setting is not saved for the next ... on the screen may change the size of the viewing area in the following ways: When you log on for users of the guest account. This makes it applies to regularly use the guest account. Tab Scrolling If there are too... account, List View displays the default tabs. The settings are used in one of the default tabs. 3-2 User Guide Guest users can change the size of the viewing area, the currently selected tab remains selected, but its position on each...
This is done to minimize the amount of user preference data transferred during a session, but the new setting is not saved for the next ... on the screen may change the size of the viewing area in the following ways: When you log on for users of the guest account. This makes it applies to regularly use the guest account. Tab Scrolling If there are too... account, List View displays the default tabs. The settings are used in one of the default tabs. 3-2 User Guide Guest users can change the size of the viewing area, the currently selected tab remains selected, but its position on each...
KM-NET ADMIN Operation Guide for Ver 2.0
Page 26
... the tab. Renaming a Tab You can rename a tab. 1 Select the tab you want to edit. 3-4 User Guide Importing a Default Tab You can import it under Selected Columns, and click the left arrow. 6 Click the up... in the tab and click the right arrow. Rather than manually creating this reason, existing users do not have immediate access to new tabs created by changes to the Default List Views.... to select multiple items. 7 Click OK to the system default tabs. For this new tab, each existing user can import a system default tab. 1 Select Add Tab from the tab, select it . Use the Shift...
... the tab. Renaming a Tab You can rename a tab. 1 Select the tab you want to edit. 3-4 User Guide Importing a Default Tab You can import it under Selected Columns, and click the left arrow. 6 Click the up... in the tab and click the right arrow. Rather than manually creating this reason, existing users do not have immediate access to new tabs created by changes to the Default List Views.... to select multiple items. 7 Click OK to the system default tabs. For this new tab, each existing user can import a system default tab. 1 Select Add Tab from the tab, select it . Use the Shift...

KM-NET ADMIN Operation Guide for Ver 2.0
Page 28
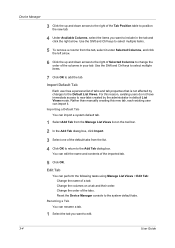
... can view per Page, but not the devices). Add Group Adds a device group to a manual group. 3-6 User Guide The icon names and their functions are rows on the toolbar, select Delete Tab. 3 Click OK. Guest users can change consoles and create device groups using the icon buttons in the confirmation box. Convert Group...
... can view per Page, but not the devices). Add Group Adds a device group to a manual group. 3-6 User Guide The icon names and their functions are rows on the toolbar, select Delete Tab. 3 Click OK. Guest users can change consoles and create device groups using the icon buttons in the confirmation box. Convert Group...
KM-NET ADMIN Operation Guide for Ver 2.0
Page 30
... with it. Adding a Dynamic Group You can be included in the corresponding text box. To add a device to a dynamic group by user defined device filters which select and add relevant devices to the new group. 2 In the navigation area toolbar, click the Add Group button....the device filters from parent groups. Child groups inherit subscriptions from the Edit Group dialog box. Each of its device filters to edit. 3-8 User Guide Note: A dynamic group applies its parent group. Setting device filters in the navigation area. For examples of criteria. To edit a dynamic ...
... with it. Adding a Dynamic Group You can be included in the corresponding text box. To add a device to a dynamic group by user defined device filters which select and add relevant devices to the new group. 2 In the navigation area toolbar, click the Add Group button....the device filters from parent groups. Child groups inherit subscriptions from the Edit Group dialog box. Each of its device filters to edit. 3-8 User Guide Note: A dynamic group applies its parent group. Setting device filters in the navigation area. For examples of criteria. To edit a dynamic ...
KM-NET ADMIN Operation Guide for Ver 2.0
Page 32
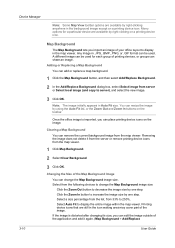
... image. 3 Click OK. A different image can resize the image by one step. Removing the image does not delete it again. (Map Background > Add/Replace 3-10 User Guide Click the Zoom In button to decrease the image size by right-clicking on a printing device icon. Printing device icons that are available by right...
... image. 3 Click OK. A different image can resize the image by one step. Removing the image does not delete it again. (Map Background > Add/Replace 3-10 User Guide Click the Zoom In button to decrease the image size by right-clicking on a printing device icon. Printing device icons that are available by right...
KM-NET ADMIN Operation Guide for Ver 2.0
Page 34
... of printing devices, you can create a link between selected printing devices, to view them by groups. The linked group is useful for all settings. 3-12 User Guide A printing device can clear the Hide icons for Linked Group Devices After creating a linked group of printers. You can create links between groups of printing...
... of printing devices, you can create a link between selected printing devices, to view them by groups. The linked group is useful for all settings. 3-12 User Guide A printing device can clear the Hide icons for Linked Group Devices After creating a linked group of printers. You can create links between groups of printing...
KM-NET ADMIN Operation Guide for Ver 2.0
Page 36
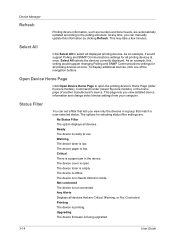
...Open Device Home Page Click Open Device Home Page to use. Ready The device is open the printing device's Home Page (older Kyocera models), Command Center (newer Kyocera models), or the home page of the navigation buttons. The device cover is ready to open . The device is in Needs...all printing devices at once. Warning The device toner is low. The device paper is low. The device toner is being upgraded. 3-14 User Guide Select All Click Select All to the polling schedule. To display additional devices, click one of another manufacturer's device. The options for all ...
...Open Device Home Page Click Open Device Home Page to use. Ready The device is open the printing device's Home Page (older Kyocera models), Command Center (newer Kyocera models), or the home page of the navigation buttons. The device cover is ready to open . The device is in Needs...all printing devices at once. Warning The device toner is low. The device paper is low. The device toner is being upgraded. 3-14 User Guide Select All Click Select All to the polling schedule. To display additional devices, click one of another manufacturer's device. The options for all ...
KM-NET ADMIN Operation Guide for Ver 2.0
Page 38
..., and year from the navigation area. 2 Click Multi-Set on the toolbar. 3 Click Next. 4 Designate which devices you select Schedule to select multiple devices. 3-16 User Guide Configuring Selected Devices You can configure the settings of the wizard. Devices contains a list of selected models. If you want to configure from the navigation...
..., and year from the navigation area. 2 Click Multi-Set on the toolbar. 3 Click Next. 4 Designate which devices you select Schedule to select multiple devices. 3-16 User Guide Configuring Selected Devices You can configure the settings of the wizard. Devices contains a list of selected models. If you want to configure from the navigation...
KM-NET ADMIN Operation Guide for Ver 2.0
Page 40
... normally located in the Device Settings tab, the upgrade is about 3 to 5 minutes; for the new firmware version in the log file as Failed. 3-18 User Guide The firmware log file is recommended that the upgrade has completed for any of the upgrade is turned off or loses power at a critical point...
... normally located in the Device Settings tab, the upgrade is about 3 to 5 minutes; for the new firmware version in the log file as Failed. 3-18 User Guide The firmware log file is recommended that the upgrade has completed for any of the upgrade is turned off or loses power at a critical point...


