Konica Minolta MS6000 MK II Research
View Results Below
Free Konica Minolta MS6000 MK II manuals!
Problems with Konica Minolta MS6000 MK II?
Ask a Question
Free Konica Minolta MS6000 MK II manuals!
Problems with Konica Minolta MS6000 MK II?
Ask a Question
Related Manual Pages


Similar Questions

Konica Minolta Ps5000c Scanner Driver
Where can I find a Konica Minolta PS5000C scanner driver for windows 10
Where can I find a Konica Minolta PS5000C scanner driver for windows 10
(Posted by itd50668 5 months ago)

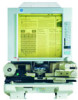
Ms6000 Mk Ii C1 Error (optical Path Switching Failure)
Hello, we have the MS6000 MKII scanner and after one scan occurs successfully, subsequent scans resu...
Hello, we have the MS6000 MKII scanner and after one scan occurs successfully, subsequent scans resu...
(Posted by tech10994 4 years ago)
Hello, Our Ms6000 Mkii Is Throwing A C1 Error When Scanning. The Description
for this error is "optical path switching failure". It works fine sometimes, but often the scanner p...
for this error is "optical path switching failure". It works fine sometimes, but often the scanner p...
(Posted by tech10994 4 years ago)


Konica Minolta Colour Book Scanner Lease
I want to lease a Konica Minolta Colour Book Scanner for a period of 3 years. Can you please give d...
I want to lease a Konica Minolta Colour Book Scanner for a period of 3 years. Can you please give d...
(Posted by ioketunji 12 years ago)
Related Terms
The following terms were also used when searching for Konica Minolta MS6000 MK II Research:- ms6000 mkii microfiche
- ms6000 mk ii price
- ms6000 mk ii scanner
- ms6000 mk ii support
- ms6000 mk ii toner
- ms6000 mk ii watches
- ms6000 mk ii windows 7
- ms6000 mkii
- ms6000 mkii driver
- ms6000 mkii drivers
- ms6000 mkii manual
- ms6000 mkii manual trim scan area
- ms6000 mk ii moves
- ms6000 mkii microfilm scanner
- ms6000 mkii price
- ms6000 mkii scanner
- ms6000 mkii toner
- ms6000 mkii user manual
- ms6000 mkii windows 7
- ms6000 mkii windows 7 drivers
- ms6000mk iii
- ms6000mk iis
- ms6000mkii microfilm reader and printer
- konica minolta ms6000 mkii price
- konica minolta ms 6000 mkii pricing
- konica minolta ms6000 mk ii moves
- konica minolta ms6000 mk ii scanner
- konica minolta ms6000 mk ii watches
- konica minolta ms6000 mkii
- konica minolta ms6000 mkii driver
- konica minolta ms6000 mkii drivers
- konica minolta ms6000 mkii manual
- konica minolta ms6000 mkii microfiche
- konica minolta ms6000 mkii microfilm scanner
- konica minolta minolta ms6000 mk ii
- konica minolta ms6000 mkii scanner
- konica minolta ms6000 mkii toner
- konica minolta ms6000 mkii user manual
- minolta ms6000 mk ii
- minolta ms6000 mkii
- minolta ms6000 mkii driver
- minolta ms6000mkii
- ms 6000 mkii pricing
- ms6000 mk ii
- ms6000 mk ii manual