User Guide
Page 2
...Kodak Driver Software installation 12 Installing application software 13 Scanner components 14 Locking the scanner 16 3 Using the Scanner 17 Turning the scanner on and off 17 Scanner positions 17 Tilting the scanner body 18 Adjusting the output tray 19 Adjusting the input tray 21 Adjusting the side guides 22 Start and stop scanning 22 Document... preparation 23 Verifying your scanner installation 24 Viewing test images 26 Understanding your scanning environment 26 Application software 26 ...
...Kodak Driver Software installation 12 Installing application software 13 Scanner components 14 Locking the scanner 16 3 Using the Scanner 17 Turning the scanner on and off 17 Scanner positions 17 Tilting the scanner body 18 Adjusting the output tray 19 Adjusting the input tray 21 Adjusting the side guides 22 Start and stop scanning 22 Document... preparation 23 Verifying your scanner installation 24 Viewing test images 26 Understanding your scanning environment 26 Application software 26 ...

User Guide
Page 3
... settings 80 The Diagnostics window 81 Diagnostics - General tab 81 Diagnostics - Example 1 67 Creating multiple images for each side of your documents - 4 Image Processing 39 Overview 39 Starting the Scan Validation Tool 39 Scan Validation Tool dialog box 40 Using the TWAIN datasource 41 ...Terminology and features 41 How do I begin 42 Selecting Image settings 43 Selecting Device settings 45 The main Kodak Scanner window 46 The Image Settings window 49 Preview area 50 General tab 51 Size tab 53 Adjustments tab: black and white 56 ...
... settings 80 The Diagnostics window 81 Diagnostics - General tab 81 Diagnostics - Example 1 67 Creating multiple images for each side of your documents - 4 Image Processing 39 Overview 39 Starting the Scan Validation Tool 39 Scan Validation Tool dialog box 40 Using the TWAIN datasource 41 ...Terminology and features 41 How do I begin 42 Selecting Image settings 43 Selecting Device settings 45 The main Kodak Scanner window 46 The Image Settings window 49 Preview area 50 General tab 51 Size tab 53 Adjustments tab: black and white 56 ...
User Guide
Page 4
... module tires 105 Replacing the pre-separation pad 106 Cleaning or replacing the feed module 108 Replacing the tires on Kodak Scanners 119 Warranty exclusions 120 Installation Warning and Disclaimer 121 How to obtain limited warranty service 121 Packaging and shipping guidelines ...only 119 Limited warranty on the feed module 110 Vacuuming the scanner 111 Cleaning the imaging area 111 Supplies and consumables 112 Accessories 112 6 Troubleshooting 113 Indicator lights and error codes 113 Clearing a document jam 114 Problem solving 115 Appendix A Specifications 116 Appendix B...
... module tires 105 Replacing the pre-separation pad 106 Cleaning or replacing the feed module 108 Replacing the tires on Kodak Scanners 119 Warranty exclusions 120 Installation Warning and Disclaimer 121 How to obtain limited warranty service 121 Packaging and shipping guidelines ...only 119 Limited warranty on the feed module 110 Vacuuming the scanner 111 Cleaning the imaging area 111 Supplies and consumables 112 Accessories 112 6 Troubleshooting 113 Indicator lights and error codes 113 Clearing a document jam 114 Problem solving 115 Appendix A Specifications 116 Appendix B...
User Guide
Page 5
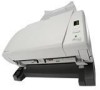
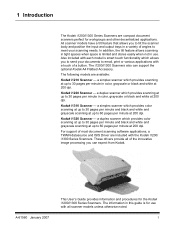
Kodak i1220 Scanner - Kodak i1320 Scanner - a simplex scanner which provides scanning at up to 30 pages per minute at 200 dpi. In addition, the tilt feature allows scanning in tight spaces when space is for use . The following models are included with all of a button. a duplex scanner ... touch of the innovative image processing you to 60 pages per minute in use with the Kodak i1200/ i1300 Series Scanners. 1 Introduction The Kodak i1200/i1300 Series Scanners are compact document scanners perfect for the Kodak i1200/i1300 Series Scanners. Kodak i1310 Scanner -
Kodak i1220 Scanner - Kodak i1320 Scanner - a simplex scanner which provides scanning at up to 30 pages per minute at 200 dpi. In addition, the tilt feature allows scanning in tight spaces when space is for use . The following models are included with all of a button. a duplex scanner ... touch of the innovative image processing you to 60 pages per minute in use with the Kodak i1200/ i1300 Series Scanners. 1 Introduction The Kodak i1200/i1300 Series Scanners are compact document scanners perfect for the Kodak i1200/i1300 Series Scanners. Kodak i1310 Scanner -

User Guide
Page 6
...searchable PDF • Scans up to 1500 pages per day using the i1200 Series Scanners or 3000 pages per day using the i1300 Series Scanners • Scans up to 21.6 x 86 cm / 8.5 x 34 inches using the automatic document feeder or as small as 50 x 63 mm / 2.0 x 2.5 inches ...• An optional A4 tethered flatbed accessory provides added scanning capability for exception documents and easily connects and disconnects to the scanner • Choose color, black and white, grayscale, simultaneous black and white and grayscale, or simultaneous black and white and color ...
...searchable PDF • Scans up to 1500 pages per day using the i1200 Series Scanners or 3000 pages per day using the i1300 Series Scanners • Scans up to 21.6 x 86 cm / 8.5 x 34 inches using the automatic document feeder or as small as 50 x 63 mm / 2.0 x 2.5 inches ...• An optional A4 tethered flatbed accessory provides added scanning capability for exception documents and easily connects and disconnects to the scanner • Choose color, black and white, grayscale, simultaneous black and white and grayscale, or simultaneous black and white and color ...

User Guide
Page 7
... employer need to observe the common sense precautions applicable to the operation of any other mechanical devices. • The Kodak i1200/i1300 Series Scanners are designed to meet worldwide environmental requirements. • Guidelines are available for the disposal of consumable items that the ... for chemical products are shipped from the factory with these precautions a part of the job description for the operator of the Kodak i1200/i1300 Series Scanners and any machinery. See the section entitled, "Supplies and consumables" later in this guide for supplies and catalog numbers. ...
... employer need to observe the common sense precautions applicable to the operation of any other mechanical devices. • The Kodak i1200/i1300 Series Scanners are designed to meet worldwide environmental requirements. • Guidelines are available for the disposal of consumable items that the ... for chemical products are shipped from the factory with these precautions a part of the job description for the operator of the Kodak i1200/i1300 Series Scanners and any machinery. See the section entitled, "Supplies and consumables" later in this guide for supplies and catalog numbers. ...
User Guide
Page 10
... allow you to turn paper and PDF files into organized digital PDF files that important documents and photos will help you begin open the box and check the contents: • Kodak i1210 or i1220 Scanner or Kodak i1310 or i1320 Scanner • Output tray • Output tray extender and exit deflector • USB 2.0 cable • Power...
... allow you to turn paper and PDF files into organized digital PDF files that important documents and photos will help you begin open the box and check the contents: • Kodak i1210 or i1220 Scanner or Kodak i1310 or i1320 Scanner • Output tray • Output tray extender and exit deflector • USB 2.0 cable • Power...
User Guide
Page 11
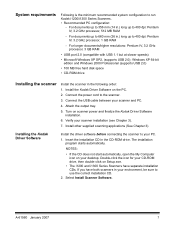
...; 100 MB free hard disk space • CD-ROM drive Installing the scanner Install the scanner in the CD-ROM drive. For documents up to 660 mm (26 in .) long up to run Kodak i1200/i1300 Series Scanners. • Recommended PC configuration: - For longer documents/higher resolutions: Pentium IV, 3.2 GHz processor, 3 GB RAM • USB port...
...; 100 MB free hard disk space • CD-ROM drive Installing the scanner Install the scanner in the CD-ROM drive. For documents up to 660 mm (26 in .) long up to run Kodak i1200/i1300 Series Scanners. • Recommended PC configuration: - For longer documents/higher resolutions: Pentium IV, 3.2 GHz processor, 3 GB RAM • USB port...

User Guide
Page 12
The Kodak i1200/i1300 Series Scanner Installation window will be displayed. 5. NOTE: This window may or may not be displayed. 3. Click Yes. The Welcome window will be displayed depending upon what was previously installed on your computer. 4. Click Next. 8 A-61560 January 2007
The Kodak i1200/i1300 Series Scanner Installation window will be displayed. 5. NOTE: This window may or may not be displayed. 3. Click Yes. The Welcome window will be displayed depending upon what was previously installed on your computer. 4. Click Next. 8 A-61560 January 2007

User Guide
Page 14
Select the appropriate AC power cord for your scanner. 2. Plug the other end of power cords packed with the Kodak i1200/ i1300 Series Scanner. After the drivers have been installed, connect the power supply and power cord to the power supply. 3. Connecting the power cord to the scanner Use only the power supply that the...
Select the appropriate AC power cord for your scanner. 2. Plug the other end of power cords packed with the Kodak i1200/ i1300 Series Scanner. After the drivers have been installed, connect the power supply and power cord to the power supply. 3. Connecting the power cord to the scanner Use only the power supply that the...

User Guide
Page 15
... B end of the USB cable to meet your PC. See the section entitled, "Adjusting the output tray" in a variety of positions to the scanner USB port, located on the back of the USB cable to the proper USB port on your scanning needs. Connecting the USB cable IMPORTANT: If... you have not installed the Kodak Driver Software, do that now before proceeding. Attach the A end of the scanner. 2. NOTE: The output tray can be placed in Chapter 3 for more information. A B 1. A-61560 January 2007 11 The...
... B end of the USB cable to meet your PC. See the section entitled, "Adjusting the output tray" in a variety of positions to the scanner USB port, located on the back of the USB cable to the proper USB port on your scanning needs. Connecting the USB cable IMPORTANT: If... you have not installed the Kodak Driver Software, do that now before proceeding. Attach the A end of the scanner. 2. NOTE: The output tray can be placed in Chapter 3 for more information. A B 1. A-61560 January 2007 11 The...

User Guide
Page 16
... (I). Click Next. When it is turned on the scanner, the scanner goes through an initialization process. Your operating system will stop flashing and stay green. Kodak has successfully tested the i1200/i1300 Series Scanners with Windows XP. 12 A-61560 January 2007 Turning on the scanner and finalizing Kodak Driver Software installation When the USB cable and...
... (I). Click Next. When it is turned on the scanner, the scanner goes through an initialization process. Your operating system will stop flashing and stay green. Kodak has successfully tested the i1200/i1300 Series Scanners with Windows XP. 12 A-61560 January 2007 Turning on the scanner and finalizing Kodak Driver Software installation When the USB cable and...

User Guide
Page 17
Click Finish. Other scanning applications are also provided on the CDs packed with your scanner. The Kodak Scan Validation Tool is available on the CDs packed with the scanner. A-61560 January 2007 13 Installing application software 3. Refer the section entitled, "Verifying your scanner (e.g., Kodak Capture Software Lite, Nuance ScanSoft PaperPort 10 Software, Nuance ScanSoft OmniPage Pro...
Click Finish. Other scanning applications are also provided on the CDs packed with your scanner. The Kodak Scan Validation Tool is available on the CDs packed with the scanner. A-61560 January 2007 13 Installing application software 3. Refer the section entitled, "Verifying your scanner (e.g., Kodak Capture Software Lite, Nuance ScanSoft PaperPort 10 Software, Nuance ScanSoft OmniPage Pro...

User Guide
Page 18
... Function window - E will be extended when scanning documents longer than 8.5 x 11 inches (A4). These numbers correspond to 50 documents (20 lb./75 g/m2) in the function window. illuminates or flashes indicating scanner status. • Steady green: ready to the ... of your choice. collects the scanned documents. LED Indicator - Input tray - Tilt release button - Scanner components Front view Scanner cover Input tray Function window Scroll button Start button LED indicator Tilt release button Output tray Scanner cover - provides access to scan &#...
... Function window - E will be extended when scanning documents longer than 8.5 x 11 inches (A4). These numbers correspond to 50 documents (20 lb./75 g/m2) in the function window. illuminates or flashes indicating scanner status. • Steady green: ready to the ... of your choice. collects the scanned documents. LED Indicator - Input tray - Tilt release button - Scanner components Front view Scanner cover Input tray Function window Scroll button Start button LED indicator Tilt release button Output tray Scanner cover - provides access to scan &#...

User Guide
Page 19
...Separation module Separation module release lever Gap release lever Scanner cover release lever Side guides - detects the presence of documents you to manually adjust the space between the feed module and separation module for documents that require special handling. this cover needs to accommodate... the size of documents in the input tray. opens the scanner to allow access to remove the separation module for cleaning or clearing a document jam. push the release lever...
...Separation module Separation module release lever Gap release lever Scanner cover release lever Side guides - detects the presence of documents you to manually adjust the space between the feed module and separation module for documents that require special handling. this cover needs to accommodate... the size of documents in the input tray. opens the scanner to allow access to remove the separation module for cleaning or clearing a document jam. push the release lever...

User Guide
Page 20
...Flatbed port lock port Power switch - connects the optional tethered flatbed accessory to the scanner. Security lock port - Power port - connects the power cord to the PC. Flatbed port - connects the scanner to the scanner. You can purchase a standard security lock (as shown below) at an office ...supply store. 1. Insert the lock into the back of the cable to secure the cable and scanner to a stationary place. 16 A-61560 January 2007...
...Flatbed port lock port Power switch - connects the optional tethered flatbed accessory to the scanner. Security lock port - Power port - connects the power cord to the PC. Flatbed port - connects the scanner to the scanner. You can purchase a standard security lock (as shown below) at an office ...supply store. 1. Insert the lock into the back of the cable to secure the cable and scanner to a stationary place. 16 A-61560 January 2007...

User Guide
Page 21
The Kodak i1200 and i1300 Series Scanners are equipped with a tilt feature which allows the scanner to turn on the scanner, wait for it to the host PC and the self-test completes, the red indicator will display "1". Depending upon your scanning needs, you turn the scanner on (I) or off • Press the...light will remain on and the function window will be on and constant and the function window will be blank. Scanner positions After you can be placed in. If the scanner is not connected to complete the self-test. or 65-degree angle. 25-degree angle A-61560 January 2007 ...
The Kodak i1200 and i1300 Series Scanners are equipped with a tilt feature which allows the scanner to turn on the scanner, wait for it to the host PC and the self-test completes, the red indicator will display "1". Depending upon your scanning needs, you turn the scanner on (I) or off • Press the...light will remain on and the function window will be on and constant and the function window will be blank. Scanner positions After you can be placed in. If the scanner is not connected to complete the self-test. or 65-degree angle. 25-degree angle A-61560 January 2007 ...

User Guide
Page 22
IMPORTANT: When using the tilt feature, be adjusted to provide even more scanning flexibility. See the following sections for information on adjusting the input and output trays. 65-degree angle Tilting the scanner body In addition to tilting the scanner body, the input and output trays can be sure the scanner cover is closed. • Press the Tilt release button and rotate the scanner body into the desired position. 18 A-61560 January 2007
IMPORTANT: When using the tilt feature, be adjusted to provide even more scanning flexibility. See the following sections for information on adjusting the input and output trays. 65-degree angle Tilting the scanner body In addition to tilting the scanner body, the input and output trays can be sure the scanner cover is closed. • Press the Tilt release button and rotate the scanner body into the desired position. 18 A-61560 January 2007

User Guide
Page 23
To remove the output tray from it's storage position underneath the scanner: • Press down on the release tabs and pull it lies flat on the table. If the way you use the output tray extender. Different ... pages at a time. • For scanning jobs of position. • The output tray can be positioned so it out of more than 5 pages, use your scanner is not described in several positions. Output tray extender A-61560 January 2007 19 This position works well for different needs. Adjusting the output tray The...
To remove the output tray from it's storage position underneath the scanner: • Press down on the release tabs and pull it lies flat on the table. If the way you use the output tray extender. Different ... pages at a time. • For scanning jobs of position. • The output tray can be positioned so it out of more than 5 pages, use your scanner is not described in several positions. Output tray extender A-61560 January 2007 19 This position works well for different needs. Adjusting the output tray The...

User Guide
Page 24
Turn the output tray over and slide the output tray extender along the rail of mixed document sets. Turn the output tray right-side up to 14 inches in the 25 degree position (see below). This setup is in length, and the ... extend output tray • In addition, the output tray can be extended to accommodate documents up and slide it under the scanner until it locks into place. • The output tray extender is best used when the scanner is ideal for scanning large batches of the output tray. To install the output tray...
Turn the output tray over and slide the output tray extender along the rail of mixed document sets. Turn the output tray right-side up to 14 inches in the 25 degree position (see below). This setup is in length, and the ... extend output tray • In addition, the output tray can be extended to accommodate documents up and slide it under the scanner until it locks into place. • The output tray extender is best used when the scanner is ideal for scanning large batches of the output tray. To install the output tray...


