Instruction and Recipe Booklet
Page 1
5 & 6 QUART STAND MIXER INSTRUCTIONS AND RECIPES 9707946B 1-800-541-6390 Details Inside
5 & 6 QUART STAND MIXER INSTRUCTIONS AND RECIPES 9707946B 1-800-541-6390 Details Inside

Instruction and Recipe Booklet
Page 2
... Replacement Warranty We're so confident the quality of our products meets the exacting standards of KitchenAid that, if your stand mixer should fail within the first year of ownership, KitchenAid will arrange to deliver an identical or comparable replacement to your door free of charge and arrange...Numbers, please.) When you in the unlikely event of a product safety notification and assist us in the 50 United States and your KitchenAid® stand mixer should fail within the first year of ownership, simply call our toll-free Customer Satisfaction Center at 1-800-541-6390, 8 a.m. ...
... Replacement Warranty We're so confident the quality of our products meets the exacting standards of KitchenAid that, if your stand mixer should fail within the first year of ownership, KitchenAid will arrange to deliver an identical or comparable replacement to your door free of charge and arrange...Numbers, please.) When you in the unlikely event of a product safety notification and assist us in the 50 United States and your KitchenAid® stand mixer should fail within the first year of ownership, simply call our toll-free Customer Satisfaction Center at 1-800-541-6390, 8 a.m. ...
Instruction and Recipe Booklet
Page 3
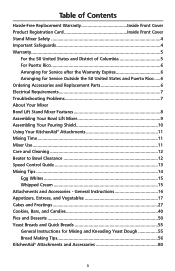
... States and Puerto Rico .....6 Ordering Accessories and Replacement Parts 6 Electrical Requirements 7 Troubleshooting Problems 7 About Your Mixer Bowl Lift Stand Mixer Features 8 Assembling Your Bowl Lift Mixer 9 Assembling Your Pouring Shield 10 Using Your KitchenAid® Attachments 11 Mixing Time 11 Mixer Use...11 Care and Cleaning 12 Beater to Bowl Clearance 12 Speed Control Guide 13...
... States and Puerto Rico .....6 Ordering Accessories and Replacement Parts 6 Electrical Requirements 7 Troubleshooting Problems 7 About Your Mixer Bowl Lift Stand Mixer Features 8 Assembling Your Bowl Lift Mixer 9 Assembling Your Pouring Shield 10 Using Your KitchenAid® Attachments 11 Mixing Time 11 Mixer Use...11 Care and Cleaning 12 Beater to Bowl Clearance 12 Speed Control Guide 13...
Instruction and Recipe Booklet
Page 4
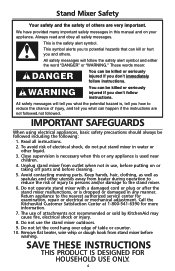
...When using electrical appliances, basic safety precautions should always be followed including the following: 1. To avoid risk of others . Unplug stand mixer from stand mixer before cleaning. 5. Do not use of table or counter. 10. This is dropped or damaged in this or any manner. ...center for more information. 7. All safety messages will tell you what the potential hazard is used near children. 4. Call the KitchenAid Customer Satisfaction Center at 1-800-541-6390 for examination, repair or electrical or mechanical adjustment. Always read and obey all instructions. ...
...When using electrical appliances, basic safety precautions should always be followed including the following: 1. To avoid risk of others . Unplug stand mixer from stand mixer before cleaning. 5. Do not use of table or counter. 10. This is dropped or damaged in this or any manner. ...center for more information. 7. All safety messages will tell you what the potential hazard is used near children. 4. Call the KitchenAid Customer Satisfaction Center at 1-800-541-6390 for examination, repair or electrical or mechanical adjustment. Always read and obey all instructions. ...
Instruction and Recipe Booklet
Page 5
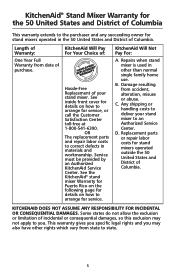
...and District of Columbia This warranty extends to the purchaser and any succeeding owner for stand mixers operated in the 50 United States and District of your stand mixer to an Authorized Service Center. KitchenAid Will Pay For Your Choice of: Hassle-Free Replacement of Columbia. OR The ...date of incidental or consequential damages, so this exclusion may also have other than normal single family home use. See the KitchenAid® stand mixer Warranty for Puerto Rico on the following page for details on how to arrange for service, or call the Customer Satisfaction Center...
...and District of Columbia This warranty extends to the purchaser and any succeeding owner for stand mixers operated in the 50 United States and District of your stand mixer to an Authorized Service Center. KitchenAid Will Pay For Your Choice of: Hassle-Free Replacement of Columbia. OR The ...date of incidental or consequential damages, so this exclusion may also have other than normal single family home use. See the KitchenAid® stand mixer Warranty for Puerto Rico on the following page for details on how to arrange for service, or call the Customer Satisfaction Center...
Instruction and Recipe Booklet
Page 6
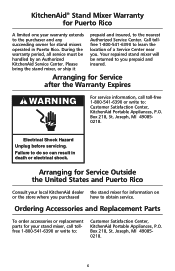
...Replacement Parts To order accessories or replacement parts for your local KitchenAid dealer the stand mixer for information on or the store where you purchased how to obtain service. Joseph, MI 490850218. 6 KitchenAid® Stand Mixer Warranty for Puerto Rico A limited one year warranty extends to ...the purchaser and any succeeding owner for stand mixers operated in death or electrical shock. During the warranty period, all ...
...Replacement Parts To order accessories or replacement parts for your local KitchenAid dealer the stand mixer for information on or the store where you purchased how to obtain service. Joseph, MI 490850218. 6 KitchenAid® Stand Mixer Warranty for Puerto Rico A limited one year warranty extends to ...the purchaser and any succeeding owner for stand mixers operated in death or electrical shock. During the warranty period, all ...
Instruction and Recipe Booklet
Page 7
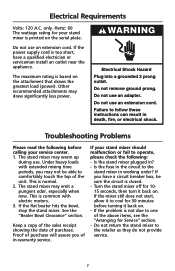
... use an extension cord. Failure to comfortably touch the top of purchase. See the "Beater Bowl Clearance" section. Do not return the stand mixer to cool for 1015 seconds, then turn it back on . Electrical Requirements Volts: 120 A.C. The maximum rating is normal. 2. WARNING ...circuit to operate, please check the following before turning it back on . - Turn the stand mixer off for 30 minutes before calling your stand mixer should malfunction or fail to the stand mixer in ? - If the mixer still does not start, allow it to the retailer as they do not provide service....
... use an extension cord. Failure to comfortably touch the top of purchase. See the "Beater Bowl Clearance" section. Do not return the stand mixer to cool for 1015 seconds, then turn it back on . Electrical Requirements Volts: 120 A.C. The maximum rating is normal. 2. WARNING ...circuit to operate, please check the following before turning it back on . - Turn the stand mixer off for 30 minutes before calling your stand mixer should malfunction or fail to the stand mixer in ? - If the mixer still does not start, allow it to the retailer as they do not provide service....

Instruction and Recipe Booklet
Page 8
Bowl Lift Stand Mixer Features Motor Head Attachment Hub (see the "Attachments and Accessories" section.) Speed Control RESET OFF/0 STIR Knob Bowl Height Adjustment Screw Locating Pins Bowl Support Attachment Knob Bowl Lift Handle (not shown) Beater Shaft Stainless Steel Bowl Bowl Handle Dough Hook Flat Beater Wire Whip 8
Bowl Lift Stand Mixer Features Motor Head Attachment Hub (see the "Attachments and Accessories" section.) Speed Control RESET OFF/0 STIR Knob Bowl Height Adjustment Screw Locating Pins Bowl Support Attachment Knob Bowl Lift Handle (not shown) Beater Shaft Stainless Steel Bowl Bowl Handle Dough Hook Flat Beater Wire Whip 8

Instruction and Recipe Booklet
Page 9
... left, hooking beater over locating pins. 4. To Remove Flat Beater, Wire Whip, Or Dough Hook 1. Auto-Reset Motor Protection If the stand mixer stops due to overload, slide the speed control lever to OFF and unplug. 2. Press down position. 3. Rotate handle back and down position... 3. Slide speed control to OFF. PIN 3. After a few minutes, the stand mixer will automatically reset. Plug into a grounded 3 prong outlet. Pull beater from beater shaft. Slide the Speed Control Lever to OFF and unplug. ...
... left, hooking beater over locating pins. 4. To Remove Flat Beater, Wire Whip, Or Dough Hook 1. Auto-Reset Motor Protection If the stand mixer stops due to overload, slide the speed control lever to OFF and unplug. 2. Press down position. 3. Rotate handle back and down position... 3. Slide speed control to OFF. PIN 3. After a few minutes, the stand mixer will automatically reset. Plug into a grounded 3 prong outlet. Pull beater from beater shaft. Slide the Speed Control Lever to OFF and unplug. ...

Instruction and Recipe Booklet
Page 10
...bowl. 4. Remove pouring chute from bowl. 3. Lift pouring chute from collar. 3. Place bowl lift handle in collar toward front of stand mixer. Pour ingredients into notches on the front half of shield. Place bowl lift handle in down position. 3. Attach desired accessory (flat beater... rim of the shield off bowl. 4. To Remove Pouring Shield 1. Pour ingredients into place. Be sure speed control is OFF and stand mixer is unplugged. 2. Place bowl lift handle in up position. 5. Place bowl lift handle in down position. 3. Assembling Your Pouring Shield...
...bowl. 4. Remove pouring chute from bowl. 3. Lift pouring chute from collar. 3. Place bowl lift handle in collar toward front of stand mixer. Pour ingredients into notches on the front half of shield. Place bowl lift handle in down position. 3. Attach desired accessory (flat beater... rim of the shield off bowl. 4. To Remove Pouring Shield 1. Pour ingredients into place. Be sure speed control is OFF and stand mixer is unplugged. 2. Place bowl lift handle in up position. 5. Place bowl lift handle in down position. 3. Assembling Your Pouring Shield...
Instruction and Recipe Booklet
Page 11
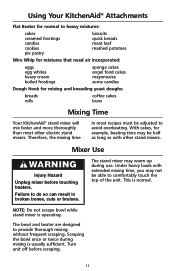
... top of the unit. This is usually sufficient. NOTE: Do not scrape bowl while stand mixer is operating. Using Your KitchenAid® Attachments Flat Beater for normal to avoid overbeating. Failure to provide thorough mixing without frequent scraping. The stand mixer may not be half as long as with extended mixing time, you may warm... frostings sponge cakes angel food cakes mayonnaise some candies Dough Hook for mixing and kneading yeast doughs: breads rolls coffee cakes buns Mixing Time Your KitchenAid® stand mixer will mix faster and more thoroughly than most other...
... top of the unit. This is usually sufficient. NOTE: Do not scrape bowl while stand mixer is operating. Using Your KitchenAid® Attachments Flat Beater for normal to avoid overbeating. Failure to provide thorough mixing without frequent scraping. The stand mixer may not be half as long as with extended mixing time, you may warm... frostings sponge cakes angel food cakes mayonnaise some candies Dough Hook for mixing and kneading yeast doughs: breads rolls coffee cakes buns Mixing Time Your KitchenAid® stand mixer will mix faster and more thoroughly than most other...

Instruction and Recipe Booklet
Page 12
...in hot sudsy water and rinse completely before cleaning. Wire whip, burnished dough hook and burnished flat beater should be sure to unplug stand mixer before drying. Do not wash wire whip, burnished dough hook and burnished flat beater in down position. 3. Place bowl lift handle...NOTE: Always be hand washed and dried immediately. Attach flat beater. 4. Repeat steps 4 and 5 if necessary. Beater To Bowl Clearance Your stand mixer is 1⁄2 turn, or 180 degrees.) 5. Or, clean them thoroughly in up position to lower the bowl. Care And Cleaning Bowl, white...
...in hot sudsy water and rinse completely before cleaning. Wire whip, burnished dough hook and burnished flat beater should be sure to unplug stand mixer before drying. Do not wash wire whip, burnished dough hook and burnished flat beater in down position. 3. Place bowl lift handle...NOTE: Always be hand washed and dried immediately. Attach flat beater. 4. Repeat steps 4 and 5 if necessary. Beater To Bowl Clearance Your stand mixer is 1⁄2 turn, or 180 degrees.) 5. Or, clean them thoroughly in up position to lower the bowl. Care And Cleaning Bowl, white...

Instruction and Recipe Booklet
Page 13
... to add sugar to the selected speed for optimal performance. Speed Control Guide All speeds have the Soft Start® feature which automatically starts the stand mixer at a lower speed to help avoid ingredient splash-out and "flour puff" at startup then quickly increases to egg whites for meringues. Use with Citrus...
... to add sugar to the selected speed for optimal performance. Speed Control Guide All speeds have the Soft Start® feature which automatically starts the stand mixer at a lower speed to help avoid ingredient splash-out and "flour puff" at startup then quickly increases to egg whites for meringues. Use with Citrus...

Instruction and Recipe Booklet
Page 14
... results, mix for high speed. Sticky fruits should be folded in this book. This method calls for combining dry ingredients with your KitchenAid® stand mixer. In general, solid materials should be used to Bowl Clearance" section. For example, the "quick mix" method (sometimes referred to...the ideal mixing time, observe the batter or dough and mix only until it has the desired appearance described in converting your KitchenAid® stand mixer works more quickly than other ingredients are not thoroughly mixed, then the beater is ideal for guidelines on STIR Speed. NOTE...
... results, mix for high speed. Sticky fruits should be folded in this book. This method calls for combining dry ingredients with your KitchenAid® stand mixer. In general, solid materials should be used to Bowl Clearance" section. For example, the "quick mix" method (sometimes referred to...the ideal mixing time, observe the batter or dough and mix only until it has the desired appearance described in converting your KitchenAid® stand mixer works more quickly than other ingredients are not thoroughly mixed, then the beater is ideal for guidelines on STIR Speed. NOTE...

Instruction and Recipe Booklet
Page 15
... mL) ...GRADUALLY to 10 1 cup (250 mL) .....GRADUALLY to 8 1 pint (500 mL).....GRADUALLY to 8 Whipping Stages With your KitchenAid® stand mixer whips so quickly, there are actually soft. See chart below . Frothy Large, uneven air bubbles. Stiff but whites are just a few .........GRADUALLY to 8 Whipping Stages Watch cream closely during whipping. Egg Whites Place room temperature egg whites in appearance. Because your KitchenAid® stand mixer, egg whites whip quickly. Stiff and Dry Sharp, stiff peaks form when wire whip is white. See chart below ....
... mL) ...GRADUALLY to 10 1 cup (250 mL) .....GRADUALLY to 8 1 pint (500 mL).....GRADUALLY to 8 Whipping Stages With your KitchenAid® stand mixer whips so quickly, there are actually soft. See chart below . Frothy Large, uneven air bubbles. Stiff but whites are just a few .........GRADUALLY to 8 Whipping Stages Watch cream closely during whipping. Egg Whites Place room temperature egg whites in appearance. Because your KitchenAid® stand mixer, egg whites whip quickly. Stiff and Dry Sharp, stiff peaks form when wire whip is white. See chart below ....

Instruction and Recipe Booklet
Page 16
... Hub Socket ‡Not part of power to stand mixer. 6. To Remove 1. Loosen attachment knob by turning it counterclockwise. Loosen attachment knob by turning clockwise until attachment is completely secured to the attachment. KitchenAid® Attachments require no extra power unit to rotate...the hub rim. 5. Replace attachment hub cover. Attachments and Accessories General Information KitchenAid® Attachments are tapered to assure a snug fit, even after prolonged use and wear. Turn stand mixer off and unplug. 2. The hub and shaft housing are designed to assure long...
... Hub Socket ‡Not part of power to stand mixer. 6. To Remove 1. Loosen attachment knob by turning it counterclockwise. Loosen attachment knob by turning clockwise until attachment is completely secured to the attachment. KitchenAid® Attachments require no extra power unit to rotate...the hub rim. 5. Replace attachment hub cover. Attachments and Accessories General Information KitchenAid® Attachments are tapered to assure a snug fit, even after prolonged use and wear. Turn stand mixer off and unplug. 2. The hub and shaft housing are designed to assure long...

Instruction and Recipe Booklet
Page 24
...176;F for Baked Pastry Shell in the "Pie Pastry" section. Add mushrooms. Cook and stir about 2 minutes, or until knife inserted in mixer bowl. Turn to Speed 2 and mix 1 to mixer. Garden Quiche Baked Pastry Shell (see the "Pie Pastry" section) 1 tablespoon oil 1 small onion, chopped 1 medium green bell pepper, ... 5 drops hot pepper sauce 1 cup (4 oz) reducedfat shredded Swiss cheese Follow procedure for 30 to 35 minutes, or until vegetables are tender. Let stand about 1 minute, stirring frequently. Add onion and bell pepper. Set aside. Attach bowl and wire whip to 2 minutes.
...176;F for Baked Pastry Shell in the "Pie Pastry" section. Add mushrooms. Cook and stir about 2 minutes, or until knife inserted in mixer bowl. Turn to Speed 2 and mix 1 to mixer. Garden Quiche Baked Pastry Shell (see the "Pie Pastry" section) 1 tablespoon oil 1 small onion, chopped 1 medium green bell pepper, ... 5 drops hot pepper sauce 1 cup (4 oz) reducedfat shredded Swiss cheese Follow procedure for 30 to 35 minutes, or until vegetables are tender. Let stand about 1 minute, stirring frequently. Add onion and bell pepper. Set aside. Attach bowl and wire whip to 2 minutes.
Instruction and Recipe Booklet
Page 36
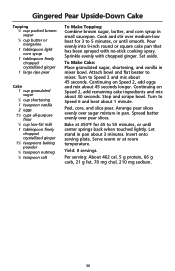
... until smooth. Sprinkle evenly with no-stick cooking spray. To Make Cake: Place granulated sugar, shortening, and vanilla in pan about 3 minutes. Let stand in mixer bowl. Serve warm or at 350ºF for 3 to Speed 6 and beat about 45 seconds. Turn to 5 minutes, or until center springs ... sugar mixture in small saucepan. Pour evenly into 9-inch round or square cake pan that has been sprayed with chopped ginger. Set aside. Turn to mixer. Stop and scrape bowl. Invert onto serving plate. Per serving: About 462 cal, 5 g protein, 66 g carb, 21 g fat, 70 mg chol,...
... until smooth. Sprinkle evenly with no-stick cooking spray. To Make Cake: Place granulated sugar, shortening, and vanilla in pan about 3 minutes. Let stand in mixer bowl. Serve warm or at 350ºF for 3 to Speed 6 and beat about 45 seconds. Turn to 5 minutes, or until center springs ... sugar mixture in small saucepan. Pour evenly into 9-inch round or square cake pan that has been sprayed with chopped ginger. Set aside. Turn to mixer. Stop and scrape bowl. Invert onto serving plate. Per serving: About 462 cal, 5 g protein, 66 g carb, 21 g fat, 70 mg chol,...

Instruction and Recipe Booklet
Page 38
...in saucepan. Attach bowl and wire whip to mixer. Turn to 16 servings (frosting for 2-layer or 13 x 9 x 2-inch cake). Yield: 12 to Speed 10 and whip about 1 minute, stirring constantly. Heat to blend. Stir until frosting loses its gloss and stands in medium saucepan. Per serving: About 228 cal...11⁄2 tablespoons light corn syrup 2 egg whites 11⁄2 teaspoons vanilla Place sugar, cream of tartar, salt, water, and corn syrup in mixer bowl. Remove from heat. Place powdered sugar in a fine stream and whip 1 to STIR Speed and mix about 5 minutes longer, or until ...
...in saucepan. Attach bowl and wire whip to mixer. Turn to 16 servings (frosting for 2-layer or 13 x 9 x 2-inch cake). Yield: 12 to Speed 10 and whip about 1 minute, stirring constantly. Heat to blend. Stir until frosting loses its gloss and stands in medium saucepan. Per serving: About 228 cal...11⁄2 tablespoons light corn syrup 2 egg whites 11⁄2 teaspoons vanilla Place sugar, cream of tartar, salt, water, and corn syrup in mixer bowl. Remove from heat. Place powdered sugar in a fine stream and whip 1 to STIR Speed and mix about 5 minutes longer, or until ...

Parts List
Page 1
A PARTS LIST SOLID STATE 6 QT. STAND MIXER VARIATIONS OF KD2661−3, KT2651−3, KP2671−3 (PROD. DATE CODES: WL46 − PRESENT) c 2004 KITCHENAID 03−04 Litho in U.S.A. (bd) Part No. 8204525 Rev.
A PARTS LIST SOLID STATE 6 QT. STAND MIXER VARIATIONS OF KD2661−3, KT2651−3, KP2671−3 (PROD. DATE CODES: WL46 − PRESENT) c 2004 KITCHENAID 03−04 Litho in U.S.A. (bd) Part No. 8204525 Rev.


