Instruction and Recipe Booklet
Page 3
... 40 Pies and Desserts 50 Yeast Breads and Quick Breads 55 General Instructions for Service Outside the 50 United States and Puerto Rico .....6 Ordering Accessories and Replacement Parts 6 Electrical Requirements 7 Troubleshooting Problems 7 About Your Mixer Bowl Lift Stand Mixer Features 8 Assembling Your Bowl Lift Mixer 9 Assembling Your Pouring Shield 10 Using Your KitchenAid® Attachments 11 Mixing Time 11 Mixer Use...11 Care and Cleaning 12 Beater to Bowl Clearance 12 Speed Control Guide 13 Mixing Tips 14 Egg Whites 15 Whipped Cream 15 Attachments and Accessories -
... 40 Pies and Desserts 50 Yeast Breads and Quick Breads 55 General Instructions for Service Outside the 50 United States and Puerto Rico .....6 Ordering Accessories and Replacement Parts 6 Electrical Requirements 7 Troubleshooting Problems 7 About Your Mixer Bowl Lift Stand Mixer Features 8 Assembling Your Bowl Lift Mixer 9 Assembling Your Pouring Shield 10 Using Your KitchenAid® Attachments 11 Mixing Time 11 Mixer Use...11 Care and Cleaning 12 Beater to Bowl Clearance 12 Speed Control Guide 13 Mixing Tips 14 Egg Whites 15 Whipped Cream 15 Attachments and Accessories -
Instruction and Recipe Booklet
Page 4
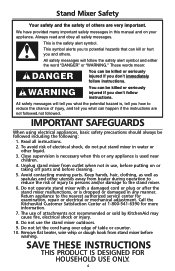
.... This is dropped or damaged in use, before putting on your appliance. Avoid contacting moving parts. Remove flat beater, wire whip or dough hook from outlet when not in any appliance is , tell you don't immediately follow the safety alert symbol and either the word "DANGER" or "WARNING." Always read and obey all instructions. 2. Stand Mixer Safety Your safety and the safety...
.... This is dropped or damaged in use, before putting on your appliance. Avoid contacting moving parts. Remove flat beater, wire whip or dough hook from outlet when not in any appliance is , tell you don't immediately follow the safety alert symbol and either the word "DANGER" or "WARNING." Always read and obey all instructions. 2. Stand Mixer Safety Your safety and the safety...
Instruction and Recipe Booklet
Page 5
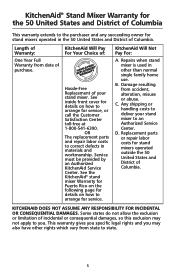
... any succeeding owner for stand mixers operated in materials and workmanship. Length of Warranty: One Year Full Warranty from accident, alteration, misuse or abuse. Any shipping or handling costs to state. 5 Some states do not allow the exclusion or limitation of Columbia. Repairs when stand mixer is used in other rights which vary from state to deliver your stand mixer. Replacement parts or repair labor costs for stand mixers operated outside the...
... any succeeding owner for stand mixers operated in materials and workmanship. Length of Warranty: One Year Full Warranty from accident, alteration, misuse or abuse. Any shipping or handling costs to state. 5 Some states do not allow the exclusion or limitation of Columbia. Repairs when stand mixer is used in other rights which vary from state to deliver your stand mixer. Replacement parts or repair labor costs for stand mixers operated outside the...
Instruction and Recipe Booklet
Page 6
... 490850218. 6 Ordering Accessories and Replacement Parts To order accessories or replacement parts for your local KitchenAid dealer the stand mixer for information on or the store where you purchased how to you . Joseph, MI 490850218. Your repaired stand mixer will be handled by an Authorized KitchenAid Service Center. Box 218, St. Electrical Shock Hazard Unplug before servicing. Arranging for Service after the Warranty Expires WARNING For service information, call tollfree...
... 490850218. 6 Ordering Accessories and Replacement Parts To order accessories or replacement parts for your local KitchenAid dealer the stand mixer for information on or the store where you purchased how to you . Joseph, MI 490850218. Your repaired stand mixer will be handled by an Authorized KitchenAid Service Center. Box 218, St. Electrical Shock Hazard Unplug before servicing. Arranging for Service after the Warranty Expires WARNING For service information, call tollfree...
Instruction and Recipe Booklet
Page 7
... . See the "Beater Bowl Clearance" section. If your stand mixer is printed on . - Do not use an extension cord. Keep a copy of the sales receipt showing the date of in-warranty service. Is the stand mixer plugged in death, fire, or electrical shock. Is the fuse in working order? Troubleshooting Problems Please read the following : - Hertz: 60 The wattage rating for Service" section. - Under heavy loads with electric motors. 3. Proof of...
... . See the "Beater Bowl Clearance" section. If your stand mixer is printed on . - Do not use an extension cord. Keep a copy of the sales receipt showing the date of in-warranty service. Is the stand mixer plugged in death, fire, or electrical shock. Is the fuse in working order? Troubleshooting Problems Please read the following : - Hertz: 60 The wattage rating for Service" section. - Under heavy loads with electric motors. 3. Proof of...

Instruction and Recipe Booklet
Page 8
Bowl Lift Stand Mixer Features Motor Head Attachment Hub (see the "Attachments and Accessories" section.) Speed Control RESET OFF/0 STIR Knob Bowl Height Adjustment Screw Locating Pins Bowl Support Attachment Knob Bowl Lift Handle (not shown) Beater Shaft Stainless Steel Bowl Bowl Handle Dough Hook Flat Beater Wire Whip 8
Bowl Lift Stand Mixer Features Motor Head Attachment Hub (see the "Attachments and Accessories" section.) Speed Control RESET OFF/0 STIR Knob Bowl Height Adjustment Screw Locating Pins Bowl Support Attachment Knob Bowl Lift Handle (not shown) Beater Shaft Stainless Steel Bowl Bowl Handle Dough Hook Flat Beater Wire Whip 8

Instruction and Recipe Booklet
Page 9
.... To Raise Bowl 1. Fit bowl supports over the pin on beater shaft. Slip flat beater on shaft. 4. To Remove Flat Beater, Wire Whip, Or Dough Hook 1. To Remove Bowl 1. Place bowl lift handle in raised, locked position when mixing. Press beater upward and turn right. 3. Auto-Reset Motor Protection If the stand mixer stops due to overload, slide the speed control lever to left, hooking beater over locating pins. 4. Bowl must always be set on back of bowl. To Lower Bowl 1. After a few minutes, the stand mixer will automatically reset. Household Stand Mixer Speed Control RESET OFF...
.... To Raise Bowl 1. Fit bowl supports over the pin on beater shaft. Slip flat beater on shaft. 4. To Remove Flat Beater, Wire Whip, Or Dough Hook 1. To Remove Bowl 1. Place bowl lift handle in raised, locked position when mixing. Press beater upward and turn right. 3. Auto-Reset Motor Protection If the stand mixer stops due to overload, slide the speed control lever to left, hooking beater over locating pins. 4. Bowl must always be set on back of bowl. To Lower Bowl 1. After a few minutes, the stand mixer will automatically reset. Household Stand Mixer Speed Control RESET OFF...

Instruction and Recipe Booklet
Page 10
... Pouring Shield is Included. Attach desired accessory (flat beater, dough hook or wire whip) and bowl. 4. Place bowl lift handle in down position and remove accessory and bowl. Place bowl lift handle in down position and remove accessory and bowl. IMPORTANT: When using the Wide Mouth Pouring Shield make sure the guides on the bottom of the chute rest on the back half of the bowl to lock into place. Be sure speed control is OFF and stand mixer is unplugged. 2. To Attach Pouring Shield 1. Be sure speed control...
... Pouring Shield is Included. Attach desired accessory (flat beater, dough hook or wire whip) and bowl. 4. Place bowl lift handle in down position and remove accessory and bowl. Place bowl lift handle in down position and remove accessory and bowl. IMPORTANT: When using the Wide Mouth Pouring Shield make sure the guides on the bottom of the chute rest on the back half of the bowl to lock into place. Be sure speed control is OFF and stand mixer is unplugged. 2. To Attach Pouring Shield 1. Be sure speed control...
Instruction and Recipe Booklet
Page 11
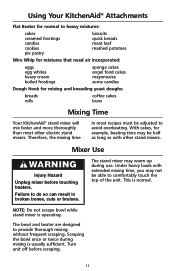
... other electric stand mixers. Turn unit off before touching beaters. The stand mixer may not be able to comfortably touch the top of the unit. This is operating. Using Your KitchenAid® Attachments Flat Beater for normal to heavy mixtures: cakes creamed frostings candies cookies pie pastry biscuits quick breads meat loaf mashed potatoes Wire Whip for mixtures that need air incorporated: eggs egg whites heavy cream boiled frostings sponge cakes angel food cakes mayonnaise...
... other electric stand mixers. Turn unit off before touching beaters. The stand mixer may not be able to comfortably touch the top of the unit. This is operating. Using Your KitchenAid® Attachments Flat Beater for normal to heavy mixtures: cakes creamed frostings candies cookies pie pastry biscuits quick breads meat loaf mashed potatoes Wire Whip for mixtures that need air incorporated: eggs egg whites heavy cream boiled frostings sponge cakes angel food cakes mayonnaise...

Instruction and Recipe Booklet
Page 12
... bowl lift handle in hot sudsy water and rinse completely before cleaning. Unplug stand mixer. 2. Just a slight turn is adjusted at the factory so the flat beater just clears the bottom of the bowl, coating may wear off beater shaft frequently, removing any reason, the flat beater hits the bottom of bowl when in an automatic dishwasher. Do not use household/commercial cleaners. Care And Cleaning Bowl, white flat beater and white dough hook may be hand washed...
... bowl lift handle in hot sudsy water and rinse completely before cleaning. Unplug stand mixer. 2. Just a slight turn is adjusted at the factory so the flat beater just clears the bottom of the bowl, coating may wear off beater shaft frequently, removing any reason, the flat beater hits the bottom of bowl when in an automatic dishwasher. Do not use household/commercial cleaners. Care And Cleaning Bowl, white flat beater and white dough hook may be hand washed...

Instruction and Recipe Booklet
Page 13
... Mill attachments. Use with : Food Grinder, Rotor Slicer/Shredder, Pasta Roller, and Fruit/Vegetable Strainer. 6 BEATING, CREAMING For medium-fast beating (creaming) or whipping. Use to combine sugar and shortening and to add sugar to mix or knead yeast doughs. 2 SLOW MIXING For slow mixing, mashing, faster stirring. Do not use STIR speed to egg whites for optimal performance. Number of mashed potatoes. cut shortening into flour; Use to finish mixing cake...
... Mill attachments. Use with : Food Grinder, Rotor Slicer/Shredder, Pasta Roller, and Fruit/Vegetable Strainer. 6 BEATING, CREAMING For medium-fast beating (creaming) or whipping. Use to combine sugar and shortening and to add sugar to mix or knead yeast doughs. 2 SLOW MIXING For slow mixing, mashing, faster stirring. Do not use STIR speed to egg whites for optimal performance. Number of mashed potatoes. cut shortening into flour; Use to finish mixing cake...

Instruction and Recipe Booklet
Page 14
... Your Recipe for the Mixer The mixing instructions for recipes in this book can be prepared using the traditional cake mixing method. To help determine the ideal mixing time, observe the batter or dough and mix only until it has the desired appearance described in very bottom of bowl are added. The Pouring Shield can guide you in converting your own favorite recipes for preparation with most cake recipes. For...
... Your Recipe for the Mixer The mixing instructions for recipes in this book can be prepared using the traditional cake mixing method. To help determine the ideal mixing time, observe the batter or dough and mix only until it has the desired appearance described in very bottom of bowl are added. The Pouring Shield can guide you in converting your own favorite recipes for preparation with most cake recipes. For...

Instruction and Recipe Booklet
Page 16
... Shaft Housing General Instructions To Attach 1. Turn stand mixer off and unplug. 2. Replace attachment hub cover. Attachments and Accessories General Information KitchenAid® Attachments are tapered to assure a snug fit, even after prolonged use and wear. The attachment power shaft and hub socket are of a square design, to eliminate any possibility of slipping during the transmission of mixer. Attachment Knob Attachment Power Shaft‡ Hinged Hub Cover ® Attachment Housing Attachment Hub Socket ‡Not part of power to the attachment. Flip up hinged hub cover...
... Shaft Housing General Instructions To Attach 1. Turn stand mixer off and unplug. 2. Replace attachment hub cover. Attachments and Accessories General Information KitchenAid® Attachments are tapered to assure a snug fit, even after prolonged use and wear. The attachment power shaft and hub socket are of a square design, to eliminate any possibility of slipping during the transmission of mixer. Attachment Knob Attachment Power Shaft‡ Hinged Hub Cover ® Attachment Housing Attachment Hub Socket ‡Not part of power to the attachment. Flip up hinged hub cover...

Instruction and Recipe Booklet
Page 30
...) semisweet chocolate and 1 teaspoon shortening in mixer bowl. Old-Fashioned Pound Cake 3 cups all-purpose flour 2 cups sugar 3 teaspoons baking powder 1⁄2 teaspoon salt 2 cups butter, softened 1⁄2 cup low-fat milk 1 teaspoon vanilla 1 teaspoon almond extract 6 eggs Combine dry ingredients in small saucepan over cake. Attach bowl and flat beater to 1 cup. Pour batter into greased and floured 10...
...) semisweet chocolate and 1 teaspoon shortening in mixer bowl. Old-Fashioned Pound Cake 3 cups all-purpose flour 2 cups sugar 3 teaspoons baking powder 1⁄2 teaspoon salt 2 cups butter, softened 1⁄2 cup low-fat milk 1 teaspoon vanilla 1 teaspoon almond extract 6 eggs Combine dry ingredients in small saucepan over cake. Attach bowl and flat beater to 1 cup. Pour batter into greased and floured 10...
Instruction and Recipe Booklet
Page 31
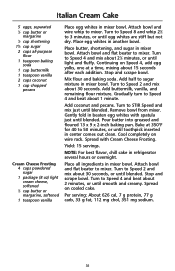
.... Place butter, shortening, and sugar in another bowl. Attach bowl and flat beater to mixer. Add coconut and pecans. Mix flour and baking soda. Italian Cream Cake 5 eggs, separated 1⁄2 cup butter or margarine 1⁄2 cup shortening 13⁄4 cup sugar 2 cups all ingredients in mixer bowl. Attach bowl and wire whip to mixer. Turn to sugar mixture in refrigerator several hours or overnight. Continuing on Speed 4, add egg yolks, one...
.... Place butter, shortening, and sugar in another bowl. Attach bowl and flat beater to mixer. Add coconut and pecans. Mix flour and baking soda. Italian Cream Cake 5 eggs, separated 1⁄2 cup butter or margarine 1⁄2 cup shortening 13⁄4 cup sugar 2 cups all ingredients in mixer bowl. Attach bowl and wire whip to mixer. Turn to sugar mixture in refrigerator several hours or overnight. Continuing on Speed 4, add egg yolks, one...
Instruction and Recipe Booklet
Page 36
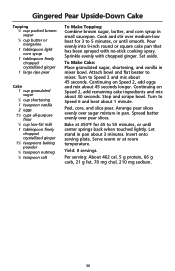
...Attach bowl and flat beater to 55 minutes, or until smooth. Turn to Speed 2 and mix about 1 minute. Yield: 8 servings. Set aside. Turn to 5 minutes, or until center springs back when touched lightly. Pour evenly into 9-inch round or square cake pan that has been sprayed with chopped ginger. Bake at room temperature. Spread batter evenly over sugar... salt To Make Topping: Combine brown sugar, butter, and corn syrup in mixer bowl. Arrange pear slices evenly over pear slices. Serve warm or at 350ºF for 3 to Speed 6 and beat about 45 seconds. Let stand in pan....
...Attach bowl and flat beater to 55 minutes, or until smooth. Turn to Speed 2 and mix about 1 minute. Yield: 8 servings. Set aside. Turn to 5 minutes, or until center springs back when touched lightly. Pour evenly into 9-inch round or square cake pan that has been sprayed with chopped ginger. Bake at room temperature. Spread batter evenly over sugar... salt To Make Topping: Combine brown sugar, butter, and corn syrup in mixer bowl. Arrange pear slices evenly over pear slices. Serve warm or at 350ºF for 3 to Speed 6 and beat about 45 seconds. Let stand in pan....

Instruction and Recipe Booklet
Page 38
... marshmallows 2 cups powdered sugar 1⁄2 teaspoon vanilla Melt butter in mixer bowl. Remove from heat. Add brown sugar mixture and vanilla. Spread on Speed 10, slowly pour hot syrup into egg whites in mixer bowl. Heat to 16 servings (frosting for 2-layer or 13 x 9 x 2-inch cake). Place powdered sugar in medium saucepan. Fluffy Frosting 11⁄2 cups sugar 1⁄2 teaspoon cream of tartar 1⁄...
... marshmallows 2 cups powdered sugar 1⁄2 teaspoon vanilla Melt butter in mixer bowl. Remove from heat. Add brown sugar mixture and vanilla. Spread on Speed 10, slowly pour hot syrup into egg whites in mixer bowl. Heat to 16 servings (frosting for 2-layer or 13 x 9 x 2-inch cake). Place powdered sugar in medium saucepan. Fluffy Frosting 11⁄2 cups sugar 1⁄2 teaspoon cream of tartar 1⁄...

Instruction and Recipe Booklet
Page 39
... mg sodium. 39 Attach bowl and flat beater to softened butter, cream, vanilla, and salt. Stop and scrape bowl. VARIATION Chocolate Buttercream Frosting Mix 1⁄3 cup cocoa with powdered sugar in mixer bowl. Orange Cream Cheese Frosting 4 cups powdered sugar 1 package (8 oz) light cream cheese 1 teaspoon orange juice 1⁄2 teaspoon grated orange peel Place all ingredients in small bowl. Turn to STIR Speed and mix about 2 minutes, or...
... mg sodium. 39 Attach bowl and flat beater to softened butter, cream, vanilla, and salt. Stop and scrape bowl. VARIATION Chocolate Buttercream Frosting Mix 1⁄3 cup cocoa with powdered sugar in mixer bowl. Orange Cream Cheese Frosting 4 cups powdered sugar 1 package (8 oz) light cream cheese 1 teaspoon orange juice 1⁄2 teaspoon grated orange peel Place all ingredients in small bowl. Turn to STIR Speed and mix about 2 minutes, or...

Instruction and Recipe Booklet
Page 51
...; Let cheesecake stand in medium bowl; Remove from drafts. Turn to Speed 2 and mix 15 to 30 seconds longer, just until cheesecake is set when pan is jiggled slightly. Place top oven rack in mixer bowl. Bake at 325°F for 50 to Speed 2 and mix about 30 seconds. Cover and refrigerate 6 to mixer. Stop and scrape bowl. open oven door. To Make Filling: Place cream cheese, sugar, and...
...; Let cheesecake stand in medium bowl; Remove from drafts. Turn to Speed 2 and mix 15 to 30 seconds longer, just until cheesecake is set when pan is jiggled slightly. Place top oven rack in mixer bowl. Bake at 325°F for 50 to Speed 2 and mix about 30 seconds. Cover and refrigerate 6 to mixer. Stop and scrape bowl. open oven door. To Make Filling: Place cream cheese, sugar, and...
Parts List
Page 6
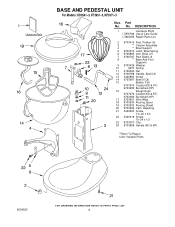
Part No. DESCRIPTION 1 Literature Parts LIT9707946 Use & Care Guide LIT8204525 Repair Parts List 2 9703414 Foot, Rubber (5) 3 Column Assembly 4 Bowl Support 5 9703474 Latch, Bowl Spring 6 9706885 Arm, Bowl Lift 7 9706787 Rod, Bowl Lift 8 Base And Foot Supports 9 9703439 Washer 10 9237 Spring 11 4159092 Nut 12 9706788 Handle, Bowl Lift 13 3400863 Screw 14 9703687 Bowl (6 Qt) 15 Beater, Flat 9707674 Coated (KD & KT) 9703485 Burnished (KP) 16 Dough Hook 9707676 Coated (KD & KT) 9703486 Burnished (KP) 17 9703491 Wire Whip 18...
Part No. DESCRIPTION 1 Literature Parts LIT9707946 Use & Care Guide LIT8204525 Repair Parts List 2 9703414 Foot, Rubber (5) 3 Column Assembly 4 Bowl Support 5 9703474 Latch, Bowl Spring 6 9706885 Arm, Bowl Lift 7 9706787 Rod, Bowl Lift 8 Base And Foot Supports 9 9703439 Washer 10 9237 Spring 11 4159092 Nut 12 9706788 Handle, Bowl Lift 13 3400863 Screw 14 9703687 Bowl (6 Qt) 15 Beater, Flat 9707674 Coated (KD & KT) 9703485 Burnished (KP) 16 Dough Hook 9707676 Coated (KD & KT) 9703486 Burnished (KP) 17 9703491 Wire Whip 18...


