Use & Care Guide
Page 3
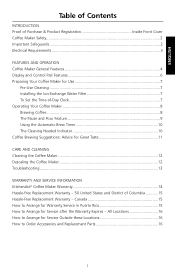
...Registration Inside Front Cover Coffee Maker Safety...2 Important Safeguards ...2 Electrical Requirements 3 FEATURES AND OPERATION Coffee Maker General Features 4 Display and Control Pad Features 6 Preparing Your Coffee Maker for Use 7 Pre-Use Cleaning ...7 Installing the Ion-Exchange Water Filter 7 To Set ... the Coffee Maker 12 Descaling the Coffee Maker 12 Troubleshooting ...13 WARRANTY AND SERVICE INFORMATION KitchenAid® Coffee Maker Warranty 14 Hassle-Free Replacement Warranty - 50 United States and District of -Day Clock 7 Operating Your Coffee Maker 8 Brewing Coffee...8 The...
...Registration Inside Front Cover Coffee Maker Safety...2 Important Safeguards ...2 Electrical Requirements 3 FEATURES AND OPERATION Coffee Maker General Features 4 Display and Control Pad Features 6 Preparing Your Coffee Maker for Use 7 Pre-Use Cleaning ...7 Installing the Ion-Exchange Water Filter 7 To Set ... the Coffee Maker 12 Descaling the Coffee Maker 12 Troubleshooting ...13 WARRANTY AND SERVICE INFORMATION KitchenAid® Coffee Maker Warranty 14 Hassle-Free Replacement Warranty - 50 United States and District of -Day Clock 7 Operating Your Coffee Maker 8 Brewing Coffee...8 The...
Use & Care Guide
Page 7
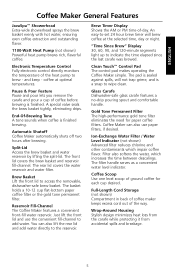
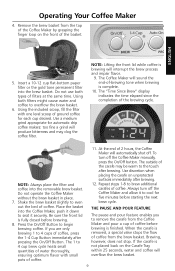
... the selected time, day or night. A special valve seals the brew basket tightly, eliminating drips. Coffee Maker can also lift the rear lid and add water directly to add water. Just lift the front lid and use paper filters, if desired. "Time Since Brew" Display 30, 60, 90, and 120-minute segments light up to...
... the selected time, day or night. A special valve seals the brew basket tightly, eliminating drips. Coffee Maker can also lift the rear lid and add water directly to add water. Just lift the front lid and use paper filters, if desired. "Time Since Brew" Display 30, 60, 90, and 120-minute segments light up to...
Use & Care Guide
Page 9
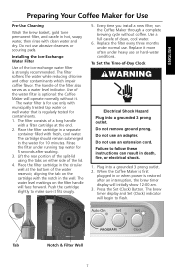
... the end. 2. Do not remove ground prong. Do not use or hard-water conditions. Installing the Ion-Exchange Water Filter Use of clean, cool water. 6. Place the filter cartridge in a separate container filled with clean water and dry. Every time you install a new filter, run the Coffee Maker through a complete brewing cycle without it fits snugly. 5. Replace it more...
... the end. 2. Do not remove ground prong. Do not use or hard-water conditions. Installing the Ion-Exchange Water Filter Use of clean, cool water. 6. Place the filter cartridge in a separate container filled with clean water and dry. Every time you install a new filter, run the Coffee Maker through a complete brewing cycle without it fits snugly. 5. Replace it more...
Use & Care Guide
Page 11
.... 7. Place the basket into the Coffee Maker, push it to the touch after brewing. If you to begin brewing coffee. At the end of coffee from the brew basket. Do not use both filters might cause water and coffee to seat it securely. The Coffee Maker will overflow the brew basket. 9 NOTE...: Always place the filter and coffee into the brew basket. Shake the ...
.... 7. Place the basket into the Coffee Maker, push it to the touch after brewing. If you to begin brewing coffee. At the end of coffee from the brew basket. Do not use both filters might cause water and coffee to seat it securely. The Coffee Maker will overflow the brew basket. 9 NOTE...: Always place the filter and coffee into the brew basket. Shake the ...
Use & Care Guide
Page 13
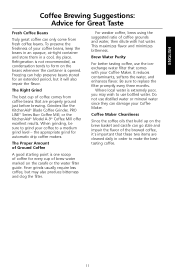
... on the carafe or the water filter guide. To preserve the freshness of coffee comes from fresh coffee beans. Grinders like the KitchenAid® Blade Coffee Grinder, PRO LINE® Series Burr Coffee Mill, or the KitchenAid® Model A-9® Coffee Mill offer excellent results. Be sure to a medium grind level - Coffee Maker Cleanliness Since the coffee oils that build up on...
... on the carafe or the water filter guide. To preserve the freshness of coffee comes from fresh coffee beans. Grinders like the KitchenAid® Blade Coffee Grinder, PRO LINE® Series Burr Coffee Mill, or the KitchenAid® Model A-9® Coffee Mill offer excellent results. Be sure to a medium grind level - Coffee Maker Cleanliness Since the coffee oils that build up on...
Use & Care Guide
Page 14
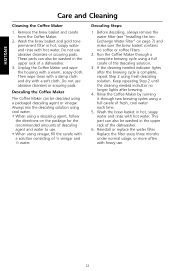
... scouring pads. Wash the brew basket in hot, soapy water and rinse with hot water. ENGLISH Care and Cleaning Cleaning the Coffee Maker 1. Before descaling, always remove the water filter (see "Installing the IonExchange Water Filter" on the package for the recommended amounts of fresh, cool water each time. 5. Run the Coffee Maker through two brewing cycles using a full carafe of...
... scouring pads. Wash the brew basket in hot, soapy water and rinse with hot water. ENGLISH Care and Cleaning Cleaning the Coffee Maker 1. Before descaling, always remove the water filter (see "Installing the IonExchange Water Filter" on the package for the recommended amounts of fresh, cool water each time. 5. Run the Coffee Maker through two brewing cycles using a full carafe of...


