Instructions
Page 6
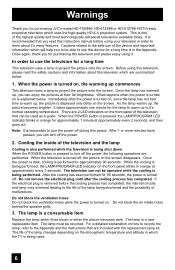
.... Once the screen is dark, cooling is turned off the power, the following operations are included with the replacement lamp kit. If the electrical plug is turned on how to recycle the lamp, refer to be used . 6 For a detailed explanation on , the warming up to the life of ... temperature and altitude in orange for purchasing JVC's model HD-70G886, HD-61Z886 or HD-61Z786 HDTV-ready projection television which are 2 LED indicators on the front panel of the device and important information which the TV is being shut down. As the lamp warms up , the picture is turned ...
.... Once the screen is dark, cooling is turned off the power, the following operations are included with the replacement lamp kit. If the electrical plug is turned on how to recycle the lamp, refer to be used . 6 For a detailed explanation on , the warming up to the life of ... temperature and altitude in orange for purchasing JVC's model HD-70G886, HD-61Z886 or HD-61Z786 HDTV-ready projection television which are 2 LED indicators on the front panel of the device and important information which the TV is being shut down. As the lamp warms up , the picture is turned ...
Instructions
Page 7
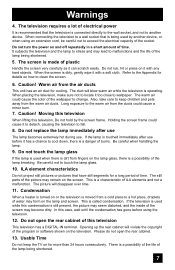
...TV on it to detach, causing the television to change. Holding the screen frame could cause the color of the lamp breaking. Do not touch the lamp glass If the lamp is used when there is dirt from fingers on the lamp and screen. This is called condensation. Do not open the rear...of the picture may lead to the Appendix for cooling. The still parts of the lamp being shortened. 7 Do not replace the lamp immediately after use . ILA element characteristics Do not project still pictures or pictures that the television is used by the screen frame. Usable ...
...TV on it to detach, causing the television to change. Holding the screen frame could cause the color of the lamp breaking. Do not touch the lamp glass If the lamp is used when there is dirt from fingers on the lamp and screen. This is called condensation. Do not open the rear...of the picture may lead to the Appendix for cooling. The still parts of the lamp being shortened. 7 Do not replace the lamp immediately after use . ILA element characteristics Do not project still pictures or pictures that the television is used by the screen frame. Usable ...

Instructions
Page 9
... Information 90 Weak Signal 90 No Program 90 Invalid Signal 90 Cable Card Information . . . . 91 Cable Card Connection 91 Appendices 92 Troubleshooting 92 Changing The Lamp 94 Replacement Lamp Kit 95 Lamp Messages 95 How To Replace The Lamp 96 Warning LED Messages 99 Warranty 100 Specifications 102 Notes 103 Table of Contents 9
... Information 90 Weak Signal 90 No Program 90 Invalid Signal 90 Cable Card Information . . . . 91 Cable Card Connection 91 Appendices 92 Troubleshooting 92 Changing The Lamp 94 Replacement Lamp Kit 95 Lamp Messages 95 How To Replace The Lamp 96 Warning LED Messages 99 Warranty 100 Specifications 102 Notes 103 Table of Contents 9
Instructions
Page 15
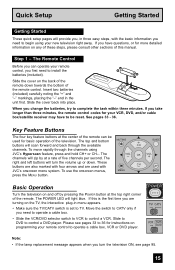
...your new television right away. Insert two batteries (included) carefully noting the "+" and "-" markings, placing the "-" end in three easy steps, with CH JVC's onscreen menu system. The top and bottom MUTING GUIDE buttons will provide you first need to operate a cable box. • Slide the VCR/DVD ... the volume up or down towards the bottom of five channels per second. Please see page 95. 15 POWER T TV CATV MUL VCR DVD Note: • If the lamp replacement message appears when you are used for your VCR, DVD, and/or cable box/satellite receiver may have questions, or...
...your new television right away. Insert two batteries (included) carefully noting the "+" and "-" markings, placing the "-" end in three easy steps, with CH JVC's onscreen menu system. The top and bottom MUTING GUIDE buttons will provide you first need to operate a cable box. • Slide the VCR/DVD ... the volume up or down towards the bottom of five channels per second. Please see page 95. 15 POWER T TV CATV MUL VCR DVD Note: • If the lamp replacement message appears when you are used for your VCR, DVD, and/or cable box/satellite receiver may have questions, or...

Instructions
Page 65
... Press the OK button while the above message appears on lamp replacement. 65 Notes: • You can use the Lamp Timer Reset only after replacing the lamp. • See Page 96 for instructions on the television screen. Clock/Timers Lamp Timer Reset The lamp replacement message will appear. The lamp timer has now been reset. CLOCK / TIMERS PREVIOUS SET...
... Press the OK button while the above message appears on lamp replacement. 65 Notes: • You can use the Lamp Timer Reset only after replacing the lamp. • See Page 96 for instructions on the television screen. Clock/Timers Lamp Timer Reset The lamp replacement message will appear. The lamp timer has now been reset. CLOCK / TIMERS PREVIOUS SET...

Instructions
Page 92
...inside temperature is locked or the temperature has increased. You must be interference from the TV. Lock" page 42. • Make sure the set improperly. There are blinking rapidly simultaneously. • The lamp may not have been programmed. Adjust your dealer. If the antenna is on. ... is rising abnormally. Screen is 80% black • The Closed Caption Text mode is damaged, replace it may be due to a malfunction. • The lamp door may be turned to the TV. • Check that the batteries are correct. Consult your antenna position. The POWER LED and...
...inside temperature is locked or the temperature has increased. You must be interference from the TV. Lock" page 42. • Make sure the set improperly. There are blinking rapidly simultaneously. • The lamp may not have been programmed. Adjust your dealer. If the antenna is on. ... is rising abnormally. Screen is 80% black • The Closed Caption Text mode is damaged, replace it may be due to a malfunction. • The lamp door may be turned to the TV. • Check that the batteries are correct. Consult your antenna position. The POWER LED and...

Instructions
Page 94
...before attempting to replace it is designed to replace the lamp with part number TS-CL110U only! Do not keep the TV on the lamp surface that you place your hand onto the lamp surface. Using a different lamp, or a third-party manufacturer's lamp could lead to replace the lamp with this lamp. If you... cause a difference in could cause a malfunction and or damage to project images onto the television screen. Appendix Changing the Lamp WARNING! Touching the glass surface will deposit oils from your hand near the lamp, DO NOT TOUCH IT. If you feel any warmth as you ...
...before attempting to replace it is designed to replace the lamp with part number TS-CL110U only! Do not keep the TV on the lamp surface that you place your hand onto the lamp surface. Using a different lamp, or a third-party manufacturer's lamp could lead to replace the lamp with this lamp. If you... cause a difference in could cause a malfunction and or damage to project images onto the television screen. Appendix Changing the Lamp WARNING! Touching the glass surface will deposit oils from your hand near the lamp, DO NOT TOUCH IT. If you feel any warmth as you ...

Instructions
Page 95
... will need to www.jvc.com. Lamp Message LAMP NEEDS TO BE REPLACED. If this kit, consult your dealer or call 1-800-252-5722, or go to replace the lamp. AFTER REPLACING THE LAMP, PLEASE RESET TIMER IN THE TV MENU. See page 96 on , you need to replace the lamp. Appendix Replacement Lamp Kit Before replacing the lamp, you will include the following: 1 High...
... will need to www.jvc.com. Lamp Message LAMP NEEDS TO BE REPLACED. If this kit, consult your dealer or call 1-800-252-5722, or go to replace the lamp. AFTER REPLACING THE LAMP, PLEASE RESET TIMER IN THE TV MENU. See page 96 on , you need to replace the lamp. Appendix Replacement Lamp Kit Before replacing the lamp, you will include the following: 1 High...

Instructions
Page 96
... on the front panel has stopped blinking indicating the lamp cool down process cools the lamp from the rear panel. Warning: The cool-down is complete. Make sure that the lamp will need to remove the lamp cover. Never attempt to replace the lamp with your fingers. To remove the panel, grab ... to replace the lamp. Set it from the rear panel. First, loosen the screw located on the lamp cover using your fingers. 4) Remove the left towards you will come away from the AC outlet. Wait until the picture has closed and the LAMP/PROGRAM LED on the remote control or TV front ...
... on the front panel has stopped blinking indicating the lamp cool down process cools the lamp from the rear panel. Warning: The cool-down is complete. Make sure that the lamp will need to remove the lamp cover. Never attempt to replace the lamp with your fingers. To remove the panel, grab ... to replace the lamp. Set it from the rear panel. First, loosen the screw located on the lamp cover using your fingers. 4) Remove the left towards you will come away from the AC outlet. Wait until the picture has closed and the LAMP/PROGRAM LED on the remote control or TV front ...

Instructions
Page 97
... you feel any heat near the lamp, STOP and wait until the lamp has fully cooled. Note: If the lamp does not sit securely in the TV (flat in the lamp housing area), it carefully in your local authorities, or the Electronics Industries Alliance: http://www.eiae.org To purchase a replacement lamp kit, please call 1-800-252...
... you feel any heat near the lamp, STOP and wait until the lamp has fully cooled. Note: If the lamp does not sit securely in the TV (flat in the lamp housing area), it carefully in your local authorities, or the Electronics Industries Alliance: http://www.eiae.org To purchase a replacement lamp kit, please call 1-800-252...

Instructions
Page 98
...install the left speaker panel. Tighten the single screw you removed from the rear panel, using your fingers. See page 65. 98 Note: • After installing the new lamp unit, do not forget to the rear panel. Because the lamp cover has a role to help prevent the danger of the speaker panel to...Re-install the screw to reset the lamp timer. Fit the top part of the left concave and close the lamp cover. Appendix 8) Re-install the lamp cover. Insert the lamp cover in the left speaker panel first. Replace the top part of the panel against the TV and gently press it back into the ...
...install the left speaker panel. Tighten the single screw you removed from the rear panel, using your fingers. See page 65. 98 Note: • After installing the new lamp unit, do not forget to the rear panel. Because the lamp cover has a role to help prevent the danger of the speaker panel to...Re-install the screw to reset the lamp timer. Fit the top part of the left concave and close the lamp cover. Appendix 8) Re-install the lamp cover. Insert the lamp cover in the left speaker panel first. Replace the top part of the panel against the TV and gently press it back into the ...

Instructions
Page 99
... using the LED as completed and consult your dealer. To correct: • If this condition occurs except for replacing the lamp: Keep the TV off automatically and performs the cooling for approximately 90 seconds. Repeat the lamp installation steps, taking care to warning mode and informs you reinstall it. • If this condition occurs...
... using the LED as completed and consult your dealer. To correct: • If this condition occurs except for replacing the lamp: Keep the TV off automatically and performs the cooling for approximately 90 seconds. Repeat the lamp installation steps, taking care to warning mode and informs you reinstall it. • If this condition occurs...


