Instructions
Page 6
...lamp Cooling is also performed while the television is a user replaceable item. Once the screen is dark, cooling is performed for approximately 1 minute at approximately every 2 seconds, and then goes out. After the cooling has been performed for purchasing JVC's model HD-61Z585 , HD-52Z585, HD-61Z575 or HD-52Z575 HDTV-ready projection.... This is one minute for a long time is explained below . 1. Cautions related to the safe use this television which the TV is turned on the front panel blinks in order to the life of the television that are summarized below . Once the...
...lamp Cooling is also performed while the television is a user replaceable item. Once the screen is dark, cooling is performed for approximately 1 minute at approximately every 2 seconds, and then goes out. After the cooling has been performed for purchasing JVC's model HD-61Z585 , HD-52Z585, HD-61Z575 or HD-52Z575 HDTV-ready projection.... This is one minute for a long time is explained below . 1. Cautions related to the safe use this television which the TV is turned on the front panel blinks in order to the life of the television that are summarized below . Once the...
Instructions
Page 7
...6. When placing the television, make sure not to change. Caution! Do not replace the lamp immediately after use . Do not open the rear cabinet. 13. Usable Time Do not keep children and pets away from fi...to malfunctions and the life of ILA elements and not a malfunction. ILA element characteristics Do not project still pictures or pictures that is a possibility of the program or software shown on it with...cause it has a chance to keep the TV on the lamp and screen. It subjects the television and the lamp to touch the lamp glass. 10. Be careful when handling the...
...6. When placing the television, make sure not to change. Caution! Do not replace the lamp immediately after use . Do not open the rear cabinet. 13. Usable Time Do not keep children and pets away from fi...to malfunctions and the life of ILA elements and not a malfunction. ILA element characteristics Do not project still pictures or pictures that is a possibility of the program or software shown on it with...cause it has a chance to keep the TV on the lamp and screen. It subjects the television and the lamp to touch the lamp glass. 10. Be careful when handling the...
Instructions
Page 8
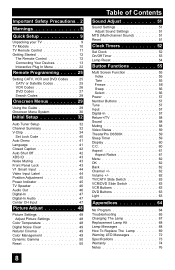
...of Contents Sound Adjust 51 Sound Settings 51 Adjust Sound Settings 51 MTS (Multi-channel Sound 51 Reset 51 Clock Timers 52 Set Clock 52 On/Off Timer 53 Lamp Reset 54 Button Functions 55 Multi Screen Function 55 Index 55 Twin 55 Freeze 56 Swap 56 Select 56 Power 57 ...62 Back 62 Channel 62 Volume 62 TV/CATV Slide Switch 63 VCR/DVD Slide Switch 63 VCR Buttons 63 DVD Buttons 63 Light 63 Appendices 64 No Program 64 Troubleshooting 65 Changing The Lamp 67 Replacement Lamp Kit 68 Lamp Messages 68 How To Replace The Lamp 69 Warning LED Messages 72 Specifications 73...
...of Contents Sound Adjust 51 Sound Settings 51 Adjust Sound Settings 51 MTS (Multi-channel Sound 51 Reset 51 Clock Timers 52 Set Clock 52 On/Off Timer 53 Lamp Reset 54 Button Functions 55 Multi Screen Function 55 Index 55 Twin 55 Freeze 56 Swap 56 Select 56 Power 57 ...62 Back 62 Channel 62 Volume 62 TV/CATV Slide Switch 63 VCR/DVD Slide Switch 63 VCR Buttons 63 DVD Buttons 63 Light 63 Appendices 64 No Program 64 Troubleshooting 65 Changing The Lamp 67 Replacement Lamp Kit 68 Lamp Messages 68 How To Replace The Lamp 69 Warning LED Messages 72 Specifications 73...
Instructions
Page 13
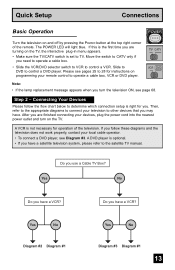
...optional. • If you have a VCR? A VCR is not necessary for instructions on the TV. Yes No Diagram #2 Diagram #1 Yes No Diagram #3 Diagram #1 13 TV CATV VCR DVD A Note: • If the lamp replacement message appears when you . After you have a satellite television system, please refer to determine which ...to DVD to other devices that you need to operate a cable box. • Slide the VCR/DVD selector switch to VCR to TV. Then, refer to the appropriate diagrams to connect your remote control to 28 for operation of the remote. Yes No Do you are ...
...optional. • If you have a VCR? A VCR is not necessary for instructions on the TV. Yes No Diagram #2 Diagram #1 Yes No Diagram #3 Diagram #1 13 TV CATV VCR DVD A Note: • If the lamp replacement message appears when you . After you have a satellite television system, please refer to determine which ...to DVD to other devices that you need to operate a cable box. • Slide the VCR/DVD selector switch to VCR to TV. Then, refer to the appropriate diagrams to connect your remote control to 28 for operation of the remote. Yes No Do you are ...

Instructions
Page 54
...; See Page 68 for instructions on the television screen. After you replace the lamp, you need to change the lamp. NEXT PAGE SELECT OPERATE MENU EXIT Press the OK button while the above message appears on lamp replacement. 54 Clock/Timers Lamp Timer Reset The lamp replacement message will appear when you need to reset the timer which...
...; See Page 68 for instructions on the television screen. After you replace the lamp, you need to change the lamp. NEXT PAGE SELECT OPERATE MENU EXIT Press the OK button while the above message appears on lamp replacement. 54 Clock/Timers Lamp Timer Reset The lamp replacement message will appear when you need to reset the timer which...
Instructions
Page 65
...unplugged. • Perhaps the On/Off Timer is less prone to the TV. • Check that the batteries are blinking alternately. Lock" page 33. • Make sure the set improperly. See page 59. See page 52. Move the antenna away from the wall outlet and wait a while .... • The tuner (Auto Tuner Setup) could be interference from the TV. Adjust your dealer. • It may be a malfunction that external noise or interference is damaged, replace it may be due to a malfunction. • The lamp door may not be closed correctly. • The antenna could be disconnected....
...unplugged. • Perhaps the On/Off Timer is less prone to the TV. • Check that the batteries are blinking alternately. Lock" page 33. • Make sure the set improperly. See page 59. See page 52. Move the antenna away from the wall outlet and wait a while .... • The tuner (Auto Tuner Setup) could be interference from the TV. Adjust your dealer. • It may be a malfunction that external noise or interference is damaged, replace it may be due to a malfunction. • The lamp door may not be closed correctly. • The antenna could be disconnected....
Instructions
Page 67
... the picture becoming dark. Replace the lamp with this lamp. Under operating conditions, THE LAMP WILL GET EXTREMELY HOT AND WILL CAUSE SEVERE BURNS IF TOUCHED. Do not keep the TV on for more . When the lamp nears the end of the lamp changes depending on the lamp surface that you how to project images onto the television screen...
... the picture becoming dark. Replace the lamp with this lamp. Under operating conditions, THE LAMP WILL GET EXTREMELY HOT AND WILL CAUSE SEVERE BURNS IF TOUCHED. Do not keep the TV on for more . When the lamp nears the end of the lamp changes depending on the lamp surface that you how to project images onto the television screen...

Instructions
Page 68
... every time you turn the TV on how to purchase a replacement kit, part number TS-CL110U. Press the OK button to www.jvc.com. PRESS OK, IF YOU DO NOT WANT TO SEE THIS MESSAGE AGAIN. See page 69 on , you need to replace the lamp. Appendix Replacement Lamp Kit Before replacing the lamp, you will include the following...
... every time you turn the TV on how to purchase a replacement kit, part number TS-CL110U. Press the OK button to www.jvc.com. PRESS OK, IF YOU DO NOT WANT TO SEE THIS MESSAGE AGAIN. See page 69 on , you need to replace the lamp. Appendix Replacement Lamp Kit Before replacing the lamp, you will include the following...
Instructions
Page 69
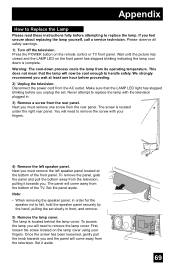
...rear panel. The panel will come away from its operating temperature. First, loosen the screw located on the remote control or TV front panel. Warning: The cool-down is complete. To remove the panel, grab the panel and pull the bottom away from the television. Appendix How to Replace the Lamp...of the front panel. This does not mean that the LAMP LED light has stopped blinking before you feel unsure about replacing the lamp yourself, call a service technician. If you unplug the set slowly in . 3) Remove a screw from the rear panel. Never attempt to fall, hold the speaker panel ...
...rear panel. The panel will come away from its operating temperature. First, loosen the screw located on the remote control or TV front panel. Warning: The cool-down is complete. To remove the panel, grab the panel and pull the bottom away from the television. Appendix How to Replace the Lamp...of the front panel. This does not mean that the LAMP LED light has stopped blinking before you feel unsure about replacing the lamp yourself, call a service technician. If you unplug the set slowly in . 3) Remove a screw from the rear panel. Never attempt to fall, hold the speaker panel ...

Instructions
Page 70
... designed to work specifically with part number TS-CL110U only! Note: If the lamp does not sit securely in the TV (flat in your local authorities, or the Electronics Industries Alliance: http://www.eiae.org To purchase a replacement lamp kit, please call 1-800-252-5722. 70 WARNING! Remember it won't turn on page 67...
... designed to work specifically with part number TS-CL110U only! Note: If the lamp does not sit securely in the TV (flat in your local authorities, or the Electronics Industries Alliance: http://www.eiae.org To purchase a replacement lamp kit, please call 1-800-252-5722. 70 WARNING! Remember it won't turn on page 67...
Instructions
Page 71
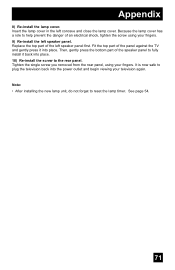
...bottom part of the panel against the TV and gently press it back into place. 10) Re-install the screw to the rear panel. Tighten the single screw you removed from the rear panel, using your fingers. Note: • After installing the new lamp unit, do not forget to help... prevent the danger of the left concave and close the lamp cover. Appendix 8) Re-install the lamp cover. It is now safe to fully install it into the power outlet and begin viewing your television again. Replace...
...bottom part of the panel against the TV and gently press it back into place. 10) Re-install the screw to the rear panel. Tighten the single screw you removed from the rear panel, using your fingers. Note: • After installing the new lamp unit, do not forget to help... prevent the danger of the left concave and close the lamp cover. Appendix 8) Re-install the lamp cover. It is now safe to fully install it into the power outlet and begin viewing your television again. Replace...

Instructions
Page 72
...while and then turn the power on again. Or it . • If this condition occurs soon after replacing the lamp: Reinstall the new lamp unit. If the TV goes into warning mode, unplug the TV after the cool down as completed and consult your dealer. To correct: • If this condition occurs... except for replacing the lamp: Keep the TV off for a while and then turn the power on again. The POWER LED and LAMP LED blink rapidly simultaneously Condition: The lamp unit has been installed on a slant and is not flat, or it...
...while and then turn the power on again. Or it . • If this condition occurs soon after replacing the lamp: Reinstall the new lamp unit. If the TV goes into warning mode, unplug the TV after the cool down as completed and consult your dealer. To correct: • If this condition occurs... except for replacing the lamp: Keep the TV off for a while and then turn the power on again. The POWER LED and LAMP LED blink rapidly simultaneously Condition: The lamp unit has been installed on a slant and is not flat, or it...


