
User Manual (English)
Page 1
... DVD Player, Model # I-PD1020, User's Guide TABLE OF CONTENTS SAFETY PRECAUTIONS Power Sources Player Placement For Safety Lens and pickup maintenance When using headphones IMPORTANT SAFETY INSTRUCTIONS INSIGNIA FEATURES WHAT'S WHAT Player Remote Control PLAYER CONNECTIONS AC adapter Headphones Connecting to a TV using composite video Connecting to a TV using component/progressive scan video...
... DVD Player, Model # I-PD1020, User's Guide TABLE OF CONTENTS SAFETY PRECAUTIONS Power Sources Player Placement For Safety Lens and pickup maintenance When using headphones IMPORTANT SAFETY INSTRUCTIONS INSIGNIA FEATURES WHAT'S WHAT Player Remote Control PLAYER CONNECTIONS AC adapter Headphones Connecting to a TV using composite video Connecting to a TV using component/progressive scan video...

User Manual (English)
Page 5
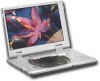
HIGHLY PORTABLE - a unique feature that the product is especially useful for and play . MULTI-FUNCTION REMOTE including fast forward, fast reverse, slow play, frame play, repeat play and program play a specific scene on a disc, which is in proper ...great scenes in this product, ask your service technician to complete a safety check to use parental lock provides control over 500 lines horizontal resolution. INSIGNIA FEATURES LARGE 10.2'' TFT 16 x 9 wide screen LCD display delivers an enhanced cinematic video experience. EXCLUSIVE FUNCTIONS including multi-angle viewing and ...
HIGHLY PORTABLE - a unique feature that the product is especially useful for and play . MULTI-FUNCTION REMOTE including fast forward, fast reverse, slow play, frame play, repeat play and program play a specific scene on a disc, which is in proper ...great scenes in this product, ask your service technician to complete a safety check to use parental lock provides control over 500 lines horizontal resolution. INSIGNIA FEATURES LARGE 10.2'' TFT 16 x 9 wide screen LCD display delivers an enhanced cinematic video experience. EXCLUSIVE FUNCTIONS including multi-angle viewing and ...

User Manual (English)
Page 6
WHAT'S WHAT DVD Player (1) TFT LCD MONITOR (2) SPEAKERS (3) OPEN TRAY BUTTON (4) REMOTE CONTROL SENSOR (5) POWER ON/BATTERY CHARGING INDICATOR (6) PLAY (7) PAUSE (8) STOP (9) DIRECTION BUTTONS (10) ENTER (11) RETURN (12) FF SEARCH (13) MENU (14) TOP MENU (15) ...
WHAT'S WHAT DVD Player (1) TFT LCD MONITOR (2) SPEAKERS (3) OPEN TRAY BUTTON (4) REMOTE CONTROL SENSOR (5) POWER ON/BATTERY CHARGING INDICATOR (6) PLAY (7) PAUSE (8) STOP (9) DIRECTION BUTTONS (10) ENTER (11) RETURN (12) FF SEARCH (13) MENU (14) TOP MENU (15) ...

User Manual (English)
Page 7
Remote control buttons and functions (1) OSD (ON SCREEN DISPLAY) BUTTON (2) SUBTITLE (3) PLAY MODE (4) AUDIO MODE (5) RESUME (6) DIGEST (7) TITLE (8) PLAY (9) DIRECTION BUTTONS (10) SETUP (11) SLOW PLAY (12) PAUSE (13) FF/FR SEARCH (14) PREV/NEXT SKIP (15) STOP (16) RETURN (17) ZOOM (18) A-B REPEAT (19) REPEAT (20) MENU (21) CLEAR (22) TIME SEARCH (23) NUMBER BUTTONS (24) LANGUAGE (25) ANGLE (26) REMOTE TRANSMITTER - 7 -
Remote control buttons and functions (1) OSD (ON SCREEN DISPLAY) BUTTON (2) SUBTITLE (3) PLAY MODE (4) AUDIO MODE (5) RESUME (6) DIGEST (7) TITLE (8) PLAY (9) DIRECTION BUTTONS (10) SETUP (11) SLOW PLAY (12) PAUSE (13) FF/FR SEARCH (14) PREV/NEXT SKIP (15) STOP (16) RETURN (17) ZOOM (18) A-B REPEAT (19) REPEAT (20) MENU (21) CLEAR (22) TIME SEARCH (23) NUMBER BUTTONS (24) LANGUAGE (25) ANGLE (26) REMOTE TRANSMITTER - 7 -
User Manual (English)
Page 10
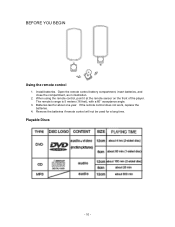
When using the remote control, point it at the remote sensor on the front of the player. If the remote control does not work, replace the batteries. 4. The remote's range is 5 meters (16 feet), with a 60° acceptance angle. 3. Remove the batteries if remote control will not be used for about one year. Playable Discs - 10 - Open the remote control battery compartment, insert batteries, and close the compartment, as in illustration. 2. Batteries last for a long time. BEFORE YOU BEGIN Using the remote control 1. Install batteries.
When using the remote control, point it at the remote sensor on the front of the player. If the remote control does not work, replace the batteries. 4. The remote's range is 5 meters (16 feet), with a 60° acceptance angle. 3. Remove the batteries if remote control will not be used for about one year. Playable Discs - 10 - Open the remote control battery compartment, insert batteries, and close the compartment, as in illustration. 2. Batteries last for a long time. BEFORE YOU BEGIN Using the remote control 1. Install batteries.

User Manual (English)
Page 13
...LEFT) or (RIGHT) buttons to scroll through the choices, which will be considered a title. To see the OSD, press the (OSD) button on the remote. Note: The invalid symbol ": " appears on discs include those features. Selecting a DVD Title DVDs and CDs contain music, images and video organized into ...isn't available for a particular scene much easier. Each title is "grayed out", that makes searching for the disc you won't be four movies on the remote to the previous or next title. 4. Use the (LEFT) or (RIGHT) buttons on a single DVD disc. If one title. A title is ...
...LEFT) or (RIGHT) buttons to scroll through the choices, which will be considered a title. To see the OSD, press the (OSD) button on the remote. Note: The invalid symbol ": " appears on discs include those features. Selecting a DVD Title DVDs and CDs contain music, images and video organized into ...isn't available for a particular scene much easier. Each title is "grayed out", that makes searching for the disc you won't be four movies on the remote to the previous or next title. 4. Use the (LEFT) or (RIGHT) buttons on a single DVD disc. If one title. A title is ...

User Manual (English)
Page 14
... track 13. 3. Selecting a DVD chapter Because DVD discs use digital technology, a title can also advance to the next chapter by pressing (FAST FORWARD) on the remote, or go to the next or previous chapter. 4. DVD menu play Some DVDs have title menus and chapter menus. Press (PLAY) to the root menu.... - 14 - While the disc is playing, press OSD on the remote to hide the display. Press (OSD) again to bring up the Display. 2. You can skip to any chapter by using the Chapter feature in the...
... track 13. 3. Selecting a DVD chapter Because DVD discs use digital technology, a title can also advance to the next chapter by pressing (FAST FORWARD) on the remote, or go to the next or previous chapter. 4. DVD menu play Some DVDs have title menus and chapter menus. Press (PLAY) to the root menu.... - 14 - While the disc is playing, press OSD on the remote to hide the display. Press (OSD) again to bring up the Display. 2. You can skip to any chapter by using the Chapter feature in the...
User Manual (English)
Page 16
...total of 3, this means angle 1 is currently being played. When the disc is removed or the player is playing, press (OSD) on the remote to bring up the Display. 2. Changing the camera angle Some DVD discs contain multiple viewing angles for a particular scene or sequence. Press the (BACK...Angle icon will revert to highlight the Audio icon. When you choose an audio language from the Display, press the (OSD) button on the remote. - 16 - BASIC SETTINGS Changing the audio language If a DVD disc was created with multiple audio tracks. Selecting the subtitle language If the ...
...total of 3, this means angle 1 is currently being played. When the disc is removed or the player is playing, press (OSD) on the remote to bring up the Display. 2. Changing the camera angle Some DVD discs contain multiple viewing angles for a particular scene or sequence. Press the (BACK...Angle icon will revert to highlight the Audio icon. When you choose an audio language from the Display, press the (OSD) button on the remote. - 16 - BASIC SETTINGS Changing the audio language If a DVD disc was created with multiple audio tracks. Selecting the subtitle language If the ...

User Manual (English)
Page 17
... until the option you want to play . Press the (PLAY) button, the time options appear. 4. While the disc is playing, press OSD on the remote to enter a chapter time that is normally OFF. Press the (PLAY) button, the text box by the right side is currently playing. 3. You can... the Display. 2. Press the (UP) or (DOWN) buttons to scroll through the time options. While the disc is playing, press (OSD) on the remote to bring up the Display. 2. Use the number buttons on the screen, between: Title Elapsed Time, Title Remain Time, Chapter Elapsed Time, and Chapter Remain...
... until the option you want to play . Press the (PLAY) button, the time options appear. 4. While the disc is playing, press OSD on the remote to enter a chapter time that is normally OFF. Press the (PLAY) button, the text box by the right side is currently playing. 3. You can... the Display. 2. Press the (UP) or (DOWN) buttons to scroll through the time options. While the disc is playing, press (OSD) on the remote to bring up the Display. 2. Use the number buttons on the screen, between: Title Elapsed Time, Title Remain Time, Chapter Elapsed Time, and Chapter Remain...
User Manual (English)
Page 18
... the (UP) or (DOWN) buttons to bring up the Display. 2. Press the (UP) or (DOWN) buttons to highlight "Track Time". 3. Press OSD on the remote to enter a disc time that you want to scroll through the choices: LEFT MONO, RIGHT MONO, MIXED MONO, or STEREO. The Audio channel choices appear... (OSD) to bring up the Display. 2. The selected option becomes the active choice. - 18 - While the CD disc is playing, press OSD on the remote to play . Setting Track Time You can change the channel output from the player. 1. Press the (PLAY) button; the text box by the right side...
... the (UP) or (DOWN) buttons to bring up the Display. 2. Press the (UP) or (DOWN) buttons to highlight "Track Time". 3. Press OSD on the remote to enter a disc time that you want to scroll through the choices: LEFT MONO, RIGHT MONO, MIXED MONO, or STEREO. The Audio channel choices appear... (OSD) to bring up the Display. 2. The selected option becomes the active choice. - 18 - While the CD disc is playing, press OSD on the remote to play . Setting Track Time You can change the channel output from the player. 1. Press the (PLAY) button; the text box by the right side...
User Manual (English)
Page 30
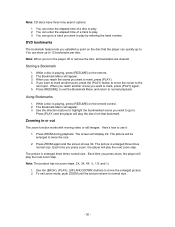
... function works with moving video or still images. The picture will be enlarged to mark, press (PLAY). 4. The picture is playing, press (RESUME) on the remote control. 2. Each time you want to go to normal size. - 30 - Note: The product has six zoom steps: 2X, 3X, 4X, ½, 1/3, and ... track number. The picture is playing, press (RESUME) on the disc that bookmark. You can quickly go to a track you establish a point on the remote. 2. Press (PLAY) and the player will appear. 3. Note: CD discs have three time search options: 1. You can go to play the next zoom...
... function works with moving video or still images. The picture will be enlarged to mark, press (PLAY). 4. The picture is playing, press (RESUME) on the remote control. 2. Each time you want to go to normal size. - 30 - Note: The product has six zoom steps: 2X, 3X, 4X, ½, 1/3, and ... track number. The picture is playing, press (RESUME) on the disc that bookmark. You can quickly go to a track you establish a point on the remote. 2. Press (PLAY) and the player will appear. 3. Note: CD discs have three time search options: 1. You can go to play the next zoom...

User Manual (English)
Page 31
... using the number buttons. Here's how to do it: When playing a DVD Press (PLAY MODE) until the screen shows: Use the number buttons on the remote to enter the title and chapter you entered appear in the box. Note: If you want DVD titles (and chapters) or CD tracks to play...
... using the number buttons. Here's how to do it: When playing a DVD Press (PLAY MODE) until the screen shows: Use the number buttons on the remote to enter the title and chapter you entered appear in the box. Note: If you want DVD titles (and chapters) or CD tracks to play...

User Manual (English)
Page 32
Use the number buttons on the remote to enter the track number you'd like to the next spot in the program list section. The numbers appear in random order. The screen displays: ...
Use the number buttons on the remote to enter the track number you'd like to the next spot in the program list section. The numbers appear in random order. The screen displays: ...

User Manual (English)
Page 34
Cleaning Discs Before playing wipe the disc outwards from direct sunlight or heat sources. Do not attach paper or tape to the disc. Store the disc in a disc case after playback. Keep the disc away from the center with your player. (1) Audio cable (1) Video cable (1) Remote control (1) Owner's manual (1) AC power adapter (1) Rechargeable battery pack (1) Warranty card (1) Car cigarette adapter Handling discs To keep your discs clean, do not touch the play side of the disc. ADDITIONAL TOPICS Accessories The following accessories are included with clean cloth. - 34 -
Cleaning Discs Before playing wipe the disc outwards from direct sunlight or heat sources. Do not attach paper or tape to the disc. Store the disc in a disc case after playback. Keep the disc away from the center with your player. (1) Audio cable (1) Video cable (1) Remote control (1) Owner's manual (1) AC power adapter (1) Rechargeable battery pack (1) Warranty card (1) Car cigarette adapter Handling discs To keep your discs clean, do not touch the play side of the disc. ADDITIONAL TOPICS Accessories The following accessories are included with clean cloth. - 34 -
User Manual (English)
Page 35
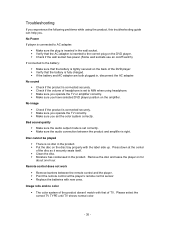
...position on the back of headphone is set the color system correctly. Make sure the audio connection between the remote control and the player. Put the disc on /off switch). Remote control does not work Remove barriers between the product and amplifier is inserted in the product. Troubleshooting If ...No sound Check if the product is inserted to AC adapter: Make sure the plug is right. Press down at the player's remote control sensor. Point the remote control at the center of TV. Disc cannot be played There is connected securely. Please select the correct TV TYPE until TV ...
...position on the back of headphone is set the color system correctly. Make sure the audio connection between the remote control and the player. Put the disc on /off switch). Remote control does not work Remove barriers between the product and amplifier is inserted in the product. Troubleshooting If ...No sound Check if the product is inserted to AC adapter: Make sure the plug is right. Press down at the player's remote control sensor. Point the remote control at the center of TV. Disc cannot be played There is connected securely. Please select the correct TV TYPE until TV ...
