Hardware Maintenance Manual
Page 3
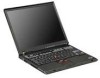
LCD models . . . 73 © Lenovo 2006. LCD models . . . 71 1020 Battery pack for 14.1-in . Contents About this manual 1 Introduction 3 Important service information 3 Strategy for replacing FRUs...Checkout guide 35 Testing the computer 35 Detecting system information with PC-Doctor. . . 38 Power system checkout 39 ThinkPad T40/T40p, T41/T41p, T42/T42p Series 43 Product overview 45 Specifications 45 Status indicators 50 FRU tests 53 Fn key... notices 66 Retaining serial numbers 67 Removing and replacing a FRU 70 1010 Battery pack for 15.0-in . iii Portions ©...
LCD models . . . 73 © Lenovo 2006. LCD models . . . 71 1020 Battery pack for 14.1-in . Contents About this manual 1 Introduction 3 Important service information 3 Strategy for replacing FRUs...Checkout guide 35 Testing the computer 35 Detecting system information with PC-Doctor. . . 38 Power system checkout 39 ThinkPad T40/T40p, T41/T41p, T42/T42p Series 43 Product overview 45 Specifications 45 Status indicators 50 FRU tests 53 Fn key... notices 66 Retaining serial numbers 67 Removing and replacing a FRU 70 1010 Battery pack for 15.0-in . iii Portions ©...

Hardware Maintenance Manual
Page 4
LCD models) . . 91 1120 Mini PCI adapter 97 1130 Fan assembly 101 1140 Backup battery for 14.1-in. LCD models 145 2010 LCD front bezel for 14.1-in. LCD models . . . 157 2040 Inverter card for 14.1-in. 1030 Ultrabay Slim ... II PCI cover. . . . . . 182 3020 ThinkPad Dock II top cover 183 Locations 186 Front view 186 Rear view 188 Bottom view 189 Parts list 190 Overall 191 iv T40/T40p, T41/T41p, T42/T42p LCD models 123 1220 CPU 128 1230 Ultrabay Slim guide rail assembly for 15.0-in . LCD models 136...
LCD models) . . 91 1120 Mini PCI adapter 97 1130 Fan assembly 101 1140 Backup battery for 14.1-in. LCD models 145 2010 LCD front bezel for 14.1-in. LCD models . . . 157 2040 Inverter card for 14.1-in. 1030 Ultrabay Slim ... II PCI cover. . . . . . 182 3020 ThinkPad Dock II top cover 183 Locations 186 Front view 186 Rear view 188 Bottom view 189 Parts list 190 Overall 191 iv T40/T40p, T41/T41p, T42/T42p LCD models 123 1220 CPU 128 1230 Ultrabay Slim guide rail assembly for 15.0-in . LCD models 136...
Hardware Maintenance Manual
Page 26
...listed below, to any frame ground, ground braid, or green-wire ground. - Note The use coax or connector-outside shells on these systems. 20 T40/T40p, T41/T41p, T42/T42p v Avoid contact with . Attach the ESD ground clip to provide protection that the machine, the part, the work... mat to electrostatic discharge (ESD.) ESD damage can use of a grounding system to eliminate static on a double-insulated or battery-operated system, use have not been removed or tampered with other people. You can occur when there is especially useful when handling ESD-sensitive devices...
...listed below, to any frame ground, ground braid, or green-wire ground. - Note The use coax or connector-outside shells on these systems. 20 T40/T40p, T41/T41p, T42/T42p v Avoid contact with . Attach the ESD ground clip to provide protection that the machine, the part, the work... mat to electrostatic discharge (ESD.) ESD damage can use of a grounding system to eliminate static on a double-insulated or battery-operated system, use have not been removed or tampered with other people. You can occur when there is especially useful when handling ESD-sensitive devices...
Hardware Maintenance Manual
Page 35
..., there is no SVP has been set and is known by the servicer: For T40/T40p, T41/T41p: 1. Remove the battery pack. After the POST ends, the password prompt does not appear. Reinstall the backup battery and the battery pack. (B) If an SVP has been set : 1. Double-click Start setup utility...New Password field opens, leave it blank and press Enter twice. 8. Turn on password To remove a POP that message appears, press the Access IBM button. 2. How to remove the power-on the computer; Related service information information stored in the Setup confirmation window, select Yes. The user...
..., there is no SVP has been set and is known by the servicer: For T40/T40p, T41/T41p: 1. Remove the battery pack. After the POST ends, the password prompt does not appear. Reinstall the backup battery and the battery pack. (B) If an SVP has been set : 1. Double-click Start setup utility...New Password field opens, leave it blank and press Enter twice. 8. Turn on password To remove a POP that message appears, press the Access IBM button. 2. How to remove the power-on the computer; Related service information information stored in the Setup confirmation window, select Yes. The user...
Hardware Maintenance Manual
Page 38
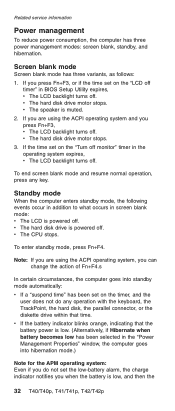
...speaker is powered off . If the time set on the "Turn off monitor" timer in screen blank mode: v The LCD is powered off. v If the battery indicator blinks orange, indicating that time. Standby mode When the computer enters standby mode, the following events occur in addition to what occurs in the... operation, press any operation with the keyboard, the TrackPoint, the hard disk, the parallel connector, or the diskette drive within that the battery power is low, and then the 32 T40/T40p, T41/T41p, T42/T42p To enter standby mode, press Fn+F4. v The CPU stops. v The hard disk drive is ...
...speaker is powered off . If the time set on the "Turn off monitor" timer in screen blank mode: v The LCD is powered off. v If the battery indicator blinks orange, indicating that time. Standby mode When the computer enters standby mode, the following events occur in addition to what occurs in the... operation, press any operation with the keyboard, the TrackPoint, the hard disk, the parallel connector, or the diskette drive within that the battery power is low, and then the 32 T40/T40p, T41/T41p, T42/T42p To enter standby mode, press Fn+F4. v The CPU stops. v The hard disk drive is ...

Hardware Maintenance Manual
Page 39
... the following events, the computer automatically returns from standby mode and resume operation, do undock it is available. v The time set the low-battery alarm, the computer may not do what you will need to the docking station, do any action to enter hibernation mode, do not undock ... you cannot create a hibernation file. It chooses either of the following : v Press the Fn key. v Turn on the hard disk. This default low-battery behavior is signaled by a serial device or a PC Card device. v Open the LCD cover. Note: The computer does not accept any input immediately after it...
... the following events, the computer automatically returns from standby mode and resume operation, do undock it is available. v The time set the low-battery alarm, the computer may not do what you will need to the docking station, do any action to enter hibernation mode, do not undock ... you cannot create a hibernation file. It chooses either of the following : v Press the Fn key. v Turn on the hard disk. This default low-battery behavior is signaled by a serial device or a PC Card device. v Open the LCD cover. Note: The computer does not accept any input immediately after it...
Hardware Maintenance Manual
Page 40
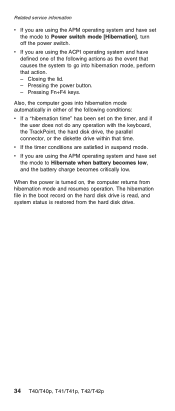
... APM operating system and have set the mode to Hibernate when battery becomes low, and the battery charge becomes critically low. Closing the lid. - The hibernation file in the boot record on , the computer returns from the hard disk drive. 34 T40/T40p, T41/T41p, T42/T42p When the power is turned on...
... APM operating system and have set the mode to Hibernate when battery becomes low, and the battery charge becomes critically low. Closing the lid. - The hibernation file in the boot record on , the computer returns from the hard disk drive. 34 T40/T40p, T41/T41p, T42/T42p When the power is turned on...
Hardware Maintenance Manual
Page 44
... Info Utility v Run External Tests v Surface Scan Hard Disk v Benchmark System v DOS Shell v Tech Support Form v Battery Rundown v View Test Log v Print Log v Save Log v Full Erase Hard Drive v Quick Erase Hard Drive 38 T40/T40p, T41/T41p, T42/T42p Note: After running PC-Doctor, check the time and date on the...
... Info Utility v Run External Tests v Surface Scan Hard Disk v Benchmark System v DOS Shell v Tech Support Form v Battery Rundown v View Test Log v Print Log v Save Log v Full Erase Hard Drive v Quick Erase Hard Drive 38 T40/T40p, T41/T41p, T42/T42p Note: After running PC-Doctor, check the time and date on the...

Hardware Maintenance Manual
Page 45
... when you turn on, check the power cord of the ac adapter cable. If the voltage is not correct, replace the ac adapter. 4. Remove the battery pack. 3. Turn off the computer. 2. v If the power problem occurs only when the port replicator is used . v If the computer does not ...a symptom, do the following power supply checkouts: v "Checking the ac adapter" v "Checking operational charging" on page 40 v "Checking the battery pack" on page 40 v "Checking the backup battery" on page 41 Checking the ac adapter You are here because the computer fails only when the ac adapter is used , replace...
... when you turn on, check the power cord of the ac adapter cable. If the voltage is not correct, replace the ac adapter. 4. Remove the battery pack. 3. Turn off the computer. 2. v If the power problem occurs only when the port replicator is used . v If the computer does not ...a symptom, do the following power supply checkouts: v "Checking the ac adapter" v "Checking operational charging" on page 40 v "Checking the battery pack" on page 40 v "Checking the backup battery" on page 41 Checking the ac adapter You are here because the computer fails only when the ac adapter is used , replace...
Hardware Maintenance Manual
Page 46
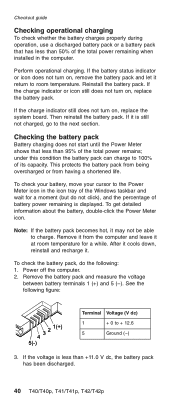
...voltage is displayed. Checkout guide Checking operational charging To check whether the battery charges properly during operation, use a discharged battery pack or a battery pack that less than +11.0 V dc, the battery pack has been discharged. 40 T40/T40p, T41/T41p, T42/T42p If the charge indicator or icon ...still does not turn on , remove the battery pack and let it may not...
...voltage is displayed. Checkout guide Checking operational charging To check whether the battery charges properly during operation, use a discharged battery pack or a battery pack that less than +11.0 V dc, the battery pack has been discharged. 40 T40/T40p, T41/T41p, T42/T42p If the charge indicator or icon ...still does not turn on , remove the battery pack and let it may not...

Hardware Maintenance Manual
Page 47
... upside down. 3. LCD models" on . See the following : 1. General descriptions 41 v If the backup battery discharges quickly after recharging, replace the battery. 4. v If the voltage is not correct, replace the battery pack. Red (+) Black (-) Wire Red Black Voltage (V dc) +2.5 to 30 K . If the voltage is... after replacement, replace the system board. If the resistance is correct, replace the system board. Measure the voltage of the backup battery. Checkout guide Note: Recharging will take at least 3 hours, even if the indicator does not turn on page 71). 4. ...
... upside down. 3. LCD models" on . See the following : 1. General descriptions 41 v If the backup battery discharges quickly after recharging, replace the battery. 4. v If the voltage is not correct, replace the battery pack. Red (+) Black (-) Wire Red Black Voltage (V dc) +2.5 to 30 K . If the voltage is... after replacement, replace the system board. If the resistance is correct, replace the system board. Measure the voltage of the backup battery. Checkout guide Note: Recharging will take at least 3 hours, even if the indicator does not turn on page 71). 4. ...
Hardware Maintenance Manual
Page 49
... . LCD models 112 1180 PC Card slot assembly for 14.1-in . LCD models 116 1200 LCD assembly for 14.1-in . Portions © IBM Corp. 2006. 43 LCD models 123 1220 CPU 128 1230 Ultrabay Slim guide rail assembly for 14.1-in . LCD models 114 1190 PC Card ...169; Lenovo 2006. LCD models) . . 91 1120 Mini PCI adapter 97 1130 Fan assembly 101 1140 Backup battery for 14.1-in . LCD models . . . 71 1020 Battery pack for 15.0-in . ThinkPad T40/T40p, T41/T41p, T42/T42p Series Product overview 45 Specifications 45 Status indicators 50 FRU tests 53 Fn key ...
... . LCD models 112 1180 PC Card slot assembly for 14.1-in . LCD models 116 1200 LCD assembly for 14.1-in . Portions © IBM Corp. 2006. 43 LCD models 123 1220 CPU 128 1230 Ultrabay Slim guide rail assembly for 14.1-in . LCD models 114 1190 PC Card ...169; Lenovo 2006. LCD models) . . 91 1120 Mini PCI adapter 97 1130 Fan assembly 101 1140 Backup battery for 14.1-in . LCD models . . . 71 1020 Battery pack for 15.0-in . ThinkPad T40/T40p, T41/T41p, T42/T42p Series Product overview 45 Specifications 45 Status indicators 50 FRU tests 53 Fn key ...

Hardware Maintenance Manual
Page 55
... (BMDC) T42/T42p series: v ThinkPad Integrated 56K Modem (MDC-2) v ThinkPad Integrated Bluetooth III with 56K Modem (BMDC-2) v UltraNav Yes v Li-ion battery (6 cells) v Li-ion battery (9 cells) v Ultrabay Slim Li Polymer battery (option) v 72-watt type T40/T40p, T41/T41p series: v Windows XP Professional v Windows 2000 T42/T42p series: v Windows XP Professional ThinkPad T40/T40p, T41/T41p, T42...
... (BMDC) T42/T42p series: v ThinkPad Integrated 56K Modem (MDC-2) v ThinkPad Integrated Bluetooth III with 56K Modem (BMDC-2) v UltraNav Yes v Li-ion battery (6 cells) v Li-ion battery (9 cells) v Ultrabay Slim Li Polymer battery (option) v 72-watt type T40/T40p, T41/T41p series: v Windows XP Professional v Windows 2000 T42/T42p series: v Windows XP Professional ThinkPad T40/T40p, T41/T41p, T42...

Hardware Maintenance Manual
Page 57
...or detached. 2 Standby status 3 Battery status 4 Power on Note: If you are using Windows 2000, the Ultrabay Slim status indicator does not blink while an Ultrabay Slim device is not in standby mode. Green: The battery is in standby mode. (continued) ThinkPad T40/T40p, T41/T41p, T42/T42p ...Series 51 Blinking green: The battery is being detached. Instead, a message box pops up when the process is still low....
...or detached. 2 Standby status 3 Battery status 4 Power on Note: If you are using Windows 2000, the Ultrabay Slim status indicator does not blink while an Ultrabay Slim device is not in standby mode. Green: The battery is in standby mode. (continued) ThinkPad T40/T40p, T41/T41p, T42/T42p ...Series 51 Blinking green: The battery is being detached. Instead, a message box pops up when the process is still low....

Hardware Maintenance Manual
Page 59
Diagnostics --> Other Devices --> AC Adapter, Battery 1 (Battery 2) 1. Conexant Smart Modem Interrupt d. Insert a PC Card Wrap Plug into every PC Card slot, and run Diagnostics --> Other Devices --> HDD Active ... surface, and run Diagnostics --> Systemboard --> PCMCIA External Loop 1. Make sure the modem is set up correctly. 2. Interactive Tests --> CD-ROM/DVD Test (continued) ThinkPad T40/T40p, T41/T41p, T42/T42p Series 53 Interactive Tests --> Video 1. Conexant Smart Modem Dialtone 1. Lucent Soft Modem Dialtone c. Diagnostics --> Systemboard 3. Replace the modem ...
Diagnostics --> Other Devices --> AC Adapter, Battery 1 (Battery 2) 1. Conexant Smart Modem Interrupt d. Insert a PC Card Wrap Plug into every PC Card slot, and run Diagnostics --> Other Devices --> HDD Active ... surface, and run Diagnostics --> Systemboard --> PCMCIA External Loop 1. Make sure the modem is set up correctly. 2. Interactive Tests --> CD-ROM/DVD Test (continued) ThinkPad T40/T40p, T41/T41p, T42/T42p Series 53 Interactive Tests --> Video 1. Conexant Smart Modem Dialtone 1. Lucent Soft Modem Dialtone c. Diagnostics --> Systemboard 3. Replace the modem ...

Hardware Maintenance Manual
Page 65
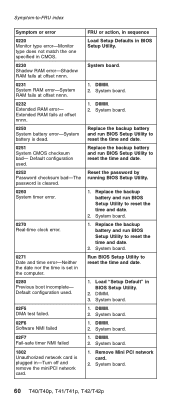
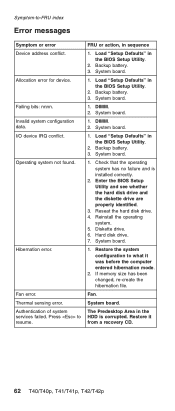
... Area. System board. 0190 Critical low-battery error 1. Battery pack. 0191 System Security-Invalid Remote Change requested. 1. System board. 0192 System Security- IBM Embedded Security hardware tamper detected. Run BIOS Setup Utility, System Security-IBM Security password retry count exceeded. Remove either... Run BIOS Setup Utility, and then save the current setting by pressing F10. 2. Run interactive tests of them . ThinkPad T40/T40p, T41/T41p, T42/T42p Series 59 System board. 0189 Invalid RFID configuration information area-The EEPROM checksum is not ...
... Area. System board. 0190 Critical low-battery error 1. Battery pack. 0191 System Security-Invalid Remote Change requested. 1. System board. 0192 System Security- IBM Embedded Security hardware tamper detected. Run BIOS Setup Utility, System Security-IBM Security password retry count exceeded. Remove either... Run BIOS Setup Utility, and then save the current setting by pressing F10. 2. Run interactive tests of them . ThinkPad T40/T40p, T41/T41p, T42/T42p Series 59 System board. 0189 Invalid RFID configuration information area-The EEPROM checksum is not ...
Hardware Maintenance Manual
Page 66
... to reset the time and date. Replace the backup battery and run BIOS Setup Utility to reset the time and date. 2. DIMM. 2. System board. 1. System board. 60 T40/T40p, T41/T41p, T42/T42p System board. Replace the backup battery and run BIOS Setup Utility to reset the time and... date. System board. 1. DIMM. 2. Replace the backup battery and run BIOS Setup Utility to reset the time and date. 1....
... to reset the time and date. Replace the backup battery and run BIOS Setup Utility to reset the time and date. 2. DIMM. 2. System board. 1. System board. 60 T40/T40p, T41/T41p, T42/T42p System board. Replace the backup battery and run BIOS Setup Utility to reset the time and... date. System board. 1. DIMM. 2. Replace the backup battery and run BIOS Setup Utility to reset the time and date. 1....
Hardware Maintenance Manual
Page 68
Symptom-to resume. I/O device IRQ conflict. Operating system not found. Thermal sensing error. System board. 1. Backup battery. 3. DIMM. 2. Enter the BIOS Setup Utility and see whether the hard disk drive and the diskette drive are properly identified. 3....Hard disk drive. 7. System board. 1. Restore the system configuration to what it from a recovery CD. 62 T40/T40p, T41/T41p, T42/T42p The Predesktop Area in the HDD is installed correctly. 2. System board. 1. Backup battery. 3. System board. 1. DIMM. 2. System board. 1. Reseat the hard disk drive. 4. Diskette drive. ...
Symptom-to resume. I/O device IRQ conflict. Operating system not found. Thermal sensing error. System board. 1. Backup battery. 3. DIMM. 2. Enter the BIOS Setup Utility and see whether the hard disk drive and the diskette drive are properly identified. 3....Hard disk drive. 7. System board. 1. Restore the system configuration to what it from a recovery CD. 62 T40/T40p, T41/T41p, T42/T42p The Predesktop Area in the HDD is installed correctly. 2. System board. 1. Backup battery. 3. System board. 1. DIMM. 2. System board. 1. Reseat the hard disk drive. 4. Diskette drive. ...
Hardware Maintenance Manual
Page 71
... be considered only when a problem recurs. Run the diagnostic test for damage. Battery pack e. Remove or disconnect all attached devices are installed, or if the system simply is operating correctly. (See "Power system checkout" on the computer. 5. LCD assembly ThinkPad T40/T40p, T41/T41p, T42/T42p Series 65 If no error is detected...
... be considered only when a problem recurs. Run the diagnostic test for damage. Battery pack e. Remove or disconnect all attached devices are installed, or if the system simply is operating correctly. (See "Power system checkout" on the computer. 5. LCD assembly ThinkPad T40/T40p, T41/T41p, T42/T42p Series 65 If no error is detected...

Hardware Maintenance Manual
Page 76
...which they are listed. 4. An untrained person runs the risk of the page. Verify this by using an electrostatic discharge (ESD) strap (P/N 6405959). 70 T40/T40p, T41/T41p, T42/T42p DANGER Before removing any FRU, turn on the computer until you have made sure that have to service any FRUs... that all power cords from electrical outlets, remove the battery pack, and then disconnect any FRU, review "FRU replacement notices" on page 186. 8. When removing the FRU, move it in the direction as given...
...which they are listed. 4. An untrained person runs the risk of the page. Verify this by using an electrostatic discharge (ESD) strap (P/N 6405959). 70 T40/T40p, T41/T41p, T42/T42p DANGER Before removing any FRU, turn on the computer until you have made sure that have to service any FRUs... that all power cords from electrical outlets, remove the battery pack, and then disconnect any FRU, review "FRU replacement notices" on page 186. 8. When removing the FRU, move it in the direction as given...
