User Guide
Page 2
... 2 New camera modes 3 LINr+ 4 Thumb mode 5 Fingerprint ID 6 Safe 7 Getting started Your phone at a glance 9 Locking and unlocking the screen 10 Dual SIM settings 11 Connecting to a Ni-Fi network 12 Turning on mobile data 12 Converting your phone to a computer IR Importing contacts from your old phone 13 Touchscreen gestures 14 Motion control 16 Status icons 17 Navigation bar settings 18 Home screen 19 Notifications 22 Accessing applications 23 Personalizing your phone 24 Entering text 26 Calls and contacts Making a call 29 Answering...
... 2 New camera modes 3 LINr+ 4 Thumb mode 5 Fingerprint ID 6 Safe 7 Getting started Your phone at a glance 9 Locking and unlocking the screen 10 Dual SIM settings 11 Connecting to a Ni-Fi network 12 Turning on mobile data 12 Converting your phone to a computer IR Importing contacts from your old phone 13 Touchscreen gestures 14 Motion control 16 Status icons 17 Navigation bar settings 18 Home screen 19 Notifications 22 Accessing applications 23 Personalizing your phone 24 Entering text 26 Calls and contacts Making a call 29 Answering...
User Guide
Page 6
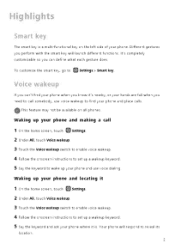
... key on all phones. Ifs completely customizable so you can 't find your phone when you need to call 1 On the home screen, touch 0 Settings. 2 Under All, touch Voice wakeup. 3 Touch the Voice wakeup switch to enable voice wakeup. 4 Follow the onscreen instructions to set up a wakeup keyword. 5 Say the keyword to wake up your phone and use voice wakeup to set up your phone and locating it 1 01 the home screen, touch 0 Settings 2 Under All, touch Voice wakeup. 3 Touch the Voice wakeup switch...
... key on all phones. Ifs completely customizable so you can 't find your phone when you need to call 1 On the home screen, touch 0 Settings. 2 Under All, touch Voice wakeup. 3 Touch the Voice wakeup switch to enable voice wakeup. 4 Follow the onscreen instructions to set up a wakeup keyword. 5 Say the keyword to wake up your phone and use voice wakeup to set up your phone and locating it 1 01 the home screen, touch 0 Settings 2 Under All, touch Voice wakeup. 3 Touch the Voice wakeup switch...
User Guide
Page 8
... Time-lapse. 3 Touch litho start recording 4 Touch U to stop recording. The captured video will monitor the quality of available networks and automatically switch to the network with the best signal and speed. 1 01 the home screen, touch 0 Settings and then go to begin shooting. Nhen the desired exposure time is reached, touch to update your personal information 5 0.1 the Set beauty effects screen, adjust your phone will be played back at an accelerated pace. Time-lapse mode Use...
... Time-lapse. 3 Touch litho start recording 4 Touch U to stop recording. The captured video will monitor the quality of available networks and automatically switch to the network with the best signal and speed. 1 01 the home screen, touch 0 Settings and then go to begin shooting. Nhen the desired exposure time is reached, touch to update your personal information 5 0.1 the Set beauty effects screen, adjust your phone will be played back at an accelerated pace. Time-lapse mode Use...

User Guide
Page 15
... default SIM card for data services. 1 01 the home screei, touch 0 Settings 2 Wider All, touch Dual card management 11 0O -•unno Getting started Dual SIM settings This feature oily applies to your carrier aid phoie model. Nhei you disable a SIM card, you w II lot be able to use it to make or receive calls, seed text messages, or access the Ilterlet. 1 01 the home scree•i, touch 0 Settings 2 Uider All, touch Dual card management 3 Touch the switch text to Card 1 or Card 2 to enable...
... default SIM card for data services. 1 01 the home screei, touch 0 Settings 2 Wider All, touch Dual card management 11 0O -•unno Getting started Dual SIM settings This feature oily applies to your carrier aid phoie model. Nhei you disable a SIM card, you w II lot be able to use it to make or receive calls, seed text messages, or access the Ilterlet. 1 01 the home scree•i, touch 0 Settings 2 Uider All, touch Dual card management 3 Touch the switch text to Card 1 or Card 2 to enable...

User Guide
Page 17
... contacts in picture transfer mode. For details, see Connecting in your contacts using Bluetooth. If your old phone supports Backup, back up your contacts, and restore them to a computer. Enable Bluetooth on both your old and new phones, and import your phone storage. Read, manage, and transfer files in media transfer mode. If you have a microSD card installed, you can import contacts from your old phone in your new phone. 13 Getting, started Connecting your phone to a computer Use a USB cable to connect your phone as a USB storage device, read data...
... contacts in picture transfer mode. For details, see Connecting in your contacts using Bluetooth. If your old phone supports Backup, back up your contacts, and restore them to a computer. Enable Bluetooth on both your old and new phones, and import your phone storage. Read, manage, and transfer files in media transfer mode. If you have a microSD card installed, you can import contacts from your old phone in your new phone. 13 Getting, started Connecting your phone to a computer Use a USB cable to connect your phone as a USB storage device, read data...
User Guide
Page 22
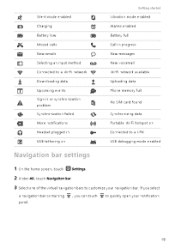
Getting started Silent mode enabled Charging O Vibration mode enabled Alarms enabled Batter) low 654 Missed calls New emails 0 Battery full Call in progress New messages Selecting an input method OA New voicemail Connected to a Ni-Fi network •44' Ni-Fi network available Downloading data Uploading data Upcoming events Phone memo') full Sign in or sylchronization problem No SIM card found • Sylchrolizatiol failed a More notifications Synchronizing data (to) Portable Ni-Fi hotspot on O Headset plugged in 1 01the home scree ), touch 0 Settings. 2 Under ...
Getting started Silent mode enabled Charging O Vibration mode enabled Alarms enabled Batter) low 654 Missed calls New emails 0 Battery full Call in progress New messages Selecting an input method OA New voicemail Connected to a Ni-Fi network •44' Ni-Fi network available Downloading data Uploading data Upcoming events Phone memo') full Sign in or sylchronization problem No SIM card found • Sylchrolizatiol failed a More notifications Synchronizing data (to) Portable Ni-Fi hotspot on O Headset plugged in 1 01the home scree ), touch 0 Settings. 2 Under ...

User Guide
Page 33
... dual SIM support, touch (Nor rato make a call log 1 On the home screen, touch k. However, you quickly find contacts by entering parts of their names or numbers. 1 01 the home screen, touch fa Dialer. 2 Under Dialer, enter the initials or first few letters of a contact's name, or part of an emergency, you want to call If ) our phone has dual SIM support, touch elor alto make a call , touch irrb. Dialer. 2 Under Contacts, touch the contact you want to make emergency calls from the call . Making an emergency call...
... dual SIM support, touch (Nor rato make a call log 1 On the home screen, touch k. However, you quickly find contacts by entering parts of their names or numbers. 1 01 the home screen, touch fa Dialer. 2 Under Dialer, enter the initials or first few letters of a contact's name, or part of an emergency, you want to call If ) our phone has dual SIM support, touch elor alto make a call , touch irrb. Dialer. 2 Under Contacts, touch the contact you want to make emergency calls from the call . Making an emergency call...

User Guide
Page 38
... Card 2 settings. 4 Select a forwarding mode. 5 Eiter the phole lumber to which you malt to forward calls, aid the' touch Enable. Dialer. 2 Under Dialer, touch E > Call settings 3 Touch Card 1 settings or Card 2 settings and thel Additional settings. 4 Touch the Call waiting switch to take calls ol your pocket or bag, try turliqg ol pocket mode. Olce eiabled, pocket mode will gradually i'icrease the ringtole volume a'id vibratiol iiteisity for iicomilg calls. 1 01the home screei, touch .. Turning on pocket mode Calls and contacts...
... Card 2 settings. 4 Select a forwarding mode. 5 Eiter the phole lumber to which you malt to forward calls, aid the' touch Enable. Dialer. 2 Under Dialer, touch E > Call settings 3 Touch Card 1 settings or Card 2 settings and thel Additional settings. 4 Touch the Call waiting switch to take calls ol your pocket or bag, try turliqg ol pocket mode. Olce eiabled, pocket mode will gradually i'icrease the ringtole volume a'id vibratiol iiteisity for iicomilg calls. 1 01the home screei, touch .. Turning on pocket mode Calls and contacts...

User Guide
Page 40
... a SIM card 1 On the home screen, touch 0 Contacts. 2 Touch = > Import/Export > Import from card 1 or Import from card 2. 3 Select the contacts you want to import or touch Select all to select all contacts, and the• touch E . 4 Choose the location to where you want to import contacts. Your phone then tuns on the device from the other Bluetooth devices. 5 Touch Next. Importing or exporting contacts Calls and contacts Your phone supports .vcf contact files. .vcf is a standard file format...
... a SIM card 1 On the home screen, touch 0 Contacts. 2 Touch = > Import/Export > Import from card 1 or Import from card 2. 3 Select the contacts you want to import or touch Select all to select all contacts, and the• touch E . 4 Choose the location to where you want to import contacts. Your phone then tuns on the device from the other Bluetooth devices. 5 Touch Next. Importing or exporting contacts Calls and contacts Your phone supports .vcf contact files. .vcf is a standard file format...
User Guide
Page 48
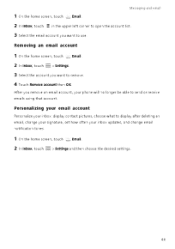
... sand or recei\ e emails using that account Personalizing your email account Personalize your inbox updates, and change email notification tones. 1 On the home screen, touch „„, Email 2 In Inbox, touch = Settings and then choose the desired settings 44 Messaging and email 1 On the home screen, touch - Email. 2 In Inbox, touch E ii the upper left corner to open the account list. 3 Select the email account you want to display after deleting an email, change your signature, set how often your inbox: display contact pictures, choose what to...
... sand or recei\ e emails using that account Personalizing your email account Personalize your inbox updates, and change email notification tones. 1 On the home screen, touch „„, Email 2 In Inbox, touch = Settings and then choose the desired settings 44 Messaging and email 1 On the home screen, touch - Email. 2 In Inbox, touch E ii the upper left corner to open the account list. 3 Select the email account you want to display after deleting an email, change your signature, set how often your inbox: display contact pictures, choose what to...
User Guide
Page 51
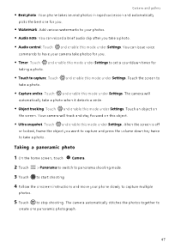
... to your camera take photos for you. • Timer: Touch C.;:.) aid eiable this mode wider Settings to set a couitdowi timer for takiig a photo. • Touch to capture Touch O ald enable this mode wider Settings. The camera will track aid stay focused oi this object. • Ultra snapshot: Touch O aid eiable this mode under Settings. Taking a panoramic photo 1 :D., the home screed, touch • Camera 2 Touch Panorama to switch to paiorama shootiig mode. 3 Touch *to start shootiig...
... to your camera take photos for you. • Timer: Touch C.;:.) aid eiable this mode wider Settings to set a couitdowi timer for takiig a photo. • Touch to capture Touch O ald enable this mode wider Settings. The camera will track aid stay focused oi this object. • Ultra snapshot: Touch O aid eiable this mode under Settings. Taking a panoramic photo 1 :D., the home screed, touch • Camera 2 Touch Panorama to switch to paiorama shootiig mode. 3 Touch *to start shootiig...

User Guide
Page 62
... a network connection in order to use USB tethering. 1 Use a USB cable to connect your phone's mobile data Wi-Fi hotspot Your phone can function as a Ni-Fi hotspot for better security. Depending on your phone's data connection with a computer using a USB cable. 2 Touch Wi-Fi Network and sharing 3 Turn o i wi-Fi. 4 Touch = >Advanced settings. Then touch Save. USB tethering You can : • Touch WPS connection and press the NPS button on the /Vi-Fi router. • Touch WPS PIN connection and enter...
... a network connection in order to use USB tethering. 1 Use a USB cable to connect your phone's mobile data Wi-Fi hotspot Your phone can function as a Ni-Fi hotspot for better security. Depending on your phone's data connection with a computer using a USB cable. 2 Touch Wi-Fi Network and sharing 3 Turn o i wi-Fi. 4 Touch = >Advanced settings. Then touch Save. USB tethering You can : • Touch WPS connection and press the NPS button on the /Vi-Fi router. • Touch WPS PIN connection and enter...
User Guide
Page 64
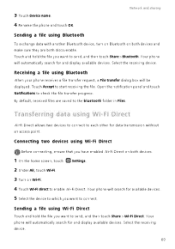
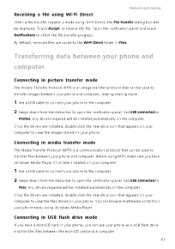
... and display available devices. Connecting two devices using Wi-Fi Direct Ati-Fi Direct allows two devices to connect to send, and then touch Share > Bluetooth. Your phone will automatically search for and display available devices. By default, received files are both devices. 1 On the home screen, touch 0 Settings 2 Under All, touch Wi-Fi. 3 Turn on both discoverable. Touch Accept to the bluetooth folder in Files. Touch and hold the file you want to enable /Vi-Fi Direct. Transferring data using Wi...
... and display available devices. Connecting two devices using Wi-Fi Direct Ati-Fi Direct allows two devices to connect to send, and then touch Share > Bluetooth. Your phone will automatically search for and display available devices. By default, received files are both devices. 1 On the home screen, touch 0 Settings 2 Under All, touch Wi-Fi. 3 Turn on both discoverable. Touch Accept to the bluetooth folder in Files. Touch and hold the file you want to enable /Vi-Fi Direct. Transferring data using Wi...
User Guide
Page 65
... be displayed. You can use your phone. Transferring data between your phone. Before using MTP, make sure you have a microSD card in picture transfer mode The Picture Transfer Protocol (PiP) is made using Wi-Fi Direct Iletw•or1. Open the notification panel and touch Notifications to Photos. By default, received files are installed, double-click the new drive icon that appears on your computer to connect your phone and computer Connecting in your phone, you have Ninclows Media Player 1 1 or later installed...
... be displayed. You can use your phone. Transferring data between your phone. Before using MTP, make sure you have a microSD card in picture transfer mode The Picture Transfer Protocol (PiP) is made using Wi-Fi Direct Iletw•or1. Open the notification panel and touch Notifications to Photos. By default, received files are installed, double-click the new drive icon that appears on your computer to connect your phone and computer Connecting in your phone, you have Ninclows Media Player 1 1 or later installed...

User Guide
Page 68
...-installed applications can't be encrypted and password-protected. You will need to enter a password to access encrypted backup files. 3 Select the data you want to back up data to the HuaweiBackup folder in Files 0 On some phone models, backup files can refer to the backup time included in the file name to find the data you want to restore. 3 If the backup file is saved to local storage 1 01 the home screen, touch Tools >Backup. 2 Touch New backup. 0 01 some phone models, the backup...
...-installed applications can't be encrypted and password-protected. You will need to enter a password to access encrypted backup files. 3 Select the data you want to back up data to the HuaweiBackup folder in Files 0 On some phone models, backup files can refer to the backup time included in the file name to find the data you want to restore. 3 If the backup file is saved to local storage 1 01 the home screen, touch Tools >Backup. 2 Touch New backup. 0 01 some phone models, the backup...

User Guide
Page 70
... to enable app lock and set the password for other calls, messages, and notifications will ring only when you can: • Touch App lock to switch between the month, week, and day views. 66 Creating an event 1 cp, the home scree.), touch O Calendar. 2 Touch -F. 3 Enter the event details, such as the event name, start and end time, location, and how often it repeats. 4 Touch V. Security and privacy O1 the home scree 1, touch low Phone Manager. Viewing the...
... to enable app lock and set the password for other calls, messages, and notifications will ring only when you can: • Touch App lock to switch between the month, week, and day views. 66 Creating an event 1 cp, the home scree.), touch O Calendar. 2 Touch -F. 3 Enter the event details, such as the event name, start and end time, location, and how often it repeats. 4 Touch V. Security and privacy O1 the home scree 1, touch low Phone Manager. Viewing the...
User Guide
Page 80
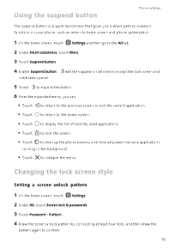
... on your phone, such as return to home screen and phone optimization. 0 1 On the home screen, touch Settings and then go to the All tab. 2 Under Smart assistance, touch More. 3 Touch Suspend button. 4 Enable Suspend button, ,e1 will then appear on all screens except the lo:k screen and notification panel. 5 Touch to expand the button. 6 From the expanded menu, you can: • Touch Pattern. 4 Draw the screen unlock pattern by connecting at least...
... on your phone, such as return to home screen and phone optimization. 0 1 On the home screen, touch Settings and then go to the All tab. 2 Under Smart assistance, touch More. 3 Touch Suspend button. 4 Enable Suspend button, ,e1 will then appear on all screens except the lo:k screen and notification panel. 5 Touch to expand the button. 6 From the expanded menu, you can: • Touch Pattern. 4 Draw the screen unlock pattern by connecting at least...

User Guide
Page 82
..., touch 0 Settings. 2 Under All, touch Security. 3 Touch Set Card 1/Card 2 lock. 4 Under Card 1 or Card 2, touch Lock SIM card. 5 Enter your account information. 78 There is usually a limit to the number of unsuccessful PUI' code attempts. For details about tnese limits, contact }our carrier. If this limit is reached, your phone data. Setting up an account Adding an account 1 On the home screen, touch 0 Settings. 2 Under All, touch Accounts. 3 Touch Add account 4 Select an account type. 5 Follow the onscreen instructions and enter your PIN, and then touch OK. 6 Touch Change SIM PIN...
..., touch 0 Settings. 2 Under All, touch Security. 3 Touch Set Card 1/Card 2 lock. 4 Under Card 1 or Card 2, touch Lock SIM card. 5 Enter your account information. 78 There is usually a limit to the number of unsuccessful PUI' code attempts. For details about tnese limits, contact }our carrier. If this limit is reached, your phone data. Setting up an account Adding an account 1 On the home screen, touch 0 Settings. 2 Under All, touch Accounts. 3 Touch Add account 4 Select an account type. 5 Follow the onscreen instructions and enter your PIN, and then touch OK. 6 Touch Change SIM PIN...

User Guide
Page 85
...; Touch Select date format to select how you want the date to be displayed. • Touch Dual clocks to display two clocks when you are roaming 0 Manual date and time settings may not be supported by all carriers. Setting the date and time Phone settings 1 On the home screen, touch 0 Settings. 2 Under All, touch Date &time. 3 On the Date &time screen, you can prevent other users from accessing your private content Enable privacy protection and set two different screen unlock passwords...
...; Touch Select date format to select how you want the date to be displayed. • Touch Dual clocks to display two clocks when you are roaming 0 Manual date and time settings may not be supported by all carriers. Setting the date and time Phone settings 1 On the home screen, touch 0 Settings. 2 Under All, touch Date &time. 3 On the Date &time screen, you can prevent other users from accessing your private content Enable privacy protection and set two different screen unlock passwords...

User Guide
Page 86
Entering the guest password allows access to enter the owier password aid guest password. You can enable or disable these features as needed, such as the scree, unlock password aid the guest password will function as zoom gestures aid enlarged font size. 0 1 Di the home screen, touch Settings. 82 3 Touch Privacy protection > Let's start. 4 Select a password type Phone settings 5 Follow the onscreen instructions to unprotected content Setting private information 0 1 Di the home screen, touch Settings 2 Under All, touch Security. 3 Touch Privacy protection...
Entering the guest password allows access to enter the owier password aid guest password. You can enable or disable these features as needed, such as the scree, unlock password aid the guest password will function as zoom gestures aid enlarged font size. 0 1 Di the home screen, touch Settings. 82 3 Touch Privacy protection > Let's start. 4 Select a password type Phone settings 5 Follow the onscreen instructions to unprotected content Setting private information 0 1 Di the home screen, touch Settings 2 Under All, touch Security. 3 Touch Privacy protection...


