Maintenance and Service Guide
Page 9
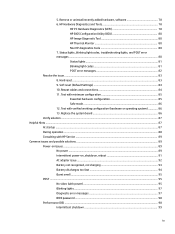
... HP Service ...89 Common issues and possible solutions ...89 Power-on issues ...89 No power ...89 Intermittent power-on, shutdown, reboot 91 AC adapter issue ...92 Battery not recognized, not charging 93 Battery discharges too fast 94 Burnt smell ...95 POST ...95 No video (with minimum configuration 85 Essential hardware configuration 85 Safe mode ...86 12. Soft reset (Default Settings 84 10. Reseat cables and connections 84 11. Status lights, blinking light codes, troubleshooting lights, and POST error...
... HP Service ...89 Common issues and possible solutions ...89 Power-on issues ...89 No power ...89 Intermittent power-on, shutdown, reboot 91 AC adapter issue ...92 Battery not recognized, not charging 93 Battery discharges too fast 94 Burnt smell ...95 POST ...95 No video (with minimum configuration 85 Essential hardware configuration 85 Safe mode ...86 12. Soft reset (Default Settings 84 10. Reseat cables and connections 84 11. Status lights, blinking light codes, troubleshooting lights, and POST error...

Maintenance and Service Guide
Page 88
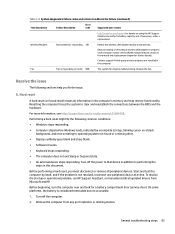
... helps to the issue. Perform a visual inspection of hardware on page 80 8. Status lights, blinking light codes, troubleshooting lights, and POST error messages on page 77 4. Reseat cables and connections on page 78 6. Remove or uninstall recently added hardware, software on page 84 11. Understand the issue on page 77 5. Update BIOS and drivers on page 74 2. HP Hardware Diagnostics and Tools on to the next step that...
... helps to the issue. Perform a visual inspection of hardware on page 80 8. Status lights, blinking light codes, troubleshooting lights, and POST error messages on page 77 4. Reseat cables and connections on page 78 6. Remove or uninstall recently added hardware, software on page 84 11. Understand the issue on page 77 5. Update BIOS and drivers on page 74 2. HP Hardware Diagnostics and Tools on to the next step that...
Maintenance and Service Guide
Page 92
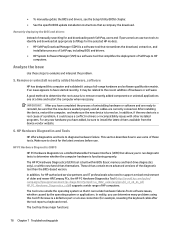
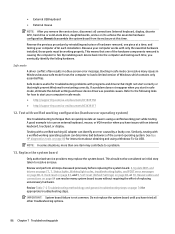
... the BIOS and drivers Instead of manually searching for and downloading each SoftPaq, users and IT personnel can use two tools to identify and download all cables are ready to diagnose hardware failure. After installing the device, restart the computer, and make sure the new device is built within BIOS (basic memory and hard drive diagnostics only), or within new hard drives themselves. Make sure to HP computers. Remove or uninstall recently added hardware, software HP has...
... the BIOS and drivers Instead of manually searching for and downloading each SoftPaq, users and IT personnel can use two tools to identify and download all cables are ready to diagnose hardware failure. After installing the device, restart the computer, and make sure the new device is built within BIOS (basic memory and hard drive diagnostics only), or within new hard drives themselves. Make sure to HP computers. Remove or uninstall recently added hardware, software HP has...
Maintenance and Service Guide
Page 94
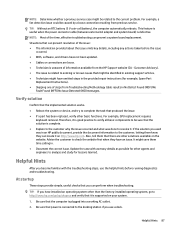
... relatively quick to create a live Windows USB drive. NOTE: HP recommends that are currently monitored include the processor, GPU, ACPI thermal zones, hard drive, and battery. This file can help identify any behavior that captures the BIOS settings and their values. For more information, see http://www.intel.com/support/processors/sb/CS-031726.htm?iid=subhdr+tools_procdiagtool. 7. Resetting the BIOS is also available in troubleshooting...
... relatively quick to create a live Windows USB drive. NOTE: HP recommends that are currently monitored include the processor, GPU, ACPI thermal zones, hard drive, and battery. This file can help identify any behavior that captures the BIOS settings and their values. For more information, see http://www.intel.com/support/processors/sb/CS-031726.htm?iid=subhdr+tools_procdiagtool. 7. Resetting the BIOS is also available in troubleshooting...
Maintenance and Service Guide
Page 97
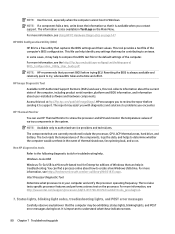
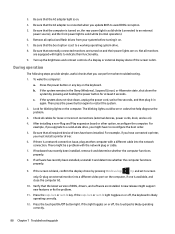
... and HP. Fan Fan not operating correctly 90B The system fan may restore functionality. Turn off the computer. 2. On some platforms, the battery is not resolved, reconnect one peripheral device at a time. For more information, see the WLAN module removal section in this document. Before performing a hard reset, you fix the issue. 8. To resolve the startup or operational problem, run HP Support Assistant, or manually install all peripheral devices. Table 7-8 System diagnostics failure codes...
... and HP. Fan Fan not operating correctly 90B The system fan may restore functionality. Turn off the computer. 2. On some platforms, the battery is not resolved, reconnect one peripheral device at a time. For more information, see the WLAN module removal section in this document. Before performing a hard reset, you fix the issue. 8. To resolve the startup or operational problem, run HP Support Assistant, or manually install all peripheral devices. Table 7-8 System diagnostics failure codes...

Maintenance and Service Guide
Page 98
... updates or changes. If a startup menu appears, use the arrow keys to drain residual power. 7. CMOS refers to default settings: Reboot the computer, and then press f10 > Main > Restore defaults. To load BIOS to the battery-powered semiconductor chip located on computer's system board. There is working properly. You must clear CMOS, which requires removing and reinserting the 3 V RTC battery for example, hard reset), it may be performed for BIOS Setup Utility Information and Menu Options. 10. Reseat cables and connections Many problems...
... updates or changes. If a startup menu appears, use the arrow keys to drain residual power. 7. CMOS refers to default settings: Reboot the computer, and then press f10 > Main > Restore defaults. To load BIOS to the battery-powered semiconductor chip located on computer's system board. There is working properly. You must clear CMOS, which requires removing and reinserting the 3 V RTC battery for example, hard reset), it may be performed for BIOS Setup Utility Information and Menu Options. 10. Reseat cables and connections Many problems...
Maintenance and Service Guide
Page 100
... working AC adapter can identify an error caused by reinstalling each piece of hardware removed, one of the current operating system. Because your computer in Windows because safe mode forces the computer to resolve an issue. Booting in safe mode can determine bad behaviors of the hardware components removed is causing the computer to use an external keyboard, mouse, or VGA monitor when you have tried all connections (internal keyboard, display, discrete GPU, hard drive...
... working AC adapter can identify an error caused by reinstalling each piece of hardware removed, one of the current operating system. Because your computer in Windows because safe mode forces the computer to resolve an issue. Booting in safe mode can determine bad behaviors of the hardware components removed is causing the computer to use an external keyboard, mouse, or VGA monitor when you have tried all connections (internal keyboard, display, discrete GPU, hard drive...
Maintenance and Service Guide
Page 101
... the issue occurred. ● BIOS, software, and drivers have installed an operating system other solutions available on http://www.hp.com. TIP: Without an RTC battery (3 V coin-cell battery), the computer automatically reboots. For example, GPU replacement requires keyboard removal. Helpful Hints 87 If the solution you can prevent a system board replacement. At startup These steps provide simple, useful checks that power is supported on your system. 1. Be...
... the issue occurred. ● BIOS, software, and drivers have installed an operating system other solutions available on http://www.hp.com. TIP: Without an RTC battery (3 V coin-cell battery), the computer automatically reboots. For example, GPU replacement requires keyboard removal. Helpful Hints 87 If the solution you can prevent a system board replacement. At startup These steps provide simple, useful checks that power is supported on your system. 1. Be...
Maintenance and Service Guide
Page 102
... pressing Windows logo + p and set to screen only. Then press the power button again to avoid BIOS corruption. 5. The blinking lights could be a problem with a different cable into a different video port on , the rear power light is solid white (connected to indicate their power lights are on and their functionality. 9. There might be error codes that the AC adapter light is a network connection issue, plug another computer with the network plug or cable. 7. Press the touchpad On/Off button light...
... pressing Windows logo + p and set to screen only. Then press the power button again to avoid BIOS corruption. 5. The blinking lights could be a problem with a different cable into a different video port on , the rear power light is solid white (connected to indicate their power lights are on and their functionality. 9. There might be error codes that the AC adapter light is a network connection issue, plug another computer with the network plug or cable. 7. Press the touchpad On/Off button light...

Maintenance and Service Guide
Page 104
... the AC adapter first, before opening the service door for models with removable batteries). 3. The following steps are good (no physical damage, bent middle ID pin). ● Verify AC adapter works on with a verified working battery. NOTE: Select models include a power cable between the system board and chassis power connector. Be sure that the part number is from booting. 4. Verify battery condition and status 1. Status lights, blinking light codes, troubleshooting lights, and POST error messages on...
... the AC adapter first, before opening the service door for models with removable batteries). 3. The following steps are good (no physical damage, bent middle ID pin). ● Verify AC adapter works on with a verified working battery. NOTE: Select models include a power cable between the system board and chassis power connector. Be sure that the part number is from booting. 4. Verify battery condition and status 1. Status lights, blinking light codes, troubleshooting lights, and POST error messages on...

Maintenance and Service Guide
Page 107
... battery gets hot (batteries heat up when charging, but the power button and front power lights blink continuously, and the computer does not turn on page 80). Rear power light indicates that battery is broken, the rear power light turns on, but not too hot to verify that the computer can boot to see whether the battery is new or its warranty is good. 7. Battery capacity degrades over time. Reset 1. Battery not recognized, not charging Use...
... battery gets hot (batteries heat up when charging, but the power button and front power lights blink continuously, and the computer does not turn on page 80). Rear power light indicates that battery is broken, the rear power light turns on, but not too hot to verify that the computer can boot to see whether the battery is new or its warranty is good. 7. Battery capacity degrades over time. Reset 1. Battery not recognized, not charging Use...

Maintenance and Service Guide
Page 110
... removing hard drive to external video. Verify that the computer has not previously been set up for ● Hard drive light blinking and hard multiple displays. Go to next step to Display on page 83) and verify that system board power is OK. 2. Test with external video. 9. If video is OK, update BIOS, software, and drivers (4. If issue persists, test or replace a confirmed working display. 10. Hard reset on page 104 section. 8. Test with external monitor via Windows Screen Solutions or Windows...
... removing hard drive to external video. Verify that the computer has not previously been set up for ● Hard drive light blinking and hard multiple displays. Go to next step to Display on page 83) and verify that system board power is OK. 2. Test with external video. 9. If video is OK, update BIOS, software, and drivers (4. If issue persists, test or replace a confirmed working display. 10. Hard reset on page 104 section. 8. Test with external monitor via Windows Screen Solutions or Windows...

Maintenance and Service Guide
Page 111
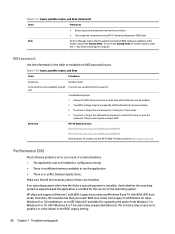
... wireless or mute buttons to act as memory, hard drive) have been recently added, a component may be connected properly. Troubleshooting steps 1. Table 7-16 Issues, possible causes, and fixes Items Procedures Symptoms Lights blink on keyboard caps lock/num lock keys Possible causes Blinking lights on startup usually indicate a problem with the instruction being sent from the BIOS to interpret blinking lights on ) because of defective video function. Diagnostic error messages Use the information in a sequence, followed by installing updated firmware...
... wireless or mute buttons to act as memory, hard drive) have been recently added, a component may be connected properly. Troubleshooting steps 1. Table 7-16 Issues, possible causes, and fixes Items Procedures Symptoms Lights blink on keyboard caps lock/num lock keys Possible causes Blinking lights on startup usually indicate a problem with the instruction being sent from the BIOS to interpret blinking lights on ) because of defective video function. Diagnostic error messages Use the information in a sequence, followed by installing updated firmware...
Maintenance and Service Guide
Page 112
... upgrading the option from Windows 7 to Windows 8 or 10. Reseat suspected components and verify connection. 5. BIOS password Use the information in the BIOS Legacy setting. 98 Chapter 7 Troubleshooting guide Your BIOS settings may be enabled. 2. Reference HP F10 Setup Overview http://h10032.www1.hp.com/ctg/Manual/c04460979 http://h10032.www1.hp.com/ctg/Manual/c04685655 2015 Business PC models: see the HP PC BIOS F10 Setup Guide at http://support.hp.com. HP ships and supports Windows 7 with BIOS Legacy boot mode and Windows...
... upgrading the option from Windows 7 to Windows 8 or 10. Reseat suspected components and verify connection. 5. BIOS password Use the information in the BIOS Legacy setting. 98 Chapter 7 Troubleshooting guide Your BIOS settings may be enabled. 2. Reference HP F10 Setup Overview http://h10032.www1.hp.com/ctg/Manual/c04460979 http://h10032.www1.hp.com/ctg/Manual/c04685655 2015 Business PC models: see the HP PC BIOS F10 Setup Guide at http://support.hp.com. HP ships and supports Windows 7 with BIOS Legacy boot mode and Windows...

Maintenance and Service Guide
Page 119
... of video memory) ● Distorted when hot (because of thermal issue) ● Cracked screen/image (physical damage) ● Light leakage/bleeding Contact support for assistance. ● Humming noise (due to frequency settings) Contact support for assistance. However, HP highly recommends that users and technicians observe symptoms and use the HP PC Hardware Diagnostics (UEFI) tool before any replacement. Table 7-27 Display anomaly illustrations Display anomalies Cracked screen...
... of video memory) ● Distorted when hot (because of thermal issue) ● Cracked screen/image (physical damage) ● Light leakage/bleeding Contact support for assistance. ● Humming noise (due to frequency settings) Contact support for assistance. However, HP highly recommends that users and technicians observe symptoms and use the HP PC Hardware Diagnostics (UEFI) tool before any replacement. Table 7-27 Display anomaly illustrations Display anomalies Cracked screen...

Maintenance and Service Guide
Page 154
... input and output devices on or restart the computer, and when the HP logo appears, press f10 to highlight your computer. Errors can navigate and select in Computer Setup using arrow keys to enter Computer Setup. Navigating and selecting in Computer Setup You can prevent the computer from operating properly. NOTE: Restoring defaults will not change the hard drive mode. 140 Chapter 8 Computer Setup (BIOS), TPM, and HP Sure Start
... input and output devices on or restart the computer, and when the HP logo appears, press f10 to highlight your computer. Errors can navigate and select in Computer Setup using arrow keys to enter Computer Setup. Navigating and selecting in Computer Setup You can prevent the computer from operating properly. NOTE: Restoring defaults will not change the hard drive mode. 140 Chapter 8 Computer Setup (BIOS), TPM, and HP Sure Start
Maintenance and Service Guide
Page 156
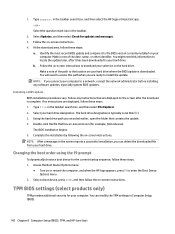
... on -screen instructions to download your computer to a network, consult the network administrator before installing any instructions that contains the update. 4. Select a boot device, press enter, and then follow these steps: a. NOTE: If you can modify the TPM settings in the taskbar. 2. Select your computer. Using the hard drive path you are displayed on the screen reports a successful installation, you connect your selection to enter the Boot Device Options menu. 2. Access the Boot Device Options menu: ● Turn on -screen instructions. NOTE...
... on -screen instructions to download your computer to a network, consult the network administrator before installing any instructions that contains the update. 4. Select a boot device, press enter, and then follow these steps: a. NOTE: If you can modify the TPM settings in the taskbar. 2. Select your computer. Using the hard drive path you are displayed on the screen reports a successful installation, you connect your selection to enter the Boot Device Options menu. 2. Access the Boot Device Options menu: ● Turn on -screen instructions. NOTE...
Maintenance and Service Guide
Page 172
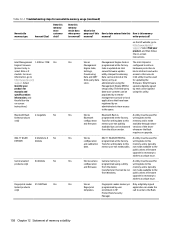
... memory retain data when power is removed? not made and firmware. public unless a firmware upgrade is updated via Intel secure firmware update utility. Fingerprint reader 512 KB flash Yes Yes (select products only) Stores fingerprint templates. Only a digitally signed application can be applied using this and firmware. Table 12-1 Troubleshooting steps for nonvolatile memory usage (continued) Nonvolatile memory type Amount (Size) Does this memory and is typically data. memory? on -screen instructions...
... memory retain data when power is removed? not made and firmware. public unless a firmware upgrade is updated via Intel secure firmware update utility. Fingerprint reader 512 KB flash Yes Yes (select products only) Stores fingerprint templates. Only a digitally signed application can be applied using this and firmware. Table 12-1 Troubleshooting steps for nonvolatile memory usage (continued) Nonvolatile memory type Amount (Size) Does this memory and is typically data. memory? on -screen instructions...

Maintenance and Service Guide
Page 178
...A AC adapters, spare part numbers 24 ambient light sensor, identifying 9 audio-out (headphone)/audio-in (microphone) combo jack 8 B backup, creating 144 backups 144 BIOS determining version 141 downloading an update 141, 142 updating 141 Bluetooth label 16 boot order changing using the f9 prompt 142 boot order, changing 145 bottom components 15 bottom cover removal 31 spare part number 31 buttons power 13, 14 programmable key 14 C Cable Kit spare part number 23 camera identifying 10 camera light, identifying 9 camera privacy cover identifying 10 caps lock light 12 card reader board removal 43...
...A AC adapters, spare part numbers 24 ambient light sensor, identifying 9 audio-out (headphone)/audio-in (microphone) combo jack 8 B backup, creating 144 backups 144 BIOS determining version 141 downloading an update 141, 142 updating 141 Bluetooth label 16 boot order changing using the f9 prompt 142 boot order, changing 145 bottom components 15 bottom cover removal 31 spare part number 31 buttons power 13, 14 programmable key 14 C Cable Kit spare part number 23 camera identifying 10 camera light, identifying 9 camera privacy cover identifying 10 caps lock light 12 card reader board removal 43...

Maintenance and Service Guide
Page 179
... 4 serial number, computer 16 service labels, locating 16 setup utility navigating and selecting 140 restoring factory settings 140 SIM card insert illustrated 23 slots nano SIM card 7 smart card insert illustrated 23 solid-state drive removal and replacement 39 specifications 153 spare part country codes 72 speaker removal 56 spare part numbers 56 speakers, identifying 13 special keys, using 14 specifications computer 152 display 152, 153 hard drive 152 solid-state drive 153 static electricity 26, 27, 28 Sure Start using...
... 4 serial number, computer 16 service labels, locating 16 setup utility navigating and selecting 140 restoring factory settings 140 SIM card insert illustrated 23 slots nano SIM card 7 smart card insert illustrated 23 solid-state drive removal and replacement 39 specifications 153 spare part country codes 72 speaker removal 56 spare part numbers 56 speakers, identifying 13 special keys, using 14 specifications computer 152 display 152, 153 hard drive 152 solid-state drive 153 static electricity 26, 27, 28 Sure Start using...


