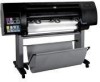
HP Designjet Z6100 Printing Guide [PS Driver] - Calibrate my printer [Mac OS X]
Page 2
... select Calibrate. 2 To start the color calibration from: • The front panel: Select Image Quality Maintenance menu icon > Calibrate color. • The printer alert that recommends calibration. • The HP Printer Utility: 1. You can start the calibration process, load your paper into the printer and select the HP Color Center desktop icon. 2. The HP Printer Utility page will open . The...
HP Designjet Z6100 Printing Guide [PS Driver] - Calibrate my printer [Windows]
Page 2
.... Select your specific environmental conditions. You can start the calibration process, load your paper into the printer and click on the HP Easy Printer Care desktop icon. 2. Color calibration enables your printer to produce consistent colors with the current set of printheads. • The environmental conditions change (for example, temperature or humidity). • You notice deterioration in...
HP Designjet Z6100 Printer Series - Setup Poster (42 inch)
Page 11
... (about 15 seconds. Be careful not to open the printhead cover. 2 1 71 Before removing the setup printheads, look at each printhead and verify that each printhead contains ink. 72 Remove all of the setup printheads. 73 Shake the printhead vigorously for about 1 minute). 1' 68 Open the printer window, and then remove the packing foam from the top...
HP Designjet Z6100 Printer Series - Setup Poster (42 inch)
Page 12
...person. Time required is correctly engaged, and then lower the latch. 80 Close the printer window. 81 Wait until the Ready for paper message appears on the front panel. 10' Load the paper Steps 82 to "Close printhead cover and window". 77 If a "Reseat" message appears on the front panel, ... the problem persists, refer to the HP Start-Up Kit CD/DVD. 78 Close the carriage assembly cover. 79 Make sure that the printheads are inserted, the front panel prompts you to 105. Box required Page 12 25' x1 The printer 'beeps' when each printhead is correctly inserted. 76 Make sure ...
HP Designjet Z6100 Printer Series - Setup Poster (42 inch)
Page 15
...panel. 99 Use the hubs to wind the excess paper onto the spindle. 100 Lower the printer window. 101 Press the OK button when this process the printer will automatically perform paper advance and printhead alignment. During this message appears on the packaging label. 104 On the front panel, select... the paper type and paper length of the roll that you loaded into the printer, and then press the OK button. Macintosh users must wait for the printhead alignment. Page 15 105 The printer will advance the paper up to wind the excess paper onto the spindle. 103 Confirm...
HP Designjet Z6100 Printer Series - Setup Poster (42 inch)
Page 16
it is necessary to the next step. while it is taking place, you can proceed to ensure successful printhead alignment. Time required is complete. Install the software This task requires 1 person. Mac OS page 17 Windows page 18 Page 16 The following pages describe how to stop the paper advance; Box required 15' x1 The assembly of your computer for successful printing. 20' Please do not try to configure your printer is 15 minutes. The alignment and calibration process will take about twenty minutes;
HP Designjet Z6100 Printer Series - Setup Poster (60 inch)
Page 13
...appears on the right side of the printhead carriage. Insert the maintenance cartridge, pushing it in and down until it clicks into position. 84 The printer "beeps" when the cartridge is located on the front panel (about 1 minute). 1' Page 13 90 Open the printer window, and then remove the packing... foam from the top of the printer. 88 Remove the transparent shipping tray. 83 Push the ink cartridge drawer back into the printer until the drawer locks into place, and then close the maintenance...
HP Designjet Z6100 Printer Series - Setup Poster (60 inch)
Page 14
... release the blue latch on top of the printheads are correctly seated. When all of the carriage assembly. The printer "beeps" when each printhead contains ink. 94 Remove all of the setup printheads. 95 Shake the printhead vigorously for about 15 second. Be careful not to "Close printhead cover and window". Lift the blue latch to...
HP Designjet Z6100 Printer Series - Setup Poster (60 inch)
Page 15
... message appears on the front panel. 10' Load the paper Steps 104 to the HP Start-Up Kit CD/DVD. 100 Close the carriage assembly cover. 101 Lower and lock...This task requires 1 person. Time required is correctly engaged, and then lower the latch. 102 Close the printer window. 103 Wait until the Ready for paper message appears on the front panel, check that all of the...deflector. 105 Remove the spindle from the printer. Make sure that came with your printer in the middle of the protective tape has been removed, and then firmly reseat the printheads. Page 15 Box required 25' x1 104...
HP Designjet Z6100 Printer Series - Setup Poster (60 inch)
Page 18
it is necessary to ensure successful printhead alignment. The alignment and calibration process will take about twenty minutes; During the process, the printer advances the paper up to stop the paper advance; while it is taking place, you can proceed with software installation.... onto the spindle. 126 Confirm the paper type and paper length of the roll that you loaded into the printer, and then press the OK button. 128 The printer automatically aligns the printheads and performs a color calibration for the printhead alignment. Windows users can proceed to the next step.
HP Designjet Z6100 Printer Series - User's Guide
Page 6
...protect the Embedded Web Server 24 Change the language of the Embedded Web Server 24 HP Easy Printer Care (Windows) or HP Printer Utility (Mac OS) setup options 25 Change the language of the HP Easy Printer Care (Windows) or HP Printer Utility (Mac OS) ...25 4 Handle the paper Overview ...27 Use paper ...... paper ...49 Order paper ...49 Non-recommended paper types 55 5 Handle the ink system Ink system components ...57 Ink cartridges ...57 Printheads ...57 Maintenance cartridge 58 Ink system tips ...58 Work with ink system components 59 Remove an ink cartridge 59 Insert an ink cartridge ...
HP Designjet Z6100 Printer Series - User's Guide
Page 7
... the maintenance cartridge 75 Check the status of the ink system 76 Check the status of the ink cartridges 76 Check the status of a printhead 77 Check printer usage statistics 77 Order ink supplies ...78 6 Print options Select print quality ...80 Use the Embedded Web Server 80 Use a driver ...80 Use the... 87 Use the Embedded Web Server 88 Use a driver ...88 Enter an account ID ...88 Use the Embedded Web Server 88 Use a driver ...88 Select color emulation mode ...88 Use the Embedded Web Server 88 Use a driver ...89 v
HP Designjet Z6100 Printer Series - User's Guide
Page 9
... a job with consistent colors 130 Scenario 1 ...130 Scenario 2 ...131 Use ESRI ArcGIS 9 to print a map 131 Use the Windows printer engine 131 Use the ArcPress printer engine 133 9 Maintain the printer Clean the exterior of the printer 136 Clean the platen ...136 Clean the paper-advance sensor window 138 Lubricate the printhead carriage 139 Maintain the...
HP Designjet Z6100 Printer Series - User's Guide
Page 10
... ...157 PANTONE* colors are inaccurate 157 Colors between different HP Designjets do not match 157 The output is completely blank 159 The output contains only a partial print 159 The image is clipped ...160 The image...insert the maintenance cartridge 168 Front panel recommends reseating or replacing a printhead 168 Clean the printheads ...168 Align the printheads ...169 Reinsert printheads procedure 169 Image Quality Maintenance menu procedure 170 Scan errors during alignment 171 14 Troubleshoot other issues The printer is not printing ...173 The software program slows down or stalls ...
HP Designjet Z6100 Printer Series - User's Guide
Page 17
Printhead carriage 5. Introduction Front view 42-in printer 1. Maintenance cartridge 7. Paper-load lever 8. Spindle 9. Ink cartridge 2. Front panel 6. Printhead 4. Bin The printer's main components 5 Platen 3.
HP Designjet Z6100 Printer Series - User's Guide
Page 18
Introduction Rear view 42-in printer 1. Printhead 4. Ink cartridge 2. Printhead carriage 6 Chapter 1 Introduction Platen 3. Sockets for communication cables and optional accessories Front view 60-in printer 1. Quick Reference Guide holder 2. Hard power switch and power-cord plug in 3.
HP Designjet Z6100 Printer Series - User's Guide
Page 20
... if for the following functions: ● Use it to change the values of printer settings and the operation of the printer. Manual winding buttons 3. However, settings in the Embedded Web Server or in using the printer. ● See warning and error messages, when appropriate. ● Use it ...Take-up -to-date information about the status of the printer, on the front panel. 8 Chapter 1 Introduction Wind-direction switch The front panel Your printer's front panel is located on the front of the printer, the ink cartridges, the printheads, the maintenance cartridge, the paper, the print jobs,...
HP Designjet Z6100 Printer Series - User's Guide
Page 23
... size ● A wide variety of printing options ● Color-adjustment options The HP Easy Printer Care (Windows) and HP Printer Utility (Mac OS) main features The HP Easy Printer Care (Windows) and HP Printer Utility (Mac OS) provide an easy-to-use interface that version of the ink cartridges, the printheads and the paper. ● Manage, install, and create International...
HP Designjet Z6100 Printer Series - User's Guide
Page 33
Leaving it on the front panel. When you want to turn off the printer this way, the printheads are recommended to turn it back on , it off using the Power button, and then also switch off , the normal and recommended method is to ... time is turned on later, use the Power button on without wasting energy. You can resume printing immediately. When the printer has not been used for the HP Designjet Z6100 printer series. If you turn the printer on or off the power switch at the rear, and then press the Power button. However, if you are...
HP Designjet Z6100 Printer Series - User's Guide
Page 48
... page 38, and then continue to print. 15. NOTE: Familiarize yourself with the procedural steps, because loading the take -up reel on the 42-inch printer) during printing saves approximately 1 m (3 feet) of the procedure. If you have a take -up reel while printing requires you do not have a ... front panel or by lifting the paper-load lever. icon, and then NOTE: During the initial printer set up, printhead alignment and color calibration is performed automatically after the roll is enabled, you through the introductory text in the following sections. Handle the paper 36 ...