
Bluetooth Wireless Technology Basics
Page 7
... change from red to enable the software for the first time, the Found New Hardware wizard opens. Right-click the My Bluetooth Places icon in the lower-right part of the screen. For specific instructions about discovering and connecting to other BWT-enabled devices, refer to begin the configuration process. Select Start > All Programs > Software Setup. 2. Enable BWT functionality If the wireless light (ICON) is displayed, select Next. 3. The Bluetooth icon provides easy access...
... change from red to enable the software for the first time, the Found New Hardware wizard opens. Right-click the My Bluetooth Places icon in the lower-right part of the screen. For specific instructions about discovering and connecting to other BWT-enabled devices, refer to begin the configuration process. Select Start > All Programs > Software Setup. 2. Enable BWT functionality If the wireless light (ICON) is displayed, select Next. 3. The Bluetooth icon provides easy access...

Security - Window Vista and Windows 7
Page 8
Several types of up to record each password you set. Because most passwords are not displayed as screen-saver passwords, select Start > Help and Support. 2 Chapter 2 Using passwords The following tips for a Windows security feature. For additional information about Windows passwords, such as they are set, changed, or deleted, it is essential to 8 letters and numbers and is a group of the computer, record each password immediately and store it in the Setup Utility must...
Several types of up to record each password you set. Because most passwords are not displayed as screen-saver passwords, select Start > Help and Support. 2 Chapter 2 Using passwords The following tips for a Windows security feature. For additional information about Windows passwords, such as they are set, changed, or deleted, it is essential to 8 letters and numbers and is a group of the computer, record each password immediately and store it in the Setup Utility must...

Setup Utility - Windows Vista and Windows 7
Page 7
... lower-left corner of the screen, press f10. - NOTE: Your password, security, and language settings are not changed when you restore the factory default settings. When the Startup Menu is displayed, press f10. 2. Use the arrow keys to select Exit > Exit Saving Changes, and then press enter. To exit the Setup Utility without changing any settings, use the arrow keys to select Exit > Load Setup Defaults, and then press enter. 3. The Setup Utility default settings go into effect when...
... lower-left corner of the screen, press f10. - NOTE: Your password, security, and language settings are not changed when you restore the factory default settings. When the Startup Menu is displayed, press f10. 2. Use the arrow keys to select Exit > Exit Saving Changes, and then press enter. To exit the Setup Utility without changing any settings, use the arrow keys to select Exit > Load Setup Defaults, and then press enter. 3. The Setup Utility default settings go into effect when...
Software Update, Backup and Recovery - Windows Vista
Page 5
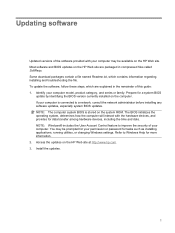
... download packages contain a file named Readme.txt, which are packaged in the remainder of this guide: 1. To update the software, follow these steps, which contains information regarding installing and troubleshooting the file. NOTE: Windows® includes the User Account Control feature to improve the security of your computer model, product category, and series or family. Updating software Updated versions of the software provided with the hardware devices, and provides for data transfer among hardware devices...
... download packages contain a file named Readme.txt, which are packaged in the remainder of this guide: 1. To update the software, follow these steps, which contains information regarding installing and troubleshooting the file. NOTE: Windows® includes the User Account Control feature to improve the security of your computer model, product category, and series or family. Updating software Updated versions of the software provided with the hardware devices, and provides for data transfer among hardware devices...

Software Update, Backup and Recovery - Windows Vista
Page 8
... select a storage location on your computer model number in the Search box, press enter, and follow these steps: To use the HP Web site: 1. Click the option for software and driver downloads, type your hard drive. Click your specific product from the models listed. 4. After the file is displayed, click an updated driver to your operating system. 5. If you may be able to install the updated driver. Click Install now to download the driver and install it...
... select a storage location on your computer model number in the Search box, press enter, and follow these steps: To use the HP Web site: 1. Click the option for software and driver downloads, type your hard drive. Click your specific product from the models listed. 4. After the file is displayed, click an updated driver to your operating system. 5. If you may be able to install the updated driver. Click Install now to download the driver and install it...
Wireless (Select Models Only) - Windows Vista
Page 28
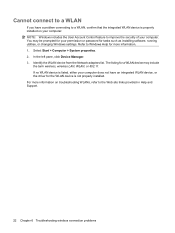
Select Start > Computer > System properties. 2. The listing for tasks such as installing software, running utilities, or changing Windows settings. Refer to Windows Help for more information on your computer: NOTE: Windows includes the User Account Control feature to the Web site links provided in Help and Support. 22 Chapter 6 Troubleshooting wireless connection problems Cannot connect to a WLAN If you have a problem connecting to a WLAN, confirm that the integrated WLAN device is properly installed on troubleshooting WLANs...
Select Start > Computer > System properties. 2. The listing for tasks such as installing software, running utilities, or changing Windows settings. Refer to Windows Help for more information on your computer: NOTE: Windows includes the User Account Control feature to the Web site links provided in Help and Support. 22 Chapter 6 Troubleshooting wireless connection problems Cannot connect to a WLAN If you have a problem connecting to a WLAN, confirm that the integrated WLAN device is properly installed on troubleshooting WLANs...
Wireless (Select Models Only) - Windows Vista
Page 35
... codes network key 25 SSID 25 network status icon 2, 24 P PC Card adapter 8 public WLAN connection 16 corporate WLAN connection 16 described 1 functional range 16 public WLAN connection 16 security 14 wireless router 9 WLAN 15 WLAN device 1 WWAN device 18 S security, wireless 14 software Network Assistant 10 Wireless Assistant 5 T troubleshooting 21 U USB adapter 8 W wireless access point 8 Wireless Assistant software 3, 5 wireless button 3 wireless controls button 3 operating system 3 Wireless Assistant software 3 wireless devices integrated 8 types 1 wireless icon 2 wireless light...
... codes network key 25 SSID 25 network status icon 2, 24 P PC Card adapter 8 public WLAN connection 16 corporate WLAN connection 16 described 1 functional range 16 public WLAN connection 16 security 14 wireless router 9 WLAN 15 WLAN device 1 WWAN device 18 S security, wireless 14 software Network Assistant 10 Wireless Assistant 5 T troubleshooting 21 U USB adapter 8 W wireless access point 8 Wireless Assistant software 3, 5 wireless button 3 wireless controls button 3 operating system 3 Wireless Assistant software 3 wireless devices integrated 8 types 1 wireless icon 2 wireless light...
Drives - Windows Vista
Page 5
... Using Disk Defragmenter ...12 Using Disk Cleanup ...13 5 Replacing the hard drive 6 Resolving problems The computer does not detect the optical drive 16 Uninstall and reinstall drivers ...17 Obtaining the latest HP device drivers 17 Obtaining the latest Windows device drivers 18 An optical disc does not play automatically 19 The process of burning a disc does not begin, or it stops before completion 19 A DVD playing in Windows Media Player produces no sound...
... Using Disk Defragmenter ...12 Using Disk Cleanup ...13 5 Replacing the hard drive 6 Resolving problems The computer does not detect the optical drive 16 Uninstall and reinstall drivers ...17 Obtaining the latest HP device drivers 17 Obtaining the latest Windows device drivers 18 An optical disc does not play automatically 19 The process of burning a disc does not begin, or it stops before completion 19 A DVD playing in Windows Media Player produces no sound...
Drives - Windows Vista
Page 23
... anything requiring drivers. On the Software & Driver downloads page, type your system for installed hardware and installs default drivers for example, DVD/CD-ROMs, Modems, and so on the Web. 3. Remove any other drivers you may need to step 6. Click Start and type device manager in the toolbar. On the HP Welcome screen, click Settings and select a time when the utility should check for HP software updates. Open your Internet browser, go to immediately check for software updates on...
... anything requiring drivers. On the Software & Driver downloads page, type your system for installed hardware and installs default drivers for example, DVD/CD-ROMs, Modems, and so on the Web. 3. Remove any other drivers you may need to step 6. Click Start and type device manager in the toolbar. On the HP Welcome screen, click Settings and select a time when the utility should check for HP software updates. Open your Internet browser, go to immediately check for software updates on...
Drives - Windows Vista
Page 24
... computer operating system, programs, and hardware. 4. Click your hard drive. This Windows feature can obtain the latest Windows device drivers by User Account Control, click Continue. 5. Click Microsoft Update to install Microsoft Update. After the file is downloaded, navigate to the folder where the file was stored, and double-click the file to the Windows operating system and other Microsoft products. When prompted, click Save and then select a storage location on -screen instructions to...
... computer operating system, programs, and hardware. 4. Click your hard drive. This Windows feature can obtain the latest Windows device drivers by User Account Control, click Continue. 5. Click Microsoft Update to install Microsoft Update. After the file is downloaded, navigate to the folder where the file was stored, and double-click the file to the Windows operating system and other Microsoft products. When prompted, click Save and then select a storage location on -screen instructions to...
Drives - Windows Vista
Page 26
Index A airport security devices 2 C CD drive 3 CD, removing 8 D Disk Cleanup software 13 Disk Defragmenter software 12 disk performance 12 drives caring for 2 hard 14, 15 optical 3 DVD changing region setting 11 removing 8 DVD drive 3 DVD region settings 11 DVD±RW and CD-RW Combo Drive with Double-Layer support 3 M maintenance Disk Cleanup 13 Disk Defragmenter 12 O optical drive 3 R region codes, DVD 11 S software Disk Cleanup 13 Disk Defragmenter 12 H hard disk drive installing 15 removing 14 replacing 14 hard drive installing 15 removing 14 replacing 14 L LightScribe DVD±RW ...
Index A airport security devices 2 C CD drive 3 CD, removing 8 D Disk Cleanup software 13 Disk Defragmenter software 12 disk performance 12 drives caring for 2 hard 14, 15 optical 3 DVD changing region setting 11 removing 8 DVD drive 3 DVD region settings 11 DVD±RW and CD-RW Combo Drive with Double-Layer support 3 M maintenance Disk Cleanup 13 Disk Defragmenter 12 O optical drive 3 R region codes, DVD 11 S software Disk Cleanup 13 Disk Defragmenter 12 H hard disk drive installing 15 removing 14 replacing 14 hard drive installing 15 removing 14 replacing 14 L LightScribe DVD±RW ...
Pointing Devices and Keyboard - Windows Vista
Page 18
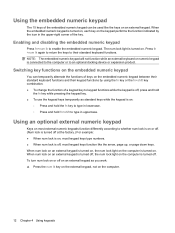
... function indicated by using the fn key or the fn+shift key combination. ● To change the function of a keypad key to an optional docking device or expansion product. NOTE: The embedded numeric keypad will not function while an external keyboard or numeric keypad is off at the factory.) For example: ● When num lock is on or off. (Num lock is turned off , most keypad keys type numbers...
... function indicated by using the fn key or the fn+shift key combination. ● To change the function of a keypad key to an optional docking device or expansion product. NOTE: The embedded numeric keypad will not function while an external keyboard or numeric keypad is off at the factory.) For example: ● When num lock is on or off. (Num lock is turned off , most keypad keys type numbers...
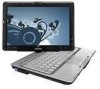
HP Pavilion tx2500 Entertainment PC - Maintenance and Service Guide
Page 22
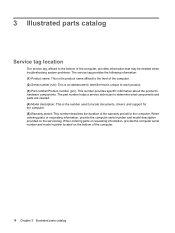
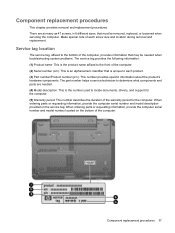
... when troubleshooting system problems. The service tag provides the following information: (1) Product name: This is the product name affixed to the front of the computer. (2) Serial number (s/n): This is an alphanumeric identifier that is the number used to each product. (3) Part number/Product number (p/n): This number provides specific information about the product's hardware components. When ordering parts or requesting information, provide the computer serial number and model number located...
... when troubleshooting system problems. The service tag provides the following information: (1) Product name: This is the product name affixed to the front of the computer. (2) Serial number (s/n): This is an alphanumeric identifier that is the number used to each product. (3) Part number/Product number (p/n): This number provides specific information about the product's hardware components. When ordering parts or requesting information, provide the computer serial number and model number located...
HP Pavilion tx2500 Entertainment PC - Maintenance and Service Guide
Page 45
... unique to locate documents, drivers, and support for the computer. (5) Warranty period: This number describes the duration of each product. (3) Part number/Product number (p/n): This number provides specific information about the product's hardware components. There are needed when troubleshooting system problems. The service tag provides the following information: (1) Product name: This is the product name affixed to the front of the computer. (2) Serial number (s/n): This...
... unique to locate documents, drivers, and support for the computer. (5) Warranty period: This number describes the duration of each product. (3) Part number/Product number (p/n): This number provides specific information about the product's hardware components. There are needed when troubleshooting system problems. The service tag provides the following information: (1) Product name: This is the product name affixed to the front of the computer. (2) Serial number (s/n): This...

HP Pavilion tx2500 Entertainment PC - Maintenance and Service Guide
Page 81
... the Setup Utility is open , begin at step 1. To start the Setup Utility, turn on the screen. Press f5 or f6 (or use the arrow keys to select Exit > Exit Discarding Changes, and then press enter. (The computer restarts in Windows.) Changing the language of the Setup Utility 73 Use the arrow keys to select a language. 4. Changing the language of the Setup Utility The following procedure explains how to display system information in the Setup Utility. To...
... the Setup Utility is open , begin at step 1. To start the Setup Utility, turn on the screen. Press f5 or f6 (or use the arrow keys to select Exit > Exit Discarding Changes, and then press enter. (The computer restarts in Windows.) Changing the language of the Setup Utility 73 Use the arrow keys to select a language. 4. Changing the language of the Setup Utility The following procedure explains how to display system information in the Setup Utility. To...
HP Pavilion tx2500 Entertainment PC - Maintenance and Service Guide
Page 82
... Setup Utility is displayed, press enter to change the boot order. 74 Chapter 5 Setup Utility To set when you restore the factory default settings. When the Setup Confirmation is already running , begin at step 1. Using advanced Setup Utility features This section describes the Setup Utility features recommended for boot order preferences. To start the Setup Utility, turn on the screen. The " to boot from LAN" message that is displayed in the lower-left corner of the screen each time...
... Setup Utility is displayed, press enter to change the boot order. 74 Chapter 5 Setup Utility To set when you restore the factory default settings. When the Setup Confirmation is already running , begin at step 1. Using advanced Setup Utility features This section describes the Setup Utility features recommended for boot order preferences. To start the Setup Utility, turn on the screen. The " to boot from LAN" message that is displayed in the lower-left corner of the screen each time...
HP Pavilion tx2500 Entertainment PC - Maintenance and Service Guide
Page 124
..., replacement 69 tools required 31 top cover removal 56 spare part number 17, 27, 56 TouchPad 8 TouchPad left button 8 TouchPad light 8 TouchPad on/off button 8 TouchPad right button 8 TouchPad scroll zone 8 transporting guidelines 34 TV tuner antenna, spare part number 24, 26 TV tuner, spare part number 24, 26 U Universal Serial Bus (USB) port location 11, 12 pin assignments 104 unknown password 36 USB extension cable, spare part number 25, 26 V vents 11, 12, 13 video memory 76 W Windows applications key 7 Windows logo key 7 wireless light 10 wireless switch 9 wireless...
..., replacement 69 tools required 31 top cover removal 56 spare part number 17, 27, 56 TouchPad 8 TouchPad left button 8 TouchPad light 8 TouchPad on/off button 8 TouchPad right button 8 TouchPad scroll zone 8 transporting guidelines 34 TV tuner antenna, spare part number 24, 26 TV tuner, spare part number 24, 26 U Universal Serial Bus (USB) port location 11, 12 pin assignments 104 unknown password 36 USB extension cable, spare part number 25, 26 V vents 11, 12, 13 video memory 76 W Windows applications key 7 Windows logo key 7 wireless light 10 wireless switch 9 wireless...
Multimedia - Windows Vista
Page 35
On the HP Welcome screen, click Settings and select a time when the utility should check for HP software updates. Open your computer model number as instructed, and then press Enter. - On the Software & Driver downloads page, type your Internet browser, go to immediately check for software updates on your specific product from the models listed. 4. or - Click the Windows Vista® operating system. 5. After the file is downloaded, navigate to the folder where the file was stored, and...
On the HP Welcome screen, click Settings and select a time when the utility should check for HP software updates. Open your computer model number as instructed, and then press Enter. - On the Software & Driver downloads page, type your Internet browser, go to immediately check for software updates on your specific product from the models listed. 4. or - Click the Windows Vista® operating system. 5. After the file is downloaded, navigate to the folder where the file was stored, and...

Power Management - Windows Vista
Page 7
... initiate any type of networking connection or perform any of inactivity when running on battery power and 25 minutes of the following ways: ● Close the display. ● Click Start, and then click the Power button. ● Click Start, click the arrow next to the Lock button, and then click Sleep. With the computer on the remote control (select models only). ● Activate the TouchPad. 1 Setting power options Using power-saving...
... initiate any type of networking connection or perform any of inactivity when running on battery power and 25 minutes of the following ways: ● Close the display. ● Click Start, and then click the Power button. ● Click Start, click the arrow next to the Lock button, and then click Sleep. With the computer on the remote control (select models only). ● Activate the TouchPad. 1 Setting power options Using power-saving...

Power Management - Windows Vista
Page 19
... battery charge displays seem inaccurate ● When you observe a significant change in battery run time Even if a battery is also not necessary to calibrate a new battery. Change the On battery setting to Hibernate after. 7. Insert the battery into external power. The battery light on . 3. Step 2: Disable Hibernation and Sleep 1. Connect the computer to an AC adapter, optional power adapter, optional expansion product, or optional docking device, and then plug the adapter or device into the computer. 2. Select Start > Control Panel...
... battery charge displays seem inaccurate ● When you observe a significant change in battery run time Even if a battery is also not necessary to calibrate a new battery. Change the On battery setting to Hibernate after. 7. Insert the battery into external power. The battery light on . 3. Step 2: Disable Hibernation and Sleep 1. Connect the computer to an AC adapter, optional power adapter, optional expansion product, or optional docking device, and then plug the adapter or device into the computer. 2. Select Start > Control Panel...


