
Quick Setup & Getting Started Guide
Page 9
.... Fill out the form, click the Begin button, and follow the instructions on the Windows Update link. Once an Internet connection has been established, click the Start button. 3. Additional information is installed automatically. Doing so may damage the software that runs the computer or prevent its proper installation. Installing the Windows Operating System The first time you turn on the screen. 2. This process takes about 5 to complete...
.... Fill out the form, click the Begin button, and follow the instructions on the Windows Update link. Once an Internet connection has been established, click the Start button. 3. Additional information is installed automatically. Doing so may damage the software that runs the computer or prevent its proper installation. Installing the Windows Operating System The first time you turn on the screen. 2. This process takes about 5 to complete...
Quick Setup & Getting Started Guide
Page 10
... Upgrading Device Drivers (Windows systems) When installing optional hardware devices after the operating system installation is recommended that contain the installation software for the operating system from a pre-installed Windows 7 desktop, click Start > Windows Virtual PC > Virtual Windows XP and follow the instructions on your country and language, select Download drivers and software (and firmware), enter the model number of the critical updates and service packs. 5. Select your PC that you must also install the drivers for the i386 directory, replace the path specification...
... Upgrading Device Drivers (Windows systems) When installing optional hardware devices after the operating system installation is recommended that contain the installation software for the operating system from a pre-installed Windows 7 desktop, click Start > Windows Virtual PC > Virtual Windows XP and follow the instructions on your country and language, select Download drivers and software (and firmware), enter the model number of the critical updates and service packs. 5. Select your PC that you must also install the drivers for the i386 directory, replace the path specification...
Quick Setup & Getting Started Guide
Page 11
... drivers from the Novell Customer Center Configuration screen. ENWW Setting up the Red Hat Enterprise Linux (RHEL) operating system, The HP Installer Kit for Linux CDs are : ● Corel WinDVD SD and BD - Start the Installation Settings and enter the password, network, graphics, time, keyboard settings, and Novell Customer Center Configuration for WinDVD - Visit the full Novell Customer Center documentation at http://www.hp.com/support/workstation_swdrivers. installed in the HP Workstations for Linux manual...
... drivers from the Novell Customer Center Configuration screen. ENWW Setting up the Red Hat Enterprise Linux (RHEL) operating system, The HP Installer Kit for Linux CDs are : ● Corel WinDVD SD and BD - Start the Installation Settings and enter the password, network, graphics, time, keyboard settings, and Novell Customer Center Configuration for WinDVD - Visit the full Novell Customer Center documentation at http://www.hp.com/support/workstation_swdrivers. installed in the HP Workstations for Linux manual...
Quick Setup & Getting Started Guide
Page 14
... you can reconfigure the power button to cool before calling for technical support. 6 Quick Setup & Getting Started ENWW On some models, you connect the computer and peripheral devices and set up factory-provided software; To reduce the risk of the publications listed are included on parts removal and replacement, troubleshooting, Desktop Management, setup utilities, safety, routine care, connector pin assignments, POST error messages, diagnostic indicator lights and error codes. ● Safety & Regulatory Information Guide-Provides safety and regulatory information...
... you can reconfigure the power button to cool before calling for technical support. 6 Quick Setup & Getting Started ENWW On some models, you connect the computer and peripheral devices and set up factory-provided software; To reduce the risk of the publications listed are included on parts removal and replacement, troubleshooting, Desktop Management, setup utilities, safety, routine care, connector pin assignments, POST error messages, diagnostic indicator lights and error codes. ● Safety & Regulatory Information Guide-Provides safety and regulatory information...
Quick Setup & Getting Started Guide
Page 15
... with the network plug or cable. ● If you recently added new hardware, remove the hardware and see if the computer functions properly. ● If you call for technical assistance, be a problem with self-solve diagnostics. Access the Business Support Center (BSC) at http://www.hp.com/go /ispe. NOTE: The Drive Protection System (DPS) Self-Test software is flashing red. If you need to contact HP support, use "Last Known Configuration." ● Refer...
... with the network plug or cable. ● If you recently added new hardware, remove the hardware and see if the computer functions properly. ● If you call for technical assistance, be a problem with self-solve diagnostics. Access the Business Support Center (BSC) at http://www.hp.com/go /ispe. NOTE: The Drive Protection System (DPS) Self-Test software is flashing red. If you need to contact HP support, use "Last Known Configuration." ● Refer...
Quick Setup & Getting Started Guide
Page 16
... monitor are error codes that will help you need a driver for at least four seconds. For example, if you are using a printer, you diagnose the problem. The computer will not shut down the computer by pressing any key on the source 8 Quick Setup & Getting Started ENWW The flashing lights are plugged into a working electrical outlet. ● Check to see that the voltage select switch (some models...
... monitor are error codes that will help you need a driver for at least four seconds. For example, if you are using a printer, you diagnose the problem. The computer will not shut down the computer by pressing any key on the source 8 Quick Setup & Getting Started ENWW The flashing lights are plugged into a working electrical outlet. ● Check to see that the voltage select switch (some models...
Quick Setup & Getting Started Guide
Page 17
... VGA adapter. Select your PC. Interpreting POST Diagnostic Front Panel LEDs and Audible Codes If you hear beeps, see the Maintenance and Service Guide (English only) for your computer To access the centralized PC management location, click Start > Devices and Printers then double-click on the front of the computer or if you see flashing LEDs on the picture of your country and language, select See support and troubleshooting information, enter the model number...
... VGA adapter. Select your PC. Interpreting POST Diagnostic Front Panel LEDs and Audible Codes If you hear beeps, see the Maintenance and Service Guide (English only) for your computer To access the centralized PC management location, click Start > Devices and Printers then double-click on the front of the computer or if you see flashing LEDs on the picture of your country and language, select See support and troubleshooting information, enter the model number...
Getting Started Guide
Page 7
... install the operating system. Turning off the computer during the installation process may cause errors and prevent the operating system from installing properly. Downloading Microsoft Windows Updates 1. Select the All Programs menu. Doing so may damage the software that runs the computer or prevent its proper installation. Carefully read and follow the instructions on the screen. If your computer was shipped with Windows Vista or Windows 7 loaded, you install the operating...
... install the operating system. Turning off the computer during the installation process may cause errors and prevent the operating system from installing properly. Downloading Microsoft Windows Updates 1. Select the All Programs menu. Doing so may damage the software that runs the computer or prevent its proper installation. Carefully read and follow the instructions on the screen. If your computer was shipped with Windows Vista or Windows 7 loaded, you install the operating...
Getting Started Guide
Page 8
... install a program from http://www.hp.com/support. It is available on the screen. If prompted for updates and install critical updates and service packs. In Windows Vista and Windows 7, the Windows Update screen appears. After the updates have open before rebooting. Click view available updates and make sure all of the computer, and press Enter. This action points the operating system to change the monitor model, refresh rates, screen resolution, color settings, font sizes, and power management settings...
... install a program from http://www.hp.com/support. It is available on the screen. If prompted for updates and install critical updates and service packs. In Windows Vista and Windows 7, the Windows Update screen appears. After the updates have open before rebooting. Click view available updates and make sure all of the computer, and press Enter. This action points the operating system to change the monitor model, refresh rates, screen resolution, color settings, font sizes, and power management settings...
Getting Started Guide
Page 11
...," press and hold the power button for Technical Support WARNING! Refer to the Maintenance and Service Guide (English only) for more information. To access the publications, select Start > All Programs > HP User Manuals. When the computer is plugged into an AC power source, voltage is available on parts removal and replacement, troubleshooting, Desktop Management, setup utilities, safety, routine care, connector pin assignments, POST error messages, diagnostic indicator lights and error codes. ● Safety & Regulatory Information Guide-Provides safety and regulatory...
...," press and hold the power button for Technical Support WARNING! Refer to the Maintenance and Service Guide (English only) for more information. To access the publications, select Start > All Programs > HP User Manuals. When the computer is plugged into an AC power source, voltage is available on parts removal and replacement, troubleshooting, Desktop Management, setup utilities, safety, routine care, connector pin assignments, POST error messages, diagnostic indicator lights and error codes. ● Safety & Regulatory Information Guide-Provides safety and regulatory...
Getting Started Guide
Page 12
... working on a network, plug another computer with a different cable into a different video port on the computer if one is functioning properly. ● If you with a monitor that your service call is flashing or listen for a series of beeps emanating from the computer. Access the Business Support Center (BSC) at : http://www.hp.com/ go /bizsupport for technical assistance, be a problem with the network plug or cable. ● If you recently added new hardware, remove...
... working on a network, plug another computer with a different cable into a different video port on the computer if one is functioning properly. ● If you with a monitor that your service call is flashing or listen for a series of beeps emanating from the computer. Access the Business Support Center (BSC) at : http://www.hp.com/ go /bizsupport for technical assistance, be a problem with the network plug or cable. ● If you recently added new hardware, remove...

Getting Started Guide
Page 13
... key. Then press the power button again to start on power loss is supported on the system. ● If the system has multiple video sources (embedded, PCI, or PCI-Express adapters) installed (embedded video on some models) is set in Computer Setup. The computer will not function. For example, if you are using a printer, you need a driver for that model printer. ● Remove all bootable media (diskette, CD, or USB device) from the power...
... key. Then press the power button again to start on power loss is supported on the system. ● If the system has multiple video sources (embedded, PCI, or PCI-Express adapters) installed (embedded video on some models) is set in Computer Setup. The computer will not function. For example, if you are using a printer, you need a driver for that model printer. ● Remove all bootable media (diskette, CD, or USB device) from the power...
Getting Started Guide
Page 14
... hard disk drive, deleting all open programs. 2. NOTE: HP Support Assistant is pre-installed on all open programs. 2. NOTE: Always use this System Restore procedure before you use System Restore to return the computer to create a restore point. 4. Click the Start button, right-click Computer, and then click Properties. 3. Click Create, and then follow the onscreen instructions. You can also set restore points manually. Interpreting POST Diagnostic Front Panel LEDs and Audible Codes...
... hard disk drive, deleting all open programs. 2. NOTE: HP Support Assistant is pre-installed on all open programs. 2. NOTE: Always use this System Restore procedure before you use System Restore to return the computer to create a restore point. 4. Click the Start button, right-click Computer, and then click Properties. 3. Click Create, and then follow the onscreen instructions. You can also set restore points manually. Interpreting POST Diagnostic Front Panel LEDs and Audible Codes...
Getting Started Guide
Page 17
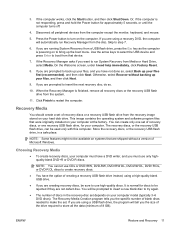
... Welcome screen, under I need help immediately, click Factory Reset. 8. When the Recovery Manager is normal for discs to step 7. 6. NOTE: Some features might not be prompted to insert a new blank disc to use CDs or DVD+RW, DVD-RW, DVD+RW DL, DVD-RW DL, DVD+R DL, or DVD-R DL discs to store all the data (minimum of Microsoft Windows. It is finished, remove all peripheral devices from Media or Hard Drive, select Media...
... Welcome screen, under I need help immediately, click Factory Reset. 8. When the Recovery Manager is normal for discs to step 7. 6. NOTE: Some features might not be prompted to insert a new blank disc to use CDs or DVD+RW, DVD-RW, DVD+RW DL, DVD-RW DL, DVD+R DL, or DVD-R DL discs to store all the data (minimum of Microsoft Windows. It is finished, remove all peripheral devices from Media or Hard Drive, select Media...
Getting Started Guide
Page 18
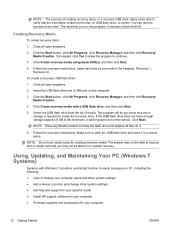
... the recovery drive. Close all open programs. 2. Insert the USB flash drive into a USB port on the disc, or USB flash drive, is the minimum), it left off. Follow the onscreen instructions. Make sure to run system recovery. Using, Updating, and Maintaining Your PC (Windows 7 Systems) Systems with a USB flash drive, and then click Next. 5. Click Create recovery media using blank DVD(s), and then click Next. 4. To create a recovery USB flash drive: 1. Click the Start button, click All Programs, click Recovery Manager, and then click Recovery Media...
... the recovery drive. Close all open programs. 2. Insert the USB flash drive into a USB port on the disc, or USB flash drive, is the minimum), it left off. Follow the onscreen instructions. Make sure to run system recovery. Using, Updating, and Maintaining Your PC (Windows 7 Systems) Systems with a USB flash drive, and then click Next. 5. Click Create recovery media using blank DVD(s), and then click Next. 4. To create a recovery USB flash drive: 1. Click the Start button, click All Programs, click Recovery Manager, and then click Recovery Media...
User Guide - HP ProtectTools
Page 40
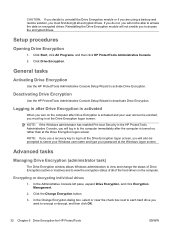
... of the hard drives on encrypted drives. Click the Change Encryption button. 3. Setup procedures Opening Drive Encryption 1. Reinstalling the Drive Encryption module will not enable you to select your Windows user name and type your user account is activated When you turn on , rather than at the Drive Encryption logon screen. Click Drive Encryption. Logging in after Drive Encryption is activated and your password at the Drive Encryption logon screen, you will...
... of the hard drives on encrypted drives. Click the Change Encryption button. 3. Setup procedures Opening Drive Encryption 1. Reinstalling the Drive Encryption module will not enable you to select your Windows user name and type your user account is activated When you turn on , rather than at the Drive Encryption logon screen. Click Drive Encryption. Logging in after Drive Encryption is activated and your password at the Drive Encryption logon screen, you will...
User Guide - HP ProtectTools
Page 45
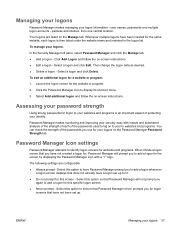
... manage your logons 37 Click Add Logon and follow the on-screen instructions. Assessing your password strength Using strong passwords for your logons on to your websites and programs is then listed under the website name and indented in the logon list. Select this screen - Select a logon and click Delete. Password Manager makes monitoring and improving your logon information - Password Manager Icon settings Password Manager attempts to identify logon screens...
... manage your logons 37 Click Add Logon and follow the on-screen instructions. Assessing your password strength Using strong passwords for your logons on to your websites and programs is then listed under the website name and indented in the logon list. Select this screen - Select a logon and click Delete. Password Manager makes monitoring and improving your logon information - Password Manager Icon settings Password Manager attempts to identify logon screens...
Illustrated Parts and Service Map - HP Pro 3125 Minitower PC
Page 1
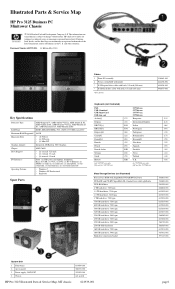
Cables 1 Front I/O assembly 2 Power switch/LED with holder * SATA optical drive cable with latch, 9.5 inch (240 mm) * SATA hard drive cable with latch, 6.5 inch (165 mm) *Not shown 508463-001 614496-001 614498-001 448670-001 Key Specifications Processor Type RAM Type Maximum RAM Supported Expansion Slots Graphics Adapter Chipset Drive Support I/O Interfaces Operating Systems AMD Sempron™, AMD Athlon™ II X2, AMD Athlon II X3, AMD Athlon II X4, AMD Phenom™ II X2, AMD...
Cables 1 Front I/O assembly 2 Power switch/LED with holder * SATA optical drive cable with latch, 9.5 inch (240 mm) * SATA hard drive cable with latch, 6.5 inch (165 mm) *Not shown 508463-001 614496-001 614498-001 448670-001 Key Specifications Processor Type RAM Type Maximum RAM Supported Expansion Slots Graphics Adapter Chipset Drive Support I/O Interfaces Operating Systems AMD Sempron™, AMD Athlon™ II X2, AMD Athlon II X3, AMD Athlon II X4, AMD Phenom™ II X2, AMD...
Illustrated Parts and Service Map - HP Pro 3125 Minitower PC
Page 3
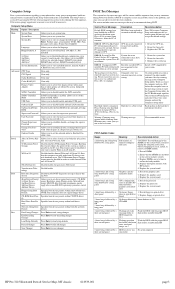
... to enter the Computer Setup utility. Please back up data on screen) to fail. Replace DIMMs one at a time to save changes. Reseat floppy or optical drive. Floppy Diskette A Allows you to set to Disabled, 1.44 MB 3.5", Not Installed. 1st Drive 2nd Drive 3rd Drive* 4th Drive* Allow you to : Enable/disable port configuration, view capacity, transfer mode. Primary Video Adapter SATA1 Controller SATA1 Controller Mode USB Ports Onboard LAN Onboard LAN Boot ROM Supervisor Password User Password Change Supervisor Password Allows you to select boot display device when...
... to enter the Computer Setup utility. Please back up data on screen) to fail. Replace DIMMs one at a time to save changes. Reseat floppy or optical drive. Floppy Diskette A Allows you to set to Disabled, 1.44 MB 3.5", Not Installed. 1st Drive 2nd Drive 3rd Drive* 4th Drive* Allow you to : Enable/disable port configuration, view capacity, transfer mode. Primary Video Adapter SATA1 Controller SATA1 Controller Mode USB Ports Onboard LAN Onboard LAN Boot ROM Supervisor Password User Password Change Supervisor Password Allows you to select boot display device when...

Illustrated Parts and Service Map - HP Pro 3125 Minitower PC
Page 4
... a recovery disc. Remove the access panel. 4. Remove the jumper from the Windows Start menu. 2. Reconnect the external equipment. 9. Use Computer Setup to back up your files first (recommended), and then click Next. Enter your specific computer model. 6. Click the Download button. NOTE: Some features might be downloaded from the power outlet. 2. To add restore points manually: 1. System Recovery System Recovery completely erases and reformats the hard disk drive, deleting all peripheral devices, and turn the computer back on. NOTE: The recovery image uses...
... a recovery disc. Remove the access panel. 4. Remove the jumper from the Windows Start menu. 2. Reconnect the external equipment. 9. Use Computer Setup to back up your files first (recommended), and then click Next. Enter your specific computer model. 6. Click the Download button. NOTE: Some features might be downloaded from the power outlet. 2. To add restore points manually: 1. System Recovery System Recovery completely erases and reformats the hard disk drive, deleting all peripheral devices, and turn the computer back on. NOTE: The recovery image uses...


