Wireless Setup Guide
Page 2
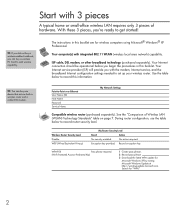
... Name Password Service Name My Network Settings Compatible wireless router (purchased separately). During router configuration, use the table below to set up your wireless router. Encryption key provided. WPA-PSK Pass phrase required. (Wi-Fi Protected Access-Preshared Key) 1 Create pass phrase. 2 Record pass phrase 3 Download the latest WPA update for "WPA." 2 ISP cable, DSL modem, or other broadband technology (purchased separately). Wireless Router Security Level Disable WEP...
... Name Password Service Name My Network Settings Compatible wireless router (purchased separately). During router configuration, use the table below to set up your wireless router. Encryption key provided. WPA-PSK Pass phrase required. (Wi-Fi Protected Access-Preshared Key) 1 Create pass phrase. 2 Record pass phrase 3 Download the latest WPA update for "WPA." 2 ISP cable, DSL modem, or other broadband technology (purchased separately). Wireless Router Security Level Disable WEP...

Wireless Setup Guide
Page 3
... the wireless button and light varies by model. 3 Connect the wireless router according to the manufacturer's instructions. (During this process your computer is on, turn on the computer according to the instructions included with the wireless router Ethernet cable connected, remove the cable from the successfully access a computer and the wireless router. If the light is temporarily connected to the router using the Ethernet cable included with router Ethernet cable temporarily connected (jack locations...
... the wireless button and light varies by model. 3 Connect the wireless router according to the manufacturer's instructions. (During this process your computer is on, turn on the computer according to the instructions included with the wireless router Ethernet cable connected, remove the cable from the successfully access a computer and the wireless router. If the light is temporarily connected to the router using the Ethernet cable included with router Ethernet cable temporarily connected (jack locations...
Wireless Setup Guide
Page 4
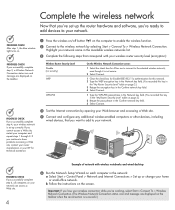
... successfully complete step 3, a Wireless Network Connection status icon and message are displayed on the computer to enable the wireless function. 2 Connect to the wireless network by opening your Web browser and accessing a Web site. 5 Connect and configure any additional wireless-enabled computers or other devices, including wired devices, that you've set up correctly. PROGRESS CHECK After step 1, the blue wireless light turns on. 1 Press the wireless on/off button on the taskbar when...
... successfully complete step 3, a Wireless Network Connection status icon and message are displayed on the computer to enable the wireless function. 2 Connect to the wireless network by opening your Web browser and accessing a Web site. 5 Connect and configure any additional wireless-enabled computers or other devices, including wired devices, that you've set up correctly. PROGRESS CHECK After step 1, the blue wireless light turns on. 1 Press the wireless on/off button on the taskbar when...
Wireless Setup Guide
Page 5
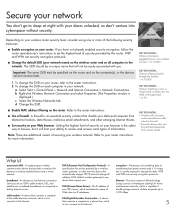
... the router instructions. 2 To change the SSID on your wireless network. DID YOU KNOW... Depending on your network: a Select Start > Control Panel > Network and Internet Connection > Network Connections. access point (AP)-A single-purpose wireless communication device that shields your wireless router security level, consider using coaxial or twisted-pair cabling) for home and business networks, which in your Web browser. d Change the SSID. DID YOU KNOW... • Windows XP and some types of...
... the router instructions. 2 To change the SSID on your wireless network. DID YOU KNOW... Depending on your network: a Select Start > Control Panel > Network and Internet Connection > Network Connections. access point (AP)-A single-purpose wireless communication device that shields your wireless router security level, consider using coaxial or twisted-pair cabling) for home and business networks, which in your Web browser. d Change the SSID. DID YOU KNOW... • Windows XP and some types of...
Wireless Setup Guide
Page 7
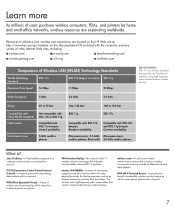
... an Internet connection, printers, files, and drives. The network uses high-frequency radio waves rather than wires to a computer or device that is required. 7 Resources to a network. wireless LAN (WLAN)-A system of connecting computers and other devices within a network. WPA (Wi-Fi Protected Access)-A specificationbased, interoperable wireless security feature for which a pass phrase (password) is connected to enhance your wireless user experience are expanding worldwide. static IP address-A fixed...
... an Internet connection, printers, files, and drives. The network uses high-frequency radio waves rather than wires to a computer or device that is required. 7 Resources to a network. wireless LAN (WLAN)-A system of connecting computers and other devices within a network. WPA (Wi-Fi Protected Access)-A specificationbased, interoperable wireless security feature for which a pass phrase (password) is connected to enhance your wireless user experience are expanding worldwide. static IP address-A fixed...

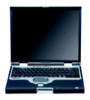
Compaq Notebook Series, Evo N1000 and Presario 1500 Maintenance and Service Guide
Page 4
... Precautions 4-4 4.6 Workstation Precautions 4-5 4.7 Grounding Equipment and Methods 4-6 5 Removal and Replacement Procedures 5.1 Serial Number 5-2 5.2 Disassembly Sequence Chart 5-3 5.3 Preparing the Computer for Disassembly 5-4 5.4 Computer Feet 5-12 5.5 Memory Expansion Board 5-12 5.6 Mini PCI Communications Board 5-14 5.7 Disk Cell RTC Battery 5-17 5.8 Connector Cover 5-18 5.9 LED Cover 5-19 5.10 Keyboard 5-21 5.11 Heat Spreader 5-24 5.12 Processor 5-27 5.13 Display 5-29 5.14 Palm Rest 5-34 5.15 Diskette Drive 5-38 iv Maintenance and Service Guide
... Precautions 4-4 4.6 Workstation Precautions 4-5 4.7 Grounding Equipment and Methods 4-6 5 Removal and Replacement Procedures 5.1 Serial Number 5-2 5.2 Disassembly Sequence Chart 5-3 5.3 Preparing the Computer for Disassembly 5-4 5.4 Computer Feet 5-12 5.5 Memory Expansion Board 5-12 5.6 Mini PCI Communications Board 5-14 5.7 Disk Cell RTC Battery 5-17 5.8 Connector Cover 5-18 5.9 LED Cover 5-19 5.10 Keyboard 5-21 5.11 Heat Spreader 5-24 5.12 Processor 5-27 5.13 Display 5-29 5.14 Palm Rest 5-34 5.15 Diskette Drive 5-38 iv Maintenance and Service Guide
Compaq Notebook Series, Evo N1000 and Presario 1500 Maintenance and Service Guide
Page 5
5.16 TouchPad Components 5-40 5.17 Display Release Assembly 5-45 5.18 Charger Board 5-46 5.19 Speaker Assembly 5-47 5.20 Top Cover 5-49 5.21 Fan 5-53 5.22 System Board 5-55 5.23 Modem Cable 5-59 6 Specifications A Connector Pin Assignments B Power Cord Set Requirements 3-Conductor Power Cord Set B-1 General Requirements B-1 Country-Specific Requirements B-2 C Screw Listing Index Maintenance and Service Guide v
5.16 TouchPad Components 5-40 5.17 Display Release Assembly 5-45 5.18 Charger Board 5-46 5.19 Speaker Assembly 5-47 5.20 Top Cover 5-49 5.21 Fan 5-53 5.22 System Board 5-55 5.23 Modem Cable 5-59 6 Specifications A Connector Pin Assignments B Power Cord Set Requirements 3-Conductor Power Cord Set B-1 General Requirements B-1 Country-Specific Requirements B-2 C Screw Listing Index Maintenance and Service Guide v

Compaq Notebook Series, Evo N1000 and Presario 1500 Maintenance and Service Guide
Page 7
... 5 Hard drive size 60 = 60 GB 40 = 40 GB 30 = 30 GB 20 = 20 GB 6 Optical drive designator V = DVD-ROM drive D = CD-ROM drive W = DVD-RW drive R = CD-RW drive 7 Integrated communication M = Modem 0 = None C = Modem/NIC combination card 8 RAM 51 = 512 MB 38 = 384 MB 25 = 256 MB 12 = 128 MB 9 Operating system 2 = Windows 2000 O = Windows XP Pro E = Windows XP Home 10 SKU# 1-2 Maintenance and Service Guide Product Description 1.1 Models Computer models are...
... 5 Hard drive size 60 = 60 GB 40 = 40 GB 30 = 30 GB 20 = 20 GB 6 Optical drive designator V = DVD-ROM drive D = CD-ROM drive W = DVD-RW drive R = CD-RW drive 7 Integrated communication M = Modem 0 = None C = Modem/NIC combination card 8 RAM 51 = 512 MB 38 = 384 MB 25 = 256 MB 12 = 128 MB 9 Operating system 2 = Windows 2000 O = Windows XP Pro E = Windows XP Home 10 SKU# 1-2 Maintenance and Service Guide Product Description 1.1 Models Computer models are...

Compaq Notebook Series, Evo N1000 and Presario 1500 Maintenance and Service Guide
Page 26
.../mouse connector Connects an optional full-sized keyboard or mouse. A network cable is included with the computer. External monitor connector Connects an external monitor or overhead projector. Security cable slot Attaches an optional security cable to cool internal components. RJ-45 network jack Connects the network cable. PC Card eject button Ejects a PC Card from the PC Card slot. USB connectors (2) Connect USB devices. A modem cable is not included with internal modem models. An optional splitter/adapter allows both an external keyboard and mouse to be used...
.../mouse connector Connects an optional full-sized keyboard or mouse. A network cable is included with the computer. External monitor connector Connects an external monitor or overhead projector. Security cable slot Attaches an optional security cable to cool internal components. RJ-45 network jack Connects the network cable. PC Card eject button Ejects a PC Card from the PC Card slot. USB connectors (2) Connect USB devices. A modem cable is not included with internal modem models. An optional splitter/adapter allows both an external keyboard and mouse to be used...

Compaq Notebook Series, Evo N1000 and Presario 1500 Maintenance and Service Guide
Page 30
... Components (Continued) Item Component 4 Power button 5 Digital audio button 6 Volume control buttons 7 Caps lock light 8 Drive indicator light 9 Display lid switch 10 Microphone 11 TouchPad 12 TouchPad buttons 13 EasyScroll 14 Battery power light 15 Power/Standby light Function Turns on an external mouse. Launches Windows Media Player to turn off the computer. Turns on . Allows for audio input. Blinking: A battery pack that is in Standby mode. Off: Power is turned off the computer display if the computer is accessed. Adjust the volume of the stereo speakers. Moves...
... Components (Continued) Item Component 4 Power button 5 Digital audio button 6 Volume control buttons 7 Caps lock light 8 Drive indicator light 9 Display lid switch 10 Microphone 11 TouchPad 12 TouchPad buttons 13 EasyScroll 14 Battery power light 15 Power/Standby light Function Turns on an external mouse. Launches Windows Media Player to turn off the computer. Turns on . Allows for audio input. Blinking: A battery pack that is in Standby mode. Off: Power is turned off the computer display if the computer is accessed. Adjust the volume of the stereo speakers. Moves...

Compaq Notebook Series, Evo N1000 and Presario 1500 Maintenance and Service Guide
Page 37
... Security, a program accessed from the Windows Control Panel.) Power-on Password Enter, change a DriveLock User or Master password. ✎ Drive Lock Settings are accessible only when you enter Computer Setup by turning on Standby or QuickBlank, you must first enable QuickLock. Password Options Password options can be selected only when a power-on password. System IDs Enter identification numbers for a DVD-ROM can be entered in the system. *Not applicable to SuperDisk LS-120 drives. 2-4 Maintenance and Service Guide DriveLock Passwords Enable/disable DriveLock;
... Security, a program accessed from the Windows Control Panel.) Power-on Password Enter, change a DriveLock User or Master password. ✎ Drive Lock Settings are accessible only when you enter Computer Setup by turning on Standby or QuickBlank, you must first enable QuickLock. Password Options Password options can be selected only when a power-on password. System IDs Enter identification numbers for a DVD-ROM can be entered in the system. *Not applicable to SuperDisk LS-120 drives. 2-4 Maintenance and Service Guide DriveLock Passwords Enable/disable DriveLock;

Compaq Notebook Series, Evo N1000 and Presario 1500 Maintenance and Service Guide
Page 54
Y 1. Replace system board. Done Remove diskette and reboot. Y Boot from diskette drive? Computer booted? Maintenance and Service Guide 2-21 Y Hard drive accessible? N CD or diskette in drive? Reseat hard drive. Done N Hard drive partitioned? Load OS using Restore CD (if applicable). Troubleshooting Flowchart 2.11 - N Run FDISK. N Done N Boot from hard drive? N Go to Flowchart 2.13, No OS Loading from Hard Drive, Part 3. Go to Flowchart 2.12, No OS Loading from Diskette Drive. No OS Loading from Hard Drive, Part 2 Continued from ...
Y 1. Replace system board. Done Remove diskette and reboot. Y Boot from diskette drive? Computer booted? Maintenance and Service Guide 2-21 Y Hard drive accessible? N CD or diskette in drive? Reseat hard drive. Done N Hard drive partitioned? Load OS using Restore CD (if applicable). Troubleshooting Flowchart 2.11 - N Run FDISK. N Done N Boot from hard drive? N Go to Flowchart 2.13, No OS Loading from Hard Drive, Part 3. Go to Flowchart 2.12, No OS Loading from Diskette Drive. No OS Loading from Hard Drive, Part 2 Continued from ...

Compaq Notebook Series, Evo N1000 and Presario 1500 Maintenance and Service Guide
Page 147
...) f. Prepare the computer for disassembly (Section 5.3) and remove the following components are removed from the old system board and installed on the new system board: ■ Memory expansion boards (Section 5.5) ■ Mini PCI communications board (Section 5.6) ■ Disk cell RTC battery (Section 5.7) ■ Processor (Section 5.12) ■ Modem cable (Section 5.23) 1. Fan (Section 5.21) Maintenance and Service Guide 5-55 Keyboard (Section 5.10) c. Charger board and shield (Section 5.18) g. LED cover (Section 5.9) b.
...) f. Prepare the computer for disassembly (Section 5.3) and remove the following components are removed from the old system board and installed on the new system board: ■ Memory expansion boards (Section 5.5) ■ Mini PCI communications board (Section 5.6) ■ Disk cell RTC battery (Section 5.7) ■ Processor (Section 5.12) ■ Modem cable (Section 5.23) 1. Fan (Section 5.21) Maintenance and Service Guide 5-55 Keyboard (Section 5.10) c. Charger board and shield (Section 5.18) g. LED cover (Section 5.9) b.
Compaq Notebook Series, Evo N1000 and Presario 1500 Maintenance and Service Guide
Page 198
... clock (RTC) removal 5-17 spare part number 3-15, 5-17 bottom components 1-26 Index C cables power cords 3-22, B-1 service considerations 4-2 caps lock light 1-25 CD-ROM drive OS loading problems 2-24 spare part number 3-15, 3-21, 5-7 specifications 6-12 CD-RW drive spare part number 3-15, 3-21, 5-7 specifications 6-13 Certificate of Authenticity label 1-27 charger board removal 5-46 spare part number 3-13, 5-46 charger board shield 3-16 Common Port Replicator, spare part number 3-22 Compaq Diagnostics 2-1, 2-7 Maintenance and Service Guide Index-1
... clock (RTC) removal 5-17 spare part number 3-15, 5-17 bottom components 1-26 Index C cables power cords 3-22, B-1 service considerations 4-2 caps lock light 1-25 CD-ROM drive OS loading problems 2-24 spare part number 3-15, 3-21, 5-7 specifications 6-12 CD-RW drive spare part number 3-15, 3-21, 5-7 specifications 6-13 Certificate of Authenticity label 1-27 charger board removal 5-46 spare part number 3-13, 5-46 charger board shield 3-16 Common Port Replicator, spare part number 3-22 Compaq Diagnostics 2-1, 2-7 Maintenance and Service Guide Index-1

Maintenance and Service Guide
Page 5
5.16 TouchPad Components 5-41 5.17 Display Release Assembly 5-46 5.18 Charger Board 5-47 5.19 Speaker Assembly 5-48 5.20 Top Cover 5-50 5.21 Fan 5-54 5.22 System Board 5-56 5.23 Modem Cable 5-60 6 Specifications A Connector Pin Assignments B Screw Listing C Power Cord Set Requirements 3-Conductor Power Cord Set B-1 General Requirements B-1 Country-Specific Requirements B-2 Index Maintenance and Service Guide v
5.16 TouchPad Components 5-41 5.17 Display Release Assembly 5-46 5.18 Charger Board 5-47 5.19 Speaker Assembly 5-48 5.20 Top Cover 5-50 5.21 Fan 5-54 5.22 System Board 5-56 5.23 Modem Cable 5-60 6 Specifications A Connector Pin Assignments B Screw Listing C Power Cord Set Requirements 3-Conductor Power Cord Set B-1 General Requirements B-1 Country-Specific Requirements B-2 Index Maintenance and Service Guide v
Maintenance and Service Guide
Page 34
... switch suspend/resume ■ Power/Suspend button ■ Advanced Configuration and Power Management (ACP) compliance Maintenance and Service Guide 1-29 These steps also clear CMOS: 1. The computer supports the following power management features: ■ Standby ■ Hibernation ■ Setting customization by the user ■ Hotkeys for more information). 2. Replace the RTC battery and reassemble the computer. 5. Prepare the computer for disassembly (refer to Section 5.7, "Disk Cell RTC Battery"). 3. Connect AC power to clear the password. Remove the...
... switch suspend/resume ■ Power/Suspend button ■ Advanced Configuration and Power Management (ACP) compliance Maintenance and Service Guide 1-29 These steps also clear CMOS: 1. The computer supports the following power management features: ■ Standby ■ Hibernation ■ Setting customization by the user ■ Hotkeys for more information). 2. Replace the RTC battery and reassemble the computer. 5. Prepare the computer for disassembly (refer to Section 5.7, "Disk Cell RTC Battery"). 3. Connect AC power to clear the password. Remove the...

Maintenance and Service Guide
Page 42
... is on when the hard drive, CD-, or DVD-ROM drive is accessed. Scrolls the screen left and right mouse buttons on . Moves the mouse cursor, selects, and activates. On: Power is closed while on an external mouse. Product Description Table 1-8 Top Components (Continued) Item Component 4 Power button 5 Digital audio button 6 Volume control buttons 7 Caps lock light 8 Drive indicator light 9 Display lid switch 10 Microphone 11 TouchPad 12 TouchPad buttons 13 EasyScroll 14 Battery power light 15 Power/Standby light Function Turns on . Use the operating system Shut Down...
... is on when the hard drive, CD-, or DVD-ROM drive is accessed. Scrolls the screen left and right mouse buttons on . Moves the mouse cursor, selects, and activates. On: Power is closed while on an external mouse. Product Description Table 1-8 Top Components (Continued) Item Component 4 Power button 5 Digital audio button 6 Volume control buttons 7 Caps lock light 8 Drive indicator light 9 Display lid switch 10 Microphone 11 TouchPad 12 TouchPad buttons 13 EasyScroll 14 Battery power light 15 Power/Standby light Function Turns on . Use the operating system Shut Down...

Maintenance and Service Guide
Page 66
Replace hard drive. 2. Done Remove diskette and reboot. Y Format hard drive and bring to bootable C:\ prompt. Maintenance and Service Guide 2-21 Y Go to Flowchart 2.12, No OS Loading from diskette drive? Troubleshooting Flowchart 2.11 - Y Hard drive accessible? N Done N Boot from Hard Drive, Part 3. Reseat hard drive. Y N Hard drive accessible? Done N Hard drive partitioned? Y N Create partition, then format hard drive to a bootable C:\ Y prompt. Go to Flowchart 2.12, No OS Loading from Hard Drive, Part 1. Load OS using Restore CD (if ...
Replace hard drive. 2. Done Remove diskette and reboot. Y Format hard drive and bring to bootable C:\ prompt. Maintenance and Service Guide 2-21 Y Go to Flowchart 2.12, No OS Loading from diskette drive? Troubleshooting Flowchart 2.11 - Y Hard drive accessible? N Done N Boot from Hard Drive, Part 3. Reseat hard drive. Y N Hard drive accessible? Done N Hard drive partitioned? Y N Create partition, then format hard drive to a bootable C:\ Y prompt. Go to Flowchart 2.12, No OS Loading from Hard Drive, Part 1. Load OS using Restore CD (if ...

Maintenance and Service Guide
Page 90
... finish for use with Evo Notebook N1020v models Parts have carbon finish for use with Evo Notebook N1000v models Parts have silver finish for use with Presario 1500 models with "K" Hard drives 60 GB 40 GB 30 GB 20 GB Spare Part Number 311282-001 285515-001 311292-001 291644-001 311291-001 285532-001 303527-001 273491-001 192406-001 288291-001 Maintenance and Service Guide 3-15 codes beginning...
... finish for use with Evo Notebook N1020v models Parts have carbon finish for use with Evo Notebook N1000v models Parts have silver finish for use with Presario 1500 models with "K" Hard drives 60 GB 40 GB 30 GB 20 GB Spare Part Number 311282-001 285515-001 311292-001 291644-001 311291-001 285532-001 303527-001 273491-001 192406-001 288291-001 Maintenance and Service Guide 3-15 codes beginning...

Maintenance and Service Guide
Page 213
... C cables power cords 3-24, B-1 service considerations 4-2 caps lock light 1-38 CD-ROM drive OS loading problems 2-24 spare part number 3-17, 3-23, 5-7 specifications 6-12 CD-RW drive spare part number 3-17, 3-23, 5-7 specifications 6-13 Certificate of Authenticity label 1-40 charger board removal 5-47 spare part number 3-13, 5-47 charger board shield 3-18 Common Port Replicator, spare part number 3-24 Compaq Diagnostics 2-1, 2-7 components bottom 1-39 front 1-31 keyboard 1-35 left side 1-33 real panel 1-33 Maintenance and Service Guide...
... C cables power cords 3-24, B-1 service considerations 4-2 caps lock light 1-38 CD-ROM drive OS loading problems 2-24 spare part number 3-17, 3-23, 5-7 specifications 6-12 CD-RW drive spare part number 3-17, 3-23, 5-7 specifications 6-13 Certificate of Authenticity label 1-40 charger board removal 5-47 spare part number 3-13, 5-47 charger board shield 3-18 Common Port Replicator, spare part number 3-24 Compaq Diagnostics 2-1, 2-7 components bottom 1-39 front 1-31 keyboard 1-35 left side 1-33 real panel 1-33 Maintenance and Service Guide...


