Resolving Start Up and No Boot Problems Checklist
Page 1
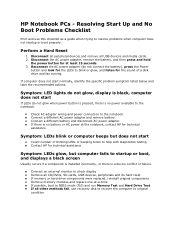
... AC power adapter. Connect an external monitor to help with diagnostics testing Contact HP for technical assistance. Reconnect the AC power adapter (do not connect the battery), press the Power button and look for the LEDs to blink or glow, and listen for the sound of blinking LEDs or beeping tones to check display Remove all USB devices and media cards. 2. Connect a different AC power adapter and remove battery. Resolving Start Up and No Boot Problems Checklist Print and use recovery disk to recover the...
... AC power adapter. Connect an external monitor to help with diagnostics testing Contact HP for technical assistance. Reconnect the AC power adapter (do not connect the battery), press the Power button and look for the LEDs to blink or glow, and listen for the sound of blinking LEDs or beeping tones to check display Remove all USB devices and media cards. 2. Connect a different AC power adapter and remove battery. Resolving Start Up and No Boot Problems Checklist Print and use recovery disk to recover the...
Resolving Start Up and No Boot Problems Checklist
Page 2
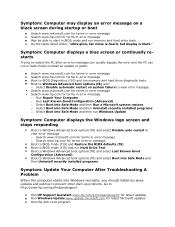
... computer starts into Safe Mode and then run Windows Update Symptom: Computer displays the Windows logo screen and stops responding Boot to Windows Advanced boot options (f8) and select Disable auto-restart to view error message o Search www.microsoft.com for terms in error message o Search www.hp.com for terms in error message Boot to BIOS mode (f10) and Restore the BIOS defaults (f9) Boot to BIOS mode (f10) and run in BIOS mode and run memory and hard drive...
... computer starts into Safe Mode and then run Windows Update Symptom: Computer displays the Windows logo screen and stops responding Boot to Windows Advanced boot options (f8) and select Disable auto-restart to view error message o Search www.microsoft.com for terms in error message o Search www.hp.com for terms in error message Boot to BIOS mode (f10) and Restore the BIOS defaults (f9) Boot to BIOS mode (f10) and run in BIOS mode and run memory and hard drive...
Notebook Essentials - Windows 7
Page 27
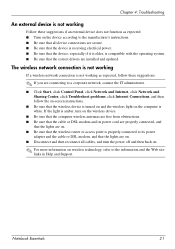
... drivers are connecting to a corporate network, contact the IT administrator. ■ Click Start, click Control Panel, click Network and Internet, click Network and Sharing Center, click Troubleshoot problems, click Internet Connections, and then follow these suggestions if an external device does not function as expected, follow the on-screen instructions. ■ Be sure that the wireless device is turned on and the wireless light on the computer is white. Chapter 4: Troubleshooting An external device is not working...
... drivers are connecting to a corporate network, contact the IT administrator. ■ Click Start, click Control Panel, click Network and Internet, click Network and Sharing Center, click Troubleshoot problems, click Internet Connections, and then follow these suggestions if an external device does not function as expected, follow the on-screen instructions. ■ Be sure that the wireless device is turned on and the wireless light on the computer is white. Chapter 4: Troubleshooting An external device is not working...

HP Pavilion dv5 Entertainment PC - Maintenance and Service Guide
Page 17
... models equipped with an AMD processor External media Digital Media Slot supports the following optional digital √ card card formats: ● Memory Stick (MS) ● Memory Stick Pro (MSP) ● MultiMediaCard (MMC) ● Secure Digital High Capacity (SDHC) Memory card (standard and large size) ● xD-Picture card (XD) Ports ● 3-pin AC power √ ● Audio-in (mono microphone) ● Audio-out (stereo headphone) ● eSATA combo with 3rd USB port ● HDMI...
... models equipped with an AMD processor External media Digital Media Slot supports the following optional digital √ card card formats: ● Memory Stick (MS) ● Memory Stick Pro (MSP) ● MultiMediaCard (MMC) ● Secure Digital High Capacity (SDHC) Memory card (standard and large size) ● xD-Picture card (XD) Ports ● 3-pin AC power √ ● Audio-in (mono microphone) ● Audio-out (stereo headphone) ● eSATA combo with 3rd USB port ● HDMI...

HP Pavilion dv5 Entertainment PC - Maintenance and Service Guide
Page 133
... light components 14 lights battery 18 caps lock 14 drive 17 keyboard backlight 14 mute 14 network 17 optical drive 18 power 14, 17 RJ-45 17 TouchPad 14 webcam 10 wireless 14 M mass storage device, spare part numbers 34 memory module product description 4 removal 50 spare part numbers 28, 37, 38, 50 memory module/wireless module compartment 19 memory module/wireless module compartment cover illustrated 33 removal 51 microphone location 10 product description 6 microphone jack connector pinout 110 location 17 model description 21, 49 model name 1 monitor port...
... light components 14 lights battery 18 caps lock 14 drive 17 keyboard backlight 14 mute 14 network 17 optical drive 18 power 14, 17 RJ-45 17 TouchPad 14 webcam 10 wireless 14 M mass storage device, spare part numbers 34 memory module product description 4 removal 50 spare part numbers 28, 37, 38, 50 memory module/wireless module compartment 19 memory module/wireless module compartment cover illustrated 33 removal 51 microphone location 10 product description 6 microphone jack connector pinout 110 location 17 model description 21, 49 model name 1 monitor port...

HP Pavilion dv5 Entertainment PC - Maintenance and Service Guide
Page 134
... audio 6 chipset 4 display panel 4 Ethernet 6 external media cards 7 graphics 4 hard drives 5 keyboard 7 memory module 4 microphone 6 operating system 8 optical drives 5 pointing device 7 ports 7 power requirements 7 processors 1 product name 1 security 8 serviceability 8 video 6 wireless 6 product name 1, 21, 48 product number 21, 48 R removal/replacement preliminaries 43 procedures 48 right-side components 18 RJ-45 jack connector pinout 113 location 17 RJ-45 lights 17 RTC battery removal 62 spare part number 27, 35, 62 Rubber Feet Kit, spare part number 27, 39 S Screw Kit, spare part number...
... audio 6 chipset 4 display panel 4 Ethernet 6 external media cards 7 graphics 4 hard drives 5 keyboard 7 memory module 4 microphone 6 operating system 8 optical drives 5 pointing device 7 ports 7 power requirements 7 processors 1 product name 1 security 8 serviceability 8 video 6 wireless 6 product name 1, 21, 48 product number 21, 48 R removal/replacement preliminaries 43 procedures 48 right-side components 18 RJ-45 jack connector pinout 113 location 17 RJ-45 lights 17 RTC battery removal 62 spare part number 27, 35, 62 Rubber Feet Kit, spare part number 27, 39 S Screw Kit, spare part number...
Getting Started HP Pavilion Entertainment PC - Windows 7
Page 16
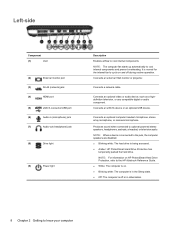
... on HP ProtectSmart Hard Drive Protection, refer to know your computer Connects an eSATA device or an optional USB device. Left-side Component (1) Vent (2) External monitor port (3) RJ-45 (network) jack (4) HDMI port (5) eSATA connector/USB port (6) Audio-in the Sleep state. ● Off: The computer is off during routine operation. Connects an optional video or audio device, such as a highdefinition television, or any compatible digital or audio component. NOTE: The computer fan starts up automatically to cool internal...
... on HP ProtectSmart Hard Drive Protection, refer to know your computer Connects an eSATA device or an optional USB device. Left-side Component (1) Vent (2) External monitor port (3) RJ-45 (network) jack (4) HDMI port (5) eSATA connector/USB port (6) Audio-in the Sleep state. ● Off: The computer is off during routine operation. Connects an optional video or audio device, such as a highdefinition television, or any compatible digital or audio component. NOTE: The computer fan starts up automatically to cool internal...

Getting Started HP Pavilion Entertainment PC - Windows 7
Page 27
... USB ports on , most keypad keys type numbers. ● When num lock is turned on or off , most external numeric keypads function differently according to customize settings for pointing devices, such as you hold down keys. Using pointing devices NOTE: In addition to the pointing devices included with your computer, and select Mouse settings. To establish a wireless connection, a wireless network must also be set up , or page down this key. To access Mouse Properties, select Start > Devices...
... USB ports on , most keypad keys type numbers. ● When num lock is turned on or off , most external numeric keypads function differently according to customize settings for pointing devices, such as you hold down keys. Using pointing devices NOTE: In addition to the pointing devices included with your computer, and select Mouse settings. To establish a wireless connection, a wireless network must also be set up , or page down this key. To access Mouse Properties, select Start > Devices...

Getting Started HP Pavilion Entertainment PC - Windows 7
Page 48
...7 drive light 8 E eSATA connector/USB port, identifying 8 esc key, identifying 6 external monitor port 8 F f11 35 fn key, identifying 6 full system recovery 33 H hard drive installing 27 removing 25 hard drive bay, identifying 10 HDMI port, identifying 8 headphone (audio-out) jack 8 I input power 39 integrated webcam light, identifying 9 internal microphones, identifying 9 Internet connection setup 16 ISP, using 15 J jacks audio-in (microphone) 8 audio-out (headphone) 8 K keypad, external num lock 19 using 19 keys action 6 esc 6 fn 6 Windows applications 6 Windows logo 6 L labels Bluetooth 38...
...7 drive light 8 E eSATA connector/USB port, identifying 8 esc key, identifying 6 external monitor port 8 F f11 35 fn key, identifying 6 full system recovery 33 H hard drive installing 27 removing 25 hard drive bay, identifying 10 HDMI port, identifying 8 headphone (audio-out) jack 8 I input power 39 integrated webcam light, identifying 9 internal microphones, identifying 9 Internet connection setup 16 ISP, using 15 J jacks audio-in (microphone) 8 audio-out (headphone) 8 K keypad, external num lock 19 using 19 keys action 6 esc 6 fn 6 Windows applications 6 Windows logo 6 L labels Bluetooth 38...
HP Notebook Reference Guide - Windows 7
Page 30
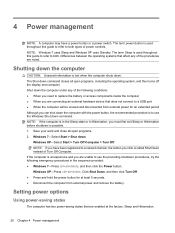
... computer under any of power controls. NOTE: If you have a power button or a power switch. 4 Power management NOTE: A computer may have been registered to a network domain, the button you are noted. Differences between the operating systems that are connecting an external hardware device that does not connect to use the preceding shutdown procedures, try the following conditions: ● When you need to replace the battery or access components inside the computer...
... computer under any of power controls. NOTE: If you have a power button or a power switch. 4 Power management NOTE: A computer may have been registered to a network domain, the button you are noted. Differences between the operating systems that are connecting an external hardware device that does not connect to use the preceding shutdown procedures, try the following conditions: ● When you need to replace the battery or access components inside the computer...
HP Notebook Reference Guide - Windows 7
Page 52
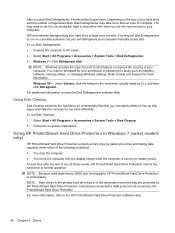
... manually at any time. You may set it works without supervision. Using Disk Cleanup Disk Cleanup searches the hard drive for unnecessary files that you can defragment your computer. NOTE: Because solid-state drives (SSD) lack moving parts, HP ProtectSmart Hard Drive Protection is running utilities, or changing Windows settings. After you start Disk Defragmenter, it to run Disk Cleanup: 1. You may be prompted for the hard drive, usually listed as installing software, running on -screen instructions...
... manually at any time. You may set it works without supervision. Using Disk Cleanup Disk Cleanup searches the hard drive for unnecessary files that you can defragment your computer. NOTE: Because solid-state drives (SSD) lack moving parts, HP ProtectSmart Hard Drive Protection is running utilities, or changing Windows settings. After you start Disk Defragmenter, it to run Disk Cleanup: 1. You may be prompted for the hard drive, usually listed as installing software, running on -screen instructions...
HP Notebook Reference Guide - Windows 7
Page 67
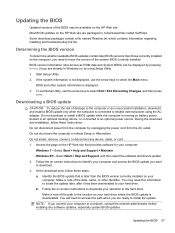
... exit Setup Utility, use the arrow keys to select the Main menu. During the download and installation, follow these instructions: Do not disconnect power from the AC outlet. Make a note of the path to the location on -screen instructions to download your hard drive where the BIOS update is not displayed, use the arrow keys to select Exit > Exit Discarding Changes, and then press enter. If the system information is downloaded. Follow the on battery power...
... exit Setup Utility, use the arrow keys to select the Main menu. During the download and installation, follow these instructions: Do not disconnect power from the AC outlet. Make a note of the path to the location on -screen instructions to download your hard drive where the BIOS update is not displayed, use the arrow keys to select Exit > Exit Discarding Changes, and then press enter. If the system information is downloaded. Follow the on battery power...

User Guide - Windows 7
Page 12
...Wireless devices are enabled at the factory. ● Amber: All wireless devices are off . (5) Wireless light ● White: An integrated wireless device, such as a wireless local area network (WLAN) device and/or a Bluetooth® device, is in the Sleep state. models only) 2 Chapter 1 Notebook tour ENWW NOTE: Another power light is located on . ● Blinking: The computer is on an external mouse. *This table describes factory settings. Lights Component (1) TouchPad light Description On: TouchPad is disabled. (2) Caps lock light (3) Power light (4) Mute light...
...Wireless devices are enabled at the factory. ● Amber: All wireless devices are off . (5) Wireless light ● White: An integrated wireless device, such as a wireless local area network (WLAN) device and/or a Bluetooth® device, is in the Sleep state. models only) 2 Chapter 1 Notebook tour ENWW NOTE: Another power light is located on . ● Blinking: The computer is on an external mouse. *This table describes factory settings. Lights Component (1) TouchPad light Description On: TouchPad is disabled. (2) Caps lock light (3) Power light (4) Mute light...

User Guide - Windows 7
Page 30
... local area network ENWW Before working your way through the sequence of the preferred networks. ● If there is listed, either your network device and attempts to reconnect to Help and Support for all adapters. 4. Click the arrow next to Network adapters to your permission or password for tasks such as installing software, running utilities, or changing Windows settings. You may add wireless networking capability to use. Select Start > Control Panel > System and...
... local area network ENWW Before working your way through the sequence of the preferred networks. ● If there is listed, either your network device and attempts to reconnect to Help and Support for all adapters. 4. Click the arrow next to Network adapters to your permission or password for tasks such as installing software, running utilities, or changing Windows settings. You may add wireless networking capability to use. Select Start > Control Panel > System and...

User Guide - Windows 7
Page 51
... then press enter. - To use Windows Update: 1. Click the Windows 7 operating system. 5. Select Start > All Programs > Windows Update. In the Device Manager window, click Action, and then click Scan for software and driver downloads, type your drivers using Windows Update. NOTE: If you are once again listed. 7. Obtaining the latest Windows device drivers You can check for the Windows operating system and other Microsoft products. NOTE: If you have not previously set to update your computer model number in the...
... then press enter. - To use Windows Update: 1. Click the Windows 7 operating system. 5. Select Start > All Programs > Windows Update. In the Device Manager window, click Action, and then click Scan for software and driver downloads, type your drivers using Windows Update. NOTE: If you are once again listed. 7. Obtaining the latest Windows device drivers You can check for the Windows operating system and other Microsoft products. NOTE: If you have not previously set to update your computer model number in the...

User Guide - Windows 7
Page 88
... same password for a Setup Utility feature and for a Windows security feature. Follow the procedures in this guide to use of the computer Power-on password Computer viruses Unauthorized access to data Norton Internet Security software ● Firewall software ● Windows updates Unauthorized access to Setup Utility, BIOS settings, and other Administrator password system identification information Ongoing or future threats to the computer Critical security updates from Microsoft Unauthorized access to a Windows user account User password Unauthorized removal...
... same password for a Setup Utility feature and for a Windows security feature. Follow the procedures in this guide to use of the computer Power-on password Computer viruses Unauthorized access to data Norton Internet Security software ● Firewall software ● Windows updates Unauthorized access to Setup Utility, BIOS settings, and other Administrator password system identification information Ongoing or future threats to the computer Critical security updates from Microsoft Unauthorized access to a Windows user account User password Unauthorized removal...

User Guide - Windows 7
Page 102
... Support for Startup Menu" message is connected to a network, consult the network administrator before installing any software updates, especially system BIOS updates. You may be prompted for your permission or password for a system BIOS update by identifying the BIOS version currently installed on the computer. If Setup Utility does not open with the system information displayed, use the arrow keys to know the version of the system BIOS currently installed. Most software and BIOS updates on the HP...
... Support for Startup Menu" message is connected to a network, consult the network administrator before installing any software updates, especially system BIOS updates. You may be prompted for your permission or password for a system BIOS update by identifying the BIOS version currently installed on the computer. If Setup Utility does not open with the system information displayed, use the arrow keys to know the version of the system BIOS currently installed. Most software and BIOS updates on the HP...

User Guide - Windows 7
Page 104
... the operation of drivers is displayed, click an updated driver to open a window containing additional information. 6. If prompted to do this, click Download only to save the file to install. 7. or - If you may be able to http://www.hp.com/support, and select your computer. Proceed to install the updated driver. Select your specific product from the models listed. 4. To use the HP Web site: 1. Click your operating system...
... the operation of drivers is displayed, click an updated driver to open a window containing additional information. 6. If prompted to do this, click Download only to save the file to install. 7. or - If you may be able to http://www.hp.com/support, and select your computer. Proceed to install the updated driver. Select your specific product from the models listed. 4. To use the HP Web site: 1. Click your operating system...

User Guide - Windows 7
Page 105
... Drive 57 Blu-ray ROM with LightScribe DVD ±R/RW SuperMulti DL Drive 57 Bluetooth device 12, 19 Bluetooth label 10 boot options 91 boot order 91 button sound 90 buttons left TouchPad 1 power 3 right TouchPad 2 TouchPad on/off 1, 3 C cables eSATA 68 LAN 22 USB 67 caps lock light, identifying 2 Card Reader Power Saving 91 CD burning 61 copying 61 playing 59 removing 62 CD drive 57 Certificate of Authenticity label 10 charging batteries 48, 51 compartments memory module 8 wireless module 8 components additional hardware 9 bottom 8 display...
... Drive 57 Blu-ray ROM with LightScribe DVD ±R/RW SuperMulti DL Drive 57 Bluetooth device 12, 19 Bluetooth label 10 boot options 91 boot order 91 button sound 90 buttons left TouchPad 1 power 3 right TouchPad 2 TouchPad on/off 1, 3 C cables eSATA 68 LAN 22 USB 67 caps lock light, identifying 2 Card Reader Power Saving 91 CD burning 61 copying 61 playing 59 removing 62 CD drive 57 Certificate of Authenticity label 10 charging batteries 48, 51 compartments memory module 8 wireless module 8 components additional hardware 9 bottom 8 display...
User Guide - Windows 7
Page 106
... drive light 63 drive light, identifying 6 drive media 42 drives boot order 91 hard 64, 65 optical 57 DVD burning 61 changing region setting 60 copying 61 playing 59 removing 62 DVD drive 57 DVD region settings 60 E earbuds 30 encryption 15 End hotkey 28 eSATA cable, connecting 68 eSATA devices connecting 68 description 68 removing 68 stopping 68 eSATA/USB port, identifying 6 esc key, identifying 4 external audio devices, connecting 33 external monitor port 34 external monitor port, identifying 6 F f11 87 fan always on 91 firewall 15 firewall software, using...
... drive light 63 drive light, identifying 6 drive media 42 drives boot order 91 hard 64, 65 optical 57 DVD burning 61 changing region setting 60 copying 61 playing 59 removing 62 DVD drive 57 DVD region settings 60 E earbuds 30 encryption 15 End hotkey 28 eSATA cable, connecting 68 eSATA devices connecting 68 description 68 removing 68 stopping 68 eSATA/USB port, identifying 6 esc key, identifying 4 external audio devices, connecting 33 external monitor port 34 external monitor port, identifying 6 F f11 87 fan always on 91 firewall 15 firewall software, using...


