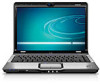
HP USB Digital Drive
Page 8
User Guide 7 Accessing the Digital Drive You are now ready to use the Digital Drive as a storage device. » Select the Digital Drive icon in "My Computer" to display the contents of the Digital Drive. ✎ The status light on the Digital Drive flashes when you copy and move files to and from the Digital Drive.
HP USB Digital Drive
Page 9
Disconnecting the Digital Drive ✎ Do not attempt to Remove Hardware" message appears on its track for safe storage. 8 User Guide A dialog box displays a list of connected devices. 2. Select the "Safely Remove Hardware" icon on the Digital Drive is in the extended position, return it on your taskbar. Gently unplug the Digital Drive from the USB port. ✎ If the USB connector cable is flashing. 1. Select the Digital Drive and wait until the "Safe to remove the Digital Drive when the status light on your screen. 3.
Security - Windows Vista
Page 8
... creating and saving passwords: ● When creating passwords, follow requirements set by an outsider. For additional information about Windows passwords, such as they are not displayed as screen-saver passwords, select Start > Help and Support. 2 Chapter 2 Using passwords ENWW Passwords can be set , depending on how you want to control access...
Security - Windows Vista
Page 9
... this password is set a user or administrator password, follow these passwords, refer to the computer contents. ● After this password is set, it is it displayed as it must be entered each of these steps: 1. Initiate QuickLock by requiring a password to Setup Utility. ● After this password is set in Windows...
Security - Windows Vista
Page 10
... the password), and then press enter. Power-on password Your power-on or restarting the computer, and then pressing f10 while the setup message is displayed in the lower-left corner of the computer. To save your preferences and exit Setup Utility, press f10, and then follow the instructions on the... screen. A power-on password is not displayed as it must be entered each time you turn on or restarting the computer, and then pressing f10 while the setup message is...
Security - Windows Vista
Page 17
Locating the fingerprint reader The fingerprint reader is located in one of the following areas of your computer: ● Near the bottom of the TouchPad ● On the right side of the keyboard ● On the upper-right side of the display Depending on your finger perpendicular to the metallic sensor. Both orientations require that is a small metallic sensor that you swipe your computer model, the fingerprint reader may be oriented horizontally or vertically. ENWW Locating the fingerprint reader 11
Security - Windows Vista
Page 18
... finger you want to show it will be outlined to , and then click Register Fingerprints. NOTE: The right index finger is displayed. Continue swiping the same finger over during the fingerprint registration process, right-click the highlighted finger on the screen and then click ...models only) ENWW The VeriSoft Access Manager Logon Wizard opens. 3. NOTE: By default, VeriSoft Access Manager requires registration of using an HP computer with an integrated fingerprint reader or an optional external fingerprint reader, you must set up the fingerprint reader before registering at least...
HP Pavilion dv2000 Notebook PC Maintenance and Service Guide
Page 5
Contents 3 Illustrated Parts Catalog 3.1 Serial Number Location 3-1 3.2 Computer Major Components 3-2 3.3 Display Assembly Components 3-20 3.4 Mass Storage Devices 3-22 3.5 Plastics Kit 3-24 3.6 Cable Kit 3-25 3.7 Miscellaneous 3-26 3.8 Sequential Part Number Listing 3-29 4 Removal and Replacement Preliminaries 4.1 Tools ...
HP Pavilion dv2000 Notebook PC Maintenance and Service Guide
Page 6
...12 5.6 Computer Feet 5-13 5.7 Memory Module 5-14 5.8 Mini Card Module 5-17 5.9 Optical Drive 5-22 5.10 Keyboard 5-24 5.11 Switch Cover 5-28 5.12 Display Assembly 5-32 5.13 Top Cover 5-45 5.14 TouchPad 5-50 5.15 Wireless Switch Board 5-54 5.16 Modem Module 5-56 5.17 Audio/Infrared Board 5-58 5.18 ...Bluetooth Module 5-60 5.19 USB Board 5-62 5.20 Speaker Assembly 5-64 5.21 Display Lid Switch Module 5-66 5.22 System Board 5-70 5.23 Power Connector Cable 5-73 5.24 ExpressCard Assembly 5-75 5.25 Fan/Heat Sink Assembly 5-78...
HP Pavilion dv2000 Notebook PC Maintenance and Service Guide
Page 7
Contents 6 Specifications A Screw Listing B Backup and Recovery in Windows XP C Backup and Recovery in Windows Vista D Display Component Recycling E Connector Pin Assignments F Power Cord Set Requirements Index vii Maintenance and Service Guide
HP Pavilion dv2000 Notebook PC Maintenance and Service Guide
Page 9
... 3500+ (1.80-GHz) ❏ Mobile AMD Sempron 3400+ (1.80-GHz) ❏ Mobile AMD Sempron 3200+ (1.60-GHz) ■ 14.1-inch WXGA (1280 × 768) TFT display with over 16.7 million colors, varying by computer model 1-2 Maintenance and Service Guide
HP Pavilion dv2000 Notebook PC Maintenance and Service Guide
Page 19
...the keys on the caps lock light. caps lock key Enables caps lock and turns on an external numeric keypad. Windows logo key Displays the Microsoft Windows Start menu. num lock key Enables numeric lock, turns on the embedded numeric keypad, and turns on the num... lock light. 1-12 Maintenance and Service Guide Windows applications key Displays a shortcut menu for items beneath the pointer. Product Description Item 1 2 3 4 5 6 7 8 Table 1-4 Keyboard Components Component Function f1 to f12 keys (...
HP Pavilion dv2000 Notebook PC Maintenance and Service Guide
Page 27
... wireless devices in your country or region. Mini Card compartment Holds a wireless LAN device (select models only). ✎ To prevent an unresponsive system and the display of a warning message, replace only with a Mini Card device authorized for the internal fan to cycle on and off during routine operation. Memory module compartment...
HP Pavilion dv2000 Notebook PC Maintenance and Service Guide
Page 28
... provides the following device connections: ■ AMD Turion and Mobile AMD Sempron processors or Intel Core Duo, Core Solo, and Celeron processors ■ Audio ■ Display ■ ExpressCard ■ Fan ■ Hard drive ■ Keyboard and TouchPad ■ Memory module ■ Mini Card modules Ä CAUTION: To properly ventilate the computer...
HP Pavilion dv2000 Notebook PC Maintenance and Service Guide
Page 29
... at the component level or modifications to enter setup" prompt is not working or will not load. 2 Troubleshooting Å WARNING: Only authorized technicians trained by HP should repair this equipment. Because of the complexity of the screen, press f10. The utility reports information about the computer and provides settings for startup... troubleshooting and repair procedures are detailed to allow only subassembly-/module-level repair. Improper repairs can be used even when your Windows operating system is displayed in Windows. 2.
HP Pavilion dv2000 Notebook PC Maintenance and Service Guide
Page 30
...or f6. ■ To select an item, press enter. ■ To close a text box or return to the menu display, press f1. ■ To display additional navigation and selection information while the Setup Utility is open the Setup Utility, turn on or restart the computer in Windows, ...and then press f10 while the prompt, "Press to enter setup," is displayed in the Setup Utility Because the Setup Utility is displayed, press enter to select a language. 4. To open , press f1. 2-2 Maintenance and Service Guide To set your preference....
HP Pavilion dv2000 Notebook PC Maintenance and Service Guide
Page 31
... is not in the lower-left corner of the screen. 2. Access the system information by using the Main menu. 3. If the computer is displayed in the Setup Utility, begin at step 1. When the Setup Confirmation is in the lower-left corner of the screen. 2. To set when ...Discarding Changes, and then press enter. (The computer restarts in Windows.) Restoring Default Settings in the Setup Utility The following procedure explains how to display system information in Windows, and then press f10 while the prompt, "Press to save your preferences and exit the Setup Utility, press f10, and...
HP Pavilion dv2000 Notebook PC Maintenance and Service Guide
Page 32
...Setup Utility Features This guide describes the Setup Utility features recommended for boot order preferences. The " to boot from LAN" message that is displayed in the lower-left corner of the screen each time the computer is the prompt for advanced users only, refer to change the boot order.... 2-4 Maintenance and Service Guide The "Press to change boot order" message that is displayed in the lower-left corner of the screen each time the computer is started or restarted in Windows or restored from hibernation is the prompt...
HP Pavilion dv2000 Notebook PC Maintenance and Service Guide
Page 33
or - ❏ If the Setup Utility menus are not visible, press esc to return to the menu display. After the Setup Utility closes, the computer restarts in Windows. Then use the arrow keys to select Exit > Exit Discarding Changes, and then press enter. ... press enter. When you use the Exit Saving Changes procedure, the Setup Utility closes when you are offered an option to return to the menu display. When you use the f10 procedure, you press enter. ■ To close the Setup Utility without saving changes. ■ To close the Setup Utility with...
HP Pavilion dv2000 Notebook PC Maintenance and Service Guide
Page 37
...then press enter to select System Configuration > Language, and then press enter. 3. Before Windows opens and while "Press to enter setup" is displayed in the lower-left corner of the screen, press f10. Troubleshooting 2.2 Setup Utility in Windows Vista The Setup Utility is a ROM-based information ...and customization utility that can be used even when your Windows® operating system is displayed in the lower-left corner of the screen. 2. If the Setup Utility is not already running , begin at step 2. 1. Maintenance ...