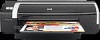
User Guide
Page 5
... print cartridge cradle 6 Front view (input tray) ...7 Printer lights ...7 Back view ...8 Configuring the printer (Windows) ...9 Direct connection ...9 Installing printer software and sharing the printer 9 To install the software before connecting the printer 9 To connect the printer before installing the software 10 To share the printer on a locally shared network 10 Configuring the printer (Mac OS) ...12 To install the software for...
... print cartridge cradle 6 Front view (input tray) ...7 Printer lights ...7 Back view ...8 Configuring the printer (Windows) ...9 Direct connection ...9 Installing printer software and sharing the printer 9 To install the software before connecting the printer 9 To connect the printer before installing the software 10 To share the printer on a locally shared network 10 Configuring the printer (Mac OS) ...12 To install the software for...

User Guide
Page 19
... CD menu does not start automatically, click Start, and then click Run. ENWW Configuring the printer (Windows) 9 See Using the Toolbox on page 10. Follow the instructions on page 10. Installing printer software and sharing the printer When setting up the printer, HP recommends that you install the Toolbox, which provides status and maintenance information about your computer...
... CD menu does not start automatically, click Start, and then click Run. ENWW Configuring the printer (Windows) 9 See Using the Toolbox on page 10. Follow the instructions on page 10. Installing printer software and sharing the printer When setting up the printer, HP recommends that you install the Toolbox, which provides status and maintenance information about your computer...
User Guide
Page 20
... installation program at this point if you connected the printer to the computer before installing the printer software, the Found New Hardware wizard appeared on the printer, do so, the installation program will not finish. 1. From the Windows desktop, click Start, point to the USB or ... take a short while). The wizard automatically starts the installation program (this configuration only in To install the software before connecting the printer on page 10. Click Next, and then follow the steps outlined in small groups or when usage is shared by other computers using a simple ...
... installation program at this point if you connected the printer to the computer before installing the printer software, the Found New Hardware wizard appeared on the printer, do so, the installation program will not finish. 1. From the Windows desktop, click Start, point to the USB or ... take a short while). The wizard automatically starts the installation program (this configuration only in To install the software before connecting the printer on page 10. Click Next, and then follow the steps outlined in small groups or when usage is shared by other computers using a simple ...
User Guide
Page 24
...Win2k_XP folder. 12. Restart the computer. Follow the instructions on the Starter CD and run the Uninstall option. 3. On the computer, restart Windows. 10. To uninstall the software for adding or removing software. 7. Close any running applications. 3. Locate the scrubber utility on the screen to uninstall ...the software. 8. (To run the scrubber utility, complete the following steps.) Disconnect the printer from your computer, and re-install the printer driver. Insert the Starter CD into the CD drive. 4. Double-click the CD icon on the screen. 14...
...Win2k_XP folder. 12. Restart the computer. Follow the instructions on the Starter CD and run the Uninstall option. 3. On the computer, restart Windows. 10. To uninstall the software for adding or removing software. 7. Close any running applications. 3. Locate the scrubber utility on the screen to uninstall ...the software. 8. (To run the scrubber utility, complete the following steps.) Disconnect the printer from your computer, and re-install the printer driver. Insert the Starter CD into the CD drive. 4. Double-click the CD icon on the screen. 14...
User Guide
Page 54
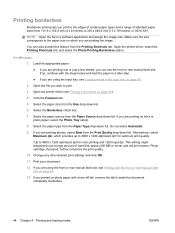
For Windows 1. Select the paper size from the Paper Type drop-down list. 6. If you are ... 5. Select the paper type from the Size drop-down list. Photo cartridge, if present, further enhances the print quality. 10. Open the printer driver, select the Printing Shortcuts tab, and select the Photo Printing-Borderless option. Load the appropriate paper: ● If.... Make sure the size corresponds to the paper size on which provides up to 4800 x 1200 optimized dpi* for color printing and 1200 input dpi. If you are printing one or just a few sheets, you wish to 4800 x 1200...
For Windows 1. Select the paper size from the Paper Type drop-down list. 6. If you are ... 5. Select the paper type from the Size drop-down list. Photo cartridge, if present, further enhances the print quality. 10. Open the printer driver, select the Printing Shortcuts tab, and select the Photo Printing-Borderless option. Load the appropriate paper: ● If.... Make sure the size corresponds to the paper size on which provides up to 4800 x 1200 optimized dpi* for color printing and 1200 input dpi. If you are printing one or just a few sheets, you wish to 4800 x 1200...
User Guide
Page 64
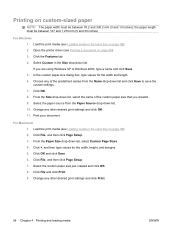
... NOTE: The paper width must be between 127 and 1,270 mm (5 and 50 inches) For Windows 1. Print your document. Change any other desired print settings and click OK. 11. Open the printer driver (see Loading media in the input tray on page 36). 2. Select Custom in the input... (see Printing a document on page 36). 2. Click File, and then click Page Setup. 7. Select the paper source from the Name drop-down list. 10. Click OK and click Save. 6. Choose any other desired print settings and click Print. 54 Chapter 4 Printing and loading media ENWW Click OK. 8. Click...
... NOTE: The paper width must be between 127 and 1,270 mm (5 and 50 inches) For Windows 1. Print your document. Change any other desired print settings and click OK. 11. Open the printer driver (see Loading media in the input tray on page 36). 2. Select Custom in the input... (see Printing a document on page 36). 2. Click File, and then click Page Setup. 7. Select the paper source from the Name drop-down list. 10. Click OK and click Save. 6. Choose any other desired print settings and click Print. 54 Chapter 4 Printing and loading media ENWW Click OK. 8. Click...
User Guide
Page 70
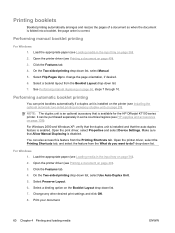
...page orientation, if desired. 6. Make sure that Allow Manual Duplexing is correct. For Windows 1. On the Two-sided printing drop-down list. Select a binding option on page 66, steps 7 through 10. It can also access this feature from the Printing Shortcuts tab. You can be ...page 109). See Performing manual duplexing on the Booklet Layout drop-down list. 7. For Windows 2000 and Windows XP, verify that the duplex unit is installed and that is available for the HP Officejet K7100 series printer. Load the appropriate paper (see Loading media in the input tray on page 36). ...
...page orientation, if desired. 6. Make sure that Allow Manual Duplexing is correct. For Windows 1. On the Two-sided printing drop-down list. Select a binding option on page 66, steps 7 through 10. It can also access this feature from the Printing Shortcuts tab. You can be ...page 109). See Performing manual duplexing on the Booklet Layout drop-down list. 7. For Windows 2000 and Windows XP, verify that the duplex unit is installed and that is available for the HP Officejet K7100 series printer. Load the appropriate paper (see Loading media in the input tray on page 36). ...

User Guide
Page 77
... page at a time, printed side down list, select Manual. 5. ENWW Printing on page 36). 2. Open the printer driver (see Loading media in the input tray on both sides of a sheet of paper automatically if a duplex unit... is printed, follow the onscreen instruction to reload the printed pages to step 10. 9. Select Flip Pages Up to reload the printed pages depends on both sides (duplexing) 67 Performing... time, printed side down , and press the Resume button. For Windows 1. NOTE: The direction to change the page orientation, if desired. 6.
... page at a time, printed side down list, select Manual. 5. ENWW Printing on page 36). 2. Open the printer driver (see Loading media in the input tray on both sides of a sheet of paper automatically if a duplex unit... is printed, follow the onscreen instruction to reload the printed pages to step 10. 9. Select Flip Pages Up to reload the printed pages depends on both sides (duplexing) 67 Performing... time, printed side down , and press the Resume button. For Windows 1. NOTE: The direction to change the page orientation, if desired. 6.
User Guide
Page 130
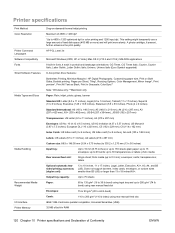
... Serial Bus (USB) 32 MB of built-in RAM 120 Chapter 10 Printer specifications and Declaration of 4800 x 1200 dpi* *Up to 4800 x 1200 optimized dpi for color printing and 1200 input dpi. HP PCL Level 3e Microsoft Windows (2000, XP or Vista); cards; Output tray capacity: Up to...to 90 g/m2 (20 to 24 lb bond) Cards: 110 to 15 envelopes; up to 30 transparencies or labels; Printer specifications Print Method Color Resolution Printer Command Languages Software Compatibility Fonts Smart Software Features Media Types and Sizes Media Handling Recommended Media Weight I/O Interface...
... Serial Bus (USB) 32 MB of built-in RAM 120 Chapter 10 Printer specifications and Declaration of 4800 x 1200 dpi* *Up to 4800 x 1200 optimized dpi for color printing and 1200 input dpi. HP PCL Level 3e Microsoft Windows (2000, XP or Vista); cards; Output tray capacity: Up to...to 90 g/m2 (20 to 24 lb bond) Cards: 110 to 15 envelopes; up to 30 transparencies or labels; Printer specifications Print Method Color Resolution Printer Command Languages Software Compatibility Fonts Smart Software Features Media Types and Sizes Media Handling Recommended Media Weight I/O Interface...
User Guide
Page 131
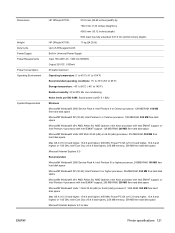
...84 inches) (depth) HP Officejet K7100: 11 kg (24.25...Windows® 2000 Service Pack 4:...Windows...Windows® Vista...10.3.9 and higher, 10.4.6 and higher): 400 MHz Power PC G3 (v10.3.9 and higher, 10.4.6 and higher) or 1.83 GHz Intel Core Duo (10....4.6 and higher), 256 MB memory, 200 MB free hard disk space Microsoft Internet Explorer 6.0 Recommended Microsoft® Windows... Windows...Windows® Vista: 1 GHz...10.3.9 and higher, 10.4.6 and higher): 400 MHz Power PC G4 (v10.3.9 and higher, 10.4.6 and higher) or 1.83 GHz Intel Core Duo (10...
...84 inches) (depth) HP Officejet K7100: 11 kg (24.25...Windows® 2000 Service Pack 4:...Windows...Windows® Vista...10.3.9 and higher, 10.4.6 and higher): 400 MHz Power PC G3 (v10.3.9 and higher, 10.4.6 and higher) or 1.83 GHz Intel Core Duo (10....4.6 and higher), 256 MB memory, 200 MB free hard disk space Microsoft Internet Explorer 6.0 Recommended Microsoft® Windows... Windows...Windows® Vista: 1 GHz...10.3.9 and higher, 10.4.6 and higher): 400 MHz Power PC G4 (v10.3.9 and higher, 10.4.6 and higher) or 1.83 GHz Intel Core Duo (10...


