
User Guide
Page 3
About This Guide This guide provides information on monitor features, setting up the monitor, using the software and technical specifications. NOTE: Text set off in bodily harm or loss of information. This product incorporates HDMI technology. iii Text set ...
About This Guide This guide provides information on monitor features, setting up the monitor, using the software and technical specifications. NOTE: Text set off in bodily harm or loss of information. This product incorporates HDMI technology. iii Text set ...
User Guide
Page 5
... components ...3 Rear and side components ...4 Setting up the monitor ...5 Use caution when setting up the monitor 5 Connecting the cables ...5 Adjusting the monitor ...8 Turning on the monitor ...9 Mounting the monitor ...10 Removing the monitor stand 10 Attaching the VESA mounting bracket 11 Re-attaching the monitor stand ...12 2 Using the monitor ...13 Software and utilities ...13 The Information file...
... components ...3 Rear and side components ...4 Setting up the monitor ...5 Use caution when setting up the monitor 5 Connecting the cables ...5 Adjusting the monitor ...8 Turning on the monitor ...9 Mounting the monitor ...10 Removing the monitor stand 10 Attaching the VESA mounting bracket 11 Re-attaching the monitor stand ...12 2 Using the monitor ...13 Software and utilities ...13 The Information file...

User Guide
Page 6
Locating the rating label ...20 4 Maintaining the monitor ...21 Maintenance guidelines ...21 Cleaning the monitor ...21 Shipping the monitor ...21 Appendix A Technical specifications ...22 Preset display resolutions ...23 Entering user modes ...24 Power adapter ...24 Energy saver feature ...24 Appendix B Accessibility ...25 Supported assistive technologies ...25 Contacting support ...25 vi
Locating the rating label ...20 4 Maintaining the monitor ...21 Maintenance guidelines ...21 Cleaning the monitor ...21 Shipping the monitor ...21 Appendix A Technical specifications ...22 Preset display resolutions ...23 Entering user modes ...24 Power adapter ...24 Energy saver feature ...24 Appendix B Accessibility ...25 Supported assistive technologies ...25 Contacting support ...25 vi
User Guide
Page 7
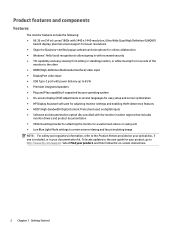
...the Product Notices provided on power cords or cables. 1 Getting Started Important safety information A power cord is an important safety feature. For your HP LCD monitor. Do not pull on or trip over them. When unplugging from the AC outlet. • If provided with the... read the Safety and Comfort Guide. Not all cords and cables connected to route all power strips provide surge protection; WARNING! Consider placing the monitor in your optical disc, if one may accidentally step on a cord or cable. WARNING! Arrange them so that they cannot be specifically labeled ...
...the Product Notices provided on power cords or cables. 1 Getting Started Important safety information A power cord is an important safety feature. For your HP LCD monitor. Do not pull on or trip over them. When unplugging from the AC outlet. • If provided with the... read the Safety and Comfort Guide. Not all cords and cables connected to route all power strips provide surge protection; WARNING! Consider placing the monitor in your optical disc, if one may accidentally step on a cord or cable. WARNING! Arrange them so that they cannot be specifically labeled ...
User Guide
Page 8
Select Find your product, go to http://www.hp.com/support. To locate updates to the user guide for attaching the monitor to a wall-mount device or swing arm ● Low Blue Light Mode settings to create a more relaxing and less stimulating...supported by your operating system ● On-screen display (OSD) adjustments in several languages for easy setup and screen optimization ● HP Display Assistant software for adjusting monitor settings and enabling theft-deterrence features ● HDCP (High-bandwidth Digital Content Protection) used on -screen instructions. 2 Chapter 1 Getting ...
Select Find your product, go to http://www.hp.com/support. To locate updates to the user guide for attaching the monitor to a wall-mount device or swing arm ● Low Blue Light Mode settings to create a more relaxing and less stimulating...supported by your operating system ● On-screen display (OSD) adjustments in several languages for easy setup and screen optimization ● HP Display Assistant software for adjusting monitor settings and enabling theft-deterrence features ● HDCP (High-bandwidth Digital Content Protection) used on -screen instructions. 2 Chapter 1 Getting ...

User Guide
Page 9
... (+) or decrease (-) speaker volume. Transmits your image in use. Product features and components 3 Press to mute or activate the speakers. When the monitor is on, the power light above the Power button is in a video conference. Press to open the OSD menu, select a menu item from audio... input. Press to decline or end a call . Press the button to answer or make a call . Press to turn the monitor on . Press to participate in the OSD menu to navigate through the OSD menu based on page 15 for more information. Front components Component 1 ...
... (+) or decrease (-) speaker volume. Transmits your image in use. Product features and components 3 Press to mute or activate the speakers. When the monitor is on, the power light above the Power button is in a video conference. Press to open the OSD menu, select a menu item from audio... input. Press to decline or end a call . Press the button to answer or make a call . Press to turn the monitor on . Press to participate in the OSD menu to navigate through the OSD menu based on page 15 for more information. Front components Component 1 ...

User Guide
Page 10
...the volume before using headphones, earbuds, or a headset. Connects a USB device to the monitor. Connects the USB Type-B cable from the source device to the monitor. Connects analog audio to the monitor. For additional safety information, see the Product Notices provided on the optical disc, if one ...is connected to the monitor. Rear and side components Component 1 Audio-out (headphone) jack 2 Power connector 3 HDMI port 4 DisplayPort 5 Audio-in jack 6 USB ports (2) 7 USB ...
...the volume before using headphones, earbuds, or a headset. Connects a USB device to the monitor. Connects the USB Type-B cable from the source device to the monitor. Connects analog audio to the monitor. For additional safety information, see the Product Notices provided on the optical disc, if one ...is connected to the monitor. Rear and side components Component 1 Audio-out (headphone) jack 2 Power connector 3 HDMI port 4 DisplayPort 5 Audio-in jack 6 USB ports (2) 7 USB ...

User Guide
Page 11
... selecting Input Control. ● Connect one end of an HDMI cable to its normal condition. Setting up the monitor Use caution when setting up the monitor 5 NOTE: The monitor will not recover to the HDMI port on the panel may cause nonuniformity of color or disorientation of the LCD... shown in a convenient, well-ventilated location near the computer. 2. Pressure on the rear of the monitor and the other end to the monitor, do not touch the surface of the liquid crystals. Place the monitor in this occurs the screen will automatically determine which inputs have valid video signals.
... selecting Input Control. ● Connect one end of an HDMI cable to its normal condition. Setting up the monitor Use caution when setting up the monitor 5 NOTE: The monitor will not recover to the HDMI port on the panel may cause nonuniformity of color or disorientation of the LCD... shown in a convenient, well-ventilated location near the computer. 2. Pressure on the rear of the monitor and the other end to the monitor, do not touch the surface of the liquid crystals. Place the monitor in this occurs the screen will automatically determine which inputs have valid video signals.

User Guide
Page 12
● Connect one end of a USB Type-C cable to the USB Type-C port on the rear of the monitor and the other end to a DisplayPort on the source device. 6 Chapter 1 Getting Started Connect one end of a DisplayPort cable to the DisplayPort on the rear of the monitor and the other end to a USB Type-C port on the source device. 3.
● Connect one end of a USB Type-C cable to the USB Type-C port on the rear of the monitor and the other end to a DisplayPort on the source device. 6 Chapter 1 Getting Started Connect one end of a DisplayPort cable to the DisplayPort on the rear of the monitor and the other end to a USB Type-C port on the source device. 3.

User Guide
Page 13
To enable sound from the monitor's speakers, connect one end of a USB Type-A to Type-B cable to the USB Type-B port on the rear of an audio cable (not included with the monitor) to the audio-in jack on the monitor and the other end to the audio-out jack on the source device. 5. Setting up the monitor 7 Connect one end of the monitor and the other end to a USB port on the source device. 4.
To enable sound from the monitor's speakers, connect one end of a USB Type-A to Type-B cable to the USB Type-B port on the rear of an audio cable (not included with the monitor) to the audio-in jack on the monitor and the other end to the audio-out jack on the source device. 5. Setting up the monitor 7 Connect one end of the monitor and the other end to a USB port on the source device. 4.

User Guide
Page 14
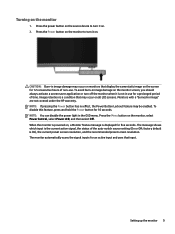
... the power cord to the AC adapter (1) and the other end to a grounded AC outlet (2), and then connect the AC adapter to the monitor (3). Adjusting the monitor Tilt the monitor panel forward or backward to set it to the equipment: Do not disable the power cord grounding plug. Arrange them so that is...
... the power cord to the AC adapter (1) and the other end to a grounded AC outlet (2), and then connect the AC adapter to the monitor (3). Adjusting the monitor Tilt the monitor panel forward or backward to set it to the equipment: Do not disable the power cord grounding plug. Arrange them so that is...
User Guide
Page 15
... then select Off. NOTE: If pressing the Power button has no effect, the Power Button Lockout feature may occur on monitors that display the same static image on the monitor 1. factory default is displayed for a prolonged period of time. NOTE: You can disable the power light in image" ...are not covered under the HP warranty. When the monitor is powered on the monitor screen, you should always activate a screen saver application or turn it is not in use . The message shows which ...
... then select Off. NOTE: If pressing the Power button has no effect, the Power Button Lockout feature may occur on monitors that display the same static image on the monitor 1. factory default is displayed for a prolonged period of time. NOTE: You can disable the power light in image" ...are not covered under the HP warranty. When the monitor is powered on the monitor screen, you should always activate a screen saver application or turn it is not in use . The message shows which ...

User Guide
Page 16
... and 10 mm long screws are disconnected. Stress on the curvature of the monitor display panel. Lift the stand away from the monitor (2). 10 Chapter 1 Getting Started or CSA-Listed wall-mount bracket. CAUTION: This monitor supports the VESA industry standard 100 mm mounting holes. doing so can be ... shielded power cable. Longer screws must be used because they may damage the panel if the monitor is important to support the weight of the display panel may damage the monitor. It is important to verify that the manufacturer's mounting solution is compliant with the VESA standard...
... and 10 mm long screws are disconnected. Stress on the curvature of the monitor display panel. Lift the stand away from the monitor (2). 10 Chapter 1 Getting Started or CSA-Listed wall-mount bracket. CAUTION: This monitor supports the VESA industry standard 100 mm mounting holes. doing so can be ... shielded power cable. Longer screws must be used because they may damage the panel if the monitor is important to support the weight of the display panel may damage the monitor. It is important to verify that the manufacturer's mounting solution is compliant with the VESA standard...

User Guide
Page 17
... VESA mounting bracket A VESA mounting bracket is aligned with the monitor for use when attaching the monitor panel to secure the VESA bracket in place. 6. Position the VESA bracket above the bottom side of the monitor. 3. Setting up the monitor 11 Using an L-shaped screwdriver, install the four screws (2) ... that the connector slot on the bracket is included with the connector slot on the monitor. 4. Press the VESA bracket (1) onto the monitor until it clicks into the monitor to a wall, swing arm, or other mounting device, insert four mounting screws through the holes on the mounting...
... VESA mounting bracket A VESA mounting bracket is aligned with the monitor for use when attaching the monitor panel to secure the VESA bracket in place. 6. Position the VESA bracket above the bottom side of the monitor. 3. Setting up the monitor 11 Using an L-shaped screwdriver, install the four screws (2) ... that the connector slot on the bracket is included with the connector slot on the monitor. 4. Press the VESA bracket (1) onto the monitor until it clicks into the monitor to a wall, swing arm, or other mounting device, insert four mounting screws through the holes on the mounting...

User Guide
Page 18
... slot on the stand is aligned with the bottom side up. Press the stand (1) onto the monitor until it clicks into the monitor to the screen; CAUTION: Do not lay the monitor face down . 2. Using an L-shaped screwdriver, install the four screws (2) into place. 4. ...Position the stand above the bottom side of the monitor, because the bezel might cause interfering reflections from surrounding light and bright surfaces. 1. Place the monitor head on a level surface. 12 Chapter 1 Getting Started Set the assembled monitor upright on a level surface with the connector slot on...
... slot on the stand is aligned with the bottom side up. Press the stand (1) onto the monitor until it clicks into the monitor to the screen; CAUTION: Do not lay the monitor face down . 2. Using an L-shaped screwdriver, install the four screws (2) into place. 4. ...Position the stand above the bottom side of the monitor, because the bezel might cause interfering reflections from surrounding light and bright surfaces. 1. Place the monitor head on a level surface. 12 Chapter 1 Getting Started Set the assembled monitor upright on a level surface with the connector slot on...
User Guide
Page 19
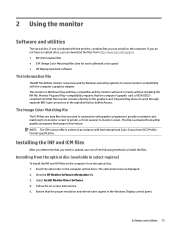
...select regions) To install the INF and ICM files on -screen instructions. 5. View the HP Monitor Software Information file. 3. Ensure that the monitor connects directly to ensure monitor compatibility with the computer's graphics adapter. compliant and that the proper resolution and refresh rates appear...files After you need to update, use one for each calibrated color space) ● HP Display Assistant software The Information file The INF file defines monitor resources used in conjunction with the International Color Consortium (ICC) Profile Format specification. Follow the...
...select regions) To install the INF and ICM files on -screen instructions. 5. View the HP Monitor Software Information file. 3. Ensure that the monitor connects directly to ensure monitor compatibility with the computer's graphics adapter. compliant and that the proper resolution and refresh rates appear...files After you need to update, use one for each calibrated color space) ● HP Display Assistant software The Information file The INF file defines monitor resources used in conjunction with the International Color Consortium (ICC) Profile Format specification. Follow the...
User Guide
Page 20
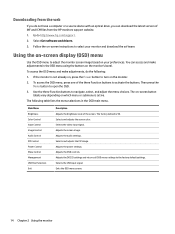
...active. To access the OSD menu, press one of the screen. Then press the Menu button to http://www.hp.com/support. 2. The on-screen button labels vary depending on the monitor's bezel. Adjusts the audio settings. Selects the USB input signal. Go to open the OSD. 3. Follow ...the menu choices. To access the OSD menu and make adjustments in the OSD main menu. Selects and adjusts the screen color. Downloading from the HP monitors support website. 1. The following : 1. Selects the video input signal. Selects and adjusts the PIP image. The factory default is not already on...
...active. To access the OSD menu, press one of the screen. Then press the Menu button to http://www.hp.com/support. 2. The on-screen button labels vary depending on the monitor's bezel. Adjusts the audio settings. Selects the USB input signal. Go to open the OSD. 3. Follow ...the menu choices. To access the OSD menu and make adjustments in the OSD main menu. Selects and adjusts the screen color. Downloading from the HP monitors support website. 1. The following : 1. Selects the video input signal. Selects and adjusts the PIP image. The factory default is not already on...

User Guide
Page 21
... button 3 assignable) Function Opens the OSD (on-screen display) menu. Switches to preset view modes. Assigning the Function buttons 15 Opens the Information menu. Switches monitor to the next video input source. Assigning the Function buttons Pressing one of the available options for the button you can change the Function buttons...
... button 3 assignable) Function Opens the OSD (on-screen display) menu. Switches to preset view modes. Assigning the Function buttons 15 Opens the Information menu. Switches monitor to the next video input source. Assigning the Function buttons Pressing one of the available options for the button you can change the Function buttons...
User Guide
Page 22
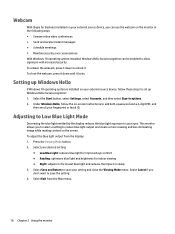
...comfort ● Reading: optimizes blue light and brightness for Business installed on your external source device, you can use the webcam on the monitor in the following ways: ● Stream online video conferences ● Send and receive Instant messages ● Schedule meetings ● Maintain ... Exit from the display: 1. Select the Start button, select Settings, select Accounts, and then select Sign-in with increased security. This monitor allows you don't want to reduce blue light output and create a more relaxing and less stimulating image while reading content on sleep 3. ...
...comfort ● Reading: optimizes blue light and brightness for Business installed on your external source device, you can use the webcam on the monitor in the following ways: ● Stream online video conferences ● Send and receive Instant messages ● Schedule meetings ● Maintain ... Exit from the display: 1. Select the Start button, select Settings, select Accounts, and then select Sign-in with increased security. This monitor allows you don't want to reduce blue light output and create a more relaxing and less stimulating image while reading content on sleep 3. ...

User Guide
Page 23
...OSD. 3. In the OSD, select PIP Control, select PIP On/Off, and then select Picture-in the OSD, and then select the desired position. The monitor will enter a reduced power state when the host PC signals low power mode (absence of the front bezel buttons to activate the buttons, and then... Power Control, select Auto-Sleep Mode, and then select Off. To change the size of the PIP, select PIP Size in -Picture (PIP) The monitor supports PIP, where one of either horizontal or vertical sync signal). Upon entering this reduced power state. Using Auto-Sleep Mode 17 Using Auto-Sleep...
...OSD. 3. In the OSD, select PIP Control, select PIP On/Off, and then select Picture-in the OSD, and then select the desired position. The monitor will enter a reduced power state when the host PC signals low power mode (absence of the front bezel buttons to activate the buttons, and then... Power Control, select Auto-Sleep Mode, and then select Off. To change the size of the PIP, select PIP Size in -Picture (PIP) The monitor supports PIP, where one of either horizontal or vertical sync signal). Upon entering this reduced power state. Using Auto-Sleep Mode 17 Using Auto-Sleep...


