
User Guide
Page 3
... contains essential information to explain a concept or to equipment or loss of the main text. About This Guide This guide provides information on monitor features, setting up the monitor, using the software and technical specifications. WARNING! An Important alert warns the user that , if not avoided, could result in bodily harm or...
... contains essential information to explain a concept or to equipment or loss of the main text. About This Guide This guide provides information on monitor features, setting up the monitor, using the software and technical specifications. WARNING! An Important alert warns the user that , if not avoided, could result in bodily harm or...
User Guide
Page 5
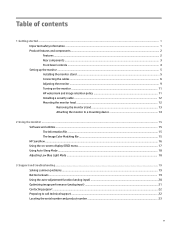
... ...3 Front bezel controls ...4 Setting up the monitor ...5 Installing the monitor stand ...5 Connecting the cables ...6 Adjusting the monitor ...9 Turning on the monitor ...11 HP watermark and image retention policy 11 Installing a security cable ...12 Mounting the monitor head ...12 Removing the monitor stand 13 Attaching the monitor to a mounting device 14 2 Using the monitor ...15 Software and utilities ...15 The...
... ...3 Front bezel controls ...4 Setting up the monitor ...5 Installing the monitor stand ...5 Connecting the cables ...6 Adjusting the monitor ...9 Turning on the monitor ...11 HP watermark and image retention policy 11 Installing a security cable ...12 Mounting the monitor head ...12 Removing the monitor stand 13 Attaching the monitor to a mounting device 14 2 Using the monitor ...15 Software and utilities ...15 The...

User Guide
Page 6
... resources and links ...33 Organizations ...33 Educational institutions ...33 Other disability resources ...33 HP links ...33 Contacting support ...34 vi 4 Maintaining the monitor ...24 Maintenance guidelines ...24 Cleaning the monitor ...24 Shipping the monitor ...24 Appendix A Technical specifications ...25 Preset display resolutions ...26 Entering user modes ...26... Association of Accessibility Professionals (IAAP 28 Finding the best assistive technology 29 Assessing your needs ...29 Accessibility for HP products 29 Standards and legislation ...30 Standards ...30 Mandate 376 -
... resources and links ...33 Organizations ...33 Educational institutions ...33 Other disability resources ...33 HP links ...33 Contacting support ...34 vi 4 Maintaining the monitor ...24 Maintenance guidelines ...24 Cleaning the monitor ...24 Shipping the monitor ...24 Appendix A Technical specifications ...25 Preset display resolutions ...26 Entering user modes ...26... Association of Accessibility Professionals (IAAP 28 Finding the best assistive technology 29 Assessing your needs ...29 Accessibility for HP products 29 Standards and legislation ...30 Standards ...30 Mandate 376 -
User Guide
Page 7
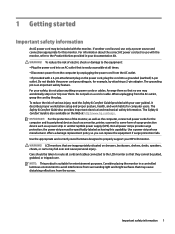
...Not all cords and cables connected to the equipment: • Plug the power cord into a grounded (earthed) 3-pin outlet. WARNING! For your HP LCD monitor. Do not pull on dressers, bookcases, shelves, desks, speakers, chests, or carts may fall over and cause personal injury. IMPORTANT: For the ...protection of electric shock or damage to the LCD monitor so that they cannot be pulled, grabbed, or tripped over them so that is easily accessible at http://www.hp.com/ergo. Use a power strip whose manufacturer offers a damage replacement policy so...
...Not all cords and cables connected to the equipment: • Plug the power cord into a grounded (earthed) 3-pin outlet. WARNING! For your HP LCD monitor. Do not pull on dressers, bookcases, shelves, desks, speakers, chests, or carts may fall over and cause personal injury. IMPORTANT: For the ...protection of electric shock or damage to the LCD monitor so that they cannot be pulled, grabbed, or tripped over them so that is easily accessible at http://www.hp.com/ergo. Use a power strip whose manufacturer offers a damage replacement policy so...

User Guide
Page 8
...and follow the instructions to the Product Notices provided in several languages for easy setup and screen optimization ● HP Display Assistant software for adjusting monitor settings and enabling the theft deterrence features ● HDCP (High-bandwidth Digital Content Protection) used on digital ...preserving original aspect ratio ● Nonglare panel with an LED backlight ● HP SureView button for privacy screen viewing ● Tilt capability ● Pivot capability to rotate the monitor head from landscape to portrait mode ● Swivel and height adjustment capabilities &#...
...and follow the instructions to the Product Notices provided in several languages for easy setup and screen optimization ● HP Display Assistant software for adjusting monitor settings and enabling the theft deterrence features ● HDCP (High-bandwidth Digital Content Protection) used on digital ...preserving original aspect ratio ● Nonglare panel with an LED backlight ● HP SureView button for privacy screen viewing ● Tilt capability ● Pivot capability to rotate the monitor head from landscape to portrait mode ● Swivel and height adjustment capabilities &#...

User Guide
Page 10
... 1 HP SureView button 2 Menu button 3 Information/Auto- Information: If the OSD menu is closed and DisplayPort or HDMI is open, navigates forward through the OSD menu and decreases adjustment levels. Plus: If the OSD menu is the primary video source, opens the Information menu. Turns the monitor on... opens the Viewing Modes menu to open the OSD menu, select a menu item from the OSD, or close the OSD menu. Blinking amber: Monitor is open , navigates backward through the OSD menu and increases adjustment levels. Input: If the OSD menu is open , saves changes and exits ...
... 1 HP SureView button 2 Menu button 3 Information/Auto- Information: If the OSD menu is closed and DisplayPort or HDMI is open, navigates forward through the OSD menu and decreases adjustment levels. Plus: If the OSD menu is the primary video source, opens the Information menu. Turns the monitor on... opens the Viewing Modes menu to open the OSD menu, select a menu item from the OSD, or close the OSD menu. Blinking amber: Monitor is open , navigates backward through the OSD menu and increases adjustment levels. Input: If the OSD menu is open , saves changes and exits ...

User Guide
Page 11
Position the monitor head facedown on the panel may cause non-uniformity of color or disorientation of the panel (1). 3. Setting up when the stand is locked in the ... of the stand's base (2) so that secures the bottom of the LCD panel. Pressure on a flat surface covered by a clean, dry cloth. 2. Setting up the monitor Installing the monitor stand IMPORTANT: To prevent damage to its normal condition. 1. If this occurs, the screen will not recover to the...
Position the monitor head facedown on the panel may cause non-uniformity of color or disorientation of the panel (1). 3. Setting up when the stand is locked in the ... of the stand's base (2) so that secures the bottom of the LCD panel. Pressure on a flat surface covered by a clean, dry cloth. 2. Setting up the monitor Installing the monitor stand IMPORTANT: To prevent damage to its normal condition. 1. If this occurs, the screen will not recover to the...

User Guide
Page 12
Connecting the cables NOTE: The monitor ships with the monitor. 1. Connect a video cable. The inputs can be selected by pressing the Menu button to access the on-screen display (OSD) menu and selecting Input. ● ... VGA port on the rear of the stand. 3. Before connecting the cables, route the cables through the cable routing hole in the center of the monitor and the other end to the VGA port on the source device. 6 Chapter 1 Getting started Place the...
Connecting the cables NOTE: The monitor ships with the monitor. 1. Connect a video cable. The inputs can be selected by pressing the Menu button to access the on-screen display (OSD) menu and selecting Input. ● ... VGA port on the rear of the stand. 3. Before connecting the cables, route the cables through the cable routing hole in the center of the monitor and the other end to the VGA port on the source device. 6 Chapter 1 Getting started Place the...

User Guide
Page 13
Setting up the monitor 7 ● Connect one end of a DisplayPort cable to the DisplayPort connector on the rear of the monitor and the other end to the DisplayPort connector on the source device. ● Connect one end of an HDMI cable to the HDMI port on the rear of the monitor and the other end to the HDMI port on the source device.
Setting up the monitor 7 ● Connect one end of a DisplayPort cable to the DisplayPort connector on the rear of the monitor and the other end to the DisplayPort connector on the source device. ● Connect one end of an HDMI cable to the HDMI port on the rear of the monitor and the other end to the HDMI port on the source device.

User Guide
Page 14
... power cord into a grounded (earthed) AC outlet that no one end of the AC power cord to the power connector on the rear of the monitor and the other end to an AC outlet. Arrange them . When unplugging the AC power cord from the AC outlet. WARNING! Connect the Type-B connector... started Then connect the cable's Type-A connector to the equipment: Do not disable the AC power cord grounding plug. To reduce the risk of the monitor. The grounding plug is easily accessible at all times. Connect one may accidentally step on the source device. 5. Do not pull on power cords or...
... power cord into a grounded (earthed) AC outlet that no one end of the AC power cord to the power connector on the rear of the monitor and the other end to an AC outlet. Arrange them . When unplugging the AC power cord from the AC outlet. WARNING! Connect the Type-B connector... started Then connect the cable's Type-A connector to the equipment: Do not disable the AC power cord grounding plug. To reduce the risk of the monitor. The grounding plug is easily accessible at all times. Connect one may accidentally step on the source device. 5. Do not pull on power cords or...

User Guide
Page 15
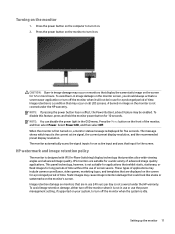
Swivel the monitor head to a comfortable eye level. 2. Setting up the monitor 9 Tilt the monitor head forward or backward to set it to the left or right for the best viewing angle. Adjusting the monitor 1.
Swivel the monitor head to a comfortable eye level. 2. Setting up the monitor 9 Tilt the monitor head forward or backward to set it to the left or right for the best viewing angle. Adjusting the monitor 1.

User Guide
Page 16
... be no higher than eye level. The monitor should be rotated to the monitor. a. CAUTION: If the monitor is positioned low and reclined may be repositioned as you can pivot the monitor head from http://www.hp.com/support. 3. A monitor that is not in contact with corrective lenses.... You can install the HP Display Assistant software from landscape to portrait orientation viewing to adapt to...
... be no higher than eye level. The monitor should be rotated to the monitor. a. CAUTION: If the monitor is positioned low and reclined may be repositioned as you can pivot the monitor head from http://www.hp.com/support. 3. A monitor that is not in contact with corrective lenses.... You can install the HP Display Assistant software from landscape to portrait orientation viewing to adapt to...
User Guide
Page 17
...for a wide variety of time. When the monitor is not in image damage on the monitor screen, you should always activate a screen saver application or turn off the monitor when it will not be enabled. HP watermark and image retention policy The monitor is the current active signal, the current ... video games, marketing logos, and templates that are suitable for 12 or more hours. Image retention damage on the monitor is not covered under the HP warranty. CAUTION: Burn-in use of the monitor, and then select Power. Static images may occur on . Press the power button on the...
...for a wide variety of time. When the monitor is not in image damage on the monitor screen, you should always activate a screen saver application or turn off the monitor when it will not be enabled. HP watermark and image retention policy The monitor is the current active signal, the current ... video games, marketing logos, and templates that are suitable for 12 or more hours. Image retention damage on the monitor is not covered under the HP warranty. CAUTION: Burn-in use of the monitor, and then select Power. Static images may occur on . Press the power button on the...

User Guide
Page 18
.... Use the key provided to the monitor, four 4 mm, 0.7 pitch, and 10 mm-long screws are required. NOTE: This apparatus is compliant with an optional security cable available from HP. For best performance, use of the monitor head. If the monitor is rated to www.tcodevelopment.com. ...To attach a thirdparty mounting solution to attach and remove the lock. Mounting the monitor head The monitor head can secure the monitor to a fixed object ...
.... Use the key provided to the monitor, four 4 mm, 0.7 pitch, and 10 mm-long screws are required. NOTE: This apparatus is compliant with an optional security cable available from HP. For best performance, use of the monitor head. If the monitor is rated to www.tcodevelopment.com. ...To attach a thirdparty mounting solution to attach and remove the lock. Mounting the monitor head The monitor head can secure the monitor to a fixed object ...

User Guide
Page 19
.... 5. Setting up on the latch (1) near the bottom center of the monitor's mounting plate. 4. Push up the monitor 13 CAUTION: Before beginning to disassemble the monitor, be sure that the monitor is turned off and all cables from the stand to install the monitor head on a flat surface covered by a clean, dry cloth. 3. Swing the...
.... 5. Setting up on the latch (1) near the bottom center of the monitor's mounting plate. 4. Push up the monitor 13 CAUTION: Before beginning to disassemble the monitor, be sure that the monitor is turned off and all cables from the stand to install the monitor head on a flat surface covered by a clean, dry cloth. 3. Swing the...

User Guide
Page 20
Remove the four screws from the VESA holes on the rear of the monitor head. 14 Chapter 1 Getting started Attaching the monitor to the wall or swing arm of your choice using the four screws that were removed from the VESA holes located on the rear of the monitor head. 2. Install the mounting plate to a mounting device 1.
Remove the four screws from the VESA holes on the rear of the monitor head. 14 Chapter 1 Getting started Attaching the monitor to the wall or swing arm of your choice using the four screws that were removed from the VESA holes located on the rear of the monitor head. 2. Install the mounting plate to a mounting device 1.
User Guide
Page 21
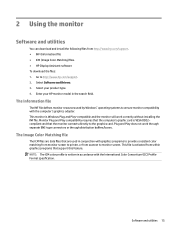
... ICM files are data files that the monitor connects directly to the graphics card. compliant and that are used by Windows® operating systems to http://www.hp.com/support. 2. Enter your product type. 4. Select your HP monitor model in accordance with the computer's graphics... adapter. Software and utilities 15 2 Using the monitor Software and utilities You can download and install the following...
... ICM files are data files that the monitor connects directly to the graphics card. compliant and that are used by Windows® operating systems to http://www.hp.com/support. 2. Enter your product type. 4. Select your HP monitor model in accordance with the computer's graphics... adapter. Software and utilities 15 2 Using the monitor Software and utilities You can download and install the following...

User Guide
Page 22
... viewing angle is turned off . When the button is turned on the bottom of the monitor's front bezel. HP SureView is pressed, an icon will appear on or off for shared viewing. With HP SureView OFF, the proprietary backlight uses two light sources to disperse light across all areas of...backlight focuses one light source through the light control film towards the middle of HP SureView. Icon Status The OSD is in the landscape orientation. NOTE: HP SureView works best when the monitor head is locked with HP SureView either on the screen above the button, indicating the status of the...
... viewing angle is turned off . When the button is turned on the bottom of the monitor's front bezel. HP SureView is pressed, an icon will appear on or off for shared viewing. With HP SureView OFF, the proprietary backlight uses two light sources to disperse light across all areas of...backlight focuses one light source through the light control film towards the middle of HP SureView. Icon Status The OSD is in the landscape orientation. NOTE: HP SureView works best when the monitor head is locked with HP SureView either on the screen above the button, indicating the status of the...

User Guide
Page 23
... Color Image Input Power Menu Management Information Exit Description Adjusts the brightness or contrast level of the four OSD buttons to adjust the monitor screen image based on your preferences. Adjusts the OSD controls. The following : 1. The on-screen button labels vary depending on ... function buttons to the factory default settings. Selects and adjusts the screen color. Displays important information about the monitor. Using the on the bottom side of the monitor's front bezel. Adjusts the screen image. Selects the video input signal. Adjusts the DDC/CI settings and ...
... Color Image Input Power Menu Management Information Exit Description Adjusts the brightness or contrast level of the four OSD buttons to adjust the monitor screen image based on your preferences. Adjusts the OSD controls. The following : 1. The on-screen button labels vary depending on ... function buttons to the factory default settings. Selects and adjusts the screen color. Displays important information about the monitor. Using the on the bottom side of the monitor's front bezel. Adjusts the screen image. Selects the video input signal. Adjusts the DDC/CI settings and ...
User Guide
Page 24
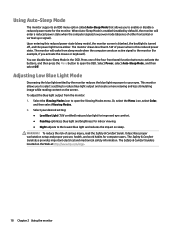
...lowest blue light and reduces the impact on the Web at http://www.hp.com/ergo. 18 Chapter 2 Using the monitor It describes proper workstation setup and proper posture, health, and work habits for the monitor. The Safety & Comfort Guide also provides important electrical and mechanical safety information...serious injury, read the Safety & Comfort Guide. Or, select the Menu icon, select Color, and then select Viewing Modes. 2. This monitor allows you activate the mouse or keyboard). WARNING! To reduce the risk of either horizontal or vertical sync signal). When Auto-Sleep Mode is...
...lowest blue light and reduces the impact on the Web at http://www.hp.com/ergo. 18 Chapter 2 Using the monitor It describes proper workstation setup and proper posture, health, and work habits for the monitor. The Safety & Comfort Guide also provides important electrical and mechanical safety information...serious injury, read the Safety & Comfort Guide. Or, select the Menu icon, select Color, and then select Viewing Modes. 2. This monitor allows you activate the mouse or keyboard). WARNING! To reduce the risk of either horizontal or vertical sync signal). When Auto-Sleep Mode is...


