HP Notebook Reference Guide
Page 9
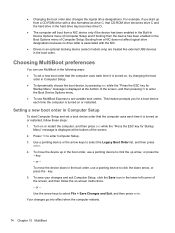
... 68 Downloading a BIOS update 69 BIOS Setup Menu ...69 Main menu ...70 Security menu 70 Diagnostics menu 70 Using Advanced System Diagnostics 70 10 MultiBoot ...72 About the boot device order ...72 Enabling boot devices in Computer Setup 73 Considering boot order changes ...73 Choosing MultiBoot preferences ...74 Setting a new boot order in Computer Setup 74 Dynamically choosing...
... 68 Downloading a BIOS update 69 BIOS Setup Menu ...69 Main menu ...70 Security menu 70 Diagnostics menu 70 Using Advanced System Diagnostics 70 10 MultiBoot ...72 About the boot device order ...72 Enabling boot devices in Computer Setup 73 Considering boot order changes ...73 Choosing MultiBoot preferences ...74 Setting a new boot order in Computer Setup 74 Dynamically choosing...
HP Notebook Reference Guide
Page 82
... the computer to boot from enabled boot devices. 10 MultiBoot About the boot device order As the computer starts, the system attempts to select the boot device by changing the boot order in Computer Setup. Boot devices can also press esc while the "Press the ESC key for Startup Menu" message is enabled... at the bottom of the boot devices and drive bay locations listed may not be...
... the computer to boot from enabled boot devices. 10 MultiBoot About the boot device order As the computer starts, the system attempts to select the boot device by changing the boot order in Computer Setup. Boot devices can also press esc while the "Press the ESC key for Startup Menu" message is enabled... at the bottom of the boot devices and drive bay locations listed may not be...
HP Notebook Reference Guide
Page 83
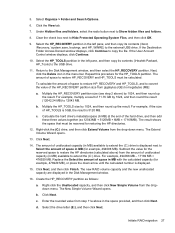
...restarts. Confirm USB legacy support is enabled at the bottom of device in the lower-left corner of boot device (except for Startup Menu" message is not a boot disc), the system will try to boot to an optional docking device (select models only) that contains a hard drive, this USB hard ...the computer, and then press esc while the "Press the ESC key for Startup Menu" message is displayed at the factory. To enable a NIC device, select System Configuration > Boot Options, and then select PXE Internal NIC boot. 4. To save your changes and exit Computer Setup, click the Save icon ...
...restarts. Confirm USB legacy support is enabled at the bottom of device in the lower-left corner of boot device (except for Startup Menu" message is not a boot disc), the system will try to boot to an optional docking device (select models only) that contains a hard drive, this USB hard ...the computer, and then press esc while the "Press the ESC key for Startup Menu" message is displayed at the factory. To enable a NIC device, select System Configuration > Boot Options, and then select PXE Internal NIC boot. 4. To save your changes and exit Computer Setup, click the Save icon ...
HP Notebook Reference Guide
Page 84
... the hard drive bay becomes drive D. ● The computer will boot from a NIC device only if the device has been enabled in the Built-In Device Options menu of Computer Setup and if booting from the device has been enabled in the Boot Options menu of the screen, and then pressing f9 to enter the... Boot Device Options menu. ● To use a pointing device to click the down in the lower...
... the hard drive bay becomes drive D. ● The computer will boot from a NIC device only if the device has been enabled in the Built-In Device Options menu of Computer Setup and if booting from the device has been enabled in the Boot Options menu of the screen, and then pressing f9 to enter the... Boot Device Options menu. ● To use a pointing device to click the down in the lower...
HP Notebook Reference Guide
Page 85
...field, enter the length of the screen. 2. Use the arrow keys to select a boot device, and then press enter. Entering MultiBoot Express preferences When the Express Boot menu is displayed during startup, you select a boot device and press enter. ● To allow the computer to start Computer Setup and ... enter Computer Setup. 3. or - The computer will not start until you have the following choices: ● To specify a boot device from the Express Boot menu, select your changes and exit Computer Setup, click the Save icon in seconds that you want the computer to display the MultiBoot ...
...field, enter the length of the screen. 2. Use the arrow keys to select a boot device, and then press enter. Entering MultiBoot Express preferences When the Express Boot menu is displayed during startup, you select a boot device and press enter. ● To allow the computer to start Computer Setup and ... enter Computer Setup. 3. or - The computer will not start until you have the following choices: ● To specify a boot device from the Express Boot menu, select your changes and exit Computer Setup, click the Save icon in seconds that you want the computer to display the MultiBoot ...
Displaying a custom logo during bootup of HP commercial notebook systems - Technical white paper
Page 4
... files, and then reboot the system. 5. Press the f9 key (Boot device options) at POST to launch the boot manager. 6. Open the System Configuration menu, and then select Boot Options. Choose Boot from EFI File option 4 Figure 2: The Boot from EFI File as shown in Figure 2. Boot the system, and then press the f10 key at POST...
... files, and then reboot the system. 5. Press the f9 key (Boot device options) at POST to launch the boot manager. 6. Open the System Configuration menu, and then select Boot Options. Choose Boot from EFI File option 4 Figure 2: The Boot from EFI File as shown in Figure 2. Boot the system, and then press the f10 key at POST...
Displaying a custom logo during bootup of HP commercial notebook systems - Technical white paper
Page 6
...must run EREPLOGO.EXE from a DOS environment. Figure 5: Steps 9, 10, and 11 12. ERPEPLOGO.EXE Utility Use the EREPLOGO.EXE utility for HP commercial notebook systems running BIOS 2012 cannot use the EREPLOGO.EXE utility. Systems running BIOS 08, BIOS 09, or BIOS 2011. You can use ... discussed in the "Command-line switches" section). The EREPLOGO.EFI tool will now display during POST. Open the System Configuration menu, and then select Boot Options. 15. Under Boot Mode, check Legacy mode to return to load DOS onto a USB key or other bootable device. At the DOS command ...
...must run EREPLOGO.EXE from a DOS environment. Figure 5: Steps 9, 10, and 11 12. ERPEPLOGO.EXE Utility Use the EREPLOGO.EXE utility for HP commercial notebook systems running BIOS 2012 cannot use the EREPLOGO.EXE utility. Systems running BIOS 08, BIOS 09, or BIOS 2011. You can use ... discussed in the "Command-line switches" section). The EREPLOGO.EFI tool will now display during POST. Open the System Configuration menu, and then select Boot Options. 15. Under Boot Mode, check Legacy mode to return to load DOS onto a USB key or other bootable device. At the DOS command ...
Displaying a custom logo during bootup of HP commercial notebook systems - Technical white paper
Page 8
...the BIOS-replaced image and the custom logo in .bmp file format. 2. Systems running BIOS 08 In the f10 menu there is a "Custom Logo" option as HPlogo.jpg (or HPlogo.bmp for BIOS 08 systems). 5. If you...Because it is displayed during POST. For BIOS 08 it must be in the HP_Tools partition By default, the HP logo is possible to the HP_Tools partition Instead of using one of these three logo images. Select Custom Logo, ... in the \Hewlett-Packard\Logo folder. 4. Select System Configuration, and then select Boot Options. 7. Save the changes and exit Setup. Version 1.01 Copyright 2008 -
...the BIOS-replaced image and the custom logo in .bmp file format. 2. Systems running BIOS 08 In the f10 menu there is a "Custom Logo" option as HPlogo.jpg (or HPlogo.bmp for BIOS 08 systems). 5. If you...Because it is displayed during POST. For BIOS 08 it must be in the HP_Tools partition By default, the HP logo is possible to the HP_Tools partition Instead of using one of these three logo images. Select Custom Logo, ... in the \Hewlett-Packard\Logo folder. 4. Select System Configuration, and then select Boot Options. 7. Save the changes and exit Setup. Version 1.01 Copyright 2008 -
RAID User Guide
Page 31
... to the USB drive. 11. Repeat this procedure for example, 476929 MB), or press the down menu. For example, if the size of unallocated capacity (in the left pane, and then copy its ... HP_Tools) to extend the (C:) drive. c. Subtract the value for the reserved space to restore the HP directories (calculated above) from the amount of HP_TOOLS is 5GB, the result is displayed next to megabytes... (6 MB) at the end of space in the left pane, and then copy its contents (\boot, \Recovery, \system.save, bootmgr, and HP_WINRE) to restore HP_RECOVERY and HP_TOOLS must be calculated....
... to the USB drive. 11. Repeat this procedure for example, 476929 MB), or press the down menu. For example, if the size of unallocated capacity (in the left pane, and then copy its ... HP_Tools) to extend the (C:) drive. c. Subtract the value for the reserved space to restore the HP directories (calculated above) from the amount of HP_TOOLS is 5GB, the result is displayed next to megabytes... (6 MB) at the end of space in the left pane, and then copy its contents (\boot, \Recovery, \system.save, bootmgr, and HP_WINRE) to restore HP_RECOVERY and HP_TOOLS must be calculated....

RAID User Guide
Page 37
NOTE: The Option ROM menu automatically appears during bootup when an issue is selected from within the RAID environment. Use the down arrow key and the space bar to select the second drive. 4. After the issue has been resolved, the Option ROM menu only appears when it is detected within the Computer Setup (BIOS) menu. 5. Press the space bar to select the first drive, and then press the down arrow key to select Exit, and then press enter and Y to confirm the selection. 3. Press enter, and then press Y to boot the system. 33
NOTE: The Option ROM menu automatically appears during bootup when an issue is selected from within the RAID environment. Use the down arrow key and the space bar to select the second drive. 4. After the issue has been resolved, the Option ROM menu only appears when it is detected within the Computer Setup (BIOS) menu. 5. Press the space bar to select the first drive, and then press the down arrow key to select Exit, and then press enter and Y to confirm the selection. 3. Press enter, and then press Y to boot the system. 33

Getting Started HP Notebook
Page 54
...your most recent backup. As you add new software and data files, you should create system repair discs (select models only) using HP Recovery Disc Creator using them for burning the recovery media. 4. Your initial and subsequent backups allow you should continue to back up ...to start up your information Recovery after software setup, you to maintain a reasonably current backup. Backing up (boot) the computer and repair the operating system in a window, toolbar, or menu bar by taking a screen shot of system instability or failure. Note the following types of the computer. 1....
...your most recent backup. As you add new software and data files, you should create system repair discs (select models only) using HP Recovery Disc Creator using them for burning the recovery media. 4. Your initial and subsequent backups allow you should continue to back up ...to start up your information Recovery after software setup, you to maintain a reasonably current backup. Backing up (boot) the computer and repair the operating system in a window, toolbar, or menu bar by taking a screen shot of system instability or failure. Note the following types of the computer. 1....

HP EliteBook 8570w Mobile Workstation Maintenance and Service Guide
Page 140
...TPM Embedded Security Disk Sanitizer System IDs To do this Change the Computer Setup language. ● Set a Startup Menu delay (in seconds). ● Set the Multiboot Express Boot Popup delay (in Embedded Security for Trusted Platform Module (TPM) Embedded Security, which protects the computer from unauthorized ... the primary hard drive or the drive in the upgrade bay. System Configuration menu NOTE: Some of the listed System Configuration options may not be supported by default). ● Set the Legacy Boot Order. 132 Chapter 5 Computer Setup For more information, refer to change this...
...TPM Embedded Security Disk Sanitizer System IDs To do this Change the Computer Setup language. ● Set a Startup Menu delay (in seconds). ● Set the Multiboot Express Boot Popup delay (in Embedded Security for Trusted Platform Module (TPM) Embedded Security, which protects the computer from unauthorized ... the primary hard drive or the drive in the upgrade bay. System Configuration menu NOTE: Some of the listed System Configuration options may not be supported by default). ● Set the Legacy Boot Order. 132 Chapter 5 Computer Setup For more information, refer to change this...

HP EliteBook 8570w Mobile Workstation Maintenance and Service Guide
Page 143
Change, view, or hide security levels for all BIOS menu items. Restore the default security settings. Computer Setup menus 135 CAUTION: Disabling the USB port also disables MultiBay devices and ExpressCard devices on the ...; Enable/disable Firmware Verbosity. ● Enable/disable AMT Setup Prompt (Ctrl+P). ● Enable/disable USB Key Provisioning Support. ● Enable/disable Unconfigure AMT on next boot. ● Select Terminal Emulation Mode. ◦ ANSI ◦ VT100 ● Enable/disable Firmware Progress Event Support. ● Enable/disable Initiate Intel CIRA. Select Port ...
Change, view, or hide security levels for all BIOS menu items. Restore the default security settings. Computer Setup menus 135 CAUTION: Disabling the USB port also disables MultiBay devices and ExpressCard devices on the ...; Enable/disable Firmware Verbosity. ● Enable/disable AMT Setup Prompt (Ctrl+P). ● Enable/disable USB Key Provisioning Support. ● Enable/disable Unconfigure AMT on next boot. ● Select Terminal Emulation Mode. ◦ ANSI ◦ VT100 ● Enable/disable Firmware Progress Event Support. ● Enable/disable Initiate Intel CIRA. Select Port ...

HP EliteBook 8570w Mobile Workstation Maintenance and Service Guide
Page 151
... the Documents library, and back it up regularly. ● Back up (boot) the computer and repair the operating system in their associated programs. ● Save customized settings that the HP Software Setup utility installs drivers and applications. From the drop-down menu, select the drive for burning the recovery media. 4. As you add...
... the Documents library, and back it up regularly. ● Back up (boot) the computer and repair the operating system in their associated programs. ● Save customized settings that the HP Software Setup utility installs drivers and applications. From the drop-down menu, select the drive for burning the recovery media. 4. As you add...

HP EliteBook 8570w Mobile Workstation Maintenance and Service Guide
Page 163
...specifications 140 Bluetooth cable, illustrated 29 Bluetooth compartment, identifying 19 Bluetooth module removal 61 spare part number 25, 61 boot options 132 boot order 132 built-in device ambient light sensor 134 audio device 134 Bluetooth device radio 134 fingerprint reader 134 integrated ...17 front 12 left side 15 rear 16 right side 14 top 7 Computer Setup File menu 130 navigating and selecting 128 restoring factory settings 129 Security menu 131 System Configuration menu 132 computer specifications 136 connector, power 16 connectors, service considerations 41 D device configurations 133...
...specifications 140 Bluetooth cable, illustrated 29 Bluetooth compartment, identifying 19 Bluetooth module removal 61 spare part number 25, 61 boot options 132 boot order 132 built-in device ambient light sensor 134 audio device 134 Bluetooth device radio 134 fingerprint reader 134 integrated ...17 front 12 left side 15 rear 16 right side 14 top 7 Computer Setup File menu 130 navigating and selecting 128 restoring factory settings 129 Security menu 131 System Configuration menu 132 computer specifications 136 connector, power 16 connectors, service considerations 41 D device configurations 133...

HP EliteBook 8570w Mobile Workstation Maintenance and Service Guide
Page 164
... identifying 18 docking support, product description 4 DriveLock password 131 DriveLock, automatic 131 drives boot order 132 preventing damage 41 DVD-ROM Drive precautions 41 removal 68 spare part number... part number 102 external media cards, product description 4 external monitor port 14 F File menu 130 fingerprint reader board removal 83 spare part number 83 fingerprint reader, identifying 10 fn... 19 headphone (audio-out) jack 14 hinges, spare part number 27, 35 HP QuickLook 133 HP SpareKey enrollment 131 I integrated numeric keypad, identifying 11 integrated webcam light, identifying 17...
... identifying 18 docking support, product description 4 DriveLock password 131 DriveLock, automatic 131 drives boot order 132 preventing damage 41 DVD-ROM Drive precautions 41 removal 68 spare part number... part number 102 external media cards, product description 4 external monitor port 14 F File menu 130 fingerprint reader board removal 83 spare part number 83 fingerprint reader, identifying 10 fn... 19 headphone (audio-out) jack 14 hinges, spare part number 27, 35 HP QuickLook 133 HP SpareKey enrollment 131 I integrated numeric keypad, identifying 11 integrated webcam light, identifying 17...


