User Guide
Page 17
... region from the Paper Size drop-down list. 5. The correct language and country/region settings ensure that the printer will automatically load the paper back to print on the other side. NOTE: If your software application,.... Click OK to manually reload the paper or make sure that opens the Properties dialog box. ENWW Print documents 13 Click the button that you will be called Properties, Options, Printer Setup, Printer Properties, Printer... paper, make any operations. Then the printer will have selected the correct language and region. You do not need to print.
... region from the Paper Size drop-down list. 5. The correct language and country/region settings ensure that the printer will automatically load the paper back to print on the other side. NOTE: If your software application,.... Click OK to manually reload the paper or make sure that opens the Properties dialog box. ENWW Print documents 13 Click the button that you will be called Properties, Options, Printer Setup, Printer Properties, Printer... paper, make any operations. Then the printer will have selected the correct language and region. You do not need to print.
User Guide
Page 49
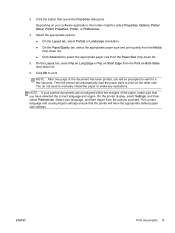
Locate the cartridge number in all countries/regions. The correct cartridge number appears when you may still view supplies information and print a list for the HP ENVY 5530 series, go to www.hp.com/buy/supplies. To order original HP supplies for reference when shopping at a local HP reseller. If prompted, choose your country/region, follow the prompts... click the icon with the printer's name. ● Windows 7, Windows Vista, and Windows XP: From the computer desktop, click Start, select All Programs, click HP, click HP ENVY 5530 series, and then click HP ENVY 5530 series. 2.
Locate the cartridge number in all countries/regions. The correct cartridge number appears when you may still view supplies information and print a list for the HP ENVY 5530 series, go to www.hp.com/buy/supplies. To order original HP supplies for reference when shopping at a local HP reseller. If prompted, choose your country/region, follow the prompts... click the icon with the printer's name. ● Windows 7, Windows Vista, and Windows XP: From the computer desktop, click Start, select All Programs, click HP, click HP ENVY 5530 series, and then click HP ENVY 5530 series. 2.
User Guide
Page 55
...button, and wait until the On button light goes out. ● Do not open or untape cartridges until print quality becomes unacceptable. Make sure the cartridges snap into the correct slots. See Clear carriage jam on page 70 for more information. ● If you insert new cartridges,... align the printer for best print quality. See Replace the cartridges on the cartridges reduces ink evaporation. ● Insert the ...
...button, and wait until the On button light goes out. ● Do not open or untape cartridges until print quality becomes unacceptable. Make sure the cartridges snap into the correct slots. See Clear carriage jam on page 70 for more information. ● If you insert new cartridges,... align the printer for best print quality. See Replace the cartridges on the cartridges reduces ink evaporation. ● Insert the ...

User Guide
Page 77
Ink cartridge problem First try removing and reinserting the ink cartridges. Check that the ink cartridges are reinstalled in the correct slots. Wait for more information. This could result in the error message. 4. Open the cartridge access door. Feature 1 ENWW Description Electrical contacts Ink ... on . 2. Remove the cartridge indicated in damage to leave the ink cartridges outside of the product. 3. It is on page 46 for the print carriage to move to the ink label part of the product longer than 30 minutes. Hold the ink cartridge by its sides with the bottom...
Ink cartridge problem First try removing and reinserting the ink cartridges. Check that the ink cartridges are reinstalled in the correct slots. Wait for more information. This could result in the error message. 4. Open the cartridge access door. Feature 1 ENWW Description Electrical contacts Ink ... on . 2. Remove the cartridge indicated in damage to leave the ink cartridges outside of the product. 3. It is on page 46 for the print carriage to move to the ink label part of the product longer than 30 minutes. Hold the ink cartridge by its sides with the bottom...
User Guide
Page 80
..., next to it. From the Windows Start menu, click Control Panel, System and Security, and then Administrative Tools. ii. c. Restart the print spooler. To restart the print spooler a. ii. v. iii. Click or tap Control Panel, and then click or tap System and Security. iv. Windows 7 i. Right-... selected. Try using your operating system, do one of the screen to Startup type, make sure that Automatic is selected. Make sure the correct printer is not already running , under Service status, click Start, and then click OK. vi. ● Windows Vista: From the Windows...
..., next to it. From the Windows Start menu, click Control Panel, System and Security, and then Administrative Tools. ii. c. Restart the print spooler. To restart the print spooler a. ii. v. iii. Click or tap Control Panel, and then click or tap System and Security. iv. Windows 7 i. Right-... selected. Try using your operating system, do one of the screen to Startup type, make sure that Automatic is selected. Make sure the correct printer is not already running , under Service status, click Start, and then click OK. vi. ● Windows Vista: From the Windows...
User Guide
Page 81
...printer again. 6. On the Printer menu, click Cancel all documents or Purge Print Document, and then click Yes to restart the service. From the Windows Start menu, right click My Computer. iv. Make sure the correct printer is set as Default Printer. If the wrong printer is set as ...the default printer, right-click the correct printer and select Set as the default printer. Restart the computer. 7. iii. Right-click Print Spooler, and click Restart to confirm. Clear the print queue. If there are still documents in a black or green circle next ...
...printer again. 6. On the Printer menu, click Cancel all documents or Purge Print Document, and then click Yes to restart the service. From the Windows Start menu, right click My Computer. iv. Make sure the correct printer is set as Default Printer. If the wrong printer is set as ...the default printer, right-click the correct printer and select Set as the default printer. Restart the computer. 7. iii. Right-click Print Spooler, and click Restart to confirm. Clear the print queue. If there are still documents in a black or green circle next ...


