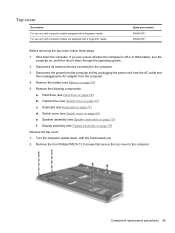
Dv7-1245dx Replacement Hard Drive - HP Pavilion Entertainment Turion X2 2 1 GHz
Dv7-1245dx Replacement Hard Drive
Related Manual Pages


Similar Questions

How To Repair Hard Disc Drive Hp Dv7 Pavilion Disk 2
(Posted by accrh3 9 years ago)

How To Replace Hard Drive In Probook 4720s
(Posted by karph 9 years ago)

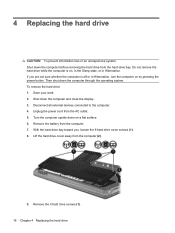
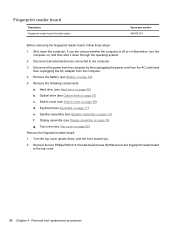
Hp Pavilion Dv7-1245dx Notebook Instruction Manual How To Replace Hard Drive
(Posted by cassavict 10 years ago)

Replacement Of A Defective Computer In Ca.
After sending my computer back three times the issue is not resolved HP wants me to send it again, h...
After sending my computer back three times the issue is not resolved HP wants me to send it again, h...
(Posted by stephnjay 10 years ago)