
Service Guide
Page 20
... Component Function (1) TouchPad light ● White: TouchPad is enabled. ● Amber: TouchPad is disabled. (2) TouchPad* Moves the pointer and selects or activates items on the screen. (3) TouchPad left button* Functions like the left button on an external mouse. (4) TouchPad on/off button Enables/disables the TouchPad. (5) TouchPad scroll zone Scrolls up...
... Component Function (1) TouchPad light ● White: TouchPad is enabled. ● Amber: TouchPad is disabled. (2) TouchPad* Moves the pointer and selects or activates items on the screen. (3) TouchPad left button* Functions like the left button on an external mouse. (4) TouchPad on/off button Enables/disables the TouchPad. (5) TouchPad scroll zone Scrolls up...
Service Guide
Page 112
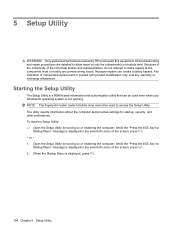
...repairs can be used even when your Windows® operating system is displayed, press f10. 104 Chapter 5 Setup Utility Any indication of the screen, press f10. - While the "Press the ESC key for startup, security, and other preferences. Starting the Setup Utility The Setup Utility ... for Startup Menu" message is a ROM-based information and customization utility that can create a safety hazard. Open the Setup Utility by HP must repair this equipment. NOTE: The fingerprint reader (select models only) cannot be used to access the Setup Utility. All troubleshooting and...
...repairs can be used even when your Windows® operating system is displayed, press f10. 104 Chapter 5 Setup Utility Any indication of the screen, press f10. - While the "Press the ESC key for startup, security, and other preferences. Starting the Setup Utility The Setup Utility ... for Startup Menu" message is a ROM-based information and customization utility that can create a safety hazard. Open the Setup Utility by HP must repair this equipment. NOTE: The fingerprint reader (select models only) cannot be used to access the Setup Utility. All troubleshooting and...

Service Guide
Page 113
.... 5. Open the Setup Utility by turning on or restarting the computer. If the Setup Utility is displayed in the lower-left corner of the screen, press f10. - To exit the Setup Utility without changing any settings, use the arrow keys to select Exit > Exit Saving Changes, and ... Menu" message is not already running , begin at step 2. 1. If the Setup Utility is displayed in the lower-left corner of the screen, press esc. Using the Setup Utility Changing the language of the Setup Utility The following procedure explains how to display system information in the Setup...
.... 5. Open the Setup Utility by turning on or restarting the computer. If the Setup Utility is displayed in the lower-left corner of the screen, press f10. - To exit the Setup Utility without changing any settings, use the arrow keys to select Exit > Exit Saving Changes, and ... Menu" message is not already running , begin at step 2. 1. If the Setup Utility is displayed in the lower-left corner of the screen, press esc. Using the Setup Utility Changing the language of the Setup Utility The following procedure explains how to display system information in the Setup...
Service Guide
Page 114
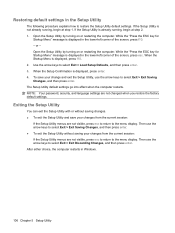
... not already running , begin at step 2. 1. While the "Press the ESC key for Startup Menu" message is displayed in the lower-left corner of the screen, press f10. - or - While the "Press the ESC key for Startup Menu" message is displayed in Windows. 106 Chapter 5 Setup Utility After either choice, the...
... not already running , begin at step 2. 1. While the "Press the ESC key for Startup Menu" message is displayed in the lower-left corner of the screen, press f10. - or - While the "Press the ESC key for Startup Menu" message is displayed in Windows. 106 Chapter 5 Setup Utility After either choice, the...
Service Guide
Page 151
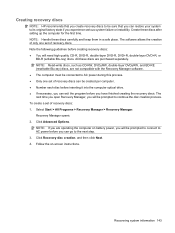
...set of recovery discs. Select Start > All Programs > Recovery Manager > Recovery Manager. NOTE: If you are operating the computer on -screen instructions. NOTE: Handle these discs after setting up the computer for the first time. Note the following guidelines before you experience serious system failure... or instability. Creating recovery discs NOTE: HP recommends that you create recovery discs to be sure that you can restore your system to its original factory state if you have...
...set of recovery discs. Select Start > All Programs > Recovery Manager > Recovery Manager. NOTE: If you are operating the computer on -screen instructions. NOTE: Handle these discs after setting up the computer for the first time. Note the following guidelines before you experience serious system failure... or instability. Creating recovery discs NOTE: HP recommends that you create recovery discs to be sure that you can restore your system to its original factory state if you have...

Service Guide
Page 152
... system restore points When you have to reset your hard drive at a specific point in the Documents folder and back up these steps: 1. Display the screen. 2. Open a word-processing document, and then select Edit > Paste. You also can be a time saver if you back up templates stored in ... programs. ● Save customized settings in a window, toolbar, or menu bar by taking a screen shot of your preferences. Copy the screen: To copy only the active window, press alt+fn+prt sc. The screen shot can create additional restore points to save and name a snapshot of your system files and...
... system restore points When you have to reset your hard drive at a specific point in the Documents folder and back up these steps: 1. Display the screen. 2. Open a word-processing document, and then select Edit > Paste. You also can be a time saver if you back up templates stored in ... programs. ● Save customized settings in a window, toolbar, or menu bar by taking a screen shot of your preferences. Copy the screen: To copy only the active window, press alt+fn+prt sc. The screen shot can create additional restore points to save and name a snapshot of your system files and...

Service Guide
Page 153
... Protection tab. 4. Under Automatic restore points, select the disk for which you want to a restore point and then change your information 145 Follow the on -screen instructions. The System Restore window opens. 5. Select Start > Control Panel > System and Maintenance > System. 2. Create a system restore point 1. The System Protection window opens. 6. Select Start...
... Protection tab. 4. Under Automatic restore points, select the disk for which you want to a restore point and then change your information 145 Follow the on -screen instructions. The System Restore window opens. 5. Select Start > Control Panel > System and Maintenance > System. 2. Create a system restore point 1. The System Protection window opens. 6. Select Start...

Service Guide
Page 154
... all personal files. 2. Access Recovery Manager in repair features, such as you have a recovery partition. Follow the on the hard drive from the partition on -screen instructions. 146 Chapter 8 Backup and Recovery Performing a recovery NOTE: You can perform a recovery from either of the following ways: ● Select Start > All Programs >...disc provided by the manufacturer. You will not be downloaded from the manufacturer's Web site or reinstalled from a dedicated recovery partition (select models only) on -screen instructions. HP recommends that you have a recovery partition.
... all personal files. 2. Access Recovery Manager in repair features, such as you have a recovery partition. Follow the on the hard drive from the partition on -screen instructions. 146 Chapter 8 Backup and Recovery Performing a recovery NOTE: You can perform a recovery from either of the following ways: ● Select Start > All Programs >...disc provided by the manufacturer. You will not be downloaded from the manufacturer's Web site or reinstalled from a dedicated recovery partition (select models only) on -screen instructions. HP recommends that you have a recovery partition.


