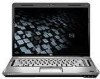
Dv5 1125nr Battery - HP Pavilion Entertainment Turion X2 2 1 GHz
Dv5 1125nr Battery
Related Manual Pages


Similar Questions

Hp Pavilion Dv7-1243cl Entertainment Notebook Pc Rtc Battery.
Mine is not a stanard CR2032 battery although it is a labeled as such. Mine has a black and red wire...
Mine is not a stanard CR2032 battery although it is a labeled as such. Mine has a black and red wire...
(Posted by oilcan 11 years ago)


Battery Charge
Does docking station stop charging battery when full? Should I take battery out of pc when on AC for...
Does docking station stop charging battery when full? Should I take battery out of pc when on AC for...
(Posted by kenbauman 12 years ago)

Where Can I Get A New Laptop Battery Of Hp Dv5 For The Die One?
I find a shop link selling hp pavilion dv5 battery , is it secure? http://www.comp-parts.com/hp-pav...
I find a shop link selling hp pavilion dv5 battery , is it secure? http://www.comp-parts.com/hp-pav...
(Posted by youna28 12 years ago)
Related Terms
The following terms were also used when searching for Dv5 1125nr Battery - HP Pavilion Entertainment Turion X2 2 1 GHz:- hp pavilion dv5 1125nr
- dv5 1125nr
- dv5-1125nr
- hp dv5 1125nr
- hp dv5-1125nr
- hp pavilion dv5-1125nr
- pavilion dv5 1125nr
- pavilion dv5-1125nr
- hp pavilion dv51125nr
- dv5 1125nr hp
- dv5 1125nr lcd
- dv5 1125nr review
- hp dv5 1125nr laptop
- dv5 1125nr xp
- hp pavilion dv5 1125nr fan
- dv5 1125nr battery
- dv5 1125nr drivers
- dv5 1125nr keyboard
- dv5 1125nr laptop
- dv5 1125nr motherboard
- dv5-1125nr laptop
- hp pavilion dv5 1125nr drivers
- hp pavilion dv5 1125nr entertainment notebook pc
- dv5-1125nr battery
- dv5-1125nr drivers
- dv5-1125nr keyboard
- hp pavilion dv5 1125nr review
- dv5 1125nr fan
- dv5 1125nr parts
- dv5 1125nr price
- dv5 1125nr problems
- dv5 1125nr reviews
- dv5 1125nr specs
- dv5-1125nr manual
- dv5-1125nr motherboard
- dv5-1125nr specs
- hp dv5 1125nr xp
- hp dv5-1125nr drivers
- hp dv5-1125nr laptop
- hp pavilion dv5 1125nr battery
- hp pavilion dv5 1125nr specs
- hp pavilion dv5 1125nr user guide
- hp pavilion dv5 1125nr xp driver
- hp pavilion dv5-1125nr review
- pavilion dv5 1125nr drivers
- pavilion dv5 1125nr review
- pavilion dv5-1125nr drivers
- pavilion dv5-1125nr entertainment notebook pc
- pavilion dv5-1125nr problems
- pavilion dv5-1125nr review
- dv5 1125nr cpu
- dv5 1125nr hard drive
- dv5 1125nr memory
- dv5 1125nr specifications
- dv5 1125nr xp drivers
- dv5-1125nr cpu
- dv5-1125nr overheating
- dv5-1125nr screen
- fr977ua aba
- fr977ua#aba
- hp dv5 1125nr battery
- hp dv5 1125nr price
- hp dv5 1125nr review
- hp dv5 1125nr specs
- hp dv51125nr review
- hp pavilion dv5 1125nr charger
- hp pavilion dv5 1125nr price
- pavilion dv5 1125nr charger
- pavilion dv5 1125nr entertainment notebook pc
- pavilion dv5 1125nr fan
- pavilion dv5 1125nr keys
- pavilion dv5 1125nr laptop
- pavilion dv5 1125nr manual
- pavilion dv5 1125nr notebook pc
- pavilion dv5 1125nr parts
- pavilion dv5 1125nr reviews
- pavilion dv5 1125nr screen
- pavilion dv5 1125nr specifications
- pavilion dv5 1125nr specs
- pavilion dv5 1125nr xp drivers
- pavilion dv5-1125nr battery
- pavilion dv5-1125nr parts
- pavilion dv5-1125nr specs
- battery for dv5-1125nr
- battery for hp dv5-1125nr
- battery for hp pavilion dv5-1125nr
- battery for pavilion dv5-1125nr
- dv5 1125nr battery life
- dv5 1125nr bios
- dv5 1125nr bios update
- dv5 1125nr bronze
- dv5 1125nr can't locate hard drive
- dv5 1125nr cant find hard drive
- dv5 1125nr driver
- dv5 1125nr dvd
- dv5 1125nr gaming
- dv5 1125nr hard drive caddy and cable
- dv5 1125nr hdmi
- dv5 1125nr heat sink
- dv5 1125nr hinge replacement
- dv5 1125nr hp blink codes 2
- dv5 1125nr hp pavilion
- dv5 1125nr internal hard drive cable
- dv5 1125nr keyboard not working
- dv5 1125nr laptop battery recalls
- dv5 1125nr laptop reviews
- dv5 1125nr manual
- dv5 1125nr motherboard specs
- dv5 1125nr network card
- dv5 1125nr notebook
- dv5 1125nr overheating
- dv5 1125nr pavilion
- dv5 1125nr problemas
- dv5 1125nr processor
- dv5 1125nr ram
- dv5 1125nr recovery disk download
- dv5 1125nr screen
- dv5 1125nr service manual
- dv5 1125nr turn wireless
- dv5 1125nr wifi won't turn on
- dv5 1125nr wifi wont turn on
- dv5 1125nr wont turn on
- dv5-1125nr bezel
- dv5-1125nr bios
- dv5-1125nr bios update
- dv5-1125nr black screen
- dv5-1125nr blinking lights
- dv5-1125nr bronze
- dv5-1125nr caps lock and scroll lock lights
- dv5-1125nr card reader driver
- dv5-1125nr charger
- dv5-1125nr cpu not functional
- dv5-1125nr disassembly
- dv5-1125nr driver
- dv5-1125nr drivers windows 7
- dv5-1125nr hp
- dv5-1125nr lcd cable
- dv5-1125nr lcd display problem
- dv5-1125nr lcd problem
- dv5-1125nr led screen
- dv5-1125nr memory
- dv5-1125nr my computer keeps shutting down
- dv5-1125nr no display
- dv5-1125nr parts
- dv5-1125nr power cord
- dv5-1125nr price
- dv5-1125nr processor replacement
- dv5-1125nr ram
- dv5-1125nr repair
- dv5-1125nr repair service
- dv5-1125nr restore disk
- dv5-1125nr review
- dv5-1125nr screen is blank
- dv5-1125nr screen replacement
- dv5-1125nr screen size
- dv5-1125nr service manual
- dv5-1125nr specifications
- dv5-1125nr user review
- dv5-1125nr video cable
- dv5-1125nr video card
- dv5-1125nr white screen
- dv5-1125nr wireless switch
- dv5-1125nr wlan will not turn on
- dv5-1125nr xp
- dv5-1125nr xp drivers
- dv5-1125nr-service manual
- dv51125nr battery
- dv51125nr drivers
- dv51125nr overheating
- dv51125nr specs
- fr977ua aba number
- fr977ua hinge
- fr977ua laptop
- fr977ua motherboard
- fr977ua#aba motherboard
- hp dv5 1125nr bios
- hp dv5 1125nr bios update
- hp dv5 1125nr cpu
- hp dv5 1125nr driver
- hp dv5 1125nr drivers
- hp dv5 1125nr dvd
- hp dv5 1125nr fan
- hp dv5 1125nr hard drive
- hp dv5 1125nr hard drive caddy and cable
- hp dv5 1125nr heat sink
- hp dv5 1125nr hinge replacement
- hp dv5 1125nr internal hard drive cable
- hp dv5 1125nr keyboard
- hp dv5 1125nr keyboard not working
- hp dv5 1125nr laptop battery recalls
- hp dv5 1125nr laptop reviews
- hp dv5 1125nr manual
- hp dv5 1125nr memory
- hp dv5 1125nr motherboard
- hp dv5 1125nr network card
- hp dv5 1125nr notebook
- hp dv5 1125nr overheating
- hp dv5 1125nr parts
- hp dv5 1125nr pavilion
- hp dv5 1125nr problemas
- hp dv5 1125nr problems
- hp dv5 1125nr processor
- hp dv5 1125nr recovery disk download
- hp dv5 1125nr reviews
- hp dv5 1125nr screen
- hp dv5 1125nr turn wireless
- hp dv5 1125nr tv tuner
- hp dv5 1125nr xp drivers
- hp dv5-1125nr battery
- hp dv5-1125nr bios
- hp dv5-1125nr bios update
- hp dv5-1125nr black screen
- hp dv5-1125nr charger
- hp dv5-1125nr cpu
- hp dv5-1125nr disassembly
- hp dv5-1125nr drivers windows 7
- hp dv5-1125nr manual
- hp dv5-1125nr motherboard
- hp dv5-1125nr overheating
- hp dv5-1125nr parts
- hp dv5-1125nr price
- hp dv5-1125nr review
- hp dv5-1125nr screen
- hp dv5-1125nr screen is blank
- hp dv5-1125nr service manual
- hp dv5-1125nr specs
- hp dv5-1125nr user review
- hp dv5-1125nr video cable
- hp dv5-1125nr wireless switch
- hp dv5-1125nr wlan will not turn on
- hp dv5-1125nr-service manual
- hp dv51125nr reviews
- hp fr977ua#aba
- hp laptop dv5 1125nr
- hp laptop dv5-1125nr
- hp laptops dv51125nr
- hp model dv5 1125nr
- hp model dv5-1125nr
- hp model dv51125nr
- hp pavilion dv5 1125nr battery not charging
- hp pavilion dv5 1125nr black screen
- hp pavilion dv5 1125nr black screen problem
- hp pavilion dv5 1125nr display cable
- hp pavilion dv5 1125nr drivers downloads
- hp pavilion dv5 1125nr entertainment notebook
- hp pavilion dv5 1125nr entertainment notebook pc black screen
- hp pavilion dv5 1125nr entertainment notebook pc drivers
- hp pavilion dv5 1125nr factory reset
- hp pavilion dv5 1125nr fan replacement
- hp pavilion dv5 1125nr freezing problems
- hp pavilion dv5 1125nr inverter
- hp pavilion dv5 1125nr keyboard keys
- hp pavilion dv5 1125nr keys
- hp pavilion dv5 1125nr laptop
- hp pavilion dv5 1125nr manual
- hp pavilion dv5 1125nr motherboard
- hp pavilion dv5 1125nr not booting
- hp pavilion dv5 1125nr notebook pc
- hp pavilion dv5 1125nr overheating
- hp pavilion dv5 1125nr parts
- hp pavilion dv5 1125nr power cord
- hp pavilion dv5 1125nr problems
- hp pavilion dv5 1125nr processor upgrade
- hp pavilion dv5 1125nr repair
- hp pavilion dv5 1125nr repair disc
- hp pavilion dv5 1125nr replacement fan
- hp pavilion dv5 1125nr reviews
- hp pavilion dv5 1125nr screen
- hp pavilion dv5 1125nr sound problems
- hp pavilion dv5 1125nr spare parts
- hp pavilion dv5 1125nr specifications
- hp pavilion dv5 1125nr support
- hp pavilion dv5 1125nr troubleshooting
- hp pavilion dv5 1125nr windows 7 drivers
- hp pavilion dv5 1125nr windows xp
- hp pavilion dv5 1125nr xp drivers
- hp pavilion dv5-1125nr battery
- hp pavilion dv5-1125nr battery replacement
- hp pavilion dv5-1125nr bios
- hp pavilion dv5-1125nr bios update
- hp pavilion dv5-1125nr bluetooth
- hp pavilion dv5-1125nr charger
- hp pavilion dv5-1125nr disassembly
- hp pavilion dv5-1125nr drivers
- hp pavilion dv5-1125nr drivers download
- hp pavilion dv5-1125nr entertainment
- hp pavilion dv5-1125nr entertainment notebook
- hp pavilion dv5-1125nr entertainment notebook pc
- hp pavilion dv5-1125nr fan
- hp pavilion dv5-1125nr hard drive
- hp pavilion dv5-1125nr laptop
- hp pavilion dv5-1125nr manual
- hp pavilion dv5-1125nr memory
- hp pavilion dv5-1125nr memory upgrade
- hp pavilion dv5-1125nr motherboard
- hp pavilion dv5-1125nr motherboard replacement
- hp pavilion dv5-1125nr no display
- hp pavilion dv5-1125nr notebook
- hp pavilion dv5-1125nr notebook pc
- hp pavilion dv5-1125nr overheating
- hp pavilion dv5-1125nr overheats
- hp pavilion dv5-1125nr parts
- hp pavilion dv5-1125nr price
- hp pavilion dv5-1125nr problems
- hp pavilion dv5-1125nr reviews
- hp pavilion dv5-1125nr screen problems
- hp pavilion dv5-1125nr service manual
- hp pavilion dv5-1125nr specifications
- hp pavilion dv5-1125nr specs
- hp pavilion dv5-1125nr unknown device
- hp pavilion dv5-1125nr video card
- hp pavillion dv5 1125nr
- keyboard for dv5 1125nr
- keyboard for dv5-1125nr
- pavilion dv5 1125nr ac adapter
- pavilion dv5 1125nr battery
- pavilion dv5 1125nr battery not charging
- pavilion dv5 1125nr black screen
- pavilion dv5 1125nr black screen problem
- pavilion dv5 1125nr cooling fan
- pavilion dv5 1125nr display cable
- pavilion dv5 1125nr drivers downloads
- pavilion dv5 1125nr entertainment notebook pc drivers
- pavilion dv5 1125nr factory reset
- pavilion dv5 1125nr fan replacement
- pavilion dv5 1125nr freezing problems
- pavilion dv5 1125nr inverter
- pavilion dv5 1125nr memory
- pavilion dv5 1125nr motherboard
- pavilion dv5 1125nr not booting
- pavilion dv5 1125nr overheating
- pavilion dv5 1125nr price
- pavilion dv5 1125nr problems
- pavilion dv5 1125nr processor upgrade
- pavilion dv5 1125nr repair
- pavilion dv5 1125nr repair disc
- pavilion dv5 1125nr replacement fan
- pavilion dv5 1125nr spare parts
- pavilion dv5 1125nr support
- pavilion dv5 1125nr troubleshooting
- pavilion dv5 1125nr windows 7 drivers
- pavilion dv5 1125nr windows xp
- pavilion dv5-1125nr battery replacement
- pavilion dv5-1125nr bios
- pavilion dv5-1125nr bios update
- pavilion dv5-1125nr bluetooth
- pavilion dv5-1125nr charger
- pavilion dv5-1125nr disassembly
- pavilion dv5-1125nr drivers download
- pavilion dv5-1125nr drivers xp
- pavilion dv5-1125nr entertainment laptop
- pavilion dv5-1125nr fan
- pavilion dv5-1125nr hard drive
- pavilion dv5-1125nr keyboard
- pavilion dv5-1125nr laptop
- pavilion dv5-1125nr lid switch
- pavilion dv5-1125nr manual
- pavilion dv5-1125nr memory
- pavilion dv5-1125nr memory upgrade
- pavilion dv5-1125nr motherboard
- pavilion dv5-1125nr motherboard replacement
- pavilion dv5-1125nr no display
- pavilion dv5-1125nr notebook
- pavilion dv5-1125nr notebook pc
- pavilion dv5-1125nr overheating
- pavilion dv5-1125nr overheats
- pavilion dv5-1125nr power supply
- pavilion dv5-1125nr price
- pavilion dv5-1125nr reviews
- pavilion dv5-1125nr screen
- pavilion dv5-1125nr screen problems
- pavilion dv5-1125nr service manual
- pavilion dv5-1125nr specifications
- pavilion dv5-1125nr support
- pavilion dv5-1125nr unknown device
- pavilion dv5-1125nr video card
- pavilion dv51125nr won't boot
- pavillion dv5 1125nr
- pavillion dv5-1125nr
- reviews for hp pavilion dv5 1125nr