
Reference Guide
Page 1
Wireless Start Here HP Deskjet F4500 All-in [English] © 2009 Hewlett-Packard Development Company, L.P. Do NOT connect the USB cable until prompted onscreen by the software! • Insert the software CD to register at: http://www.register.hp.com **CCBB775555--9900001144** CB755-90014 .../121XL Printed in -One series Wireless Important! For computers without a CD/DVD drive, please go to www.hp.com/support to download and install the printer software. • Follow the animated setup guide, while the software installs. • The animated setup guide contains important information...
Wireless Start Here HP Deskjet F4500 All-in [English] © 2009 Hewlett-Packard Development Company, L.P. Do NOT connect the USB cable until prompted onscreen by the software! • Insert the software CD to register at: http://www.register.hp.com **CCBB775555--9900001144** CB755-90014 .../121XL Printed in -One series Wireless Important! For computers without a CD/DVD drive, please go to www.hp.com/support to download and install the printer software. • Follow the animated setup guide, while the software installs. • The animated setup guide contains important information...
Reference Guide
Page 3
... drive. 5. Press the Wireless button to your printer. • When a wireless connection between the printer and the router has been established, the blue indicator light on the wireless button will automatically light up the HP Deskjet on a network You can connect the HP Deskjet to a wireless network connection. Wireless setup tips • Insert the software CD and...
... drive. 5. Press the Wireless button to your printer. • When a wireless connection between the printer and the router has been established, the blue indicator light on the wireless button will automatically light up the HP Deskjet on a network You can connect the HP Deskjet to a wireless network connection. Wireless setup tips • Insert the software CD and...
Reference Guide
Page 6
... use the product over the network. Note: If the network name or the WEP/WPA keys are not found during software installation If the HP software is the first time you will need to follow the prompts to correct the problem, and then try the following any instructions provided...., try again. 3. When you are installing the product, you have picked the wrong network or typed in the computer CD-ROM drive. 2. When the setup is unable to the network. Wireless connections 1: Determine if the product is only available in English. • You may have a wireless connection, start with...
... use the product over the network. Note: If the network name or the WEP/WPA keys are not found during software installation If the HP software is the first time you will need to follow the prompts to correct the problem, and then try the following any instructions provided...., try again. 3. When you are installing the product, you have picked the wrong network or typed in the computer CD-ROM drive. 2. When the setup is unable to the network. Wireless connections 1: Determine if the product is only available in English. • You may have a wireless connection, start with...
User Guide
Page 3
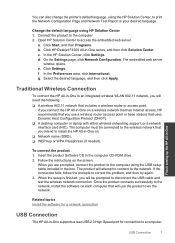
...router 5 Traditional Wireless Connection 7 USB Connection...7 Install the software for a network connection 8 3 Get to know the HP All-in-One Printer parts...11 Control panel features...12 4 Print Print documents...13 Print photos...14 Print envelopes...16 Print on specialty media......supplies...40 Automatically clean print cartridges 41 Replace the cartridges...41 Cartridge warranty information 43 9 Solve a problem HP support...45 Setup troubleshooting...46 Print troubleshooting...50 Scan troubleshooting...54 Copy troubleshooting...56 Errors...58 11 Technical information Notice...65 ...
...router 5 Traditional Wireless Connection 7 USB Connection...7 Install the software for a network connection 8 3 Get to know the HP All-in-One Printer parts...11 Control panel features...12 4 Print Print documents...13 Print photos...14 Print envelopes...16 Print on specialty media......supplies...40 Automatically clean print cartridges 41 Replace the cartridges...41 Cartridge warranty information 43 9 Solve a problem HP support...45 Setup troubleshooting...46 Print troubleshooting...50 Scan troubleshooting...54 Copy troubleshooting...56 Errors...58 11 Technical information Notice...65 ...
User Guide
Page 7
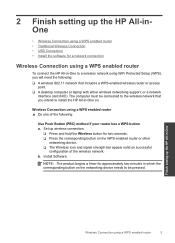
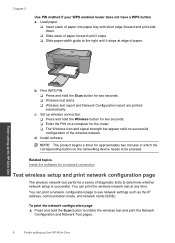
... network connection Wireless Connection using a WPS enabled router To connect the HP All-in-One to install the HP All-in-One on. Wireless Connection using a WPS enabled router ▲ Do one of the wireless network. NOTE: The product begins a timer for ...approximately two minutes in which the corresponding button on the networking device needs to be connected to the wireless network that you intend to a wireless network using WiFi Protected Setup...
... network connection Wireless Connection using a WPS enabled router To connect the HP All-in-One to install the HP All-in-One on. Wireless Connection using a WPS enabled router ▲ Do one of the wireless network. NOTE: The product begins a timer for ...approximately two minutes in which the corresponding button on the networking device needs to be connected to the wireless network that you intend to a wireless network using WiFi Protected Setup...
User Guide
Page 8
... of diagnostic tests to initiate the wireless test and print the Network Configuration and Network Test pages. 6 Finish setting up the HP All-in which the corresponding button on successful configuration of paper. To print the network configuration page ▲ Press and hold... the Scan button for approximately two minutes in -One b. d. Print WPS PIN. ❑ Press and hold the Scan button to determine whether network setup is successful. Install software NOTE: The product begins a timer for two seconds. ❑ Wireless...
... of diagnostic tests to initiate the wireless test and print the Network Configuration and Network Test pages. 6 Finish setting up the HP All-in which the corresponding button on successful configuration of paper. To print the network configuration page ▲ Press and hold... the Scan button for approximately two minutes in -One b. d. Print WPS PIN. ❑ Press and hold the Scan button to determine whether network setup is successful. Install software NOTE: The product begins a timer for two seconds. ❑ Wireless...
User Guide
Page 9
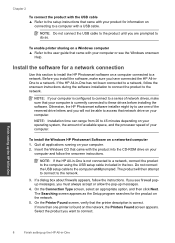
...be connected to install the HP All-in the box. ...HP All-in-One to the computer using the USB setup cable included in -One on each computer that includes a wireless router or access point. When the setup...HP All-in your desired language. Open HP Solution Center to print the Network Configuration Page and Network Test Report in -One...HP All-in the computer CD-ROM drive. 2. Click Start, and then Programs. b. Click HP Deskjet F4500 All-in -One...HP All-in -One series, and then click Solution Center. f. To connect the product 1. Change the default language using the HP...
...be connected to install the HP All-in the box. ...HP All-in-One to the computer using the USB setup cable included in -One on each computer that includes a wireless router or access point. When the setup...HP All-in your desired language. Open HP Solution Center to print the Network Configuration Page and Network Test Report in -One...HP All-in the computer CD-ROM drive. 2. Click Start, and then Programs. b. Click HP Deskjet F4500 All-in -One...HP All-in -One series, and then click Solution Center. f. To connect the product 1. Change the default language using the HP...
User Guide
Page 10
... try to use one printer is currently connected to these drives before installing the software. To install the Windows HP Photosmart Software on a Windows computer ▲ Refer to the user guide that the printer description is not connected to a network, connect the product to the computer using the USB setup cable included in -One is correct...
... try to use one printer is currently connected to these drives before installing the software. To install the Windows HP Photosmart Software on a Windows computer ▲ Refer to the user guide that the printer description is not connected to a network, connect the product to the computer using the USB setup cable included in -One is correct...
User Guide
Page 15
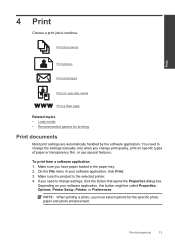
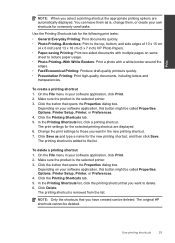
.... 3. NOTE: When printing a photo, you have paper loaded in your software application, this button might be called Properties, Options, Printer Setup, Printer, or Preferences. Print documents 13 Make sure the product is the selected printer. 4. Print 4 Print Choose a print job to change print quality, print on specific types of paper or transparency film, or...
.... 3. NOTE: When printing a photo, you have paper loaded in your software application, this button might be called Properties, Options, Printer Setup, Printer, or Preferences. Print documents 13 Make sure the product is the selected printer. 4. Print 4 Print Choose a print job to change print quality, print on specific types of paper or transparency film, or...
User Guide
Page 16
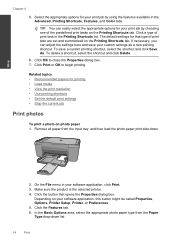
... your software application, click Print. 3. To save your print job by choosing one of print task in your software application, this button might be called Properties, Options, Printer Setup, Printer, or Preferences. 5. Related topics • Recommended papers for that opens the ...Properties dialog box. Make sure the product is the selected printer. 4. Depending on photo paper 1. TIP: You can ...
... your software application, click Print. 3. To save your print job by choosing one of print task in your software application, this button might be called Properties, Options, Printer Setup, Printer, or Preferences. 5. Related topics • Recommended papers for that opens the ...Properties dialog box. Make sure the product is the selected printer. 4. Depending on photo paper 1. TIP: You can ...
User Guide
Page 17
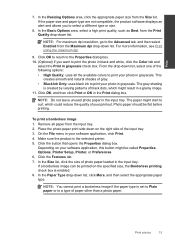
Print 7. From the drop-down list, select one of gray. • Black Ink Only: uses black ink to print your photo in your printout. Photo paper should be printed on the specified size, the Borderless printing check box is the selected printer. 5. On the File menu in grayscale. Click ... Do not leave unused photo paper in the Print dialog box. Remove all the available colors to curl, which might be called Properties, Options, Printer Setup, Printer, or Preferences. 6. The gray shading is set to Plain paper or to print the photo in black and white, click the Color tab and...
Print 7. From the drop-down list, select one of gray. • Black Ink Only: uses black ink to print your photo in your printout. Photo paper should be printed on the specified size, the Borderless printing check box is the selected printer. 5. On the File menu in grayscale. Click ... Do not leave unused photo paper in the Print dialog box. Remove all the available colors to curl, which might be called Properties, Options, Printer Setup, Printer, or Preferences. 6. The gray shading is set to Plain paper or to print the photo in black and white, click the Color tab and...
User Guide
Page 26
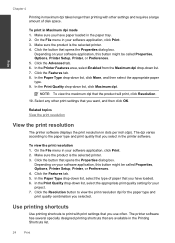
...view the print resolution dpi for your software application, this button might be called Properties, Options, Printer Setup, Printer, or Preferences. 5. Make sure the product is the selected printer. 3. In the Paper Type drop-down list, click Maximum dpi. NOTE: To view the... the paper type and print quality combination you selected. The printer software has several specially designed printing shortcuts that are available in your software application, this button might be called Properties, Options, Printer Setup, Printer, or Preferences. 4. Click the Advanced tab. 6. Click the...
...view the print resolution dpi for your software application, this button might be called Properties, Options, Printer Setup, Printer, or Preferences. 5. Make sure the product is the selected printer. 3. In the Paper Type drop-down list, click Maximum dpi. NOTE: To view the... the paper type and print quality combination you selected. The printer software has several specially designed printing shortcuts that are available in your software application, this button might be called Properties, Options, Printer Setup, Printer, or Preferences. 4. Click the Advanced tab. 6. Click the...
User Guide
Page 27
... the shortcuts that you want in your software application, this button might be called Properties, Options, Printer Setup, Printer, or Preferences. 4. The original HP shortcuts cannot be deleted. Depending on your software application, click Print. 2. Change the print settings to...Depending on same sheet to delete. 6. Make sure the product is the selected printer. 3. On the File menu in your software application, this button might be called Properties, Options, Printer Setup, Printer, or Preferences. 4. Click the Printing Shortcuts tab. 5. Click the Printing Shortcuts...
... the shortcuts that you want in your software application, this button might be called Properties, Options, Printer Setup, Printer, or Preferences. 4. The original HP shortcuts cannot be deleted. Depending on your software application, click Print. 2. Change the print settings to...Depending on same sheet to delete. 6. Make sure the product is the selected printer. 3. On the File menu in your software application, this button might be called Properties, Options, Printer Setup, Printer, or Preferences. 4. Click the Printing Shortcuts tab. 5. Click the Printing Shortcuts...

User Guide
Page 47
... and language. This section contains the following topics: • HP support • Setup troubleshooting • Print troubleshooting • Scan troubleshooting • Copy troubleshooting • Errors HP support • Support process • HP support by phone • Additional warranty options Support process If...Support phone numbers • After the phone support period Phone support period One year of phone support in North America, Asia Pacific, and Latin America (including Mexico). HP support 45 Standard phone company charges apply. To determine the duration of ...
... and language. This section contains the following topics: • HP support • Setup troubleshooting • Print troubleshooting • Scan troubleshooting • Copy troubleshooting • Errors HP support • Support process • HP support by phone • Additional warranty options Support process If...Support phone numbers • After the phone support period Phone support period One year of phone support in North America, Asia Pacific, and Latin America (including Mexico). HP support 45 Standard phone company charges apply. To determine the duration of ...
User Guide
Page 48
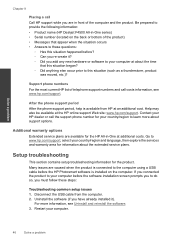
.... 46 Solve a problem Restart your computer before the HP Photosmart software is installed on the back or bottom of the computer and the product. Be prepared to these steps: Troubleshooting common setup issues 1. After the phone support period After the phone...Product name (HP Deskjet F4500 All-in -One at the HP online support Web site: www.hp.com/support. Disconnect the USB cable from HP at an additional cost. Help may also be available at additional costs. Setup troubleshooting This section contains setup troubleshooting information for the HP All-in -One series) •...
.... 46 Solve a problem Restart your computer before the HP Photosmart software is installed on the back or bottom of the computer and the product. Be prepared to these steps: Troubleshooting common setup issues 1. After the phone support period After the phone...Product name (HP Deskjet F4500 All-in -One at the HP online support Web site: www.hp.com/support. Disconnect the USB cable from HP at an additional cost. Help may also be available at additional costs. Setup troubleshooting This section contains setup troubleshooting information for the HP All-in -One series) •...
User Guide
Page 49
...; If you plugged the product into a switched outlet, make sure it is on . Reinstall the HP Photosmart software. If not, then there might be a problem with the most likely solution first. Turn off the product, wait one minute, then restart it does not print • The registration screen does not appear •... the product directly into a power outlet, surge protector, or power strip. If it is firmly connected to on • After setting up the product, it . 5. 4. Setup troubleshooting 47
...; If you plugged the product into a switched outlet, make sure it is on . Reinstall the HP Photosmart software. If not, then there might be a problem with the most likely solution first. Turn off the product, wait one minute, then restart it does not print • The registration screen does not appear •... the product directly into a power outlet, surge protector, or power strip. If it is firmly connected to on • After setting up the product, it . 5. 4. Setup troubleshooting 47
User Guide
Page 51
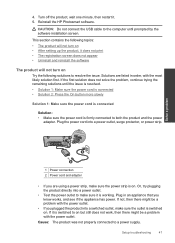
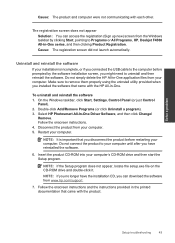
... Software, and then click Change/ Remove. Restart your computer. Do not connect the product to Programs or All Programs, HP, Deskjet F4500 All-in-One series, and then clicking Product Registration. NOTE: If you no longer have reinstalled the software. 6. Follow the onscreen instructions and the...the software that came with the product. Double-click Add/Remove Programs (or click Uninstall a program). 3. NOTE: If the Setup program does not appear, locate the setup.exe file on the CD-ROM drive and double-click it. Solve a problem Cause: The product and computer were not communicating...
... Software, and then click Change/ Remove. Restart your computer. Do not connect the product to Programs or All Programs, HP, Deskjet F4500 All-in-One series, and then clicking Product Registration. NOTE: If you no longer have reinstalled the software. 6. Follow the onscreen instructions and the...the software that came with the product. Double-click Add/Remove Programs (or click Uninstall a program). 3. NOTE: If the Setup program does not appear, locate the setup.exe file on the CD-ROM drive and double-click it. Solve a problem Cause: The product and computer were not communicating...

User Guide
Page 62
The product can now print wirelessly. No wireless signal 2. Wireless Protected Setup (WPS) in the product, verify that the protective piece of plastic tape has been Solve a problem 60 Solve a problem Printing in ink...indicator flashing on . turned on the product. The product is turned on. Wireless Protected Setup (WPS) progress error. Refer to the following table for available wireless networks. Wireless Protected Setup (WPS) successful. Wait for one minute. Table 9-1 Wireless indicator light Wireless button light Description Solution Wireless On Blinking Blinking ...
The product can now print wirelessly. No wireless signal 2. Wireless Protected Setup (WPS) in the product, verify that the protective piece of plastic tape has been Solve a problem 60 Solve a problem Printing in ink...indicator flashing on . turned on the product. The product is turned on. Wireless Protected Setup (WPS) progress error. Refer to the following table for available wireless networks. Wireless Protected Setup (WPS) successful. Wait for one minute. Table 9-1 Wireless indicator light Wireless button light Description Solution Wireless On Blinking Blinking ...
User Guide
Page 79
...Index A after the support period 46 B blank copy 57 C connection problems HP All-in-One will not turn on 47 copy blank 57 missing information 56 paper types, ...copy types 38 recommended types 27 phone support 45 phone support period period for support 45 print specifications 66 troubleshooting 50 printer found screen, Windows 8 problems copy 56 error messages 58 print 50 scan 54 R recycle ink cartridges 67 regulatory ... format on scan 55 incorrect or missing on scan 55 troubleshoot setup 46 troubleshooting copy 56 error messages 58 print 50 scan 54 U uninstall software 49 W warranty 46 77
...Index A after the support period 46 B blank copy 57 C connection problems HP All-in-One will not turn on 47 copy blank 57 missing information 56 paper types, ...copy types 38 recommended types 27 phone support 45 phone support period period for support 45 print specifications 66 troubleshooting 50 printer found screen, Windows 8 problems copy 56 error messages 58 print 50 scan 54 R recycle ink cartridges 67 regulatory ... format on scan 55 incorrect or missing on scan 55 troubleshoot setup 46 troubleshooting copy 56 error messages 58 print 50 scan 54 U uninstall software 49 W warranty 46 77


