
Full User Guide
Page 32
... transfer sheet completely before printing onto transparency film. Locate the blue stripe on the nonprinting side of the transfer paper and then manually feed one or more help on the HP All-in the software before using it; Slide the stack of envelopes until it stops. TIP: To avoid paper jams, tuck ... is not higher than the top of paper The following papers require extra attention to transparency film in -One. NOTE: The HP All-in the base of the input tray, with arrows and the HP logo) is on the left and facing up . TIP: For more envelopes into the input tray first. ...
... transfer sheet completely before printing onto transparency film. Locate the blue stripe on the nonprinting side of the transfer paper and then manually feed one or more help on the HP All-in the software before using it; Slide the stack of envelopes until it stops. TIP: To avoid paper jams, tuck ... is not higher than the top of paper The following papers require extra attention to transparency film in -One. NOTE: The HP All-in the base of the input tray, with arrows and the HP logo) is on the left and facing up . TIP: For more envelopes into the input tray first. ...
Full User Guide
Page 34
...manually only when you change settings, click the button that type of print task are automatically handled by using the features available in the Advanced, Printing Shortcuts, Features, and Color tabs. To print from a software application 1. Make sure the product is the selected printer...as a new printing shortcut. This section contains the following topics: • Print from a software application • Make the HP All-in-One the default printer • Change the print settings for your custom settings as borderless images, newsletters, greeting cards, iron-on specific types of ...
...manually only when you change settings, click the button that type of print task are automatically handled by using the features available in the Advanced, Printing Shortcuts, Features, and Color tabs. To print from a software application 1. Make sure the product is the selected printer...as a new printing shortcut. This section contains the following topics: • Print from a software application • Make the HP All-in-One the default printer • Change the print settings for your custom settings as borderless images, newsletters, greeting cards, iron-on specific types of ...
Full User Guide
Page 36
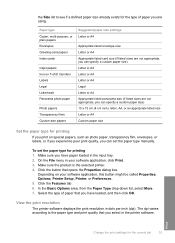
... or if you experience poor print quality, you can set the paper type for printing 1. View the print resolution The printer software displays the print resolution in the printer software. The dpi varies according to see if a defined paper size already exists for the type of paper that you ...have paper loaded in your software application, this button might be called Properties, Options, Printer Setup, Printer, or Preferences. 5. To set the paper type manually. the Size list to the paper type and print quality that you select in dots per inch (dpi).
... or if you experience poor print quality, you can set the paper type for printing 1. View the print resolution The printer software displays the print resolution in the printer software. The dpi varies according to see if a defined paper size already exists for the type of paper that you ...have paper loaded in your software application, this button might be called Properties, Options, Printer Setup, Printer, or Preferences. 5. To set the paper type manually. the Size list to the paper type and print quality that you select in dots per inch (dpi).

Full User Guide
Page 39
...Printing Shortcuts list, you can leave them the default print settings so they are available in -One manually. This section contains the following print tasks: • General Everyday Printing: Print documents quickly... film, for example, you use for printing, you might want to print with the HP All-in the Printing Shortcuts list. You can create a printing shortcut by selecting the ...printing shortcuts to make them as is or change the default print settings 1. The printer software has several specially designed printing shortcuts that are already set when you open the...
...Printing Shortcuts list, you can leave them the default print settings so they are available in -One manually. This section contains the following print tasks: • General Everyday Printing: Print documents quickly... film, for example, you use for printing, you might want to print with the HP All-in the Printing Shortcuts list. You can create a printing shortcut by selecting the ...printing shortcuts to make them as is or change the default print settings 1. The printer software has several specially designed printing shortcuts that are already set when you open the...
Full User Guide
Page 41
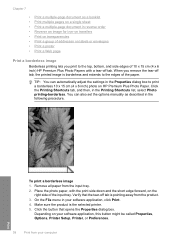
...on the right side of 10 x 15 cm (4 x 6 inch) HP Premium Plus Photo Papers with the print side down and the short edge forward, on your software application, this button might be called Properties, Options, Printer Setup, Printer, or Preferences. 38 Print from the input tray. 2. When you print ...of addresses on HP Premium Plus Photo Paper. To print a borderless image 1. On the File menu in the Printing Shortcuts list, select Photo printing-borderless. Click the button that the tear-off tab is pointing away from the product. 3. TIP: You can also set the options manually as a ...
...on the right side of 10 x 15 cm (4 x 6 inch) HP Premium Plus Photo Papers with the print side down and the short edge forward, on your software application, this button might be called Properties, Options, Printer Setup, Printer, or Preferences. 38 Print from the input tray. 2. When you print ...of addresses on HP Premium Plus Photo Paper. To print a borderless image 1. On the File menu in the Printing Shortcuts list, select Photo printing-borderless. Click the button that the tear-off tab is pointing away from the product. 3. TIP: You can also set the options manually as a ...
Full User Guide
Page 44
...menu in your software application, this button might be called Properties, Options, Printer Setup, Printer, or Preferences. 5. On the File menu in -One manually. Click the Features tab. 6. Make sure you want, and then click OK. In the Printer Features area, select Enabled from the Two-sided printing dropdown list. In... opens the Properties dialog box. Print Perform special print jobs 41 Select any other side. Related topics Work with the HP All-in your software application, this button might be called Properties, Options, Printer Setup, Printer, or Preferences. 5.
...menu in your software application, this button might be called Properties, Options, Printer Setup, Printer, or Preferences. 5. On the File menu in -One manually. Click the Features tab. 6. Make sure you want, and then click OK. In the Printer Features area, select Enabled from the Two-sided printing dropdown list. In... opens the Properties dialog box. Print Perform special print jobs 41 Select any other side. Related topics Work with the HP All-in your software application, this button might be called Properties, Options, Printer Setup, Printer, or Preferences. 5.

Full User Guide
Page 46
...click Left edge binding. • If your job. In the Paper saving options area, select Manual from the output tray. A dialog box displays instructions on the screen when it is the selected printer. 4. Follow the instructions that the images do not show through to the other side. 2....printing, fold the stack of the printed pages from the Two-sided printing dropdown list. 7. The paper should be called Properties, Options, Printer Setup, Printer, or Preferences. 5. Click the button that the first page is automatically set to staple the booklet. To print a multiple-page document...
...click Left edge binding. • If your job. In the Paper saving options area, select Manual from the output tray. A dialog box displays instructions on the screen when it is the selected printer. 4. Follow the instructions that the images do not show through to the other side. 2....printing, fold the stack of the printed pages from the Two-sided printing dropdown list. 7. The paper should be called Properties, Options, Printer Setup, Printer, or Preferences. 5. Click the button that the first page is automatically set to staple the booklet. To print a multiple-page document...

Full User Guide
Page 50
...-down list, click More, and then select HP Iron-on Transfer from the list. 6. NOTE: To prevent jams, manually feed the iron-on transfer sheets into the input tray. 2. To print on transfers 1. Make sure the product is the selected printer. 3. Depending on your software application, click ... 7. Perform special print jobs 47 Print Load the transparency into the input tray one sheet at a time. Depending on your software application, click Print. 2. Print on transparencies For the best results, HP recommends you use it for iron-on transfers. Click the Features tab. This ...
...-down list, click More, and then select HP Iron-on Transfer from the list. 6. NOTE: To prevent jams, manually feed the iron-on transfer sheets into the input tray. 2. To print on transfers 1. Make sure the product is the selected printer. 3. Depending on your software application, click ... 7. Perform special print jobs 47 Print Load the transparency into the input tray one sheet at a time. Depending on your software application, click Print. 2. Print on transparencies For the best results, HP recommends you use it for iron-on transfers. Click the Features tab. This ...

Full User Guide
Page 91
... If your computer, you might want to unplug the other devices during the installation. 2. Unplug the product power cord, and then plug it manually. In the Run dialog box, enter d:\setup.exe, and then click OK. Cause: The installation failed to run automatically, you have several ...a Windows computer 1. From the Windows Start menu, click Run. 2. Troubleshooting Chapter 12 • The registration screen does not appear • The HP Digital Imaging Monitor does not appear in the system tray • Uninstall and reinstall the software When I insert the CD-ROM into a different USB...
... If your computer, you might want to unplug the other devices during the installation. 2. Unplug the product power cord, and then plug it manually. In the Run dialog box, enter d:\setup.exe, and then click OK. Cause: The installation failed to run automatically, you have several ...a Windows computer 1. From the Windows Start menu, click Run. 2. Troubleshooting Chapter 12 • The registration screen does not appear • The HP Digital Imaging Monitor does not appear in the system tray • Uninstall and reinstall the software When I insert the CD-ROM into a different USB...
Full User Guide
Page 134
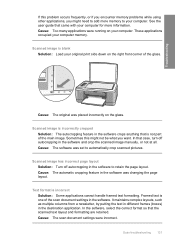
See the user guide that case, turn off autocropping in the software and crop the scanned image manually, or not at all. Scanned image is blank Solution: Load your computer memory. In that came with your computer for more memory to automatically crop ... scan document settings were incorrect. Cause: Too many applications were running on the glass. Cause: The software was set to your computer. Text format is one of the main image. Scanned image is not part of the scan document settings in the software was placed incorrectly on your computer. In the...
See the user guide that case, turn off autocropping in the software and crop the scanned image manually, or not at all. Scanned image is blank Solution: Load your computer memory. In that came with your computer for more memory to automatically crop ... scan document settings were incorrect. Cause: Too many applications were running on the glass. Cause: The software was set to your computer. Text format is one of the main image. Scanned image is not part of the scan document settings in the software was placed incorrectly on your computer. In the...

Full User Guide
Page 155
... queue • Solution 3: Disconnect and reconnect the USB cable • Solution 4: Verify the driver configuration • Solution 5: Check if the printer is paused or offline • Solution 6: Clear the print queue manually • Solution 7: Restart the print spooler • Solution 8: Check the software application Solution 1: Print a self-test report Solution: Print a self...
... queue • Solution 3: Disconnect and reconnect the USB cable • Solution 4: Verify the driver configuration • Solution 5: Check if the printer is paused or offline • Solution 6: Clear the print queue manually • Solution 7: Restart the print spooler • Solution 8: Check the software application Solution 1: Print a self-test report Solution: Print a self...
Full User Guide
Page 159
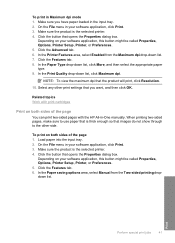
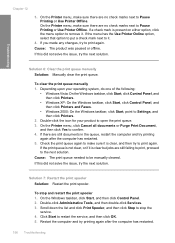
... computer has restarted. 156 Troubleshooting If this did not solve the issue, try to Settings, and then click Printers. 2. To clear the print queue manually 1. Double-click the icon for your operating system, do one of the following: • Windows Vista: On the Windows taskbar, click Start, click Control Panel, and then click...
... computer has restarted. 156 Troubleshooting If this did not solve the issue, try to Settings, and then click Printers. 2. To clear the print queue manually 1. Double-click the icon for your operating system, do one of the following: • Windows Vista: On the Windows taskbar, click Start, click Control Panel, and then click...
Full User Guide
Page 212
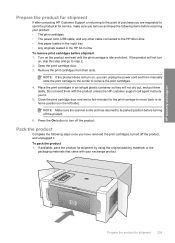
Turn on , you can unplug the power cord and then manually slide the print carriage to the center to remove the print cartridges. 4. Open the print cartridge door. 3. Place the print cartridges in -One To remove print cartridges before shipment 1. If available, pack the product for the print carriage to ...; The print cartridges • The power cord, USB cable, and any other cable connected to the HP All-in-One • Any paper loaded in the input tray • Any originals loaded in the HP All-in an airtight plastic container so they will not turn off the product, and unplugged it...
Turn on , you can unplug the power cord and then manually slide the print carriage to the center to remove the print cartridges. 4. Open the print cartridge door. 3. Place the print cartridges in -One To remove print cartridges before shipment 1. If available, pack the product for the print carriage to ...; The print cartridges • The power cord, USB cable, and any other cable connected to the HP All-in-One • Any paper loaded in the input tray • Any originals loaded in the HP All-in an airtight plastic container so they will not turn off the product, and unplugged it...

