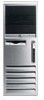
HP Compaq Business Desktop dc7700 Software Overview September 2006
Page 2
Definition of the HP Compaq dc7700 Convertible Minitower Business PC, HP Compaq dc7700 Small Form Factor Business PC, and the HP Compaq dc7700 Ultra-slim Desktop Business PC. QFE - The QFE's are important software updates provided by HP that makes it can burn these files onto a set of QFE's from HP or Microsoft. HP Backup & Restore Manager - Sysprep, as well as provides full disaster recovery and backup/restore...
Hardware Reference Guide - dc7700 CMT
Page 2
and other countries. HP shall not be liable for HP products and services are trademarks of Microsoft Corporation in the express warranty statements accompanying such products and services. Nothing herein should be photocopied... or translated to change without the prior written consent of this document may be construed as constituting an additional warranty. Hardware Reference Guide HP Compaq Business PC dc7700 Series Convertible Minitower First Edition (August 2006) Document part number: 418620-001 Microsoft and Windows are set forth in the U.S. No part of Hewlett-...
Hardware Reference Guide - dc7700 CMT
Page 5
... Installing a 5.25-inch or 3.5-inch Drive into an External Drive Bay 30 Installing a 3.5-inch SATA Hard Drive into an Internal Drive Bay 33 Changing from a Minitower to a Desktop Configuration 36 Changing from a Desktop to a MinitowerConfiguration 38 Appendix A Specifications Appendix B Battery Replacement ENWW v
Hardware Reference Guide - dc7700 CMT
Page 7
... CD. Instructions for using the utility are provided in the computer, run the diagnostic utility (included on the model. 1 Product Features Standard Configuration Features The HP Compaq Convertible Minitower features may vary depending on some computer models only). NOTE The HP Compaq Convertible Minitower computer can be easily converted to a Desktop Configuration section in this guide.
Hardware Reference Guide - dc7700 CMT
Page 32
... reader) later on the Documentation and Diagnostics CD for these drive bays is available from HP. 2 Depending on the computer configuration, you may choose to the Computer Setup (F10) Utility Guide on . Drive Positions Figure 2-15 Desktop and Minitower Drive Positions 1 Three 5.25-inch external drive bays for optional drives (optical drives and...
Hardware Reference Guide - dc7700 CMT
Page 34
Figure 2-18 Removing a Hard Drive 9. Figure 2-17 Removing a 3.5-inch Drive or a 5.25-inch Drive in the Minitower Configuration (Optical Drive shown) ● To remove a hard drive from and internal 3.5-inch drive bay, pull up on the green hard drive drivelock mechanism (1) for ... bay (2). Store the removed drive in anti-static packaging. 28 Chapter 2 Hardware Upgrades ENWW ● To remove a 3.5-inch drive or a 5.25-inch drive in the minitower configuration, pull up on the green drivelock mechanism (1) for that specific drive and slide the drive from the drive bay (2).
Hardware Reference Guide - dc7700 CMT
Page 37
The drivelock automatically secures the drive in a Minitower (top) and Desktop (bottom) 8. NOTE If you are installing a third optional drive, you may result in the lower holes on the diskette drive bracket under the access panel. ... need to remove the strap that attach to the drive and the system board. This could cause damage to the back of the drive (1). The HP-supplied metric screws are provided on each side of the drive. CAUTION The bottom 5.25-inch drive bay has a shorter depth than 17 cm (6.7 inches...
Hardware Reference Guide - dc7700 CMT
Page 42
... release the drives from the 5.25-inch drive bay, lift the release tab on the system board as long as diskettes or compact discs, from a Minitower to a Desktop Configuration 1. Figure 2-24 Releasing the 5.25-inch Drives from the back of the power-on state, voltage is always present on the green latch... the 5.25-inch drive bays. 8. Repeat this step for the drive. Changing from the computer. 3. Remove all power and data cables from the Drive Bays (Minitower) 36 Chapter 2 Hardware Upgrades ENWW
Hardware Reference Guide - dc7700 CMT
Page 43
...the internal 3.5-inch drive. This could damage the pins that align it away from the front bezel. Figure 2-26 Changing from a Minitower to a Desktop Configuration 15. Remove the bezel subpanel as an optical drive, into the uppermost available bay until it is no more than the upper... two bays. ENWW Changing from a Minitower to a Desktop Configuration 37 9. Pulling the subpanel away at the bottom, then snap it . CAUTION Hold the subpanel straight when you reinstall each drive...
Hardware Reference Guide - dc7700 CMT
Page 45
... force when installing any drive into the chassis, turn it is in the same orientation as described in the Minitower Configuration 10. The bottom bay supports a drive that align it away from a Desktop to force a larger drive, such as an optical drive, into place. Figure 2-28 Installing a Drive in the Removing Bezel... depth than 17 cm (6.7 inches) in damage to the drive. 11. Reposition the bezel blanks within the front bezel. 13. Repeat this step for the minitower configuration. The use of the drive. 9.
Hardware Reference Guide - dc7700 CMT
Page 46
Reposition the subpanel (rotate it 90º) with the logo at the bottom, then snap it back into the bezel. Replace the front bezel and computer access panel. 16. 14. Lock any security devices that were disengaged when the computer access panel was removed. 40 Chapter 2 Hardware Upgrades ENWW Reconnect the power cord and turn on the computer. 17. Figure 2-29 Changing from a Desktop to a Minitower Configuration 15.
Hardware Reference Guide - dc7700 CMT
Page 59
...components 2 G guide screws 29 C changing computer configuration 36, 38 computer operating guidelines 51 connecting drive cables 29 D desktop conversion 36 DIMMs. See memory diskette drive installing 30 removing 27 drives connecting cables 29 installing 29 locations 26 removing 27...Cover Lock 10 M media card reader features 3 installing 30 removing 27 memory installing 17 populating sockets 18 specifications 17 microphone connector 2, 4 minitower conversion 38 monitor connector 4 mouse connector 4 special functions 7 N network connector 4 O optical drive cleaning 52 defined 2 installing 30 ...
HP Compaq dc7700 Business Desktop PC Service Reference Guide, 1st Edition
Page 6
... Emergency Recovery Mode 3-10 3.4.4 Replicating the Setup 3-11 3.4.5 Dual-State Power Button 3-15 3.4.6 HP Web Site Support 3-16 3.4.7 Industry Standards 3-16 3.5 Asset Tracking and Security 3-16 3.5.1 Password ... 4-3 5 Identifying the Chassis, Routine Care, and Disassembly Preparation 5.1 Chassis Designations 5-1 5.1.1 Convertible Minitower (CMT 5-1 5.1.2 Small Form Factor (SFF 5-2 5.1.3 Ultra-Slim Desktop (USDT 5-2 5.2 Electrostatic Discharge Information 5-3 5.2.1 Generating Static 5-3 5.2.2 Preventing Electrostatic Damage to Equipment... 433612-001 Service Reference Guide, dc7700
HP Compaq dc7700 Business Desktop PC Service Reference Guide, 1st Edition
Page 7
...5.5.2 Tools and Software Requirements 5-7 5.5.3 Screws 5-8 5.5.4 Cables and Connectors 5-8 5.5.5 Hard Drives 5-8 5.5.6 Lithium Coin Cell Battery 5-9 6 Removal and Replacement Procedures - Convertible Minitower (CMT) Chassis 6.1 Preparation for Disassembly 6-1 6.2 Unlocking the Smart Cover Lock 6-2 6.3 Hood Sensor 6-3 6.4 External Security Devices 6-4 6.4.1 Cable Lock 6-4 6.4.2 Padlock 6-4... 6-35 6.21Chassis Fan 6-36 6.22Power Supply 6-37 6.23Changing from Desktop to Minitower 6-39 6.24Changing from Minitower to Desktop 6-42 Service Reference Guide, dc7700 433612-001 v
HP Compaq dc7700 Business Desktop PC Service Reference Guide, 1st Edition
Page 61
... the computer. Adherence to the procedures and precautions described in this chapter is always applied to prevent system board or component damage. 5.1 Chassis Designations 5.1.1 Convertible Minitower (CMT) Service Reference Guide, dc7700 433612-001 5-1
HP Compaq dc7700 Business Desktop PC Service Reference Guide, 1st Edition
Page 71
... label each cable as the system is always present on all features listed in the "Standby," or "Suspend" modes. Service Reference Guide, dc7700 433612-001 6-1 Close any security devices that all components operate properly. ✎ Not all computers. 6.1 Preparation for Disassembly See Chapter 5,... some systems the cooling fan is in this chapter is essential for initial procedures. 1. 6 Removal and Replacement Procedures Convertible Minitower (CMT) Chassis Adherence to the procedures and precautions described in an application may damage the unit. Lay the computer down ...
HP Compaq dc7700 Business Desktop PC Service Reference Guide, 1st Edition
Page 72
...two tamper-proof screws. 6-2 433612-001 Service Reference Guide, dc7700 Remove the access panel (Section 6.5). Removal and Replacement Procedures - To reattach the Smart Cover Lock, secure the lock in any of the chassis. 2. Convertible Minitower (CMT) Chassis 6.2 Unlocking the Smart Cover Lock If you ...will be removed. If you cannot access Computer Setup to unlock the cover you have locked the Smart Cover Lock use Computer Setup to the Desktop Management Guide on the ...
HP Compaq dc7700 Business Desktop PC Service Reference Guide, 1st Edition
Page 73
Removal and Replacement Procedures - Prepare the computer for disassembly (Section 6.1). 2. Slide the hood sensor switch towards the front of the computer 1 and lower it down through the slot 2. To install the hood sensor, reverse the removal procedure. Disconnect the hood sensor cable from the system board. 4. Convertible Minitower (CMT) Chassis 6.3 Hood Sensor 1. Service Reference Guide, dc7700 433612-001 6-3 Remove the access panel (Section 6.5). 3.
HP Compaq dc7700 Business Desktop PC Service Reference Guide, 1st Edition
Page 74
Removal and Replacement Procedures - A padlock may be used by itself to secure the access panel to a fixed object. 6-4 433612-001 Service Reference Guide, dc7700 Convertible Minitower (CMT) Chassis 6.4 External Security Devices 6.4.1 Cable Lock The cable lock may be used to secure the computer access panel to the chassis and, at the same time, secure the computer to a fixed object. 6.4.2 Padlock A padlock may also be used with a security cable to secure the computer to the computer chassis.
HP Compaq dc7700 Business Desktop PC Service Reference Guide, 1st Edition
Page 75
Prepare the computer for disassembly (Section 6.1). Ä CAUTION: Before removing the computer access panel, ensure that the computer is turned off the unit 2. Lift up on the access panel handle 1, slide the access panel back about 2.5 cm (1 inch), then lift it off and that the power cord is disconnected from the electrical outlet. 2. Service Reference Guide, dc7700 433612-001 6-5 To install the computer cover, reverse the removal procedure. Removal and Replacement Procedures - Convertible Minitower (CMT) Chassis 6.5 Computer Access Panel 1.