
End User License Agreement
Page 2
... DATA. UPGRADES. After upgrading, you fail to the ADDITIONAL SOFTWARE. a. The initial user of the Software Product may not be used for restoring the hard disk of the Software Product, your license is effective unless terminated or rejected. PROPRIETARY RIGHTS. This EULA will prevail. 4. TRANSFER... or Software Product except as expressly provided in such recovery solution shall be licensed for the original Software Product identified by HP unless HP provides other form, may only be an indirect transfer, such as other terms will also terminate upon conditions set forth ...
... DATA. UPGRADES. After upgrading, you fail to the ADDITIONAL SOFTWARE. a. The initial user of the Software Product may not be used for restoring the hard disk of the Software Product, your license is effective unless terminated or rejected. PROPRIETARY RIGHTS. This EULA will prevail. 4. TRANSFER... or Software Product except as expressly provided in such recovery solution shall be licensed for the original Software Product identified by HP unless HP provides other form, may only be an indirect transfer, such as other terms will also terminate upon conditions set forth ...
2008 HP business notebook PC F10 Setup overview
Page 4
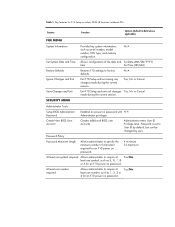
...Exit F10 Setup and save all changes Yes, No or Cancel made during the current session. Set Time (HH:MM) Restores F10 settings to require at Yes/No least one symbol required Allows administrator to factory defaults. Password Policy Password Minimum Length ...Administrator Tools Setup BIOS Administrator Password Establish an power on select 2008 HP business notebook PCs Feature Function Options (Default in Bold where applicable) FILE MENU System Information Set System Date and Time Restore Defaults Ignore Changes and Exit Save Changes and Exit SECURITY MENU Provides ...
...Exit F10 Setup and save all changes Yes, No or Cancel made during the current session. Set Time (HH:MM) Restores F10 settings to require at Yes/No least one symbol required Allows administrator to factory defaults. Password Policy Password Minimum Length ...Administrator Tools Setup BIOS Administrator Password Establish an power on select 2008 HP business notebook PCs Feature Function Options (Default in Bold where applicable) FILE MENU System Information Set System Date and Time Restore Defaults Ignore Changes and Exit Save Changes and Exit SECURITY MENU Provides ...

HP Business Notebook Computer EFI Guidelines - White paper
Page 1
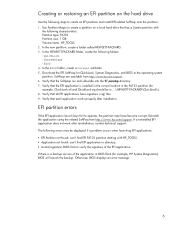
HP Business Notebook Computer EFI Guidelines Subtitle Introduction...2 EFI applications and tools ...2 Applications accessible during startup 2 BIOS Recovery...3 Launching EFI applications ...3 EFI and custom imaging ...3 EFI architecture...4 Volume name ...4 Directories and descriptions ...4 How BIOS launches EFI applications...4 For HP-signed EFI applications ...4 Non-HP...-signed EFI applications ...5 User launch and boot options ...5 Additional BIOS policies for the EFI environment 5 Creating or restoring an EFI partition on...
HP Business Notebook Computer EFI Guidelines Subtitle Introduction...2 EFI applications and tools ...2 Applications accessible during startup 2 BIOS Recovery...3 Launching EFI applications ...3 EFI and custom imaging ...3 EFI architecture...4 Volume name ...4 Directories and descriptions ...4 How BIOS launches EFI applications...4 For HP-signed EFI applications ...4 Non-HP...-signed EFI applications ...5 User launch and boot options ...5 Additional BIOS policies for the EFI environment 5 Creating or restoring an EFI partition on...
HP Business Notebook Computer EFI Guidelines - White paper
Page 6
... files. 9. In the HEWLETT-PACKARD folder, create the following folders: - Reinstall the application using the related SoftPaq from http://www.hp.com/support. 6. If there is installed in the correct location in the FAT32 partition (for example, QuickLook.efi and QuickLook.sig ... problem occurs when launching EFI applications: ƒ EFI Partition not found : can 't find EFI application in ...\HEWLETT-PACKARD\QuickLook\). 8. Creating or restoring an EFI partition on a local hard drive that has a System partition with HP_TOOLS. ƒ Application not found : can 't find EFI FAT32...
... files. 9. In the HEWLETT-PACKARD folder, create the following folders: - Reinstall the application using the related SoftPaq from http://www.hp.com/support. 6. If there is installed in the correct location in the FAT32 partition (for example, QuickLook.efi and QuickLook.sig ... problem occurs when launching EFI applications: ƒ EFI Partition not found : can 't find EFI application in ...\HEWLETT-PACKARD\QuickLook\). 8. Creating or restoring an EFI partition on a local hard drive that has a System partition with HP_TOOLS. ƒ Application not found : can 't find EFI FAT32...
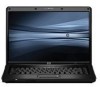
HP Business Notebook PC - Getting Started Guide - Enhanced for Accessibility
Page 3
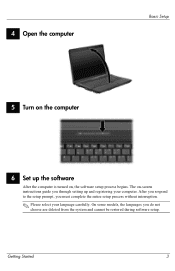
The on-screen instructions guide you do not choose are deleted from the system and cannot be restored during software setup. On some models, the languages you through setting up the software After the computer is turned on, the software setup process begins. Getting Started 3 4 Open the computer Basic Setup 5 Turn on the computer 6 Set up and registering your language carefully. After you respond to the setup prompt, you must complete the entire setup process without interruption. ✎ Please select your computer.
The on-screen instructions guide you do not choose are deleted from the system and cannot be restored during software setup. On some models, the languages you through setting up the software After the computer is turned on, the software setup process begins. Getting Started 3 4 Open the computer Basic Setup 5 Turn on the computer 6 Set up and registering your language carefully. After you respond to the setup prompt, you must complete the entire setup process without interruption. ✎ Please select your computer.
HP Business Notebook PC - Getting Started Guide - Enhanced for Accessibility
Page 5
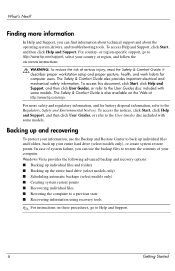
...and follow the on-screen instructions. Å WARNING: To reduce the risk of system failure, you can use the Backup and Restore Center to the User Guides disc included with some models. It describes proper workstation setup and proper posture, health, and work habits ... ■ Recovering individual files ■ Restoring the computer to a previous state ■ Recovering information using recovery tools ✎ For instructions on the Web at http://www.hp.com/ergo. For country- Finding more safety and regulatory information, and for computer users. The Safety & Comfort Guide...
...and follow the on-screen instructions. Å WARNING: To reduce the risk of system failure, you can use the Backup and Restore Center to the User Guides disc included with some models. It describes proper workstation setup and proper posture, health, and work habits ... ■ Recovering individual files ■ Restoring the computer to a previous state ■ Recovering information using recovery tools ✎ For instructions on the Web at http://www.hp.com/ergo. For country- Finding more safety and regulatory information, and for computer users. The Safety & Comfort Guide...
HP Business Notebook PC - Getting Started Guide - Enhanced for Accessibility
Page 6
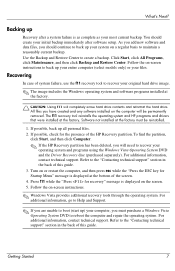
... backup. For additional information, contact technical support. Press f11 while the "Press for the presence of the HP Recovery partition. Use the Backup and Restore Center to back up your entire computer (select models only) or your system on the computer will completely..., contact technical support. Recovering In case of this guide. Click Start, click All Programs, click Maintenance, and then click Backup and Restore Center. If possible, back up Recovery after a system failure is displayed on -screen instructions. ✎ Windows Vista provides additional recovery tools...
... backup. For additional information, contact technical support. Press f11 while the "Press for the presence of the HP Recovery partition. Use the Backup and Restore Center to back up your entire computer (select models only) or your system on the computer will completely..., contact technical support. Recovering In case of this guide. Click Start, click All Programs, click Maintenance, and then click Backup and Restore Center. If possible, back up Recovery after a system failure is displayed on -screen instructions. ✎ Windows Vista provides additional recovery tools...

Computer Setup - Windows Vista and Windows XP
Page 3
Table of contents 1 Starting Computer Setup 2 Using Computer Setup Navigating and selecting in Computer Setup 3 Restoring factory settings in Computer Setup 4 3 Computer Setup menus File menu ...6 Security menu ...7 Diagnostics menu ...9 System Configuration menu ...10 Index ...13 iii
Table of contents 1 Starting Computer Setup 2 Using Computer Setup Navigating and selecting in Computer Setup 3 Restoring factory settings in Computer Setup 4 3 Computer Setup menus File menu ...6 Security menu ...7 Diagnostics menu ...9 System Configuration menu ...10 Index ...13 iii
Computer Setup - Windows Vista and Windows XP
Page 8
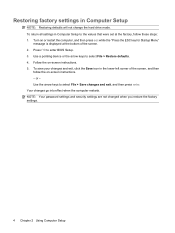
... Your changes go into effect when the computer restarts. To save your changes and exit, click the Save icon in Computer Setup to select File > Restore defaults. 4. Use the arrow keys to enter BIOS Setup. 3. Press f10 to select File > Save changes and exit, and then press enter. ... settings in the lower-left corner of the screen. 2. NOTE: Your password settings and security settings are not changed when you restore the factory settings. 4 Chapter 2 Using Computer Setup Restoring factory settings in Computer Setup NOTE: Restoring defaults will not change the hard drive mode.
... Your changes go into effect when the computer restarts. To save your changes and exit, click the Save icon in Computer Setup to select File > Restore defaults. 4. Use the arrow keys to enter BIOS Setup. 3. Press f10 to select File > Save changes and exit, and then press enter. ... settings in the lower-left corner of the screen. 2. NOTE: Your password settings and security settings are not changed when you restore the factory settings. 4 Chapter 2 Using Computer Setup Restoring factory settings in Computer Setup NOTE: Restoring defaults will not change the hard drive mode.

Computer Setup - Windows Vista and Windows XP
Page 10
...computer. Then exit and restart the computer. Then exit and restart the computer. File menu Select System Information Set System Date and Time Restore defaults Ignore changes and exit Save changes and exit To do this ● View identification information for the computer and the batteries in Computer... Setup with the original factory settings. (Hard drive mode, password settings, and security settings are not changed when you restore the factory settings.) Cancel any changes entered during the current session. Save any changes entered during the current session.
...computer. Then exit and restart the computer. Then exit and restart the computer. File menu Select System Information Set System Date and Time Restore defaults Ignore changes and exit Save changes and exit To do this ● View identification information for the computer and the batteries in Computer... Setup with the original factory settings. (Hard drive mode, password settings, and security settings are not changed when you restore the factory settings.) Cancel any changes entered during the current session. Save any changes entered during the current session.

Computer Setup - Windows Vista and Windows XP
Page 16
... the advanced port replicator. ● Enable/disable the 1394 port. Change, view, or hide security levels for all are disabled by default) Set Security Level Restore Security Defaults To do this ● Enable/disable the parallel port. ● Enable/disable the flash media reader. ● Enable/disable the USB port. CAUTION... Terminal Emulation Mode ● Enable/disable Firmware Progress Event Support. ● Enable/disable Include TYPE-131 in SMBIOS. Select AMT Options (all BIOS menu items. Restore the default security settings. 12 Chapter 3 Computer Setup menus
... the advanced port replicator. ● Enable/disable the 1394 port. Change, view, or hide security levels for all are disabled by default) Set Security Level Restore Security Defaults To do this ● Enable/disable the parallel port. ● Enable/disable the flash media reader. ● Enable/disable the USB port. CAUTION... Terminal Emulation Mode ● Enable/disable Firmware Progress Event Support. ● Enable/disable Include TYPE-131 in SMBIOS. Select AMT Options (all BIOS menu items. Restore the default security settings. 12 Chapter 3 Computer Setup menus
Computer Setup - Windows Vista and Windows XP
Page 17
...wireless button 11 WWAN device radio 11 built-in device options 11 built-in-device Notebook Multibay 11 C Computer Setup accessing 1 Diagnostics menu 9 File menu 6 navigating and selecting 3 restoring factory settings 4 Security menu 7 System Configuration menu 10 using 2 D device ...configurations 10 Diagnostics menu 9 Disk Sanitizer 7 DriveLock password 7 DriveLock, automatic 7 drives, boot order 10 Dual Core CPU 11 E Execution Disable 10 F File menu 6 H hard disk test 9 HP QuickLook 2 11 HP SpareKey...
...wireless button 11 WWAN device radio 11 built-in device options 11 built-in-device Notebook Multibay 11 C Computer Setup accessing 1 Diagnostics menu 9 File menu 6 navigating and selecting 3 restoring factory settings 4 Security menu 7 System Configuration menu 10 using 2 D device ...configurations 10 Diagnostics menu 9 Disk Sanitizer 7 DriveLock password 7 DriveLock, automatic 7 drives, boot order 10 Dual Core CPU 11 E Execution Disable 10 F File menu 6 H hard disk test 9 HP QuickLook 2 11 HP SpareKey...

Computer Setup - Windows Vista and Windows XP
Page 18
TPM embedded Security 7 user management 7 set security level 12 setup utility accessing 1 Diagnostics menu 9 File menu 6 navigating and selecting 3 restoring factory settings 4 Security menu 7 System Configuration menu 10 using 2 start-up test 9 System Configuration menu 10 system date and time 6 System Diagnostics menu 9 system fan 10 system IDs 8 system information 6 T Trusted Platform Module Embedded Security 7 TXT (Intel® Trusted Execution Technology) 11 U Unified Extensible Firmware Interface (UEFI) mode 11 USB legacy support 1, 10 V Virtualization Technology 11 14 Index
TPM embedded Security 7 user management 7 set security level 12 setup utility accessing 1 Diagnostics menu 9 File menu 6 navigating and selecting 3 restoring factory settings 4 Security menu 7 System Configuration menu 10 using 2 start-up test 9 System Configuration menu 10 system date and time 6 System Diagnostics menu 9 system fan 10 system IDs 8 system information 6 T Trusted Platform Module Embedded Security 7 TXT (Intel® Trusted Execution Technology) 11 U Unified Extensible Firmware Interface (UEFI) mode 11 USB legacy support 1, 10 V Virtualization Technology 11 14 Index

Computer Setup - Windows Vista, Windows XP, and Windows 7
Page 3
Table of contents 1 Starting Computer Setup 2 Using Computer Setup Navigating and selecting in Computer Setup 3 Restoring factory settings in Computer Setup 4 3 Computer Setup menus File menu ...6 Security menu ...7 Diagnostics menu ...8 System Configuration menu ...9 Index ...12 iii
Table of contents 1 Starting Computer Setup 2 Using Computer Setup Navigating and selecting in Computer Setup 3 Restoring factory settings in Computer Setup 4 3 Computer Setup menus File menu ...6 Security menu ...7 Diagnostics menu ...8 System Configuration menu ...9 Index ...12 iii

Computer Setup - Windows Vista, Windows XP, and Windows 7
Page 8
...arrow keys to select File > Save changes and exit, and then press enter. NOTE: Your password settings and security settings are not changed when you restore the factory settings. 4 Chapter 2 Using Computer Setup To return all settings in Computer Setup to enter BIOS Setup. 3. Follow the on -screen instructions.... - To save your changes and exit, click the Save icon in Computer Setup NOTE: Restoring defaults will not change the hard drive mode. Use the arrow keys to select File > Restore defaults. 4. Press f10 to the values that were set at the bottom of the screen, and...
...arrow keys to select File > Save changes and exit, and then press enter. NOTE: Your password settings and security settings are not changed when you restore the factory settings. 4 Chapter 2 Using Computer Setup To return all settings in Computer Setup to enter BIOS Setup. 3. Follow the on -screen instructions.... - To save your changes and exit, click the Save icon in Computer Setup NOTE: Restoring defaults will not change the hard drive mode. Use the arrow keys to select File > Restore defaults. 4. Press f10 to the values that were set at the bottom of the screen, and...

Computer Setup - Windows Vista, Windows XP, and Windows 7
Page 10
...batteries in Computer Setup with the original factory settings. (Hard drive mode, password settings, and security settings are not changed when you restore the factory settings.) Cancel any changes entered during the current session. Your changes go into effect when the computer restarts. 6 Chapter ... restart the computer. Save any changes entered during the current session. File menu Select System Information Set System Date and Time Restore defaults Ignore changes and exit Save changes and exit To do this ● View identification information for the processor, cache and...
...batteries in Computer Setup with the original factory settings. (Hard drive mode, password settings, and security settings are not changed when you restore the factory settings.) Cancel any changes entered during the current session. Your changes go into effect when the computer restarts. 6 Chapter ... restart the computer. Save any changes entered during the current session. File menu Select System Information Set System Date and Time Restore defaults Ignore changes and exit Save changes and exit To do this ● View identification information for the processor, cache and...

Computer Setup - Windows Vista, Windows XP, and Windows 7
Page 15
... Progress Event Support. ● Enable/disable include TYPE-131 in SMBIOS. Change, view, or hide security levels for all BIOS menu items. Restore the default security settings. NOTE: All AMT options are disabled by default. ● Enable/disable Firmware Verbosity. ● Enable/disable AMT Setup...9679; Enable/disable Unconfigure AMT on the advanced port replicator. ● Enable/disable the 1394 port. Select AMT Options Set Security Level Restore Security Defaults To do this ● Enable/disable the parallel port. ● Enable/disable the flash media reader. ● Enable/disable ...
... Progress Event Support. ● Enable/disable include TYPE-131 in SMBIOS. Change, view, or hide security levels for all BIOS menu items. Restore the default security settings. NOTE: All AMT options are disabled by default. ● Enable/disable Firmware Verbosity. ● Enable/disable AMT Setup...9679; Enable/disable Unconfigure AMT on the advanced port replicator. ● Enable/disable the 1394 port. Select AMT Options Set Security Level Restore Security Defaults To do this ● Enable/disable the parallel port. ● Enable/disable the flash media reader. ● Enable/disable ...
Computer Setup - Windows Vista, Windows XP, and Windows 7
Page 16
... camera 10 LAN/WLAN switching 10 modem 10 Network Interface Controller (LAN) 10 Notebook Multibay 10 Wake on LAN 10 wireless button 10 WWAN device radio 10 built-...restore the factory settings 6 run-in test 8 S SATA (Serial Advanced Technology Attachment) devices AHCI (Advanced Host Controller Interface) 9 IDE (Integrated Drive Electronics) 9 Secondary Battery Fast Charge 10 Security menu allow reset of HP ProtectTools security keys 7 always prompt for HP SpareKey enrollment 7 Automatic DriveLock 7 change password 7 Disk Sanitizer 7 DriveLock 7 fingerprint reader reset 7 HP Sparekey 7 HP...
... camera 10 LAN/WLAN switching 10 modem 10 Network Interface Controller (LAN) 10 Notebook Multibay 10 Wake on LAN 10 wireless button 10 WWAN device radio 10 built-...restore the factory settings 6 run-in test 8 S SATA (Serial Advanced Technology Attachment) devices AHCI (Advanced Host Controller Interface) 9 IDE (Integrated Drive Electronics) 9 Secondary Battery Fast Charge 10 Security menu allow reset of HP ProtectTools security keys 7 always prompt for HP SpareKey enrollment 7 Automatic DriveLock 7 change password 7 Disk Sanitizer 7 DriveLock 7 fingerprint reader reset 7 HP Sparekey 7 HP...
Computer Setup - Windows Vista, Windows XP, and Windows 7
Page 17
Diagnostics menu 8 File menu 6 navigating and selecting 3 restoring factory settings 4 Security menu 7 System Configuration menu 9 using 2 start-up test 8 System Configuration menu 9 system date and time 6 System Diagnostics menu 8 system fan 9 system IDs 7 system information 6 T TPM Embedded Security 7 TXT (Intel® Trusted Execution Technology) 10 U Unified Extensible Firmware Interface (UEFI) mode 10 USB legacy support 1, 9 V Virtualization Technology 10 Index 13
Diagnostics menu 8 File menu 6 navigating and selecting 3 restoring factory settings 4 Security menu 7 System Configuration menu 9 using 2 start-up test 8 System Configuration menu 9 system date and time 6 System Diagnostics menu 8 system fan 9 system IDs 7 system information 6 T TPM Embedded Security 7 TXT (Intel® Trusted Execution Technology) 10 U Unified Extensible Firmware Interface (UEFI) mode 10 USB legacy support 1, 9 V Virtualization Technology 10 Index 13

HP ProtectTools - Windows Vista and Windows XP
Page 3
... or external locations 6 Creating strong password policies 7 Additional security elements ...8 Assigning security roles ...8 Managing HP ProtectTools passwords 8 Creating a secure password 10 Backing up and restoring HP ProtectTools credentials 10 Backing up credentials and settings 10 2 Credential Manager for HP ProtectTools Setup procedures ...11 Logging on to Credential Manager 11 Using the Credential Manager Logon...
... or external locations 6 Creating strong password policies 7 Additional security elements ...8 Assigning security roles ...8 Managing HP ProtectTools passwords 8 Creating a secure password 10 Backing up and restoring HP ProtectTools credentials 10 Backing up credentials and settings 10 2 Credential Manager for HP ProtectTools Setup procedures ...11 Logging on to Credential Manager 11 Using the Credential Manager Logon...


