
HP USB Digital Drive
Page 9
Disconnecting the Digital Drive ✎ Do not attempt to Remove Hardware" message appears on your screen. 3. A dialog box displays a list of connected devices. 2. Gently unplug the Digital Drive from the USB port. ✎ If the USB connector cable is flashing. 1. Select the "Safely Remove Hardware" icon on your taskbar. Select the Digital Drive and wait until the "Safe to remove the Digital Drive when the status light on the Digital Drive is in the extended position, return it on its track for safe storage. 8 User Guide
Disconnecting the Digital Drive ✎ Do not attempt to Remove Hardware" message appears on your screen. 3. A dialog box displays a list of connected devices. 2. Gently unplug the Digital Drive from the USB port. ✎ If the USB connector cable is flashing. 1. Select the "Safely Remove Hardware" icon on your taskbar. Select the Digital Drive and wait until the "Safe to remove the Digital Drive when the status light on the Digital Drive is in the extended position, return it on its track for safe storage. 8 User Guide
Bluetooth Wireless Technology Basics
Page 6
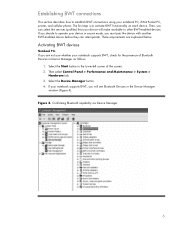
...These requirements are not sure whether your device will see Bluetooth Devices in the Device Manager window (Figure 4). Activating BWT devices Notebook PCs If you will make available to other BWT-enabled devices. If you decide to operate your device in Device Manager as...must pair the device with another BWT-enabled device before they can select the services (profiles) that your notebook supports BWT, check for the presence of the screen. 2. Confirming Bluetooth capability via Device Manager 6 Establishing BWT connections This section describes how to activate BWT functionality...
...These requirements are not sure whether your device will see Bluetooth Devices in the Device Manager window (Figure 4). Activating BWT devices Notebook PCs If you will make available to other BWT-enabled devices. If you decide to operate your device in Device Manager as...must pair the device with another BWT-enabled device before they can select the services (profiles) that your notebook supports BWT, check for the presence of the screen. 2. Confirming Bluetooth capability via Device Manager 6 Establishing BWT connections This section describes how to activate BWT functionality...

Bluetooth Wireless Technology Basics
Page 7
...Places. 2. These steps are explained below. Install the BWT software The required BWT software comes preloaded on your notebook. Select the check box next to Bluetooth by hp to your BWT-enabled notebook PC: 1. Refer to enable the software for the first time, the Found New Hardware wizard opens. The ...on the wireless device for installation, and then select Next. 4. Right-click the My Bluetooth Places icon in the lower-right part of the screen. Set up the BWT software. The logo will appear in the Windows System Tray located in the Folders pane of the connection (Table 1). The...
...Places. 2. These steps are explained below. Install the BWT software The required BWT software comes preloaded on your notebook. Select the check box next to Bluetooth by hp to your BWT-enabled notebook PC: 1. Refer to enable the software for the first time, the Found New Hardware wizard opens. The ...on the wireless device for installation, and then select Next. 4. Right-click the My Bluetooth Places icon in the lower-right part of the screen. Set up the BWT software. The logo will appear in the Windows System Tray located in the Folders pane of the connection (Table 1). The...

Bluetooth Wireless Technology Basics
Page 8
... device to send images, text, business cards, and calendar notes. Refer to view product compatibility, visit http://www.hp.com/products/wireless/PAN/. To see the full line of HP BWT offerings and to the "Selecting... an iPAQ that is attached to another BWT-enabled device. Printers The HP 995c Deskjet printer and some of the BWT profiles built into HP notebook PCs, iPAQ Pocket PCs, and printers. Detailed instructions on a cell phone...are described in the lower right corner of the Today screen to activate BWT functionality, to create BWT connections, or to a BWT-enabled printer.
... device to send images, text, business cards, and calendar notes. Refer to view product compatibility, visit http://www.hp.com/products/wireless/PAN/. To see the full line of HP BWT offerings and to the "Selecting... an iPAQ that is attached to another BWT-enabled device. Printers The HP 995c Deskjet printer and some of the BWT profiles built into HP notebook PCs, iPAQ Pocket PCs, and printers. Detailed instructions on a cell phone...are described in the lower right corner of the Today screen to activate BWT functionality, to create BWT connections, or to a BWT-enabled printer.
Backup and Recovery - Windows XP and Windows Vista
Page 7
... the disc creation before you will need high-quality CD-R, DVD-R, or DVD+R media (purchased separately). Select Start > All Programs > HP Backup & Recovery > Backup & Recovery Manager. 2. Click Next. 3. Follow the on-screen instructions. 1 NOTE: Read-write discs, such as CD-RW and DVD±RW discs, are used to start up the...
... the disc creation before you will need high-quality CD-R, DVD-R, or DVD+R media (purchased separately). Select Start > All Programs > HP Backup & Recovery > Backup & Recovery Manager. 2. Click Next. 3. Follow the on-screen instructions. 1 NOTE: Read-write discs, such as CD-RW and DVD±RW discs, are used to start up the...
Backup and Recovery - Windows XP and Windows Vista
Page 10
... into a word-processing document: a. c. NOTE: Drivers, utilities, and applications installed by taking a screen shot of recovery discs using HP Backup & Recovery Manager. ● Create system recovery points using HP Backup & Recovery Manager. 4 Chapter 2 Backing up templates stored in their associated programs. ● ...Save customized settings in a window, toolbar, or menu bar by HP can be connected to reset your preferences. To copy the entire screen, press fn+prt sc. NOTE: Before you can perform backup and recovery procedures, the computer ...
... into a word-processing document: a. c. NOTE: Drivers, utilities, and applications installed by taking a screen shot of recovery discs using HP Backup & Recovery Manager. ● Create system recovery points using HP Backup & Recovery Manager. 4 Chapter 2 Backing up templates stored in their associated programs. ● ...Save customized settings in a window, toolbar, or menu bar by HP can be connected to reset your preferences. To copy the entire screen, press fn+prt sc. NOTE: Before you can perform backup and recovery procedures, the computer ...
Backup and Recovery - Windows XP and Windows Vista
Page 11
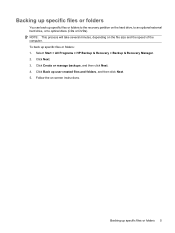
Click Next. 3. Click Back up specific files or folders 5 Select Start > All Programs > HP Backup & Recovery > Backup & Recovery Manager. 2. Click Create or manage backups, and then click Next. 4. Backing up user created files and folders, and then click Next. 5. ...Follow the on the file size and the speed of the computer. NOTE: This process will take several minutes, depending on -screen instructions. To back up specific files or folders to the recovery partition on the hard drive, to an optional external hard drive, or to optical...
Click Next. 3. Click Back up specific files or folders 5 Select Start > All Programs > HP Backup & Recovery > Backup & Recovery Manager. 2. Click Create or manage backups, and then click Next. 4. Backing up user created files and folders, and then click Next. 5. ...Follow the on the file size and the speed of the computer. NOTE: This process will take several minutes, depending on -screen instructions. To back up specific files or folders to the recovery partition on the hard drive, to an optional external hard drive, or to optical...
Backup and Recovery - Windows XP and Windows Vista
Page 12
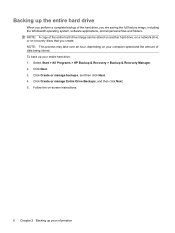
Select Start > All Programs > HP Backup & Recovery > Backup & Recovery Manager. 2. Click Create or manage Entire Drive Backups, and then click Next. 5. To back up your information Click Next. 3. NOTE: A copy ...: This process may take over an hour, depending on your entire hard drive: 1. Click Create or manage backups, and then click Next. 4. Follow the on-screen instructions. 6 Chapter 2 Backing up your computer speed and the amount of data being stored. Backing up the entire hard drive When you perform a complete backup...
Select Start > All Programs > HP Backup & Recovery > Backup & Recovery Manager. 2. Click Create or manage Entire Drive Backups, and then click Next. 5. To back up your information Click Next. 3. NOTE: A copy ...: This process may take over an hour, depending on your entire hard drive: 1. Click Create or manage backups, and then click Next. 4. Follow the on-screen instructions. 6 Chapter 2 Backing up your computer speed and the amount of data being stored. Backing up the entire hard drive When you perform a complete backup...

Backup and Recovery - Windows XP and Windows Vista
Page 13
...4. Click Create or manage Recovery Points, and then click Next. 5. Creating recovery points 7 Select Start > All Programs > HP Backup & Recovery > Backup & Recovery Manager. 2. This allows you to save a snapshot of your last backup, you are ...creating system recovery points. You can then recover back to that recovery point. HP recommends that you create recovery points at a specific point in time. Click Next. 3. Subsequent recovery points make...changes made after that time. Follow the on-screen instructions. To create a system recovery point: 1.
...4. Click Create or manage Recovery Points, and then click Next. 5. Creating recovery points 7 Select Start > All Programs > HP Backup & Recovery > Backup & Recovery Manager. 2. This allows you to save a snapshot of your last backup, you are ...creating system recovery points. You can then recover back to that recovery point. HP recommends that you create recovery points at a specific point in time. Click Next. 3. Subsequent recovery points make...changes made after that time. Follow the on-screen instructions. To create a system recovery point: 1.

Backup and Recovery - Windows XP and Windows Vista
Page 14
To schedule backups: 1. Select Start > All Programs > HP Backup & Recovery > HP Backup Scheduler. 2. Follow the on-screen instructions. 8 Chapter 2 Backing up your information Scheduling backups Use HP Backup Scheduler to an optional docking station (select models only). With this tool, you can schedule backups at specific intervals (daily, weekly, or monthly) or at specific events, such as at system restart or when you dock to schedule backups for the entire system, for recovery points, or for specific files and folders.
To schedule backups: 1. Select Start > All Programs > HP Backup & Recovery > HP Backup Scheduler. 2. Follow the on-screen instructions. 8 Chapter 2 Backing up your information Scheduling backups Use HP Backup Scheduler to an optional docking station (select models only). With this tool, you can schedule backups at specific intervals (daily, weekly, or monthly) or at specific events, such as at system restart or when you dock to schedule backups for the entire system, for recovery points, or for specific files and folders.

Backup and Recovery - Windows XP and Windows Vista
Page 16
Follow the on-screen instructions. 10 Chapter 3 Performing a recovery Performing a recovery from the recovery discs To perform a recovery from the recovery discs, follow these steps: 1. Insert the first recovery disc into the optical drive and restart the computer. 3. Back up all personal files. 2.
Follow the on-screen instructions. 10 Chapter 3 Performing a recovery Performing a recovery from the recovery discs To perform a recovery from the recovery discs, follow these steps: 1. Insert the first recovery disc into the optical drive and restart the computer. 3. Back up all personal files. 2.

Backup and Recovery - Windows XP and Windows Vista
Page 18
Select Start > All Programs > HP Backup & Recovery > Backup & Recovery Manager. 3. Click Perform a recovery, and then click Next. 5. Follow the on-screen instructions. 12 Chapter 3 Performing a recovery Back up all personal files. 2. Initiating a recovery in Windows To initiate a recovery in Windows, follow these steps: 1. Click Next. 4.
Select Start > All Programs > HP Backup & Recovery > Backup & Recovery Manager. 3. Click Perform a recovery, and then click Next. 5. Follow the on-screen instructions. 12 Chapter 3 Performing a recovery Back up all personal files. 2. Initiating a recovery in Windows To initiate a recovery in Windows, follow these steps: 1. Click Next. 4.

Backup and Recovery - Windows XP and Windows Vista
Page 19
Back up all personal files. 2. Restart the computer, and then press f8 before the Windows operating system loads. 3. Initiating a recovery from the hard drive recovery partition To initiate a recovery from the hard drive 13 Performing a recovery from the hard drive recovery partition, follow these steps: 1. Click a recovery option, and then click Next. 4. Follow the on-screen instructions.
Back up all personal files. 2. Restart the computer, and then press f8 before the Windows operating system loads. 3. Initiating a recovery from the hard drive recovery partition To initiate a recovery from the hard drive 13 Performing a recovery from the hard drive recovery partition, follow these steps: 1. Click a recovery option, and then click Next. 4. Follow the on-screen instructions.
Software Update - Windows Vista
Page 7
... BIOS updates. You can also access software updates by identifying the BIOS version currently installed on -screen instructions. Most software on the HP Web site is stored on the HP Web site. NOTE: The computer system BIOS is packaged in compressed files called SoftPaqs. NOTE:...contains information regarding installing and troubleshooting the file. (Readme.txt files included with the hardware devices, and provides for software updates from HP. To update the software: 1. Prepare for more information. 2. The BIOS initializes the operating system, determines how the computer will ...
... BIOS updates. You can also access software updates by identifying the BIOS version currently installed on -screen instructions. Most software on the HP Web site is stored on the HP Web site. NOTE: The computer system BIOS is packaged in compressed files called SoftPaqs. NOTE:...contains information regarding installing and troubleshooting the file. (Readme.txt files included with the hardware devices, and provides for software updates from HP. To update the software: 1. Prepare for more information. 2. The BIOS initializes the operating system, determines how the computer will ...

Software Update - Windows Vista
Page 8
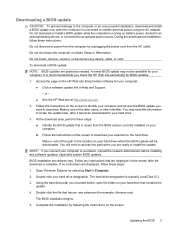
...the "Press to select File > System Information, and then press enter. ROM date information is displayed in Windows) or by turning on the screen. 2 Updating software Determining the BIOS version To determine whether available BIOS updates contain later BIOS versions than those currently installed on the computer, ... and exit. Use the arrow keys to enter Setup" message is displayed. 3. To use the arrow keys to know the version of the screen. 2. Updating the BIOS To update the BIOS, first determine what BIOS version you are already in the lower-left corner of the system BIOS...
...the "Press to select File > System Information, and then press enter. ROM date information is displayed in Windows) or by turning on the screen. 2 Updating software Determining the BIOS version To determine whether available BIOS updates contain later BIOS versions than those currently installed on the computer, ... and exit. Use the arrow keys to enter Setup" message is displayed. 3. To use the arrow keys to know the version of the screen. 2. Updating the BIOS To update the BIOS, first determine what BIOS version you are already in the lower-left corner of the system BIOS...
Software Update - Windows Vista
Page 9
...hp.com. 2. You may not be downloaded. BIOS installation procedures vary. Double-click your computer to a network, consult the network administrator before installing any software updates, especially system BIOS updates. Double-click the file that has an .exe extension (for your computer. b. Follow the instructions on the screen... the page on battery power, docked in Help and Support. - Complete the installation by following the instructions on the screen to the hard drive. At the download area, perform these instructions: Do not disconnect power from the computer by selecting...
...hp.com. 2. You may not be downloaded. BIOS installation procedures vary. Double-click your computer to a network, consult the network administrator before installing any software updates, especially system BIOS updates. Double-click the file that has an .exe extension (for your computer. b. Follow the instructions on the screen... the page on battery power, docked in Help and Support. - Complete the installation by following the instructions on the screen to the hard drive. At the download area, perform these instructions: Do not disconnect power from the computer by selecting...

Software Update - Windows Vista
Page 10
NOTE: After a message on the screen reports a successful installation, you may delete the downloaded file from your hard drive. 4 Updating software
NOTE: After a message on the screen reports a successful installation, you may delete the downloaded file from your hard drive. 4 Updating software
Software Update - Windows Vista
Page 11
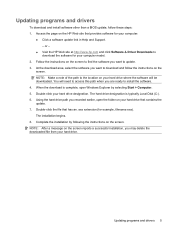
...designation. Updating programs and drivers To download and install software other than a BIOS update, follow the instructions on the screen. Access the page on the screen. Follow the instructions on the screen reports a successful installation, you want to install the software. 4. NOTE: Make a note of the path to ...for example, filename.exe). Using the hard drive path you recorded earlier, open Windows Explorer by following the instructions on the HP Web site that contains the update. 7. NOTE: After a message on the screen to find the software you are ready to update. 3.
...designation. Updating programs and drivers To download and install software other than a BIOS update, follow the instructions on the screen. Access the page on the screen. Follow the instructions on the screen reports a successful installation, you want to install the software. 4. NOTE: Make a note of the path to ...for example, filename.exe). Using the hard drive path you recorded earlier, open Windows Explorer by following the instructions on the HP Web site that contains the update. 7. NOTE: After a message on the screen to find the software you are ready to update. 3.
HP Business Notebook PC - Getting Started Guide - Enhanced for Accessibility
Page 4
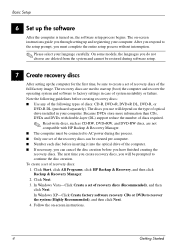
... of the full factory image. Click Start, click All Programs, click HP Backup & Recovery, and then click Backup & Recovery Manager. 2. Follow the on , the software setup process begins. Click Next. 3. The on-screen instructions guide you have finished creating the recovery discs. To create a ... recovery discs: ■ Use any of the following guidelines before you through setting up the software After the computer is turned on -screen instructions. 4 Getting Started Note the following types of recovery discs: 1. Because DVDs store more information than CDs, DVDs and DVDs with...
... of the full factory image. Click Start, click All Programs, click HP Backup & Recovery, and then click Backup & Recovery Manager. 2. Follow the on , the software setup process begins. Click Next. 3. The on-screen instructions guide you have finished creating the recovery discs. To create a ... recovery discs: ■ Use any of the following guidelines before you through setting up the software After the computer is turned on -screen instructions. 4 Getting Started Note the following types of recovery discs: 1. Because DVDs store more information than CDs, DVDs and DVDs with...

HP Business Notebook PC - Getting Started Guide - Enhanced for Accessibility
Page 5
Locating the electronic manuals For detailed information about your computer. Getting Started 5 You do not need to connect to the Internet to access the user guides in Help and Support. ✎ If you are running Windows® XP, your screens may look slightly different. ✎ A User Guides disc may have also been included with your computer, such as power management, drives, memory, security, and other features, click Start, click Help and Support, and then click User Guides. What's Next?
Locating the electronic manuals For detailed information about your computer. Getting Started 5 You do not need to connect to the Internet to access the user guides in Help and Support. ✎ If you are running Windows® XP, your screens may look slightly different. ✎ A User Guides disc may have also been included with your computer, such as power management, drives, memory, security, and other features, click Start, click Help and Support, and then click User Guides. What's Next?


