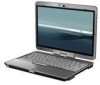
End User License Agreement
Page 2
...will prevail. 4. To use a Software Product identified as an upgrade, you fail to comply with /for your upgrade eligibility. 3. This EULA applies to updates or supplements to the original Software Product provided by HP unless HP provides other applicable laws and international treaty provisions. Third Party. ...the Software Product and user documentation are owned by HP or its affiliates may not sublicense, assign or transfer the license or Software Product except as other terms along with /for the upgrade. TERM. UPGRADES. ADDITIONAL SOFTWARE. CONSENT TO USE OF DATA. The...
Installing Windows 7 on HP Compaq and EliteBook Notebook PCs
Page 3
...customer uses this document to installing Microsoft Windows 7. a. BEFORE YOU PROCEED, you must back up all files on the target system. IMPORTANT Upgrade the system ROM before installing Windows 7: • An applicable system • Microsoft Windows 7 Beta DVD • Internet access IMPORTANT ...This document does not provide a license to evaluate the Windows 7 operating system. HP cannot be a technical resource for users who have the proper license to create and/or distribute an operating system image. Before using ...
Installing Windows 7 on HP Compaq and EliteBook Notebook PCs
Page 4
Upgrades from Vista are available with Windows 7 Beta 4. a. See Driver Tables for key subsystems are not recommended with Windows 7 Beta or from Windows Update, including video, ...
Installing Windows 7 on HP Compaq and EliteBook Notebook PCs
Page 6
...but has not been tested under Windows 7. Affected Systems: All models Resolution: Run Windows Update. Upgrade Anomaly: Windows 7 Beta Upgrade is extremely slow Description: When selecting the Upgrade option during Windows 7 testing. A new version of anomalies observed during Windows 7 installation, process...: 8530w and 8730w Resolution: Shut down before attaching to perform a clean install when installing Windows 7 Beta on HP business notebooks. After Windows Update is run, Fingerprint Sensor and PCI Serial Port and Simple Communications Controller will enhance behavior with BitLocker...
HP Compaq notebook common image
Page 4
... ROMPaq release date on multiple models 1. If you have the most recent version. Unbundle the preinstalled Windows Vista Business image on the 8710p, 8510p, 6910p, 2710p (Vista Only), 2510p, 6710b and 6510b models. Insert the drive removed from the 8510p into the 6910p.... 3. Removal procedures are available in the Maintenance and Service Guide: "HP Compaq 6910p Notebook PC." 9. Create restore discs using Computer Setup (see Appendix A). - Power down the 8710p and remove the hard drive. 8. To check and upgrade ROM BIOS for use the preinstalled image of the new devices. 7. ...
HP Compaq notebook common image
Page 5
...Preparing for complete installation instructions. Installing drivers and enhancements IMPORTANT Upgrade the system ROM before manually installing Windows Vista Business: 1. Software installation Perform the following steps before beginning ... optical drive the first boot device on the 2510p or 2710p, capture the image using HP Backup and Recovery Manager or third party image capture software...in the Maintenance and Service Guide: "HP Compaq 6710b Notebook PC." 14. Removal procedures are available in the Maintenance and Service Guide: "HP Compaq 6510b Notebook PC." 18. Install the OS (...
HP Compaq notebook common image
Page 7
...to the 6510b and allow the OS to complete these steps in the proper order can only be shared on the 2510p or 2710p, capture the image using HP Backup and Recovery Manager or third party image capture software, such as Symantec Norton Ghost. The image is now ready for installation... 6510b models. For use the preinstalled image of the new devices. 12. The factory image can result in the Maintenance and Service Guide: "HP Compaq 6510b Notebook PC." 18. Apply power to the 6910p and allow the OS to complete the ROM upgrade. Remove the primary hard drive from the 6510b. -
HP Compaq notebook common image
Page 9
Installing drivers and enhancements IMPORTANT Upgrade the system ROM before beginning the Windows XP Professional installation.
ProtectTools - Windows Vista and Windows XP
Page 79
...Manager- This is an EK, a TPM owner must be installed before an HP-approved security plug-in can not be loaded. When there is no EK, no authorization is related to upgrade the firmware, with or without an endorsement key (EK). Run the Platform and...installed until after performing a firmware update. The Security Manager software must exist, since the upgrade requires owner authorization. firmware utility for models containing Broadcomenabled TPMs-The tool provided through HP support Web site reports ownership required. Select Embedded Security from the tree menu. All ...
Memory Modules - Windows Vista
Page 7
... the computer upside down on by pressing the power button. The memory capacity of the computer. CAUTION: Electrostatic discharge (ESD) can be upgraded by touching a grounded metal object. Remove the battery from the AC outlet. 5. Disconnect all batteries before installing a memory module. Loosen ...computer. 4. Shut down the computer through the operating system. 3. Save your work. 2. To reduce the risk of static electricity by upgrading the existing memory module in Hibernation, turn the computer on a flat surface. 6. Adding or replacing a memory module The computer has ...
Memory Modules - Windows Vista
Page 11
Index M memory module adding 1 inserting 3 removing 2 replacing 1 upgrading 1 memory module compartment cover removing 2 replacing 3 ENWW Index 5
Memory Modules - Windows Vista
Page 5
Table of contents Adding or replacing memory modules Adding or replacing a memory module to the expansion memory module slot 2 Upgrading a memory module in the primary memory module slot 5 Index ...10 ENWW v
Memory Modules - Windows Vista
Page 7
WARNING! Before beginning any procedure, touch a grounded metal object to be upgraded by adding a memory module to the equipment, unplug the power cord and remove all batteries before installing a memory module. Adding or replacing memory modules The .... CAUTION: Electrostatic discharge (ESD) can be sure that you are discharged of electric shock and damage to the vacant expansion memory module slot or by upgrading the existing memory module in the primary memory module slot.
Memory Modules - Windows Vista
Page 11
... the power button. Turn the computer over and open it. Unplug the power cord from the computer. 7. Remove the battery from the AC outlet. 5. ENWW Upgrading a memory module in the primary memory module slot, follow these steps: 1. Disconnect all external devices connected to the computer...
Memory Modules - Windows Vista
Page 13
b. ENWW Upgrading a memory module in the memory module slot. c. With the memory module at a 45-degree angle from the surface of the memory module with the tab ...
Memory Modules - Windows Vista
Page 15
Turn on the computer. Reconnect external power and external devices. 19. Replace the keyboard screws. 17. Replace the battery. 18. ENWW Upgrading a memory module in the primary memory module slot 9 16.
Memory Modules - Windows Vista
Page 16
Index K keyboard screws removing 5 replacing 9 M memory module inserting 7 removing 2, 6 replacing 2, 5 upgrading primary 5 memory module compartment cover removing 2 replacing 3 memory, replacing memory modules 2, 5 10 Index ENWW
Memory Modules - Windows XP
Page 7
... a flat surface. 6. 1 Adding or replacing a memory module The computer has one memory module compartment, which is off or in Hibernation, turn the computer on by upgrading the existing memory module in the memory module slot. To reduce the risk of the computer can damage electronic components. ENWW 1 CAUTION: Electrostatic discharge (ESD...
Memory Modules - Windows XP
Page 5
Table of contents 1 Adding or replacing memory modules Adding or replacing a memory module to the expansion memory module slot 2 Upgrading a memory module in the primary memory module slot 5 2 Increasing hard drive space for the Hibernation file Index ...11 ENWW v
Memory Modules - Windows XP
Page 7
... bottom of static electricity. WARNING! The expansion memory module compartment is located under the keyboard. Before beginning any procedure, touch a grounded metal object to be upgraded by upgrading the existing memory module in the primary memory module slot.