User's Guide
Page 5
... Introduction 7 Before You Begin 7 Parts Checklist 7 Telephone Jack Requirements...........8 Installation 8 Digital Security System 8 Important Installation Guidelines.....9 Base Layout 10 Front View 10 Top View 10 Handset Layout 11... Display Icons 11 Installing the Phone 12 Installing the Handset Battery........ 12 Base Station 13 Answering System ...Code 16 Speaker Volume 17 Voice Instruction 17 Recording the Outgoing Announcement 17 Reviewing and Choosing the Announcement 18 GOOG411 19 Programming the Telephone..........20 Standby Screen...
... Introduction 7 Before You Begin 7 Parts Checklist 7 Telephone Jack Requirements...........8 Installation 8 Digital Security System 8 Important Installation Guidelines.....9 Base Layout 10 Front View 10 Top View 10 Handset Layout 11... Display Icons 11 Installing the Phone 12 Installing the Handset Battery........ 12 Base Station 13 Answering System ...Code 16 Speaker Volume 17 Voice Instruction 17 Recording the Outgoing Announcement 17 Reviewing and Choosing the Announcement 18 GOOG411 19 Programming the Telephone..........20 Standby Screen...
User's Guide
Page 6
...to Other Handsets 39 Caller ID (CID 40 Call Waiting Caller ID 40 Receiving CID Records 40 Storing CID Records 41 Reviewing CID Records 41 Dialing a CID Number 41 Storing CID Records in Internal Memory 42 Deleting All CID Records 43 Phonebook 44...Changing the Battery 53 Battery Safety Precautions 54 Display Messages 54 Answering System Display Messages 57 Troubleshooting Guide 57 Caller ID Solutions 57 Cordless Phone Solutions 58 Battery Solutions 59 Answering System Solutions...........60 Causes of Poor Reception 61 General Product Care 61 Warranty Assistance 62 Limited ...
...to Other Handsets 39 Caller ID (CID 40 Call Waiting Caller ID 40 Receiving CID Records 40 Storing CID Records 41 Reviewing CID Records 41 Dialing a CID Number 41 Storing CID Records in Internal Memory 42 Deleting All CID Records 43 Phonebook 44...Changing the Battery 53 Battery Safety Precautions 54 Display Messages 54 Answering System Display Messages 57 Troubleshooting Guide 57 Caller ID Solutions 57 Cordless Phone Solutions 58 Battery Solutions 59 Answering System Solutions...........60 Causes of Poor Reception 61 General Product Care 61 Warranty Assistance 62 Limited ...
User's Guide
Page 11
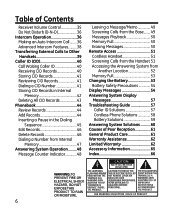
Handset Layout Voice Mail Waiting Indicator (VMWI)/ Visual Ringer CALLER ID-VOL 5 or 6 (caller id/volume up or down button) display TALK/SPEAKER (button) flash/ answerer (button) delete/int/conf (delete/intercom/ conference) review (button) play/stop (button) *tone (button) END (button) Headphone jack mute/menu OK (button) GOOG 411 (google free one touch directory assistance) format/redial (button) skip (button) #pause/ringer (button) Display Icons microphone Signal strength Speakerphone Message Voicemail SMS Ringer OFF/DND ON Alarm ON New Call Battery AM AM PM PM 11
Handset Layout Voice Mail Waiting Indicator (VMWI)/ Visual Ringer CALLER ID-VOL 5 or 6 (caller id/volume up or down button) display TALK/SPEAKER (button) flash/ answerer (button) delete/int/conf (delete/intercom/ conference) review (button) play/stop (button) *tone (button) END (button) Headphone jack mute/menu OK (button) GOOG 411 (google free one touch directory assistance) format/redial (button) skip (button) #pause/ringer (button) Display Icons microphone Signal strength Speakerphone Message Voicemail SMS Ringer OFF/DND ON Alarm ON New Call Battery AM AM PM PM 11

User's Guide
Page 17
... inches from the microphone, and eliminate as much background noise as possible. Voice Instruction If you hear the beep. Make sure the answering system is reviewing. 17 To return to the default announcement after you choose not to a comfortable level. L1 is the minimum speaker volume and L8 is the maximum...
... inches from the microphone, and eliminate as much background noise as possible. Voice Instruction If you hear the beep. Make sure the answering system is reviewing. 17 To return to the default announcement after you choose not to a comfortable level. L1 is the minimum speaker volume and L8 is the maximum...
User's Guide
Page 18
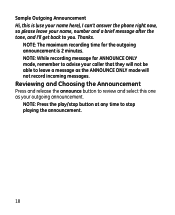
NOTE: Press the play/stop button at any time to you. Reviewing and Choosing the Announcement Press and release the announce button to review and select this is 2 minutes. Thanks. Sample Outgoing Announcement Hi, this one as the ANNOUNCE ONLY mode will not be able to leave a message as ... I'll get back to stop playing the announcement. 18 NOTE: While recording message for the outgoing announcement is (use your name here), I can't answer the phone right now, so please leave your caller that they will not record incoming messages.
NOTE: Press the play/stop button at any time to you. Reviewing and Choosing the Announcement Press and release the announce button to review and select this is 2 minutes. Thanks. Sample Outgoing Announcement Hi, this one as the ANNOUNCE ONLY mode will not be able to leave a message as ... I'll get back to stop playing the announcement. 18 NOTE: While recording message for the outgoing announcement is (use your name here), I can't answer the phone right now, so please leave your caller that they will not record incoming messages.
User's Guide
Page 34
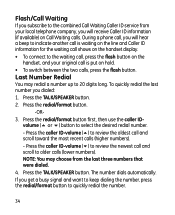
NOTE: You may redial a number up to 20 digits long. Press the TALK/SPEAKER button. During a phone call, you dialed: 1. Press the TALK/SPEAKER button. 2. Press the caller ID-volume (5) to select the desired redial number. - Last Number Redial You may choose...flash button. Press the redial/format button first, then use the caller IDvolume (5 or 6) button to review the oldest call and scroll to quickly redial the number. 34 Press the caller ID-volume (6) to review the newest call and scroll toward the most recent calls (higher numbers). - The number dials automatically. ...
NOTE: You may redial a number up to 20 digits long. Press the TALK/SPEAKER button. During a phone call, you dialed: 1. Press the TALK/SPEAKER button. 2. Press the caller ID-volume (5) to select the desired redial number. - Last Number Redial You may choose...flash button. Press the redial/format button first, then use the caller IDvolume (5 or 6) button to review the oldest call and scroll to quickly redial the number. 34 Press the caller ID-volume (6) to review the newest call and scroll toward the most recent calls (higher numbers). - The number dials automatically. ...
User's Guide
Page 41
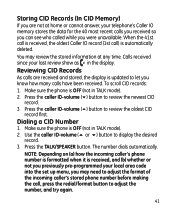
...recent calls you received so you can see who called while you were unavailable. Press the caller ID-volume (6) button to review the oldest CID record first. Make sure the phone is OFF (not in TALK mode). 2. Dialing a CID Number 1. The number dials automatically. You may need to ...adjust the format of the incoming caller's stored phone number before making the call ) is automatically deleted. Press the caller ID-volume (5) button to review the newest CID record. 3. Reviewing CID Records As calls are not at any time. Press the TALK/SPEAKER button...
...recent calls you received so you can see who called while you were unavailable. Press the caller ID-volume (6) button to review the oldest CID record first. Make sure the phone is OFF (not in TALK mode). 2. Dialing a CID Number 1. The number dials automatically. You may need to ...adjust the format of the incoming caller's stored phone number before making the call ) is automatically deleted. Press the caller ID-volume (5) button to review the newest CID record. 3. Reviewing CID Records As calls are not at any time. Press the TALK/SPEAKER button...
User's Guide
Page 44
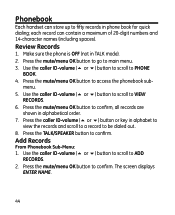
...button to go to access the phonebook sub- The screen displays ENTER NAME. 44 Make sure the phone is OFF (not in alphabetical order. 7. Press the mute/menu OK button to main menu...., all records are shown in TALK mode). 2. Press the mute/menu OK button to VIEW RECORDS. 6. Review Records 1. Use the caller ID-volume (5 or 6) button to scroll to confirm. Use the caller ID-volume...6) button to scroll to confirm. Press the caller ID-volume (5 or 6) button or key in phone book for quick dialing; Press the TALK/SPEAKER button to ADD RECORDS. 2. Add Records From Phonebook Sub...
...button to go to access the phonebook sub- The screen displays ENTER NAME. 44 Make sure the phone is OFF (not in alphabetical order. 7. Press the mute/menu OK button to main menu...., all records are shown in TALK mode). 2. Press the mute/menu OK button to VIEW RECORDS. 6. Review Records 1. Use the caller ID-volume (5 or 6) button to scroll to confirm. Use the caller ID-volume...6) button to scroll to confirm. Press the caller ID-volume (5 or 6) button or key in phone book for quick dialing; Press the TALK/SPEAKER button to ADD RECORDS. 2. Add Records From Phonebook Sub...
User's Guide
Page 52
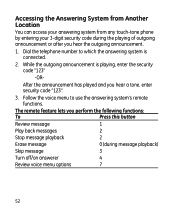
..., enter the security code "123" -OR- After the announcement has played and you perform the following functions: To Press this button Review message 1 Play back messages 2 Stop message playback 2 Erase message 0 (during the playing of outgoing announcement or after you hear the...Answering System from Another Location You can access your answering system from any touch-tone phone by entering your 3-digit security code during message playback) Skip message 3 Turn off/on answerer 4 Review voice menu options 7 52 Dial the telephone number to use the answering system's ...
..., enter the security code "123" -OR- After the announcement has played and you perform the following functions: To Press this button Review message 1 Play back messages 2 Stop message playback 2 Erase message 0 (during the playing of outgoing announcement or after you hear the...Answering System from Another Location You can access your answering system from any touch-tone phone by entering your 3-digit security code during message playback) Skip message 3 Turn off/on answerer 4 Review voice menu options 7 52 Dial the telephone number to use the answering system's ...

User's Guide
Page 55
...subscribed to enter the telephone number for one of the 50 memory locations. Indicates no additional information in the phone's memory. Indicates CID record is from service provider. Displays on handset while the line is not working. ...you to CID service, or CID service is in use . Caller information is interrupted during transmission or the phone line is no CID information was received, you to be charged. Prompt telling you want to enter the ... if you to erase one of new CID records not reviewed. 55 DELETE? Indicates that there is excessively noisy.
...subscribed to enter the telephone number for one of the 50 memory locations. Indicates no additional information in the phone's memory. Indicates CID record is from service provider. Displays on handset while the line is not working. ...you to CID service, or CID service is in use . Caller information is interrupted during transmission or the phone line is no CID information was received, you to be charged. Prompt telling you want to enter the ... if you to erase one of new CID records not reviewed. 55 DELETE? Indicates that there is excessively noisy.

User's Guide
Page 67
Index Installing the Handset Battery 12 Installing the Phone 12 Intercom Operation 36 Interference Information 3 Introduction 7 K Key Tone 30 L Language 25 Last Number Redial 34 Leaving a Message/Memo 49 Licensing 4 Limited Warranty 62 ...20 R Receiver Volume Control 35 Receiving CID Records 40 Recording the Outgoing Announcement17 Registration 26 Remote Access 51 Reset Setting 30 Review Records 44 Reviewing and Choosing the Announcement 18 Reviewing CID Records 41 Ringer Tone 29 Ringer Volume 29, 33 Room Monitor 20 S Screening Calls from the Base 49 Screening ...
Index Installing the Handset Battery 12 Installing the Phone 12 Intercom Operation 36 Interference Information 3 Introduction 7 K Key Tone 30 L Language 25 Last Number Redial 34 Leaving a Message/Memo 49 Licensing 4 Limited Warranty 62 ...20 R Receiver Volume Control 35 Receiving CID Records 40 Recording the Outgoing Announcement17 Registration 26 Remote Access 51 Reset Setting 30 Review Records 44 Reviewing and Choosing the Announcement 18 Reviewing CID Records 41 Ringer Tone 29 Ringer Volume 29, 33 Room Monitor 20 S Screening Calls from the Base 49 Screening ...