Gateway Notebook User's Guide - Canada/French
Page 5
... pointing device settings 75 Adjusting tablet, digital pen, and input panel settings 76 Adding and modifying user accounts 77 Changing accessibility settings 78 Using the Ease of Access Center 78 Using voice recognition 79 Using the Windows Mobility Center 80 Setting up parental controls 82 Filtering Internet access 82 Scheduling notebook and Internet use 83 Restricting game access 83 Restricting specific programs 85 Creating activity reports 85 Chapter 8: Maintaining Your Notebook 87 Setting up a maintenance schedule 88 Updating Windows 88 Managing hard drive...
... pointing device settings 75 Adjusting tablet, digital pen, and input panel settings 76 Adding and modifying user accounts 77 Changing accessibility settings 78 Using the Ease of Access Center 78 Using voice recognition 79 Using the Windows Mobility Center 80 Setting up parental controls 82 Filtering Internet access 82 Scheduling notebook and Internet use 83 Restricting game access 83 Restricting specific programs 85 Creating activity reports 85 Chapter 8: Maintaining Your Notebook 87 Setting up a maintenance schedule 88 Updating Windows 88 Managing hard drive...
Gateway Notebook User's Guide - Canada/French
Page 52
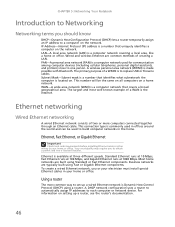
... Ethernet network consists of creating a LAN. Business networks are common methods of two or more computers connected together through an Ethernet cable. Wired and wireless Ethernet are typically built using Standard or Fast Ethernet components. CHAPTER 5: Networking Your Notebook Introduction to Networking Networking terms you should know DHCP-Dynamic Host Configuration Protocol (DHCP) lets a router temporarily assign an IP address to a computer on setting...
... Ethernet network consists of creating a LAN. Business networks are common methods of two or more computers connected together through an Ethernet cable. Wired and wireless Ethernet are typically built using Standard or Fast Ethernet components. CHAPTER 5: Networking Your Notebook Introduction to Networking Networking terms you should know DHCP-Dynamic Host Configuration Protocol (DHCP) lets a router temporarily assign an IP address to a computer on setting...

Gateway Notebook User's Guide - Canada/French
Page 60
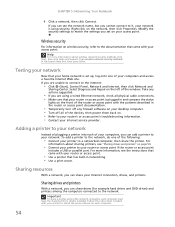
... connected to the Internet: • Click (Start), Control Panel, Network and Internet, then click Network and Sharing Center. If you are unable to connect to the network. Select Diagnose and Repair on . • Refer to install the printer drivers on the network, then click Properties. Follow the instructions included with the patterns described in the router or access point documentation. • Temporarily turn off all physical cable connections. • Make...
... connected to the Internet: • Click (Start), Control Panel, Network and Internet, then click Network and Sharing Center. If you are unable to connect to the network. Select Diagnose and Repair on . • Refer to install the printer drivers on the network, then click Properties. Follow the instructions included with the patterns described in the router or access point documentation. • Temporarily turn off all physical cable connections. • Make...

Gateway Notebook User's Guide - English
Page 52
...) is made possible with Bluetooth. A wireless personal area network (WPAN) is a computer network used for communication among computer devices (including cellular telephones, personal digital assistants, and printers) close to one person. This number will be used in offices around the world and can be the same on all computers on a home network. This connection type is located on the network. Standard Ethernet runs...
...) is made possible with Bluetooth. A wireless personal area network (WPAN) is a computer network used for communication among computer devices (including cellular telephones, personal digital assistants, and printers) close to one person. This number will be used in offices around the world and can be the same on all computers on a home network. This connection type is located on the network. Standard Ethernet runs...
Gateway Notebook User's Guide - English
Page 60
...; Turn off all physical cable connections. • Make sure that your router or access point is set on the network, then click Properties. Help For more information, see the instructions that came with your Internet service provider. CHAPTER 5: Networking Your Notebook 4 Click a network, then click Connect. If you cannot connect to it, your network is using a wired Ethernet network, check all of the devices, then power them back on wireless security...
...; Turn off all physical cable connections. • Make sure that your router or access point is set on the network, then click Properties. Help For more information, see the instructions that came with your Internet service provider. CHAPTER 5: Networking Your Notebook 4 Click a network, then click Connect. If you cannot connect to it, your network is using a wired Ethernet network, check all of the devices, then power them back on wireless security...
Gateway Quick Start Guide for Windows 7
Page 1
... 6 Control Devices (Keyboard/Touchpad 6 Volume Controls 7 Remote Control (optional 8 Your Computer's Drives 8 Power Supply 10 Ports and Connectors 11 Turning your Computer ON or OFF 12 Upgrading your Computer 14 Internet and Software 15 Using Windows and your Software 15 Windows Welcome Center 15 Internet Security Offer 15 Gateway Recovery Management 16 Your Computer's Documentation 17 Playing Multimedia Files 18 First steps on the Net 20 Protecting your computer 20 Choose an 'Internet Service Provider...
... 6 Control Devices (Keyboard/Touchpad 6 Volume Controls 7 Remote Control (optional 8 Your Computer's Drives 8 Power Supply 10 Ports and Connectors 11 Turning your Computer ON or OFF 12 Upgrading your Computer 14 Internet and Software 15 Using Windows and your Software 15 Windows Welcome Center 15 Internet Security Offer 15 Gateway Recovery Management 16 Your Computer's Documentation 17 Playing Multimedia Files 18 First steps on the Net 20 Protecting your computer 20 Choose an 'Internet Service Provider...
Gateway Quick Start Guide for Windows 7
Page 12
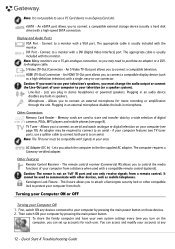
... external storage device (usually a hard disk drive) with a high-speed SATA connection. Microphone - Lets you to use a PC Card device in an audio device disables any 12 - Turning your Computer ON or OFF Turning your television (or a speaker system). Quick Start & Troubleshooting Guide eSATA - Connect to connect a compatible display device (such as mobile telephones. Line-Out - Allows you to a monitor with a VGA port. An adapter may need to protect your computer from theft. AC Adapter (DC In) - Kensington Lock...
... external storage device (usually a hard disk drive) with a high-speed SATA connection. Microphone - Lets you to use a PC Card device in an audio device disables any 12 - Turning your Computer ON or OFF Turning your television (or a speaker system). Quick Start & Troubleshooting Guide eSATA - Connect to connect a compatible display device (such as mobile telephones. Line-Out - Allows you to a monitor with a VGA port. An adapter may need to protect your computer from theft. AC Adapter (DC In) - Kensington Lock...

Gateway Quick Start Guide for Windows 7
Page 36
... startup options. 3. The screen freezes when the Gateway logo displays When the computer starts, it into CD or DVD using the arrow keys and press Enter to restart your computer to use basic files and drivers. 1. However, if the test fails, the computer may cause your computer using the arrow keys or mouse (if available). 2. Press OK to default settings. Start with a different boot device. Set the BIOS to confirm. 4. This controls the hardware...
... startup options. 3. The screen freezes when the Gateway logo displays When the computer starts, it into CD or DVD using the arrow keys and press Enter to restart your computer to use basic files and drivers. 1. However, if the test fails, the computer may cause your computer using the arrow keys or mouse (if available). 2. Press OK to default settings. Start with a different boot device. Set the BIOS to confirm. 4. This controls the hardware...
Gateway Quick Start Guide for Windows 7
Page 42
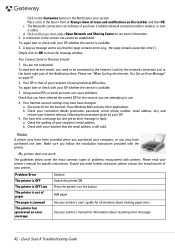
... cannot be connected to the Internet. Make sure you may have been changed. Look for information about clearing paper jams. See your recipient's email address. a. a. Printer A printer may have purchased one later. b. Quick Start & Troubleshooting Guide Click on OK to close the message window. Click on line button Add paper See your printer's user's guide for the network connection icon at the lower right part of...
... cannot be connected to the Internet. Make sure you may have been changed. Look for information about clearing paper jams. See your recipient's email address. a. a. Printer A printer may have purchased one later. b. Quick Start & Troubleshooting Guide Click on OK to close the message window. Click on line button Add paper See your printer's user's guide for the network connection icon at the lower right part of...
Gateway Quick Start Guide for Windows 7
Page 45
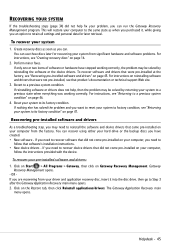
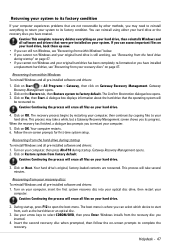
... Perform minor fixes. To recover your pre-installed software and drivers: 1. If you can recover using either your hard drive or the backup discs you have stopped working correctly. To recover software and drivers that were pre-installed at the factory, see that software's installation instructions. • New device drivers - The Gateway Application Recovery main menu opens. For instructions, see "Creating recovery discs" on your system to Step 3 after the Gateway Application Recovery main menu opens. 2. Click on Gateway Recovery Management. This will restore your...
... Perform minor fixes. To recover your pre-installed software and drivers: 1. If you can recover using either your hard drive or the backup discs you have stopped working correctly. To recover software and drivers that were pre-installed at the factory, see that software's installation instructions. • New device drivers - The Gateway Application Recovery main menu opens. For instructions, see "Creating recovery discs" on your system to Step 3 after the Gateway Application Recovery main menu opens. 2. Click on Gateway Recovery Management. This will restore your...
Gateway Quick Start Guide for Windows 7
Page 47
... files to your hard drive. The boot menu is still working, see "Recovering from , such as the hard drive or an optical disc. 3. Insert the second recovery disc when prompted, then follow the on the Restore tab, then Restore system to factory default. Recovering from your recovery discs To reinstall Windows and all pre-installed software and drivers: 1. Click on Start > All Programs > Gateway, then click on Yes, then Start. Gateway Recovery Management opens. 2. Click on Gateway Recovery Management. Click on OK...
... files to your hard drive. The boot menu is still working, see "Recovering from , such as the hard drive or an optical disc. 3. Insert the second recovery disc when prompted, then follow the on the Restore tab, then Restore system to factory default. Recovering from your recovery discs To reinstall Windows and all pre-installed software and drivers: 1. Click on Start > All Programs > Gateway, then click on Yes, then Start. Gateway Recovery Management opens. 2. Click on Gateway Recovery Management. Click on OK...
Gateway Quick Start Guide for Windows 7
Page 56
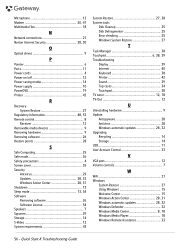
Quick Start & Troubleshooting Guide Microphone 12 Modem 20, 41 Multimedia files 18 N Network connections 21 Norton Internet Security 28, 30 O Optical drives 9 P Pointer 6 Ports 11 Power cords 4 Power on/off 12 Power saving modes 14 Power supply 10 PowerDVD 19 Printer 42 R Recovery System Restore 27 Regulatory Information 48, 53 Remote control 8 Receiver 12 Removable media devices 9 Removing hardware 9 Removing software 26 Restore points 28 S Safe Computing 25 Safe mode 36 Safety precautions 4 Screen saver 35 Security Antivirus 29 Updates 28, 32...
Quick Start & Troubleshooting Guide Microphone 12 Modem 20, 41 Multimedia files 18 N Network connections 21 Norton Internet Security 28, 30 O Optical drives 9 P Pointer 6 Ports 11 Power cords 4 Power on/off 12 Power saving modes 14 Power supply 10 PowerDVD 19 Printer 42 R Recovery System Restore 27 Regulatory Information 48, 53 Remote control 8 Receiver 12 Removable media devices 9 Removing hardware 9 Removing software 26 Restore points 28 S Safe Computing 25 Safe mode 36 Safety precautions 4 Screen saver 35 Security Antivirus 29 Updates 28, 32...
Service Guide
Page 7
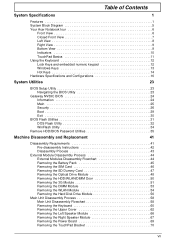
... 9 Indicators 10 TouchPad Basics 11 Using the Keyboard 12 Lock Keys and embedded numeric keypad 12 Windows Keys 13 Hot Keys 14 Hardware Specifications and Configurations 16 System Utilities 23 BIOS Setup Utility 23 Navigating the BIOS Utility 23 Gateway NV59C BIOS 24 Information 24 Main 25 Security 26 Boot 29 Exit 30 BIOS Flash Utilities 31 DOS Flash Utility 32 WinFlash Utility 34 Remove HDD/BIOS Password Utilities 35 Machine Disassembly and Replacement 41 Disassembly Requirements 41 Pre-disassembly Instructions 42 Disassembly Process 43 External Module Disassembly...
... 9 Indicators 10 TouchPad Basics 11 Using the Keyboard 12 Lock Keys and embedded numeric keypad 12 Windows Keys 13 Hot Keys 14 Hardware Specifications and Configurations 16 System Utilities 23 BIOS Setup Utility 23 Navigating the BIOS Utility 23 Gateway NV59C BIOS 24 Information 24 Main 25 Security 26 Boot 29 Exit 30 BIOS Flash Utilities 31 DOS Flash Utility 32 WinFlash Utility 34 Remove HDD/BIOS Password Utilities 35 Machine Disassembly and Replacement 41 Disassembly Requirements 41 Pre-disassembly Instructions 42 Disassembly Process 43 External Module Disassembly...

Service Guide
Page 8
... Replacing the Left Speaker Module 124 Replacing the Upper Cover 125 Replacing the Keyboard 128 Replacing the Hard Disk Drive Module 129 Replacing the WLAN Module 130 Replacing the DIMM Modules 131 Replacing the 3G Module 132 Replacing the HDD/WLAN/DIMM Door 134 Replacing the ODD Module 135 Replacing the SD Dummy Card 136 Replacing the SIM Card 137 Replacing the Battery 138 Troubleshooting 139 Common Problems 139 Power On Issue 140 No Display Issue 141 Random Loss of BIOS Settings 142 LCD...
... Replacing the Left Speaker Module 124 Replacing the Upper Cover 125 Replacing the Keyboard 128 Replacing the Hard Disk Drive Module 129 Replacing the WLAN Module 130 Replacing the DIMM Modules 131 Replacing the 3G Module 132 Replacing the HDD/WLAN/DIMM Door 134 Replacing the ODD Module 135 Replacing the SD Dummy Card 136 Replacing the SIM Card 137 Replacing the Battery 138 Troubleshooting 139 Common Problems 139 Power On Issue 140 No Display Issue 141 Random Loss of BIOS Settings 142 LCD...
Service Guide
Page 37
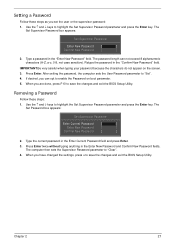
... the changes and exit the BIOS Setup Utility. Use the ↑ and ↓ keys to "Clear". 4. The Set Password box appears: Set Supervisor Password Enter Current Password [ ] Enter New Password [ ] Confirm New Password [ ] 2. The computer then sets the Supervisor Password parameter to highlight the Set Supervisor Password parameter and press the Enter key. Type a password in the Enter Current Password field and press Enter. 3. When you are done, press F10 to enable the Password on the screen. 3. After setting the password, the computer sets the User Password...
... the changes and exit the BIOS Setup Utility. Use the ↑ and ↓ keys to "Clear". 4. The Set Password box appears: Set Supervisor Password Enter Current Password [ ] Enter New Password [ ] Confirm New Password [ ] 2. The computer then sets the Supervisor Password parameter to highlight the Set Supervisor Password parameter and press the Enter key. Type a password in the Enter Current Password field and press Enter. 3. When you are done, press F10 to enable the Password on the screen. 3. After setting the password, the computer sets the User Password...
Service Guide
Page 68
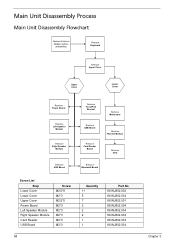
... Main Unit Disassembly Flowchart Remove External Modules before proceeding Remove Keyboard Remove Upper Cover Upper Cover Lower Cover Remove Power Board Remove Left Speaker Module Remove Right Speaker Module Remove USB Board Remove TouchPad Bracket Remove USB Board Remove Card Reader Board Remove Mainboard Remove Thermal Module Remove CPU Remove Bluetooth Board Screw List Step Lower Cover Lower Cover Upper Cover Power Board Left Speaker Module Right Speaker Module Card Reader USB Board Screw M2.5*8 M2*3 M2.5*5 M2*3 M2*3 M2*3 M2*3 M2*3 58 Quantity 11 5 7 2 2 2 1 1 Part No. 86...
... Main Unit Disassembly Flowchart Remove External Modules before proceeding Remove Keyboard Remove Upper Cover Upper Cover Lower Cover Remove Power Board Remove Left Speaker Module Remove Right Speaker Module Remove USB Board Remove TouchPad Bracket Remove USB Board Remove Card Reader Board Remove Mainboard Remove Thermal Module Remove CPU Remove Bluetooth Board Screw List Step Lower Cover Lower Cover Upper Cover Power Board Left Speaker Module Right Speaker Module Card Reader USB Board Screw M2.5*8 M2*3 M2.5*5 M2*3 M2*3 M2*3 M2*3 M2*3 58 Quantity 11 5 7 2 2 2 1 1 Part No. 86...
Service Guide
Page 149
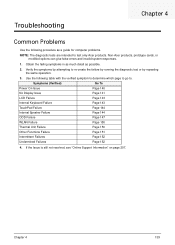
... to re-create the failure by running the diagnostic test or by repeating the same operation. 3. Troubleshooting Chapter 4 Common Problems Use the following table with the verified symptom to determine which page to go to. Symptoms (Verified) Power On Issue Go To Page 140 No Display Issue Page 141 LCD Failure Page 143 Internal Keyboard Failure Page 143 TouchPad Failure Page...
... to re-create the failure by running the diagnostic test or by repeating the same operation. 3. Troubleshooting Chapter 4 Common Problems Use the following table with the verified symptom to determine which page to go to. Symptoms (Verified) Power On Issue Go To Page 140 No Display Issue Page 141 LCD Failure Page 143 Internal Keyboard Failure Page 143 TouchPad Failure Page...

Service Guide
Page 151
... power, see "Disassembly Process" on page 207. Remove any stored power by pressing Fn+F5. Reconnect the power and reboot the computer. 4. Restart the computer. Make sure the computer has power by pressing Fn+F5 (on this notebook model, switching between the internal display and the external display is done by removing the power cable and battery and holding down the power button for specific model procedures. 2. If the computer boots correctly, add the devices...
... power, see "Disassembly Process" on page 207. Remove any stored power by pressing Fn+F5. Reconnect the power and reboot the computer. 4. Restart the computer. Make sure the computer has power by pressing Fn+F5 (on this notebook model, switching between the internal display and the external display is done by removing the power cable and battery and holding down the power button for specific model procedures. 2. If the computer boots correctly, add the devices...

Service Guide
Page 161
... alternative mouse. 2. If the mouse uses a wireless connection, insert new batteries and confirm there is ok. 3. Reinstall the program experiencing mouse failure. 5. Run the Event Viewer to verify mouse operation. Remove and reinstall the mouse driver. 12. Other Failures If the CRT Switch, Dock, LAN Port, external MIC or Speakers, PCI Express Card, 5-in-1 Card Reader or Volume Wheel fail, perform the following actions one at a time to correct the problem. 1. Check...
... alternative mouse. 2. If the mouse uses a wireless connection, insert new batteries and confirm there is ok. 3. Reinstall the program experiencing mouse failure. 5. Run the Event Viewer to verify mouse operation. Remove and reinstall the mouse driver. 12. Other Failures If the CRT Switch, Dock, LAN Port, external MIC or Speakers, PCI Express Card, 5-in-1 Card Reader or Volume Wheel fail, perform the following actions one at a time to correct the problem. 1. Check...

Service Guide
Page 219
... Onboard Device Configuration 27 Power 29 Save and Exit 30 Security 26 System Security 30 Board Layout Top View 159 C Camera Module Removing 89, 90 Replacing 103, 105, 106, 107, 109 Common Problems 140 computer on indicator 10 CPU Removing 83 Replacing 112 D DIMM Modules Replacing 131 Display 5 display hotkeys 14 Index E EasyTouch Failure 150 External Module Disassembly Flowchart 44 F Features 1 Flash Utility 31 FPC Cable Removing 94 FRU (Field Replaceable Unit) List 165 H Hard Disk Drive Removing 56 Replacing 129 HDTV Switch...
... Onboard Device Configuration 27 Power 29 Save and Exit 30 Security 26 System Security 30 Board Layout Top View 159 C Camera Module Removing 89, 90 Replacing 103, 105, 106, 107, 109 Common Problems 140 computer on indicator 10 CPU Removing 83 Replacing 112 D DIMM Modules Replacing 131 Display 5 display hotkeys 14 Index E EasyTouch Failure 150 External Module Disassembly Flowchart 44 F Features 1 Flash Utility 31 FPC Cable Removing 94 FRU (Field Replaceable Unit) List 165 H Hard Disk Drive Removing 56 Replacing 129 HDTV Switch...


