8512041 - Gateway Hardware Reference Guide (5-bay uATX Case)
Page 4
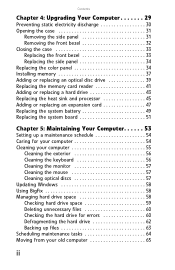
Contents Chapter 4: Upgrading Your Computer 29 Preventing static electricity discharge 30 Opening the case 31 Removing the side panel 31 Removing the front bezel 32 Closing the case 33 Replacing the front bezel 33 Replacing the side panel 34 Replacing the color panel 34 ... Adding or replacing an optical disc drive 39 Replacing the memory card reader 41 Adding or replacing a hard drive 43 Replacing the heat sink and processor 45 Adding or replacing an expansion card 47 Replacing the system battery 49 Replacing the system board 51 Chapter 5: Maintaining Your Computer. . . . . . 53 ...
Contents Chapter 4: Upgrading Your Computer 29 Preventing static electricity discharge 30 Opening the case 31 Removing the side panel 31 Removing the front bezel 32 Closing the case 33 Replacing the front bezel 33 Replacing the side panel 34 Replacing the color panel 34 ... Adding or replacing an optical disc drive 39 Replacing the memory card reader 41 Adding or replacing a hard drive 43 Replacing the heat sink and processor 45 Adding or replacing an expansion card 47 Replacing the system battery 49 Replacing the system board 51 Chapter 5: Maintaining Your Computer. . . . . . 53 ...

8512041 - Gateway Hardware Reference Guide (5-bay uATX Case)
Page 51
... You need a Phillips screwdriver to replace the heat sink. To replace the heat sink and processor: 1 Remove the side panel by following the instructions in "Replacing the side panel" on page 34. 13 Reconnect all external cables and the power cord. 14 ... fan cable from Step 2. 12 Replace the side panel by following the instructions in "Removing the side panel" on page 31. 2 For more information on restoring your system, see "Recovering your computer on its side. www.gateway.com 9 Line up the tabs on the right side of the cage with your computer...
... You need a Phillips screwdriver to replace the heat sink. To replace the heat sink and processor: 1 Remove the side panel by following the instructions in "Replacing the side panel" on page 34. 13 Reconnect all external cables and the power cord. 14 ... fan cable from Step 2. 12 Replace the side panel by following the instructions in "Removing the side panel" on page 31. 2 For more information on restoring your system, see "Recovering your computer on its side. www.gateway.com 9 Line up the tabs on the right side of the cage with your computer...

8512041 - Gateway Hardware Reference Guide (5-bay uATX Case)
Page 52
...the silk-screened arrow on the corner of the processor) aligns with Pin 1 on the processor socket (indicated by the absence of a pin hole in the processor socket), then return the retention bracket and lever to the system board, then remove the assembly and place it on a stable surface... flat surface of the heat sink (the side with the thermal grease) up. (The four screws cannot be completely removed.) Screws (only one shown) 5 Push the processor release lever down, lift it completely up, then lift the processor retention bracket. 6 Remove the processor from the system board. 7 Install the new...
...the silk-screened arrow on the corner of the processor) aligns with Pin 1 on the processor socket (indicated by the absence of a pin hole in the processor socket), then return the retention bracket and lever to the system board, then remove the assembly and place it on a stable surface... flat surface of the heat sink (the side with the thermal grease) up. (The four screws cannot be completely removed.) Screws (only one shown) 5 Push the processor release lever down, lift it completely up, then lift the processor retention bracket. 6 Remove the processor from the system board. 7 Install the new...

8512041 - Gateway Hardware Reference Guide (5-bay uATX Case)
Page 53
... a heat sink, re-apply a small bead of thermal grease (about the size of a pea) to the surface that contacts the processor. 9 Place the heat sink and fan assembly on the processor, then tighten the screws that secure it to the system board. 10 Connect the heat sink fan cable to the system... Adding or replacing an expansion card To add or replace an expansion card: 1 Remove the side panel by following the instructions in "Replacing the side panel" on page 34. www.gateway.com 8 If this is a new heat sink, remove the strip on the heat sink that are replacing an expansion card, disconnect any...
... a heat sink, re-apply a small bead of thermal grease (about the size of a pea) to the surface that contacts the processor. 9 Place the heat sink and fan assembly on the processor, then tighten the screws that secure it to the system board. 10 Connect the heat sink fan cable to the system... Adding or replacing an expansion card To add or replace an expansion card: 1 Remove the side panel by following the instructions in "Replacing the side panel" on page 34. www.gateway.com 8 If this is a new heat sink, remove the strip on the heat sink that are replacing an expansion card, disconnect any...

8512041 - Gateway Hardware Reference Guide (5-bay uATX Case)
Page 58
CHAPTER 4: Upgrading Your Computer 9 If your replacement system board does not include a processor remove the processor from the old system board by following the directions in "Replacing the heat sink and processor" on page 45, then install it and the heat sink into the new system board by following the ...the case. 11 Connect all power and data cables using your notes from Step 4. 12 Reinstall any memory modules you removed previously. 13 Reinstall any expansion cards you removed previously. 14 Replace the side panel by following the instructions in "Replacing the side panel" on page 34. 52
CHAPTER 4: Upgrading Your Computer 9 If your replacement system board does not include a processor remove the processor from the old system board by following the directions in "Replacing the heat sink and processor" on page 45, then install it and the heat sink into the new system board by following the ...the case. 11 Connect all power and data cables using your notes from Step 4. 12 Reinstall any memory modules you removed previously. 13 Reinstall any expansion cards you removed previously. 14 Replace the side panel by following the instructions in "Replacing the side panel" on page 34. 52


