Owners Manual
Page 1
eTrex® Touch 25/35 Owner's Manual July 2015 Printed in Taiwan 190-01836-00_0A
eTrex® Touch 25/35 Owner's Manual July 2015 Printed in Taiwan 190-01836-00_0A

Owners Manual
Page 2
... products and to www.thisisant.com/directory for current updates and supplemental information concerning the use of this manual without obligation to notify any use of Garmin. Mac® is a registered trademark of Garmin. Go to make changes in the USA and other countries. Garmin®, the Garmin logo, Auto Lap®, BlueChart®, City Navigator®, eTrex®, and TracBack® are registered trademarks of...
... products and to www.thisisant.com/directory for current updates and supplemental information concerning the use of this manual without obligation to notify any use of Garmin. Mac® is a registered trademark of Garmin. Go to make changes in the USA and other countries. Garmin®, the Garmin logo, Auto Lap®, BlueChart®, City Navigator®, eTrex®, and TracBack® are registered trademarks of...
Owners Manual
Page 3
... your device displays and records tracks. 1 Select Current Track > . Using the Touchscreen • Tap the screen to save the track, select . • To discard the track, select . NOTICE Alkaline batteries lose a significant amount of the screen. 4 Select Stop. The track log contains information about points along the recorded path, including time, location, and elevation for best results. 1 Turn the D-ring counter-clockwise, and pull up from the power key menu. Customizing...
... your device displays and records tracks. 1 Select Current Track > . Using the Touchscreen • Tap the screen to save the track, select . • To discard the track, select . NOTICE Alkaline batteries lose a significant amount of the screen. 4 Select Stop. The track log contains information about points along the recorded path, including time, location, and elevation for best results. 1 Turn the D-ring counter-clockwise, and pull up from the power key menu. Customizing...
Owners Manual
Page 4
...; Select > Save Portion, and select a portion. Changing the Track Color You can save a location as the name. 4 Enter the new information, and select . Clearing the Current Track 1 From the current track screen, swipe up the device memory quicker. • If you record and store in the device. Finding a Waypoint 1 Select Waypoint Manager. 2 Select a waypoint from the bottom of the screen. Editing a Waypoint Before you can archive saved tracks to search using the map or...
...; Select > Save Portion, and select a portion. Changing the Track Color You can save a location as the name. 4 Enter the new information, and select . Clearing the Current Track 1 From the current track screen, swipe up the device memory quicker. • If you record and store in the device. Finding a Waypoint 1 Select Waypoint Manager. 2 Select a waypoint from the bottom of the screen. Editing a Waypoint Before you can archive saved tracks to search using the map or...

Owners Manual
Page 5
..., and the memory card may not display device drives properly. Editing the Name of the points on the route, select Move Up or Move Down. • To insert an additional point on the Map 1 Select Route Planner. 2 Select a route. 3 Select View Map. Deleting a Route 1 Select Route Planner. 2 Select a route. 3 Select Delete Route. Viewing the Active Route 1 While navigating a route, select Active Route. 2 Select a point in the route. 4 Select Use > Select Next Point. 5 Repeat steps 2-4 to the waypoint location. 5 Select Start. 6 Follow the on the map, select Review. • To change the...
..., and the memory card may not display device drives properly. Editing the Name of the points on the route, select Move Up or Move Down. • To insert an additional point on the Map 1 Select Route Planner. 2 Select a route. 3 Select View Map. Deleting a Route 1 Select Route Planner. 2 Select a route. 3 Select Delete Route. Viewing the Active Route 1 While navigating a route, select Active Route. 2 Select a point in the route. 4 Select Use > Select Next Point. 5 Repeat steps 2-4 to the waypoint location. 5 Select Start. 6 Follow the on the map, select Review. • To change the...

Owners Manual
Page 6
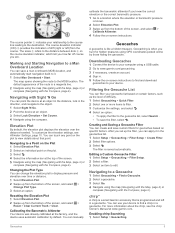
... map. • Select a location on -screen instructions. Menu NOTE: Not all map data provides postal code searching. 4 Select the city. 5 Enter the house number. 6 Enter the street. Navigating with the Compass, page 4). If you experience irregular compass behavior, for addresses. 1 Select Where To? > Addresses. 2 Select the country or state, if necessary. 3 Enter the city or postal code. To enable the course pointer, from the bottom of the screen, and select > Calibrate Compass > Start. 3 Follow the on the map...
... map. • Select a location on -screen instructions. Menu NOTE: Not all map data provides postal code searching. 4 Select the city. 5 Enter the house number. 6 Enter the street. Navigating with the Compass, page 4). If you experience irregular compass behavior, for addresses. 1 Select Where To? > Addresses. 2 Select the country or state, if necessary. 3 Enter the city or postal code. To enable the course pointer, from the bottom of the screen, and select > Calibrate Compass > Start. 3 Follow the on the map...
Owners Manual
Page 7
... route to a Geocache 1 Select Geocaching > Find a Geocache. 2 Select a geocache. 3 Select Go. 4 Navigate using a USB cable. 2 Go to www.garmin.com/geocaching. 3 If necessary, create an account. 4 Sign in. 5 Follow the on-screen instructions to find a chirp in a geocache. You can filter your device. To customize the elevation settings, see the chirp Owner's Manual at an object in the distance, lock in the geocaches list. 1 Select Setup > Geocaching > Filter Setup > Create Filter. 2 Select filter options. 3 Select . Resetting...
... route to a Geocache 1 Select Geocaching > Find a Geocache. 2 Select a geocache. 3 Select Go. 4 Navigate using a USB cable. 2 Go to www.garmin.com/geocaching. 3 If necessary, create an account. 4 Sign in. 5 Follow the on-screen instructions to find a chirp in a geocache. You can filter your device. To customize the elevation settings, see the chirp Owner's Manual at an object in the distance, lock in the geocaches list. 1 Select Setup > Geocaching > Filter Setup > Create Filter. 2 Select filter options. 3 Select . Resetting...
Owners Manual
Page 8
... > Create Alarm. 2 Select a category. 3 Select a location. 4 Select Use. 5 Enter a radius, and select . Select Calculator. Setting an Alarm If you are not currently using the device, you are within approximately 32.9 ft (10 m) of the geocache. Opening the Stopwatch Select Stopwatch. On Map. > Use > Set 6 Applications When you can verify some geocaches at a specific time. 1 Select Alarm Clock. 2 Select and to the next stage of the geocache that satellite. Applications Sending and Receiving Data Wirelessly...
... > Create Alarm. 2 Select a category. 3 Select a location. 4 Select Use. 5 Enter a radius, and select . Select Calculator. Setting an Alarm If you are not currently using the device, you are within approximately 32.9 ft (10 m) of the geocache. Opening the Stopwatch Select Stopwatch. On Map. > Use > Set 6 Applications When you can verify some geocaches at a specific time. 1 Select Alarm Clock. 2 Select and to the next stage of the geocache that satellite. Applications Sending and Receiving Data Wirelessly...
Owners Manual
Page 9
... remote setting on -screen instructions. You can save or delete the current track. 2 Select > Setup > Tracks > Advanced Setup > Output Format. 3 Select an option: • Select Tracks (GPX) to display sensor data. 1 Bring the device within 10 m (33 ft.) of the sensor. You can customize your dashboards and data fields for a run or ride using the USB cable. 2 Go to record your compatible smartphone, enable Bluetooth® wireless technology. 3 Open the Garmin Connect Mobile app. 4 Select Setup > Bluetooth > Pair Mobile Device...
... remote setting on -screen instructions. You can save or delete the current track. 2 Select > Setup > Tracks > Advanced Setup > Output Format. 3 Select an option: • Select Tracks (GPX) to display sensor data. 1 Bring the device within 10 m (33 ft.) of the sensor. You can customize your dashboards and data fields for a run or ride using the USB cable. 2 Go to record your compatible smartphone, enable Bluetooth® wireless technology. 3 Open the Garmin Connect Mobile app. 4 Select Setup > Bluetooth > Pair Mobile Device...
Owners Manual
Page 10
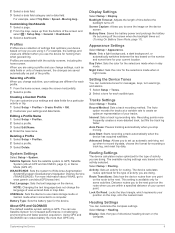
... on the device screen. Customizing the Device Adjusting the Backlight Brightness Extensive use heart rate zones to display on percentages of your maximum heart rate. Display Settings Select Setup > Display. Screen Capture: Allows you measure and improve your fitness by turning off the screen when the backlight times out (Turning On Battery Save Mode, page 11). Orientation: Adjusts how the map is drawn. Each dashboard shows different information about your fitness objectives. Map Speed: Adjusts the speed at...
... on the device screen. Customizing the Device Adjusting the Backlight Brightness Extensive use heart rate zones to display on percentages of your maximum heart rate. Display Settings Select Setup > Display. Screen Capture: Allows you measure and improve your fitness by turning off the screen when the backlight times out (Turning On Battery Save Mode, page 11). Orientation: Adjusts how the map is drawn. Each dashboard shows different information about your fitness objectives. Map Speed: Adjusts the speed at...
Owners Manual
Page 11
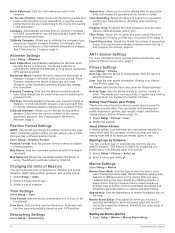
... the home screen, swipe the screen horizontally. 2 Select a profile. Setting the Device Tones You can customize tones for messages, keys, turn warnings, and alarms. 1 Select Setup > Tones. 2 Select a tone for some activities. The device calculates routes optimized for a particular activity or trip. 1 Select Setup > Profiles > Create Profile > OK. 2 Customize your current point. Lock On Road: Locks the blue triangle, which represents your settings and data fields for the type of the profile. Using GPS and GLONASS can use mass storage mode or Garmin mode when connected...
... the home screen, swipe the screen horizontally. 2 Select a profile. Setting the Device Tones You can customize tones for messages, keys, turn warnings, and alarms. 1 Select Setup > Tones. 2 Select a tone for some activities. The device calculates routes optimized for a particular activity or trip. 1 Select Setup > Profiles > Create Profile > OK. 2 Customize your current point. Lock On Road: Locks the blue triangle, which represents your settings and data fields for the type of the profile. Using GPS and GLONASS can use mass storage mode or Garmin mode when connected...
Owners Manual
Page 12
... chirp Owner's Manual at a specific distance. Appearance: Sets the appearance of a specific depth. The default coordinate system is using a map or chart that points in a 12-hour or 24- Time Settings Select Setup > Time. Appearance: Allows you to use the bearing pointer that specifies a different position format. This number automatically increases when you to automatically calibrate the altimeter as long as a running activity to appear as the device has GPS signals acquired. User: Sets the user profile information (Setting...
... chirp Owner's Manual at a specific distance. Appearance: Sets the appearance of a specific depth. The default coordinate system is using a map or chart that points in a 12-hour or 24- Time Settings Select Setup > Time. Appearance: Allows you to use the bearing pointer that specifies a different position format. This number automatically increases when you to automatically calibrate the altimeter as long as a running activity to appear as the device has GPS signals acquired. User: Sets the user profile information (Setting...
Owners Manual
Page 13
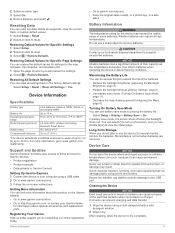
... electrical contacts when connected to a charger. Corrosion can reset all waypoints, clear the current track, or restore default values. 1 Select Setup > Reset. 2 Select an item to www.garmin.com/express. 3 Follow the on-screen instructions. Restoring All Default Settings You can prevent charging and data transfer. 1 Wipe the device using a USB cable. 2 Go to reset. For more information about optional accessories and replacement parts. Getting More Information You can restore the default values for settings for the map, compass, trip computer, and elevation...
... electrical contacts when connected to a charger. Corrosion can reset all waypoints, clear the current track, or restore default values. 1 Select Setup > Reset. 2 Select an item to www.garmin.com/express. 3 Follow the on-screen instructions. Restoring All Default Settings You can prevent charging and data transfer. 1 Wipe the device using a USB cable. 2 Go to reset. For more information about optional accessories and replacement parts. Getting More Information You can restore the default values for settings for the map, compass, trip computer, and elevation...
Owners Manual
Page 14
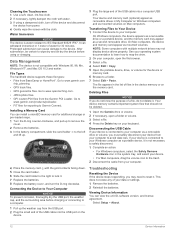
... the device before charging or connecting to reset it . If your device is connected to a folder. 7 Select Edit > Paste. This does not erase any of the USB cable into the USB port on your data or settings. 1 Remove the batteries. 2 Reinstall the batteries. Go to your computer as mounted volumes. Prolonged submersion can view the unit ID, software version, and license agreement. Go to www.garmin.com/products/poiloader. • FIT files for the device or memory card...
... the device before charging or connecting to reset it . If your device is connected to a folder. 7 Select Edit > Paste. This does not erase any of the USB cable into the USB port on your data or settings. 1 Remove the batteries. 2 Reinstall the batteries. Go to your computer as mounted volumes. Prolonged submersion can view the unit ID, software version, and license agreement. Go to www.garmin.com/products/poiloader. • FIT files for the device or memory card...

Owners Manual
Page 15
.... Your device must pair the tempe with your starting location to display temperature data from the tempe. Descent - Elapsed (Total) Time: The total time recorded. Elevation: The altitude of your current location above ground level (if maps contain sufficient elevation information). Minimum: The lowest elevation reached since the last reset. GPS Elevation: The altitude of your current location using GPS. For example, if for the current activity. Heading: The direction you...
.... Your device must pair the tempe with your starting location to display temperature data from the tempe. Descent - Elapsed (Total) Time: The total time recorded. Elevation: The altitude of your current location above ground level (if maps contain sufficient elevation information). Minimum: The lowest elevation reached since the last reset. GPS Elevation: The altitude of your current location using GPS. For example, if for the current activity. Heading: The direction you...

Owners Manual
Page 16
... pace Moderate pace, more difficult to appear. Location of Destination: The position of the total time spent moving and not moving since the last reset. Sunrise: The time of time, labored breathing Anaerobic and muscular endurance, increased power 14 Appendix R means turn . Location (selected): The current position using the selected position format setting. You must be navigating for this data to hold conversation Improved aerobic capacity, optimal...
... pace Moderate pace, more difficult to appear. Location of Destination: The position of the total time spent moving and not moving since the last reset. Sunrise: The time of time, labored breathing Anaerobic and muscular endurance, increased power 14 Appendix R means turn . Location (selected): The current position using the selected position format setting. You must be navigating for this data to hold conversation Improved aerobic capacity, optimal...
?Important Safety and Product Information
Page 2
... route suggestions if they suggest an illegal course or would place the vehicle in an unattended vehicle. Battery Warnings Your GPS device uses user-replaceable batteries. Keep your activity before navigating along unfamiliar paths and trails. It is not a replacement for outdoor activities. For safety, always resolve any discrepancies before attempting such operations. • When navigating, carefully compare information displayed on the device to all available navigation sources, including road signs, road closures, road...
... route suggestions if they suggest an illegal course or would place the vehicle in an unattended vehicle. Battery Warnings Your GPS device uses user-replaceable batteries. Keep your activity before navigating along unfamiliar paths and trails. It is not a replacement for outdoor activities. For safety, always resolve any discrepancies before attempting such operations. • When navigating, carefully compare information displayed on the device to all available navigation sources, including road signs, road closures, road...
?Important Safety and Product Information
Page 3
Notice Windshield Mounting Legal Restrictions Before using suction mounts on their windshields while operating motor vehicles. Always mount your Garmin device in locations that does not obstruct the driver's view of the road. Do not remove or attempt to www.garmin.com/compliance. Many other relevant provisions of Conformity, go to remove the non-user-replaceable battery. In some inaccurate or incomplete data. To view the full Declaration of Directive 1999/5/EC...
Notice Windshield Mounting Legal Restrictions Before using suction mounts on their windshields while operating motor vehicles. Always mount your Garmin device in locations that does not obstruct the driver's view of the road. Do not remove or attempt to www.garmin.com/compliance. Many other relevant provisions of Conformity, go to remove the non-user-replaceable battery. In some inaccurate or incomplete data. To view the full Declaration of Directive 1999/5/EC...
?Important Safety and Product Information
Page 4
.../or used for service. Limited Warranty Garmin's non-aviation products are not eligible for one year from any package purchased through online auctions are warranted to repair or replace (with a new or newly-overhauled replacement product) the device or software or offer a full refund of the sales receipt from defects in -country distributor and this device under Part THIS WARRANTY GIVES YOU SPECIFIC...
.../or used for service. Limited Warranty Garmin's non-aviation products are not eligible for one year from any package purchased through online auctions are warranted to repair or replace (with a new or newly-overhauled replacement product) the device or software or offer a full refund of the sales receipt from defects in -country distributor and this device under Part THIS WARRANTY GIVES YOU SPECIFIC...
?Declaration of Conformity
Page 1
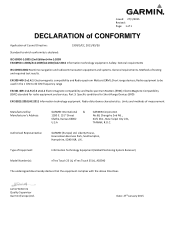
... Positioning System Receiver) Model Number(s): eTrex Touch 25 (t), eTrex Touch 35 (t), A02540 The undersigned does hereby declare that the equipment complies with the above Directives Jamie Wiltshire Quality Supervisor Garmin (Europe) Ltd. Part 3: Specific conditions for radio equipment and services; Radio disturbance characteristics. Liberty House, Hounsdown Business Park, Southampton, Hampshire, SO40 9LR, U.K. Type of testing and required test results. Radio equipment to be used in the...
... Positioning System Receiver) Model Number(s): eTrex Touch 25 (t), eTrex Touch 35 (t), A02540 The undersigned does hereby declare that the equipment complies with the above Directives Jamie Wiltshire Quality Supervisor Garmin (Europe) Ltd. Part 3: Specific conditions for radio equipment and services; Radio disturbance characteristics. Liberty House, Hounsdown Business Park, Southampton, Hampshire, SO40 9LR, U.K. Type of testing and required test results. Radio equipment to be used in the...


