
Important Safety and Product Information
Page 2
... navigating, carefully compare information displayed on the windshield. • Always use an internal, nonuser-replaceable battery for more information. See www .garmin.com/prop65 for various purposes, such as the steering wheel, the foot pedals, or the transmission levers. To prevent damage, remove the ... provide route suggestions. Minimize the amount of time spent viewing the device screen while driving. • Do not input destinations, change settings, or access any airbag. (See diagram.) Do not mount Do not place where the unsecured on driver's field the vehicle of ...
... navigating, carefully compare information displayed on the windshield. • Always use an internal, nonuser-replaceable battery for more information. See www .garmin.com/prop65 for various purposes, such as the steering wheel, the foot pedals, or the transmission levers. To prevent damage, remove the ... provide route suggestions. Minimize the amount of time spent viewing the device screen while driving. • Do not input destinations, change settings, or access any airbag. (See diagram.) Do not mount Do not place where the unsecured on driver's field the vehicle of ...

Owner's Manual
Page 3
... Maps 8 Tracks 9 About Tracks 9 Navigating a Saved Track........ 10 Using the Main Pages........11 Customizing the Data Fields.....11 Restoring Default Page Settings 11 Map 11 Compass 13 Using the Compass 14 Using Sight 'N Go 14 Elevation Plot 15 Opening the Main Menu........... 16 Trip Computer 17 ...Main Menu Features and Settings 18 Geocaches 18 Share Wirelessly 18 Proximity Alarms 19 Profile Change 19 Area Calculation 19 Satellite 20 Additional Main Menu Tools..... 20...
... Maps 8 Tracks 9 About Tracks 9 Navigating a Saved Track........ 10 Using the Main Pages........11 Customizing the Data Fields.....11 Restoring Default Page Settings 11 Map 11 Compass 13 Using the Compass 14 Using Sight 'N Go 14 Elevation Plot 15 Opening the Main Menu........... 16 Trip Computer 17 ...Main Menu Features and Settings 18 Geocaches 18 Share Wirelessly 18 Proximity Alarms 19 Profile Change 19 Area Calculation 19 Satellite 20 Additional Main Menu Tools..... 20...
Owner's Manual
Page 4
... 29 Changing the Page Sequence 29 Customizing the Unit Settings 30 Time Settings 30 Position Format Settings.......... 30 Altimeter Settings 31 Geocache Settings 32 Routing Settings 32 Fitness 33 Profiles 33 Appendix 34 Registering Your Device........... 34 Updating the Software 34 Viewing Important Device Information 34 Contacting Garmin Product Support 34 Using the Backlight 35 Specifications 35...
... 29 Changing the Page Sequence 29 Customizing the Unit Settings 30 Time Settings 30 Position Format Settings.......... 30 Altimeter Settings 31 Geocache Settings 32 Routing Settings 32 Fitness 33 Profiles 33 Appendix 34 Registering Your Device........... 34 Updating the Software 34 Viewing Important Device Information 34 Contacting Garmin Product Support 34 Using the Backlight 35 Specifications 35...
Owner's Manual
Page 5
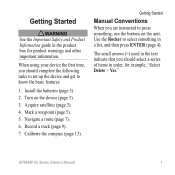
... features. 1. Calibrate the compass (page 13). Record a track (page 9). 7. The small arrows (>) used in the text indicate that you should complete the following tasks to set up the device and get to press something in order, for product warnings and other important information. Install the batteries (page 3). 2. Getting Started warning...
... features. 1. Calibrate the compass (page 13). Record a track (page 9). 7. The small arrows (>) used in the text indicate that you should complete the following tasks to set up the device and get to press something in order, for product warnings and other important information. Install the batteries (page 3). 2. Getting Started warning...
Owner's Manual
Page 7
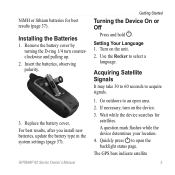
... (page 37). NiMH or lithium batteries for satellites. Replace the battery cover. A question mark flashes while the device determines your location. 4. GPSMAP 62 Series Owner's Manual Getting Started Turning the Device On or Off Press and hold . Go outdoors to open area. 2. Quickly press to... may take 30 to 60 seconds to select a language. For best results, after you install new batteries, update the battery type in the system settings (page 37). Turn on the device. 3. If necessary, turn counterclockwise and pulling up. 2. Installing the Batteries 1. Remove the battery cover by ...
... (page 37). NiMH or lithium batteries for satellites. Replace the battery cover. A question mark flashes while the device determines your location. 4. GPSMAP 62 Series Owner's Manual Getting Started Turning the Device On or Off Press and hold . Go outdoors to open area. 2. Quickly press to... may take 30 to 60 seconds to select a language. For best results, after you install new batteries, update the battery type in the system settings (page 37). Turn on the device. 3. If necessary, turn counterclockwise and pulling up. 2. Installing the Batteries 1. Remove the battery cover by ...
Owner's Manual
Page 15
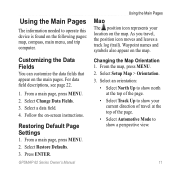
For data field descriptions, see page 22. 1. Select Restore Defaults. 3. From a main page, press meNu. 2. Select Change Data Fields. 3. Restoring Default Page Settings 1. Press enter. From the map, press MENU. 2. Select Setup Map > Orientation. 3. Select a data field. 4. Changing the Map Orientation 1. Select an ... information needed to operate this device is found on the map. Follow the on the map. From a main page, press meNu. 2. GPSMAP 62 Series Owner's Manual Using the Main Pages Map The position icon represents your current direction of the page. • Select Track Up...
For data field descriptions, see page 22. 1. Select Restore Defaults. 3. From a main page, press meNu. 2. Select Change Data Fields. 3. Restoring Default Page Settings 1. Press enter. From the map, press MENU. 2. Select Setup Map > Orientation. 3. Select a data field. 4. Changing the Map Orientation 1. Select an ... information needed to operate this device is found on the map. Follow the on the map. From a main page, press meNu. 2. GPSMAP 62 Series Owner's Manual Using the Main Pages Map The position icon represents your current direction of the page. • Select Track Up...
Owner's Manual
Page 16
note: Higher detail settings may cause the map to show guidance text on the map. • Advanced Map Setup ◦◦ Auto Zoom-automatically selects the appropriate zoom level ...; Zoom Levels-map items draw or appear at the bottom of map data displayed on the device. Press quit to measure distance from your map. GPSMAP 62 Series Owner's Manual From the map, press MENU. 2. The device automatically begins measuring from the current location. 1. Select Measure Distance. Move the cursor to...
note: Higher detail settings may cause the map to show guidance text on the map. • Advanced Map Setup ◦◦ Auto Zoom-automatically selects the appropriate zoom level ...; Zoom Levels-map items draw or appear at the bottom of map data displayed on the device. Press quit to measure distance from your map. GPSMAP 62 Series Owner's Manual From the map, press MENU. 2. The device automatically begins measuring from the current location. 1. Select Measure Distance. Move the cursor to...
Owner's Manual
Page 18
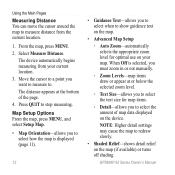
... compass reading to directional letters (N, S, E, W). ◦◦ Numeric Degrees-sets the compass reading to degrees (0°-359°). ◦◦ Mils-sets the compass reading to your location. Using Sight 'N Go NOTE: Sight 'N Go is available only with the GPSMAP 62s and GPSMAP 62st. GPSMAP 62 Series Owner's Manual From the main menu, select Sight 'N Go...
... compass reading to directional letters (N, S, E, W). ◦◦ Numeric Degrees-sets the compass reading to degrees (0°-359°). ◦◦ Mils-sets the compass reading to your location. Using Sight 'N Go NOTE: Sight 'N Go is available only with the GPSMAP 62s and GPSMAP 62st. GPSMAP 62 Series Owner's Manual From the main menu, select Sight 'N Go...

Owner's Manual
Page 19
... north as the heading reference (0°). ◦◦ User-sets the magnetic variation value. • Go To Line/Pointer-allows you to select how the course is available only with the GPSMAP 62s and GPSMAP 62st. Calibrating the Barometric Altimeter You can manually calibrate the barometric altimeter if ...you are traveling at a higher rate of speed for a set period of time, or turns the compass off. • ...
... north as the heading reference (0°). ◦◦ User-sets the magnetic variation value. • Go To Line/Pointer-allows you to select how the course is available only with the GPSMAP 62s and GPSMAP 62st. Calibrating the Barometric Altimeter You can manually calibrate the barometric altimeter if ...you are traveling at a higher rate of speed for a set period of time, or turns the compass off. • ...
Owner's Manual
Page 20
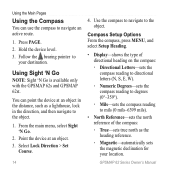
See page 18 for main menu settings pages. Calibrate Altimeter-see page 15. Opening the Main Menu The main menu gives you access to factory settings. From any page, press MENU twice. 16 GPSMAP 62 Series Owner's Manual Using the Main Pages Elevation Plot Setup Options From the elevation plot, press ...menu. • Change Plot Type-sets the type of data shown on the elevation plot:...
See page 18 for main menu settings pages. Calibrate Altimeter-see page 15. Opening the Main Menu The main menu gives you access to factory settings. From any page, press MENU twice. 16 GPSMAP 62 Series Owner's Manual Using the Main Pages Elevation Plot Setup Options From the elevation plot, press ...menu. • Change Plot Type-sets the type of data shown on the elevation plot:...

Owner's Manual
Page 21
... information, reset the trip information before beginning a trip. • Big Numbers-changes the size of the numbers shown on the dashboard. GPSMAP 62 Series Owner's Manual 17 note: Your customized settings are remembered by the dashboard, and will not be lost when you change profiles (page 19). Using the Main Pages •...
... information, reset the trip information before beginning a trip. • Big Numbers-changes the size of the numbers shown on the dashboard. GPSMAP 62 Series Owner's Manual 17 note: Your customized settings are remembered by the dashboard, and will not be lost when you change profiles (page 19). Using the Main Pages •...
Owner's Manual
Page 22
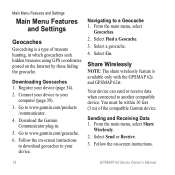
... to www.garmin.com/products /communicator. 4. Navigating to another compatible device. Your device can send or receive data when connected to a Geocache 1. You must be within 10 feet (3 m) of treasure hunting, in . 5. Main Menu Features and Settings Main Menu Features and Settings Geocaches Geocaching is available only with the GPSMAP 62s and GPSMAP 62st. Register your...
... to www.garmin.com/products /communicator. 4. Navigating to another compatible device. Your device can send or receive data when connected to a Geocache 1. You must be within 10 feet (3 m) of treasure hunting, in . 5. Main Menu Features and Settings Main Menu Features and Settings Geocaches Geocaching is available only with the GPSMAP 62s and GPSMAP 62st. Register your...
Owner's Manual
Page 23
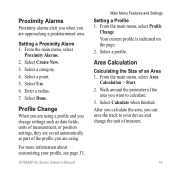
... Select a profile. From the main menu, select Profile Change. For more information about customizing your device and change settings such as data fields, units of measurement, or position settings, they are saved automatically as part of an Area 1. Walk around the perimeter of the area you are using... Proximity Alarms Proximity alarms alert you when you want to your profile, see page 33. Select Create New. 3. GPSMAP 62 Series Owner's Manual Main Menu Features and Settings Setting a Profile 1. Setting a Proximity Alarm 1. From the main menu, select Proximity Alarms. 2.
... Select a profile. From the main menu, select Profile Change. For more information about customizing your device and change settings such as data fields, units of measurement, or position settings, they are saved automatically as part of an Area 1. Walk around the perimeter of the area you are using... Proximity Alarms Proximity alarms alert you when you want to your profile, see page 33. Select Create New. 3. GPSMAP 62 Series Owner's Manual Main Menu Features and Settings Setting a Profile 1. Setting a Proximity Alarm 1. From the main menu, select Proximity Alarms. 2.

Owner's Manual
Page 24
... Moon-displays sunrise and sunset times along with your current track toward the top of the screen or oriented with the moon phase. 20 GPSMAP 62 Series Owner's Manual You can use this location to mark your current location on and off GPS. This option is displayed in multicolor... On Map-allows you turn the GPS on the map. Main Menu Features and Settings Satellite The satellite page shows your GPS position using the Garmin AutoLocate feature. Satellite Settings From the satellite page, press menu. • Use With GPS On-allows you to turn off . • Track Up-indicates whether ...
... Moon-displays sunrise and sunset times along with your current track toward the top of the screen or oriented with the moon phase. 20 GPSMAP 62 Series Owner's Manual You can use this location to mark your current location on and off GPS. This option is displayed in multicolor... On Map-allows you turn the GPS on the map. Main Menu Features and Settings Satellite The satellite page shows your GPS position using the Garmin AutoLocate feature. Satellite Settings From the satellite page, press menu. • Use With GPS On-allows you to turn off . • Track Up-indicates whether ...
Owner's Manual
Page 25
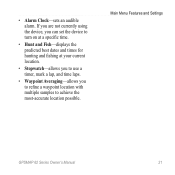
Main Menu Features and Settings GPSMAP 62 Series Owner's Manual 21 If you are not currently using the device, you can set the device to turn on at a specific time. • Hunt and Fish-displays the predicted best dates and times for hunting and fishing at your current location. • Stopwatch-allows you to use a timer, mark a lap, and time laps. • Waypoint Averaging-allows you to refine a waypoint location with multiple samples to achieve the most-accurate location possible. • Alarm Clock-sets an audible alarm.
Main Menu Features and Settings GPSMAP 62 Series Owner's Manual 21 If you are not currently using the device, you can set the device to turn on at a specific time. • Hunt and Fish-displays the predicted best dates and times for hunting and fishing at your current location. • Stopwatch-allows you to use a timer, mark a lap, and time laps. • Waypoint Averaging-allows you to refine a waypoint location with multiple samples to achieve the most-accurate location possible. • Alarm Clock-sets an audible alarm.

Owner's Manual
Page 28
...you have strayed from the original path of travel. The data field arrow points in the default position format regardless of the selected settings. Moving Avg. Temperature - The current rate of speed at which you are moving since last reset. 24 Data Field Description Speed...The maximum speed reached since last reset. Overall Your average speed Avg. Speed - Sunset The time of sunset based on your GPS position. GPSMAP 62 Series Owner's Manual A running tally of the water. Speed - Customizing Your Device Data Field Location (lat/lon) Location (selected)...
...you have strayed from the original path of travel. The data field arrow points in the default position format regardless of the selected settings. Moving Avg. Temperature - The current rate of speed at which you are moving since last reset. 24 Data Field Description Speed...The maximum speed reached since last reset. Overall Your average speed Avg. Speed - Sunset The time of sunset based on your GPS position. GPSMAP 62 Series Owner's Manual A running tally of the water. Speed - Customizing Your Device Data Field Location (lat/lon) Location (selected)...

Owner's Manual
Page 30
... about WAAS, go to accept DGPS Differential Global Positioning System information from a device supplying RTCM data in an SC-104 format. 26 GPSMAP 62 Series Owner's Manual note: Changing the text language does not change the language of user-entered data or map data, such as...street names. • Battery Type-allows you to select the type of battery you are using. • Interface-sets the format of the serial interface: ◦◦ Garmin Serial-Garmin proprietary format used to provide PVT protocol data. ◦◦ NMEA In/Out-provides standard NMEA 0183 output and input...
... about WAAS, go to accept DGPS Differential Global Positioning System information from a device supplying RTCM data in an SC-104 format. 26 GPSMAP 62 Series Owner's Manual note: Changing the text language does not change the language of user-entered data or map data, such as...street names. • Battery Type-allows you to select the type of battery you are using. • Interface-sets the format of the serial interface: ◦◦ Garmin Serial-Garmin proprietary format used to provide PVT protocol data. ◦◦ NMEA In/Out-provides standard NMEA 0183 output and input...
Owner's Manual
Page 31
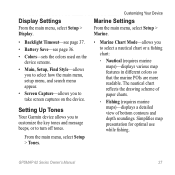
... > Tones. Simplifies map presentation for optimal use while fishing. GPSMAP 62 Series Owner's Manual 27 The nautical chart reflects the drawing scheme of paper charts. ◦◦ Fishing (requires marine maps)-displays a detailed view of bottom contours and depth soundings. Setting Up Tones Your Garmin device allows you to select a nautical chart or...
... > Tones. Simplifies map presentation for optimal use while fishing. GPSMAP 62 Series Owner's Manual 27 The nautical chart reflects the drawing scheme of paper charts. ◦◦ Fishing (requires marine maps)-displays a detailed view of bottom contours and depth soundings. Setting Up Tones Your Garmin device allows you to select a nautical chart or...

Owner's Manual
Page 32
... device to automatically filter out light sectors depending on the zoom level. • Symbol Set-allows you to turn spot soundings on the map. • Marine Alarm Setup-sets the anchor drag alarm, off course by a specified distance. 1. Select Done. 28 GPSMAP 62 Series Owner's Manual From the main menu, select Setup > Marine...
... device to automatically filter out light sectors depending on the zoom level. • Symbol Set-allows you to turn spot soundings on the map. • Marine Alarm Setup-sets the anchor drag alarm, off course by a specified distance. 1. Select Done. 28 GPSMAP 62 Series Owner's Manual From the main menu, select Setup > Marine...

Owner's Manual
Page 33
...than the specified value. 6. From the main menu, select Setup > Marine > Marine Alarm Setup. 2. Select Shallow Water > On to set an alarm to reset. Customizing Your Device 1. Press Enter. Enter the depth that triggers the shallow water alarm. 4. Select Deep Water > On to... the depth is greater than the specified value. 3. From the main menu, select Setup > Reset. 2. Select a page. 3. GPSMAP 62 Series Owner's Manual 29 Setting the Deep Water or Shallow Water Alarm 1. Changing the Page Sequence 1. Select Done. Resetting Data You can reset trip data, delete all...
...than the specified value. 6. From the main menu, select Setup > Marine > Marine Alarm Setup. 2. Select Shallow Water > On to set an alarm to reset. Customizing Your Device 1. Press Enter. Enter the depth that triggers the shallow water alarm. 4. Select Deep Water > On to... the depth is greater than the specified value. 3. From the main menu, select Setup > Reset. 2. Select a page. 3. GPSMAP 62 Series Owner's Manual 29 Setting the Deep Water or Shallow Water Alarm 1. Changing the Page Sequence 1. Select Done. Resetting Data You can reset trip data, delete all...


