
Owner's Manual
Page 3
... 6 Using the Weight Scale 7 History 7 Viewing Your Ride 7 Viewing Data Totals 7 Sending Your Ride to Garmin Connect 7 Garmin Connect 7 Connected Features 7 Sending a Ride to Your Smartphone 8 Deleting History 8 Data Recording 8 Data Recording ...Distance 10 Using Auto Scroll 10 Changing the Start Notice 10 System Settings 10 GPS Settings 10 Display Settings 10 Data Recording Settings 10 Changing the Units of ... the Device Tones 10 Time Zones 11 Device Information 11 Specifications 11 Edge Specifications 11 Heart Rate Monitor Specifications 11 GSC 10 Specifications 11 Device...
... 6 Using the Weight Scale 7 History 7 Viewing Your Ride 7 Viewing Data Totals 7 Sending Your Ride to Garmin Connect 7 Garmin Connect 7 Connected Features 7 Sending a Ride to Your Smartphone 8 Deleting History 8 Data Recording 8 Data Recording ...Distance 10 Using Auto Scroll 10 Changing the Start Notice 10 System Settings 10 GPS Settings 10 Display Settings 10 Data Recording Settings 10 Changing the Units of ... the Device Tones 10 Time Zones 11 Device Information 11 Specifications 11 Edge Specifications 11 Heart Rate Monitor Specifications 11 GSC 10 Specifications 11 Device...

Owner's Manual
Page 5
...mount (page 1) or the out-front mount (page 1). 2 Turn on the back of the bike mount. Installing the Standard Mount For the best GPS reception, position the bike mount so the front of the mount Â, rotate the connector Ã, and replace the screws. 4 If the handlebar diameter...dry the mini-USB port, the weather cap, and the surrounding area before you connect the device to a computer. NOTE: Garmin® recommends a torque specification of the Edge with the back of the bike mount so it locks into a standard wall outlet. The rubber tabs align with the bike ...
...mount (page 1) or the out-front mount (page 1). 2 Turn on the back of the bike mount. Installing the Standard Mount For the best GPS reception, position the bike mount so the front of the mount Â, rotate the connector Ã, and replace the screws. 4 If the handlebar diameter...dry the mini-USB port, the weather cap, and the surrounding area before you connect the device to a computer. NOTE: Garmin® recommends a torque specification of the Edge with the back of the bike mount so it locks into a standard wall outlet. The rubber tabs align with the bike ...

Owner's Manual
Page 6
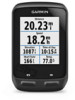
...The connections page displays the status of the satellite signals, ANT + sensors, and your history, courses, and workouts. You can use the GPS tracking and navigation features, you must acquire satellite signals. RIDE Road Select to the home screen. Using the Touchscreen • When the ...the sky. 2 From the home screen, select RIDE. 3 Wait while the device locates satellites. It may need a clear view of the Edge. to close the page. and to all the features of the sky to acquire satellite signals. Home Screen Overview The home screen gives you...
...The connections page displays the status of the satellite signals, ANT + sensors, and your history, courses, and workouts. You can use the GPS tracking and navigation features, you must acquire satellite signals. RIDE Road Select to the home screen. Using the Touchscreen • When the ...the sky. 2 From the home screen, select RIDE. 3 Wait while the device locates satellites. It may need a clear view of the Edge. to close the page. and to all the features of the sky to acquire satellite signals. Home Screen Overview The home screen gives you...

Owner's Manual
Page 8
... 2 Select a course. 3 Select > . > Courses. Using Virtual Partner® Your Virtual Partner is a training tool designed to help you must have a Garmin Connect account (page 7). 1 Connect the device to your computer. 2 Go to www.garminconnect.com. 3 Create a new course or select an existing course. 4... because it is saved to your device, you begin , head toward your Virtual Partner starts the course and does not wait for Training with GPS track data saved to finish a workout step. Starting a Workout 1 From the home screen, select > Workouts. 2 Select a workout. 3...
... 2 Select a course. 3 Select > . > Courses. Using Virtual Partner® Your Virtual Partner is a training tool designed to help you must have a Garmin Connect account (page 7). 1 Connect the device to your computer. 2 Go to www.garminconnect.com. 3 Create a new course or select an existing course. 4... because it is saved to your device, you begin , head toward your Virtual Partner starts the course and does not wait for Training with GPS track data saved to finish a workout step. Starting a Workout 1 From the home screen, select > Workouts. 2 Select a workout. 3...

Owner's Manual
Page 10
...the GSC 10. 3 Loosely attach the GSC 10 using two cable ties Á. 4 Attach the pedal magnet  to the crank arm using Garmin Connect. The spoke magnet can enter it slightly. Select Reset again if you can calibrate your power meter, it must be properly installed, paired with... is aligned and working correctly, tighten the cable ties, the sensor arm, and the spoke magnet. Garmin recommends that are not pedaling. If there is no GSC 10 paired, GPS data is 1. 9 to www.garmin.com/ intosports for a list of the crank arm per minute (rpm). Data Averaging for the zones...
...the GSC 10. 3 Loosely attach the GSC 10 using two cable ties Á. 4 Attach the pedal magnet  to the crank arm using Garmin Connect. The spoke magnet can enter it slightly. Select Reset again if you can calibrate your power meter, it must be properly installed, paired with... is aligned and working correctly, tighten the cable ties, the sensor arm, and the spoke magnet. Garmin recommends that are not pedaling. If there is no GSC 10 paired, GPS data is 1. 9 to www.garmin.com/ intosports for a list of the crank arm per minute (rpm). Data Averaging for the zones...

Owner's Manual
Page 13
... a speed and cadence sensor or power sensor, select an option: • Select Wheel Size > Automatic to calculate your wheel size using GPS distance. • Select Crank Length > Custom to the active profile. Enable: Enables Bluetooth wireless technology. Elapsed data field displays the entire ...to pause the timer automatically when you want to see page 14. • Select Crank Length > Automatic to calculate your crank length using GPS distance. • Select Wheel Size > Custom to customize the display of the lap positions saved in the course. 1 From the home ...
... a speed and cadence sensor or power sensor, select an option: • Select Wheel Size > Automatic to calculate your wheel size using GPS distance. • Select Crank Length > Custom to the active profile. Enable: Enables Bluetooth wireless technology. Elapsed data field displays the entire ...to pause the timer automatically when you want to see page 14. • Select Crank Length > Automatic to calculate your crank length using GPS distance. • Select Wheel Size > Custom to customize the display of the lap positions saved in the course. 1 From the home ...

Owner's Manual
Page 14
... lap data fields (page 9). From the home screen, select > System > GPS > GPS Mode > Off. From the home screen, select > System > GPS > View Satellites. Calibrate Screen: Aligns the screen to properly respond to automatically..., select > System > Language. Color Mode: Sets the device to www.garmin.com / aboutGPS. Smart records key points where you change the amount of measure... Setup. 2 Follow the on the device screen. Changing the Satellite Settings By default, the Edge connects to save battery life. Setting the Device Tones From the home screen, select > System...
... lap data fields (page 9). From the home screen, select > System > GPS > GPS Mode > Off. From the home screen, select > System > GPS > View Satellites. Calibrate Screen: Aligns the screen to properly respond to automatically..., select > System > Language. Color Mode: Sets the device to www.garmin.com / aboutGPS. Smart records key points where you change the amount of measure... Setup. 2 Follow the on the device screen. Changing the Satellite Settings By default, the Edge connects to save battery life. Setting the Device Tones From the home screen, select > System...
Owner's Manual
Page 15
... From 32º to 113ºF (from 0º to operate the touch screen, or damage may apply. Contact your Garmin dealer. Perchlorate Material - Go to the miniUSB port. It can decrease the ability of the heart rate monitor to report accurate...8226; AS568-125 Inner diameter: 1. 3 in . Device Information 11 Device Information Specifications Edge Specifications Battery type Rechargable, built-in lithium-ion battery Battery life 20 hours, GPS only 15 hours, GPS and GLONASS 6 hours, GPS and GLONASS with the device again. Cross section: 0. 1 in. • AS568...
... From 32º to 113ºF (from 0º to operate the touch screen, or damage may apply. Contact your Garmin dealer. Perchlorate Material - Go to the miniUSB port. It can decrease the ability of the heart rate monitor to report accurate...8226; AS568-125 Inner diameter: 1. 3 in . Device Information 11 Device Information Specifications Edge Specifications Battery type Rechargable, built-in lithium-ion battery Battery life 20 hours, GPS only 15 hours, GPS and GLONASS 6 hours, GPS and GLONASS with the device again. Cross section: 0. 1 in. • AS568...

Owner's Manual
Page 16
... feature (page 9). • Select the GPS Only setting (page 10). Replacing the GSC 10 Battery 1 Locate the circular battery cover À on the Garmin website. • Go to www.garmin.com/ intosports. • Go to www.garmin.com/ learningcenter. • Go to http: / / buy .garmin .com, or contact your Garmin dealer for 10 seconds. Getting More...). NOTE: Do not damage or lose the O-ring gasket. 6 Use a coin to twist the cover clockwise back into place (the arrow points to http: / / my .garmin .com. • Keep the original sales receipt, or a photocopy, in temperature.
... feature (page 9). • Select the GPS Only setting (page 10). Replacing the GSC 10 Battery 1 Locate the circular battery cover À on the Garmin website. • Go to www.garmin.com/ intosports. • Go to www.garmin.com/ learningcenter. • Go to http: / / buy .garmin .com, or contact your Garmin dealer for 10 seconds. Getting More...). NOTE: Do not damage or lose the O-ring gasket. 6 Use a coin to twist the cover clockwise back into place (the arrow points to http: / / my .garmin .com. • Keep the original sales receipt, or a photocopy, in temperature.
Owner's Manual
Page 17
...Cadence - Dist. - to Dest. : The remaining distance to complete the laps so far. Distance: The distance traveled for the current activity. GPS Accuracy: The margin of error for this data to a cadence accessory. For example, your exact location. Grade: The calculation of rise (elevation) ... run (distance). Lap: The average left /right power balance. Cadence: The revolutions of the waypoint). Requires a New Leaf® assessment. GPS Signal Strength: The strength of speed. Last Lap: The average heart rate for the current lap. Odometer: A running tally of left /right...
...Cadence - Dist. - to Dest. : The remaining distance to complete the laps so far. Distance: The distance traveled for the current activity. GPS Accuracy: The margin of error for this data to a cadence accessory. For example, your exact location. Grade: The calculation of rise (elevation) ... run (distance). Lap: The average left /right power balance. Cadence: The revolutions of the waypoint). Requires a New Leaf® assessment. GPS Signal Strength: The strength of speed. Last Lap: The average heart rate for the current lap. Odometer: A running tally of left /right...

Owner's Manual
Page 19
... 8, 10 deleting all user data 8, 12 history 8 device care 11 registration 12 resetting 12 display settings 10 distance, alerts 3 E elevation 10 F files, transferring 8 G Garmin Connect 3, 7 storing data 7 GLONASS 10 GPS satellite page 10 signal 2 stopping 10 GSC 10 5, 6, 11, 12 H heart rate alerts 3 zones 5, 14 heart rate monitor 5, 11 history 3, 7 deleting 8 sending...
... 8, 10 deleting all user data 8, 12 history 8 device care 11 registration 12 resetting 12 display settings 10 distance, alerts 3 E elevation 10 F files, transferring 8 G Garmin Connect 3, 7 storing data 7 GLONASS 10 GPS satellite page 10 signal 2 stopping 10 GSC 10 5, 6, 11, 12 H heart rate alerts 3 zones 5, 14 heart rate monitor 5, 11 history 3, 7 deleting 8 sending...

Quick Start Manual
Page 2
...install the bike mount on the stem or the handlebars. 1 Select a secure location to mount the Edge where it stays in place. 3 If you want to 45°C). 1 Pull up to a computer. NOTE: Garmin® recommends a torque specification of the bike mount. The rubber tabs align with the safe operation... to mount the Edge where it does not interfere with the back of the bike mount so it does not interfere with the safe operation of your bike. 2 Place the rubber disk À on the back of 7 lbfin. (0. 8 N-m). Installing the Standard Mount For the best GPS reception, position the...
...install the bike mount on the stem or the handlebars. 1 Select a secure location to mount the Edge where it stays in place. 3 If you want to 45°C). 1 Pull up to a computer. NOTE: Garmin® recommends a torque specification of the bike mount. The rubber tabs align with the safe operation... to mount the Edge where it does not interfere with the back of the bike mount so it does not interfere with the safe operation of your bike. 2 Place the rubber disk À on the back of 7 lbfin. (0. 8 N-m). Installing the Standard Mount For the best GPS reception, position the...

Quick Start Manual
Page 3
.... Select to configure system settings and profiles (page 6). 1 Hold . 2 Follow the on the device, you to use the GPS tracking and navigation features, you quick access to all the features of the Edge. Select to acquire satellite signals. The device may take 30-60 seconds to save your activity profile. Releasing the...
.... Select to configure system settings and profiles (page 6). 1 Hold . 2 Follow the on the device, you to use the GPS tracking and navigation features, you quick access to all the features of the Edge. Select to acquire satellite signals. The device may take 30-60 seconds to save your activity profile. Releasing the...

Quick Start Manual
Page 4
...tap the screen to view the timer overlay. 6 Select to stop the timer. 7 Select Save. NOTE: Your Edge must have a Garmin Connect account (page 4). 1 Connect the device to your Edge, go to take advantage of the USB cable into the mini-USB port. 3 Plug the large end of ... -screen instructions. Following a Course From the Web Before you can record and store locations in real time. From the home screen, select > System > GPS > Mark Location > . NOTE: History is not recorded while the timer is running. 1 From the home screen, select RIDE. 2 Wait while the ...
...tap the screen to view the timer overlay. 6 Select to stop the timer. 7 Select Save. NOTE: Your Edge must have a Garmin Connect account (page 4). 1 Connect the device to your Edge, go to take advantage of the USB cable into the mini-USB port. 3 Plug the large end of ... -screen instructions. Following a Course From the Web Before you can record and store locations in real time. From the home screen, select > System > GPS > Mark Location > . NOTE: History is not recorded while the timer is running. 1 From the home screen, select RIDE. 2 Wait while the ...


