
T5010 BIOS Guide
Page 5
...'s use. Use the Date and Time icon on page 2 for each segment of the field's function and any special information needed to set from your Windows Control panel or type time or date from the MS-DOS prompt. System Menu Table 2: Fields, Options and Defaults for the System Menu Note that...
...'s use. Use the Date and Time icon on page 2 for each segment of the field's function and any special information needed to set from your Windows Control panel or type time or date from the MS-DOS prompt. System Menu Table 2: Fields, Options and Defaults for the System Menu Note that...

T5010 BIOS Guide
Page 11
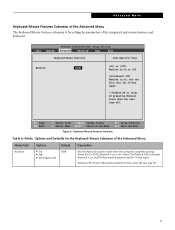
... is for the Keyboard/Mouse Submenu of the integrated and external mouse and keyboard. When [On/Padlock Off] is selected, Numlock is on or off. Windows XP (or later OS) preserves Numlock state when the user logs off . When [On] or [Off], Numlock is On, but [Fn] key must be pressed... used for 10-key input. * Windows XP or later OS preserves Numlock state when the user logs off . 11 Phoenix SecureCore(tm) Setup Utility Info System Advanced Security Boot Exit Keyboard...
... is for the Keyboard/Mouse Submenu of the integrated and external mouse and keyboard. When [On/Padlock Off] is selected, Numlock is on or off. Windows XP (or later OS) preserves Numlock state when the user logs off . When [On] or [Off], Numlock is On, but [Fn] key must be pressed... used for 10-key input. * Windows XP or later OS preserves Numlock state when the user logs off . 11 Phoenix SecureCore(tm) Setup Utility Info System Advanced Security Boot Exit Keyboard...

T5010 BIOS Guide
Page 12
LifeBook T Series BIOS Video Features Submenu of the Advanced Menu The Video Features submenu is for the Video Features Submenu of the Advanced Menu Menu Field ... Change Values F9 Setup Defaults ▲ Select Menu Enter Select Sub-Menu F10 Save and Exit Figure 7. Note that this setting is not effective after Windows starts up . Video Features Submenu Table 7: Fields, Options and Defaults for setting the display parameters.
LifeBook T Series BIOS Video Features Submenu of the Advanced Menu The Video Features submenu is for the Video Features Submenu of the Advanced Menu Menu Field ... Change Values F9 Setup Defaults ▲ Select Menu Enter Select Sub-Menu F10 Save and Exit Figure 7. Note that this setting is not effective after Windows starts up . Video Features Submenu Table 7: Fields, Options and Defaults for setting the display parameters.

T5010 BIOS Guide with UMTS
Page 5
... Exit Figure 2. System Time and System Date can also be set or view the current system parameters. (See Navigating through the Setup Utility on your Windows Control panel or type time or date from your system's configuration. Move between the segments with the [Tab] key and/or [Shift] + [Tab] keys. System...
... Exit Figure 2. System Time and System Date can also be set or view the current system parameters. (See Navigating through the Setup Utility on your Windows Control panel or type time or date from your system's configuration. Move between the segments with the [Tab] key and/or [Shift] + [Tab] keys. System...
T5010 BIOS Guide with UMTS
Page 11
... Setup Defaults ▲ Select Menu Enter Select Sub-Menu F10 Save and Exit Figure 6. When [On/Padlock Off] is selected, Numlock is on or off. Windows XP (or later OS) preserves Numlock state when the user logs off. 11 When [On] or [Off], Numlock is on , but use with [Fn] for... when the computer completes booting. Advanced Menu Keyboard/Mouse Features Submenu of the Advanced Menu The Keyboard/Mouse Features submenu is for 10-key input. * Windows XP or later OS preserves Numlock state when the user logs off.
... Setup Defaults ▲ Select Menu Enter Select Sub-Menu F10 Save and Exit Figure 6. When [On/Padlock Off] is selected, Numlock is on or off. Windows XP (or later OS) preserves Numlock state when the user logs off. 11 When [On] or [Off], Numlock is on , but use with [Fn] for... when the computer completes booting. Advanced Menu Keyboard/Mouse Features Submenu of the Advanced Menu The Keyboard/Mouse Features submenu is for 10-key input. * Windows XP or later OS preserves Numlock state when the user logs off.

T5010 BIOS Guide with UMTS
Page 12
... Security Boot Exit Video Features Item Specific Help Display: [Auto] Select display terminal. * This setting is not effective after Windows starts up . Note that this setting is for setting the display parameters. LifeBook T Series BIOS Video Features Submenu of the Advanced Menu Menu Field Display: Options ■ Internal Flat Panel ■ External...
... Security Boot Exit Video Features Item Specific Help Display: [Auto] Select display terminal. * This setting is not effective after Windows starts up . Note that this setting is for setting the display parameters. LifeBook T Series BIOS Video Features Submenu of the Advanced Menu Menu Field Display: Options ■ Internal Flat Panel ■ External...

T5010 User's Guide
Page 2
We disclaim liability for errors, omissions, or future changes. Microsoft, Windows, Windows Vista, and OneNote are trademarks or registered trademarks of Google Incorporated. Copyright and Trademark Information Fujitsu Computer Systems Corporation has made every effort to ensure the accuracy and ...CyberLink Corp. EverNote is a trademark of Bluetooth SIG, Inc., USA. PowerProducer is a trademark of this document; Fujitsu, the Fujitsu logo, and LifeBook are continually improving the capabilities of our products, we cannot guarantee the accuracy of the contents of the Personal ...
We disclaim liability for errors, omissions, or future changes. Microsoft, Windows, Windows Vista, and OneNote are trademarks or registered trademarks of Google Incorporated. Copyright and Trademark Information Fujitsu Computer Systems Corporation has made every effort to ensure the accuracy and ...CyberLink Corp. EverNote is a trademark of Bluetooth SIG, Inc., USA. PowerProducer is a trademark of this document; Fujitsu, the Fujitsu logo, and LifeBook are continually improving the capabilities of our products, we cannot guarantee the accuracy of the contents of the Personal ...
T5010 User's Guide
Page 8
...69 Hard Disk Drive Passwords 69 BIOS Setup Utility 70 Booting the System 71 Starting Windows Vista the first time 71 Registering Your LifeBook Tablet PC with Fujitsu 73 Installing ClickMe 73 Fujitsu Driver Update Utility 73 Power Management 74 Power/Suspend/Resume Button 74 Sleep Mode 74... Hibernation (Save-to-Disk) Feature 76 Windows Power Management 76 Restarting the System 76 Powering ...
...69 Hard Disk Drive Passwords 69 BIOS Setup Utility 70 Booting the System 71 Starting Windows Vista the first time 71 Registering Your LifeBook Tablet PC with Fujitsu 73 Installing ClickMe 73 Fujitsu Driver Update Utility 73 Power Management 74 Power/Suspend/Resume Button 74 Sleep Mode 74... Hibernation (Save-to-Disk) Feature 76 Windows Power Management 76 Restarting the System 76 Powering ...
T5010 User's Guide
Page 9
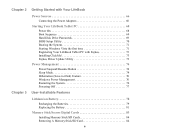
Chapter 4 PC Cards 85 Installing PC Cards 86 Removing PC Cards 86 Smart Card Reader 87 Memory Upgrade Module 88 Installing Memory Upgrade Modules 88 Removing a Memory Upgrade Module 90 Checking the Memory Capacity 90 ... Port Replicator Connector 94 Universal Serial Bus Ports 94 IEEE 1394 Port 95 Headphone Jack 96 Microphone Jack 96 External Video Port 96 Troubleshooting Your LifeBook Troubleshooting 98 Identifying the Problem 98 Specific Problems 100 Power On Self Test Messages 111 Restoring Your Pre-installed Software 115 Re-installing Individual Drivers...
Chapter 4 PC Cards 85 Installing PC Cards 86 Removing PC Cards 86 Smart Card Reader 87 Memory Upgrade Module 88 Installing Memory Upgrade Modules 88 Removing a Memory Upgrade Module 90 Checking the Memory Capacity 90 ... Port Replicator Connector 94 Universal Serial Bus Ports 94 IEEE 1394 Port 95 Headphone Jack 96 Microphone Jack 96 External Video Port 96 Troubleshooting Your LifeBook Troubleshooting 98 Identifying the Problem 98 Specific Problems 100 Power On Self Test Messages 111 Restoring Your Pre-installed Software 115 Re-installing Individual Drivers...

T5010 User's Guide
Page 11
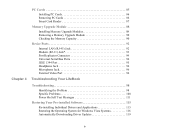
.../Off Switch 170 Disconnection Using the Icon in the Taskbar 170 Activating the WLAN Device 170 Configuring the Wireless LAN 171 Configuring the WLAN Using Windows Vista 171 Connection to the network 171 Troubleshooting the WLAN 172 Troubleshooting 172 WLAN Specifications 174 Specifications 174 Using the Bluetooth Device 176 What is...
.../Off Switch 170 Disconnection Using the Icon in the Taskbar 170 Activating the WLAN Device 170 Configuring the Wireless LAN 171 Configuring the WLAN Using Windows Vista 171 Connection to the network 171 Troubleshooting the WLAN 172 Troubleshooting 172 WLAN Specifications 174 Specifications 174 Using the Bluetooth Device 176 What is...

T5010 User's Guide
Page 18
The Suspend/Resume button allows you to connect an external monitor or LCD projector to your Tablet PC from suspend mode, and power on the system when it has been shut down from Windows. The LAN (RJ-45) jack is equipped with a DVI-D port for more information. Connect a telephone ...line to a Local Area Network (LAN) in your Tablet PC. 18 - Refer to suspend Tablet PC activity without powering off . The external video port ...
The Suspend/Resume button allows you to connect an external monitor or LCD projector to your Tablet PC from suspend mode, and power on the system when it has been shut down from Windows. The LAN (RJ-45) jack is equipped with a DVI-D port for more information. Connect a telephone ...line to a Local Area Network (LAN) in your Tablet PC. 18 - Refer to suspend Tablet PC activity without powering off . The external video port ...
T5010 User's Guide
Page 20
... Components The following is used to turn on and off , resume your LifeBook Tablet PC from sleep mode, and power on your Tablet PC when it has been shut down from Windows. See "Status Indicator Panel" on page 38. Status Indicator Panels The ... page 30. Keyboard A full-size keyboard with dedicated Windows keys. See "Activating the WLAN Device" on page 54. LifeBook Security/Tablet PC Buttons The LifeBook Security/Tablet PC Buttons provide password security for the display of your LifeBook Tablet PC. See "LifeBook Security/Tablet PC Buttons" on page 170. 20 - See "Power/...
... Components The following is used to turn on and off , resume your LifeBook Tablet PC from sleep mode, and power on your Tablet PC when it has been shut down from Windows. See "Status Indicator Panel" on page 38. Status Indicator Panels The ... page 30. Keyboard A full-size keyboard with dedicated Windows keys. See "Activating the WLAN Device" on page 54. LifeBook Security/Tablet PC Buttons The LifeBook Security/Tablet PC Buttons provide password security for the display of your LifeBook Tablet PC. See "LifeBook Security/Tablet PC Buttons" on page 170. 20 - See "Power/...

T5010 User's Guide
Page 31
...Access Indicator The Hard Drive/Optical Drive Access indicator shows whether your Tablet PC has been turned off . Even if the system was shut down from Windows, the Power indicator symbol will remain on even if your tablet is operating from the batteries, and you are charging your battery,...do not have an adapter connected External Power Indicator The external power indicator shows whether your LifeBook Tablet PC is shut off . This icon has two different states that can tell you what power source your LifeBook Tablet PC is using. • On: This means that either in use. • Off:...
...Access Indicator The Hard Drive/Optical Drive Access indicator shows whether your Tablet PC has been turned off . Even if the system was shut down from Windows, the Power indicator symbol will remain on even if your tablet is operating from the batteries, and you are charging your battery,...do not have an adapter connected External Power Indicator The external power indicator shows whether your LifeBook Tablet PC is shut off . This icon has two different states that can tell you what power source your LifeBook Tablet PC is using. • On: This means that either in use. • Off:...
T5010 User's Guide
Page 37
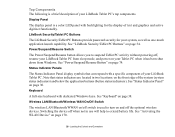
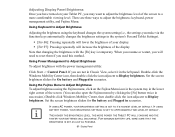
... with the power management utility: Click Start -> Control Panel. Double-click the Windows Mobility Center icon, then double-click the icon adjacent to Adjust Brightness Adjusting the brightness using the Fujitsu menu, click on your display. • [Fn+F7]: Pressing repeatedly will need... adjust the brightness: keyboard, power management utility, and Fujitsu Menu. Set the screen brightness sliders for On battery and Plugged in scenarios. Display Panel THE HIGHER THE BRIGHTNESS LEVEL, THE MORE POWER THE TABLET PC WILL CONSUME AND THE FASTER YOUR BATTERIES WILL DISCHARGE. ...
... with the power management utility: Click Start -> Control Panel. Double-click the Windows Mobility Center icon, then double-click the icon adjacent to Adjust Brightness Adjusting the brightness using the Fujitsu menu, click on your display. • [Fn+F7]: Pressing repeatedly will need... adjust the brightness: keyboard, power management utility, and Fujitsu Menu. Set the screen brightness sliders for On battery and Plugged in scenarios. Display Panel THE HIGHER THE BRIGHTNESS LEVEL, THE MORE POWER THE TABLET PC WILL CONSUME AND THE FASTER YOUR BATTERIES WILL DISCHARGE. ...

T5010 User's Guide
Page 38
The keys perform all the standard functions of a 101-key keyboard, including the Windows keys and other special function keys. This section describes the following keys (Figure 13): 38 - Keyboard Keyboard Function Keys Fn Key Start Key Numeric Keypad Application Key (surrounded by heavy line) Cursor Keys Figure 13. Keyboard Using the Keyboard Your Fujitsu LifeBook Tablet PC has an integral 84-key keyboard.
The keys perform all the standard functions of a 101-key keyboard, including the Windows keys and other special function keys. This section describes the following keys (Figure 13): 38 - Keyboard Keyboard Function Keys Fn Key Start Key Numeric Keypad Application Key (surrounded by heavy line) Cursor Keys Figure 13. Keyboard Using the Keyboard Your Fujitsu LifeBook Tablet PC has an integral 84-key keyboard.

T5010 User's Guide
Page 39
... enter numerals 0 through [F12], are marked on the keyboard perform dual functions as both as standard characters and as ten-key function keys. Windows Keys Your LifeBook Tablet PC has two Windows keys, consisting of the key to the right, left, up, or down , left , or right). 39 - Once this feature is done the same...
... enter numerals 0 through [F12], are marked on the keyboard perform dual functions as both as standard characters and as ten-key function keys. Windows Keys Your LifeBook Tablet PC has two Windows keys, consisting of the key to the right, left, up, or down , left , or right). 39 - Once this feature is done the same...

T5010 User's Guide
Page 43
... LONG, THE DOUBLE-CLICK WILL NOT BE EXECUTED. • PARAMETERS FOR THE QUICK POINT CAN BE ADJUSTED FROM THE MOUSE DIALOG BOX LOCATED IN THE WINDOWS CONTROL PANEL. 43 - Figure 18. To double-click, move the cursor to the item you wish to select, press the left button twice in rapid...
... LONG, THE DOUBLE-CLICK WILL NOT BE EXECUTED. • PARAMETERS FOR THE QUICK POINT CAN BE ADJUSTED FROM THE MOUSE DIALOG BOX LOCATED IN THE WINDOWS CONTROL PANEL. 43 - Figure 18. To double-click, move the cursor to the item you wish to select, press the left button twice in rapid...

T5010 User's Guide
Page 45
... speed of the cursor control pad. To scroll, slide your touchpad with the Scroll Strip Touchpad Control Adjustment The Windows Control Panel allows you to setting up the time interval allowed between clicks in tablet mode, a second scroll strip is particularly useful when you are navigating through a document quickly without using the...
... speed of the cursor control pad. To scroll, slide your touchpad with the Scroll Strip Touchpad Control Adjustment The Windows Control Panel allows you to setting up the time interval allowed between clicks in tablet mode, a second scroll strip is particularly useful when you are navigating through a document quickly without using the...

T5010 User's Guide
Page 53
...the system tray. Click on the icon and follow these easy steps: Flexible Bay Release Latch 1 Close any open files. 2 Shut down your LifeBook Tablet PC. 3 Turn the system upside down and press the Flexible Bay release latch in the direction shown in Figure 30. 4 While holding the latch,...your Flexible Bay follow the on-screen instructions. 53 - This will be created and listed under My Computer and Windows Explorer. Removing/Installing Flexible Bay Device Your Tablet PC will automatically detect the device and activate it within your device out until it is clear of the bay. ...
...the system tray. Click on the icon and follow these easy steps: Flexible Bay Release Latch 1 Close any open files. 2 Shut down your LifeBook Tablet PC. 3 Turn the system upside down and press the Flexible Bay release latch in the direction shown in Figure 30. 4 While holding the latch,...your Flexible Bay follow the on-screen instructions. 53 - This will be created and listed under My Computer and Windows Explorer. Removing/Installing Flexible Bay Device Your Tablet PC will automatically detect the device and activate it within your device out until it is clear of the bay. ...

T5010 User's Guide
Page 55
...pre-boot or resuming from suspend Security Panel Function Security Button 1 Security Button 2 Security Button 3 Security Button 4 Security Enter Button Table 1. LifeBook Security/Tablet PC Buttons When you press the [Fn] button then press and release the [Page Down] button, each press of the buttons have secondary functions... is displayed). Security Panel Button Functions Pre-logon button functions All five buttons can be used before logging on to Windows (i.e., when the Windows logon screen is pre-logon, each press of the button will act as if you had pressed the [Enter] key. 55 ...
...pre-boot or resuming from suspend Security Panel Function Security Button 1 Security Button 2 Security Button 3 Security Button 4 Security Enter Button Table 1. LifeBook Security/Tablet PC Buttons When you press the [Fn] button then press and release the [Page Down] button, each press of the buttons have secondary functions... is displayed). Security Panel Button Functions Pre-logon button functions All five buttons can be used before logging on to Windows (i.e., when the Windows logon screen is pre-logon, each press of the button will act as if you had pressed the [Enter] key. 55 ...


