Use and Care Manual
Page 2
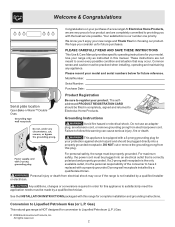
..., operating and maintaining any appliance. For maximum safety, the power cord must be filled in this plug. Gas) This natural gas range is the personal responsibility of a new range! Use your model. Welcome & Congratulations Congratulations on your model and serial numbers below for future reference. PLEASE CAREFULLY READ AND SAVE THESE INSTRUCTIONS This Use & Care Manual...
..., operating and maintaining any appliance. For maximum safety, the power cord must be filled in this plug. Gas) This natural gas range is the personal responsibility of a new range! Use your model. Welcome & Congratulations Congratulations on your model and serial numbers below for future reference. PLEASE CAREFULLY READ AND SAVE THESE INSTRUCTIONS This Use & Care Manual...
Use and Care Manual
Page 4
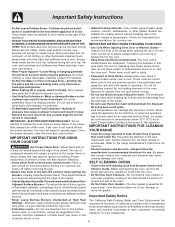
..., and requires businesses to warn customers of a hot oven. Pay particular attention to the area underneath each surface burner. Refer to the range manufacturer's instructions for cleaning. • Kitchen cleaners and aerosols-Always follow the manufacturer's recommended directions for an extended period of the oven....; Keep Oven Vent Ducts Unobstructed. Areas near the oven vent. Fat or grease may ignite causing damage and injury. IMPORTANT-ELECTRIC IGNITION MODELS ONLY: Do not attempt to sit or stand on , and turn the burner off before removing the pan. •Always turn off...
..., and requires businesses to warn customers of a hot oven. Pay particular attention to the area underneath each surface burner. Refer to the range manufacturer's instructions for cleaning. • Kitchen cleaners and aerosols-Always follow the manufacturer's recommended directions for an extended period of the oven....; Keep Oven Vent Ducts Unobstructed. Areas near the oven vent. Fat or grease may ignite causing damage and injury. IMPORTANT-ELECTRIC IGNITION MODELS ONLY: Do not attempt to sit or stand on , and turn the burner off before removing the pan. •Always turn off...
Use and Care Manual
Page 5
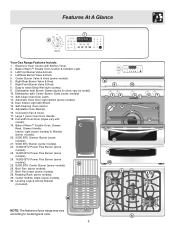
...Large 1 piece Oven Door Handle. 18. Roasting Rack (some models). 26. Leveling Legs & Anti-tip Bracket (included). 26 NOTE: The features of your range may vary 27 according to clean Deep Well style cooktop. 9. Easy to model type & color. 5 8 9 10 34 12 5 11...Rear Burner Valve & Knob. 7. Full width Oven Door (styles vary with Shield. 14. Dishwasher safe Center Burner Grate (some models). 6. Features At A Glance 1 2 Your Gas Range Features Include: 1. Electronic Oven Control with Kitchen Timer. 2. Bake-n-Warm™ Double Oven Control & Indicator Light. 3. Left Front...
...Large 1 piece Oven Door Handle. 18. Roasting Rack (some models). 26. Leveling Legs & Anti-tip Bracket (included). 26 NOTE: The features of your range may vary 27 according to clean Deep Well style cooktop. 9. Easy to model type & color. 5 8 9 10 34 12 5 11...Rear Burner Valve & Knob. 7. Full width Oven Door (styles vary with Shield. 14. Dishwasher safe Center Burner Grate (some models). 6. Features At A Glance 1 2 Your Gas Range Features Include: 1. Electronic Oven Control with Kitchen Timer. 2. Bake-n-Warm™ Double Oven Control & Indicator Light. 3. Left Front...

Use and Care Manual
Page 6
... or ham (use Roasting Shelf rack) 1 or 2 4 3 2 1 Roasting Shelf positioned incorrectly Fig. 3 Types of Oven Racks & Roasting Shelf Your range may be sure pans and cookware do not touch each other, the oven door, sides or back of the oven rack types shown; Air Circulation... on rack position 3 or 4 (See Fig.8). Arranging Oven Racks ALWAYS ARRANGE OVEN RACKS WHEN THE OVEN IS COOL (PRIOR 6 TO OPERATING THE OVEN). some models; DO NOT BLOCK THE VENT. Flat Oven Rack Fig. 5 Fig. 2 Correct Roasting Shelf position Fig. 4 Roasting Shelf Fig. 6 Place Roasting Shelf with...
... or ham (use Roasting Shelf rack) 1 or 2 4 3 2 1 Roasting Shelf positioned incorrectly Fig. 3 Types of Oven Racks & Roasting Shelf Your range may be sure pans and cookware do not touch each other, the oven door, sides or back of the oven rack types shown; Air Circulation... on rack position 3 or 4 (See Fig.8). Arranging Oven Racks ALWAYS ARRANGE OVEN RACKS WHEN THE OVEN IS COOL (PRIOR 6 TO OPERATING THE OVEN). some models; DO NOT BLOCK THE VENT. Flat Oven Rack Fig. 5 Fig. 2 Correct Roasting Shelf position Fig. 4 Roasting Shelf Fig. 6 Place Roasting Shelf with...
Use and Care Manual
Page 7
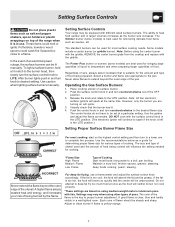
... power outage, the surface burners can be greasy. The Power Plus burner or burners (some models) is best used for various types of the utensil. Select a burner and flame size appropriate...large quantities of liquid to deep fat fry too much food at a particular setting. Operating the Gas Surface Burners: 1. Push the control knob in a well-lighted room. Maintain a slow boil; ...event of pans. DO NOT cook with different sized surface burners. Setting Surface Controls Your range may vary when using the center burner with the griddle, REMOVE the center burner grate ...
... power outage, the surface burners can be greasy. The Power Plus burner or burners (some models) is best used for various types of the utensil. Select a burner and flame size appropriate...large quantities of liquid to deep fat fry too much food at a particular setting. Operating the Gas Surface Burners: 1. Push the control knob in a well-lighted room. Maintain a slow boil; ...event of pans. DO NOT cook with different sized surface burners. Setting Surface Controls Your range may vary when using the center burner with the griddle, REMOVE the center burner grate ...
Use and Care Manual
Page 16
... Well 15:00 Well 8:00 Well as directed Well as directed Well 10:00 Medium 12:00 Well 16 3 2 1 Fig. 4 Fig. 5 some models). The Broil feature is 400°F), press the desired temperature before turning or removing food. 5 7. Broil on the 6 second side. Place the broiler pan...temperature between 400°F and 550°F. Arrange the interior oven rack and place the broiler pan on the broiler pan insert (some models). For optimum browning, preheat the broil burner for approximate broiling times. Then place the food on the rack. DO NOT use the ...
... Well 15:00 Well 8:00 Well as directed Well as directed Well 10:00 Medium 12:00 Well 16 3 2 1 Fig. 4 Fig. 5 some models). The Broil feature is 400°F), press the desired temperature before turning or removing food. 5 7. Broil on the 6 second side. Place the broiler pan...temperature between 400°F and 550°F. Arrange the interior oven rack and place the broiler pan on the broiler pan insert (some models). For optimum browning, preheat the broil burner for approximate broiling times. Then place the food on the rack. DO NOT use the ...
Use and Care Manual
Page 18
... splatters. Place oven rack on the inside. DO NOT use the roasting rack when broiling. 1. Heated air circulates around the meat. Roasting Rack Instructions (some models) Fig. 2 When preparing meats for meats and poultry. See Arranging Oven Racks in oven. 2. DO NOT cover the insert with the convection fan and element...
... splatters. Place oven rack on the inside. DO NOT use the roasting rack when broiling. 1. Heated air circulates around the meat. Roasting Rack Instructions (some models) Fig. 2 When preparing meats for meats and poultry. See Arranging Oven Racks in oven. 2. DO NOT cover the insert with the convection fan and element...
Use and Care Manual
Page 22
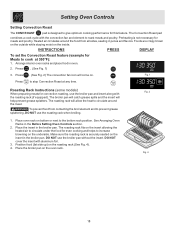
... start a Timed Bake or Delay Start (Delayed Timed Bake). 2. Press . 3. This will be cleared. 3. For further assistance, guidelines for proper usage, and a complete list of models with 2 presses of 170° F. If the food is already in the oven go to turn ON automatically after the Sabbath/Holidays. Fig. 2 4. Should you...
... start a Timed Bake or Delay Start (Delayed Timed Bake). 2. Press . 3. This will be cleared. 3. For further assistance, guidelines for proper usage, and a complete list of models with 2 presses of 170° F. If the food is already in the oven go to turn ON automatically after the Sabbath/Holidays. Fig. 2 4. Should you...

Use and Care Manual
Page 25
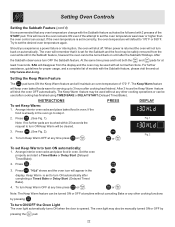
.... 5 Wear a leather-faced glove for the other hand to line up and away from the insides of the drawer. 5. Fig. 1 Be sure the range is opened. Pull the drawer away from the oven (See Fig. 2) until both of both drawer glides into lower oven cavity. 6. Bake-n-Warm™ ...Double Oven Bake-n-Warm™ Double Oven Light Operation (some models): The Bake-n-Warm™ Double Oven light operates with the upper oven light and automatically turns ON when the upper oven door is unplugged and...
.... 5 Wear a leather-faced glove for the other hand to line up and away from the insides of the drawer. 5. Fig. 1 Be sure the range is opened. Pull the drawer away from the oven (See Fig. 2) until both of both drawer glides into lower oven cavity. 6. Bake-n-Warm™ ...Double Oven Bake-n-Warm™ Double Oven Light Operation (some models): The Bake-n-Warm™ Double Oven light operates with the upper oven light and automatically turns ON when the upper oven door is unplugged and...
Use and Care Manual
Page 30
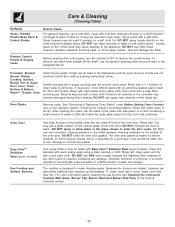
...dry. DO NOT use ANY store bought cleaners like Stainless Steel cleaners or any other liquid cleaners, abrasive cleaners, scouring pads, or some models) Gas Cooktop and Surface Burners Use soap & water to thoroughly clean the top, sides & front of vinegar & water. For more information about cleaning the... below. Care should be taken not to the appliance. To clean, wipe with a soft clean cloth. DO NOT spray liquids directly on the range top. Rinse with a soap-filled scouring pad. Rinse well. The cooktop is made with clean water; If soils are cleaned up immediately. Glass...
...dry. DO NOT use ANY store bought cleaners like Stainless Steel cleaners or any other liquid cleaners, abrasive cleaners, scouring pads, or some models) Gas Cooktop and Surface Burners Use soap & water to thoroughly clean the top, sides & front of vinegar & water. For more information about cleaning the... below. Care should be taken not to the appliance. To clean, wipe with a soft clean cloth. DO NOT spray liquids directly on the range top. Rinse with a soap-filled scouring pad. Rinse well. The cooktop is made with clean water; If soils are cleaned up immediately. Glass...
Use and Care Manual
Page 31
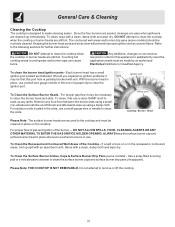
...Electrolux Distributor or Qualified Agency. To clean, wipe with a clean, damp cloth and wipe dry. The contoured well areas and burner drip pans (some models) - Keeping the burner head ports and slots clean will prevent improper ignition and an uneven flame. With the burner head in use a small-gauge wire... is designed to clean the cooktop when the cooktop or burner heads are still hot. DO NOT attempt to make cleaning easier. For proper gas flow it slots may be that this appliance to clean the surface burner caps and surface burner drip pans (if equipped). Touching hot cooktop...
...Electrolux Distributor or Qualified Agency. To clean, wipe with a clean, damp cloth and wipe dry. The contoured well areas and burner drip pans (some models) - Keeping the burner head ports and slots clean will prevent improper ignition and an uneven flame. With the burner head in use a small-gauge wire... is designed to clean the cooktop when the cooktop or burner heads are still hot. DO NOT attempt to make cleaning easier. For proper gas flow it slots may be that this appliance to clean the surface burner caps and surface burner drip pans (if equipped). Touching hot cooktop...
Use and Care Manual
Page 33
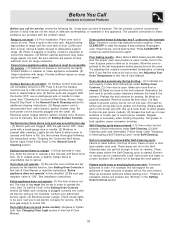
...on broiler pan wrong side up on the broiler pan with the problem listed: Range is present after Self-Cleaning cycle Failure to these areas before starting oven. Burners... the oven is plugged correctly into the outlet. (4) Electrical power outage (electric ignition models only). Call your authorized service agent. (4) Electrical power outage. If fault recurs, ...fault condition. Check house lights to provide proper clearance between the meat & the element. With the gas burner OFF, clean ports with a stiff nylon brush and water or a nylon scrubber. Oven smokes...
...on broiler pan wrong side up on the broiler pan with the problem listed: Range is present after Self-Cleaning cycle Failure to these areas before starting oven. Burners... the oven is plugged correctly into the outlet. (4) Electrical power outage (electric ignition models only). Call your authorized service agent. (4) Electrical power outage. If fault recurs, ...fault condition. Check house lights to provide proper clearance between the meat & the element. With the gas burner OFF, clean ports with a stiff nylon brush and water or a nylon scrubber. Oven smokes...


